home → TEMPLATES → Storyboard
Video Storyboard Template
Video storyboard template
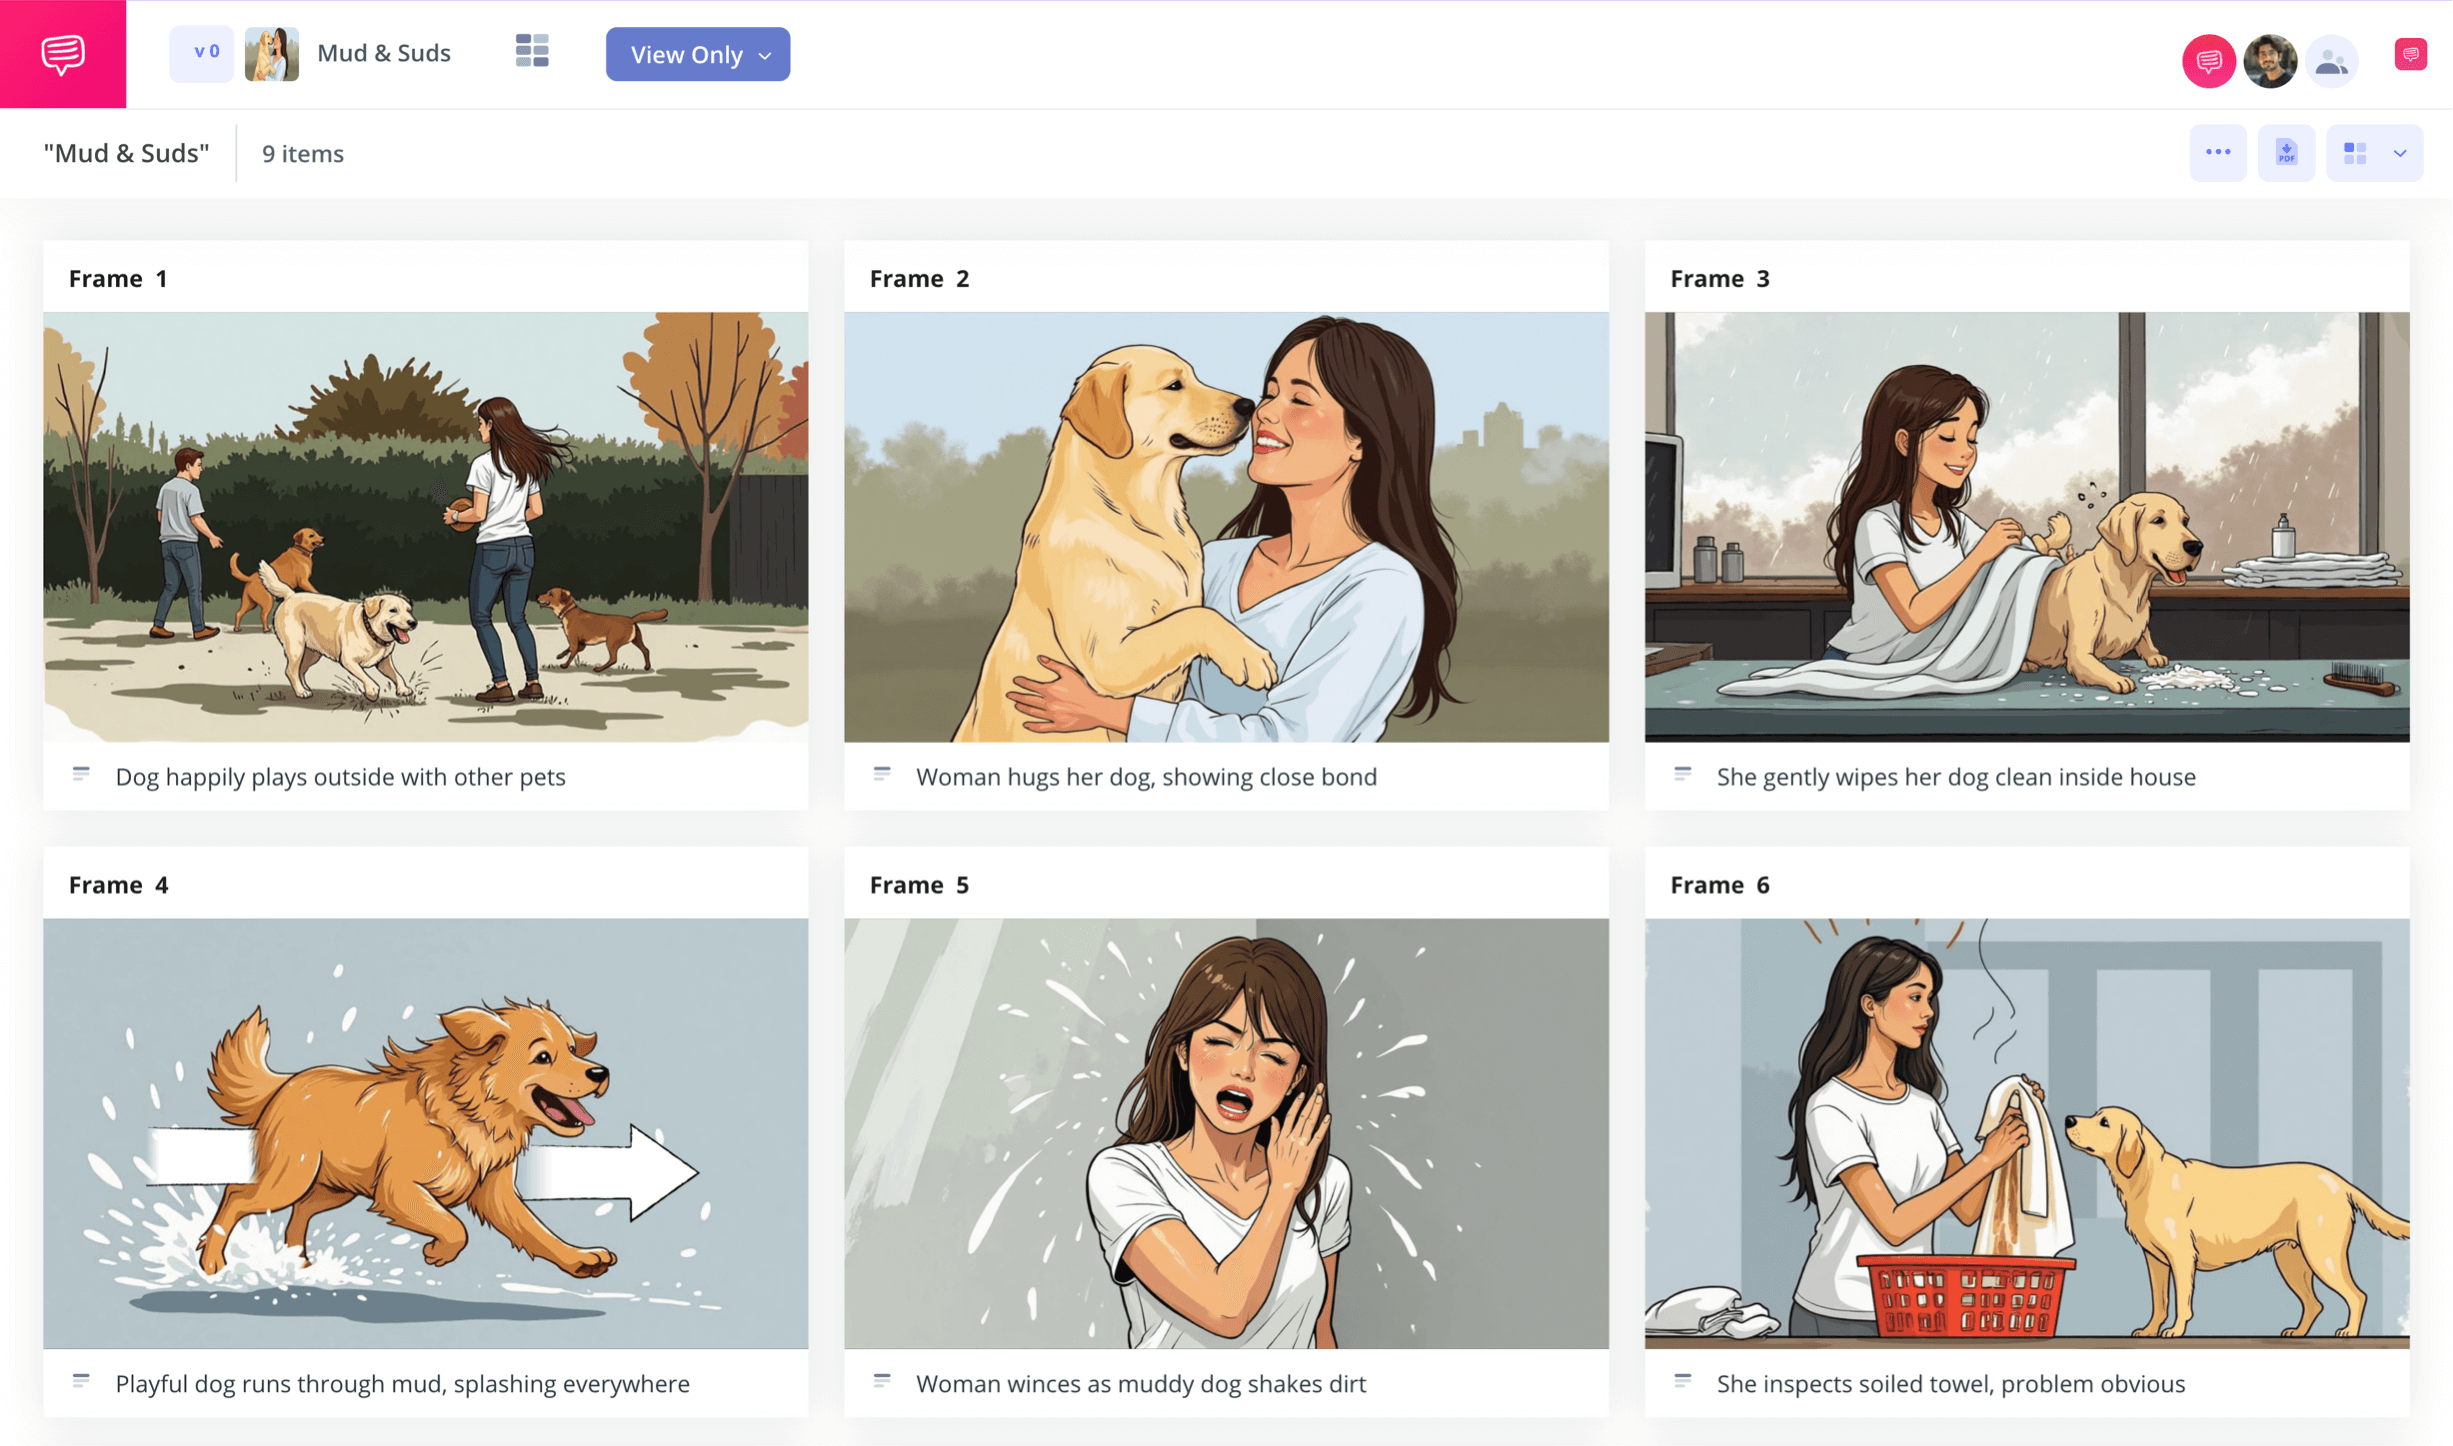
If you’re creating a video with any kind of narrative structure, a video storyboard template is one of the best planning tools you can use. Especially if you’re working on a tight budget, you’ll want to take advantage of the kind of meticulous pre-planning a storyboard provides for filmmaking. Here you will lay out, much like a comic book, each frame in your sequence. You’ll then be able to assess and make a plan around all the pacing and camera shot needs that your video storyboard highlights.
For this guide, we’ll take you step-by-step through the video storyboarding process using StudioBinder’s storyboard creator. But even if you’re making your storyboard with nothing but a pen and paper, these steps can still provide a helpful plan of action.
Step 1
1. Setup your template
Before you dive into the nitty gritty of creating the visual style of your storyboard, you’ll first need to set up a video storyboard template that’s tailored to your specific needs. After beginning a new storyboard project with StudioBinder and following the initial customization prompts, your template will look clean, clear, and ready to display your visual narrative:
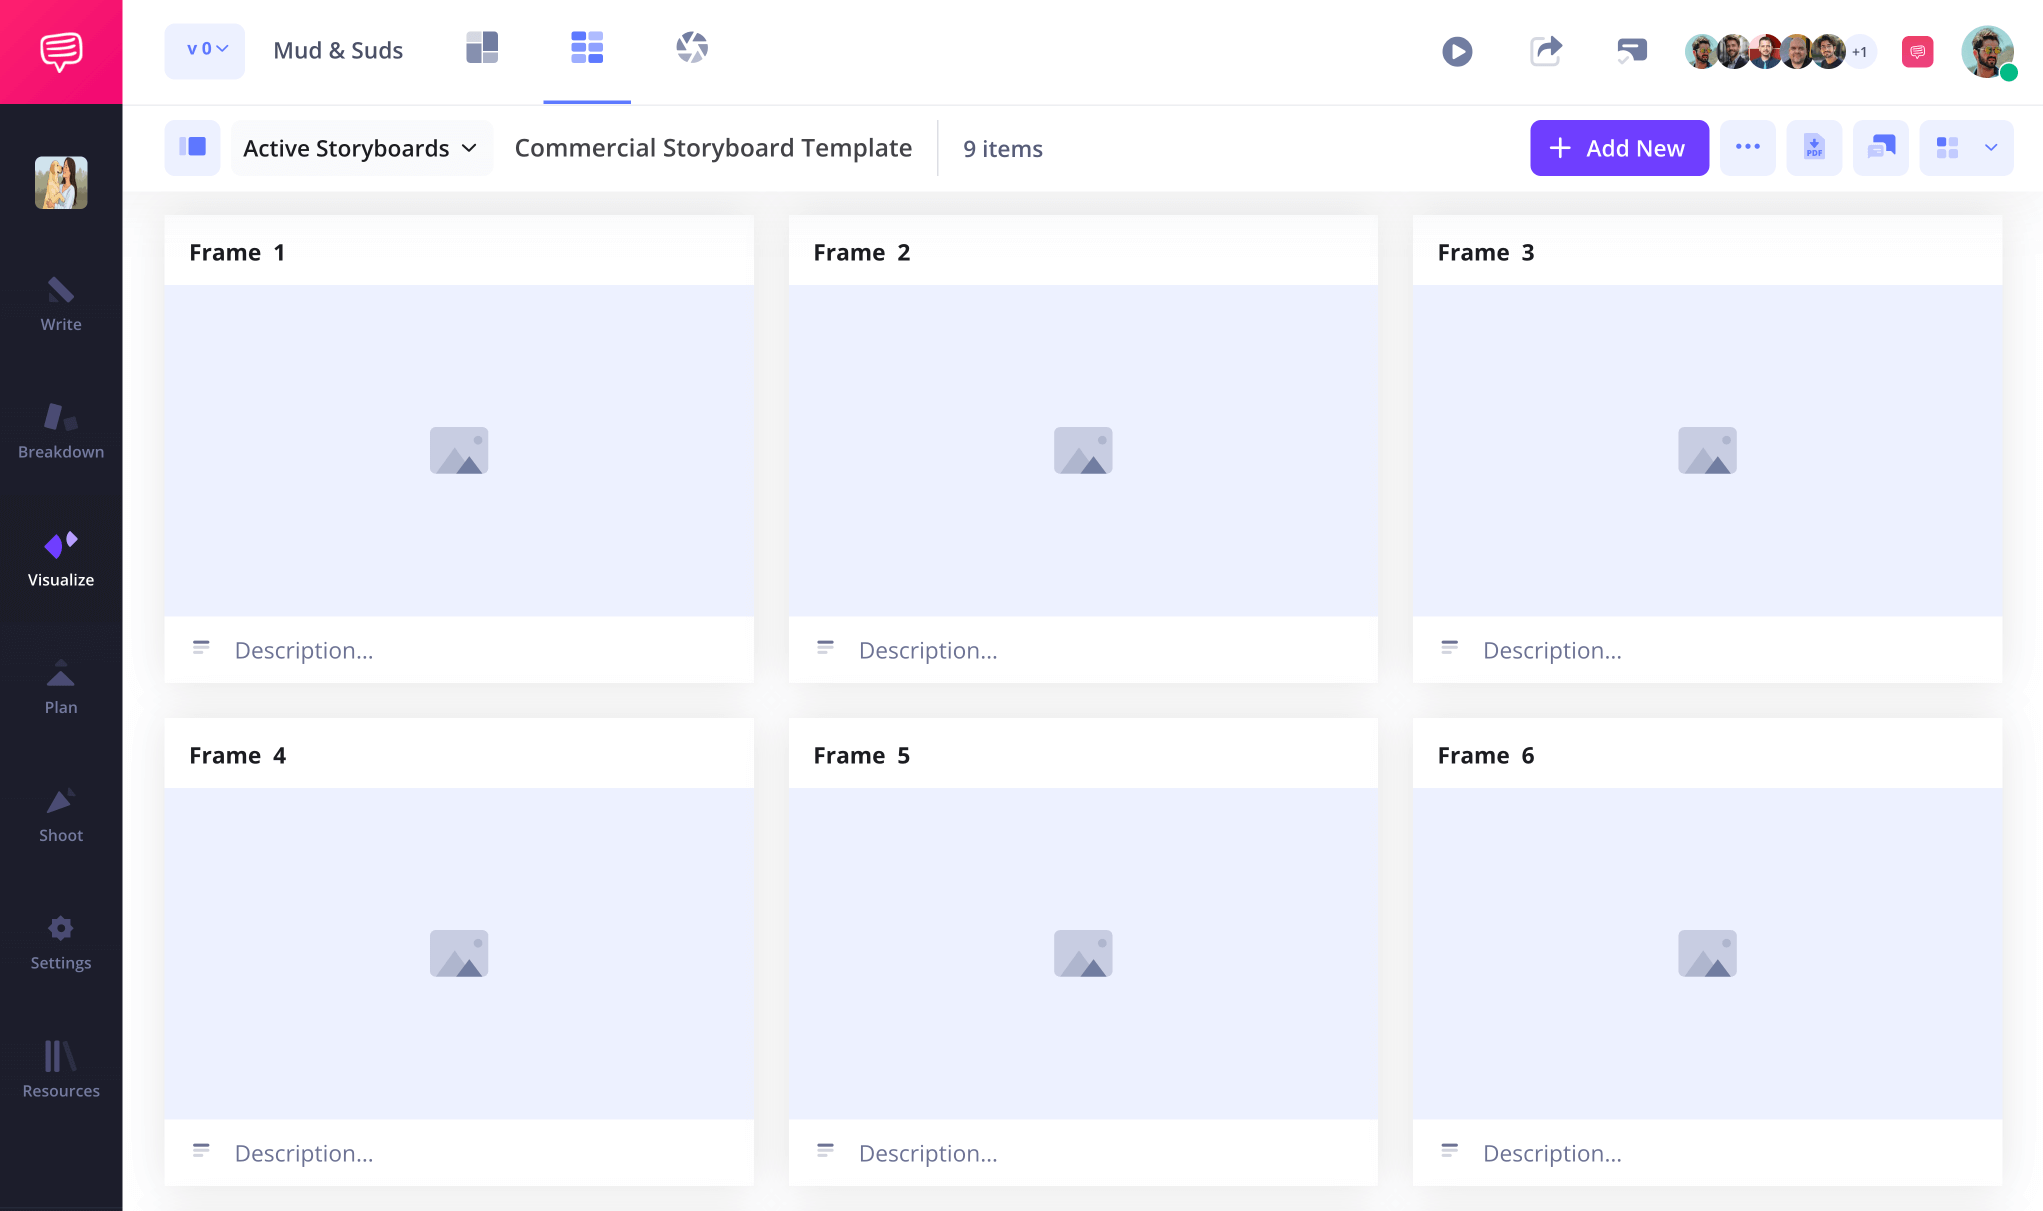
To adjust the description fields below your image, you can customize your frames in the settings bar at any time. Once you’re ready to start inputting the visual action you want in each frame, just write your text in your preferred field.
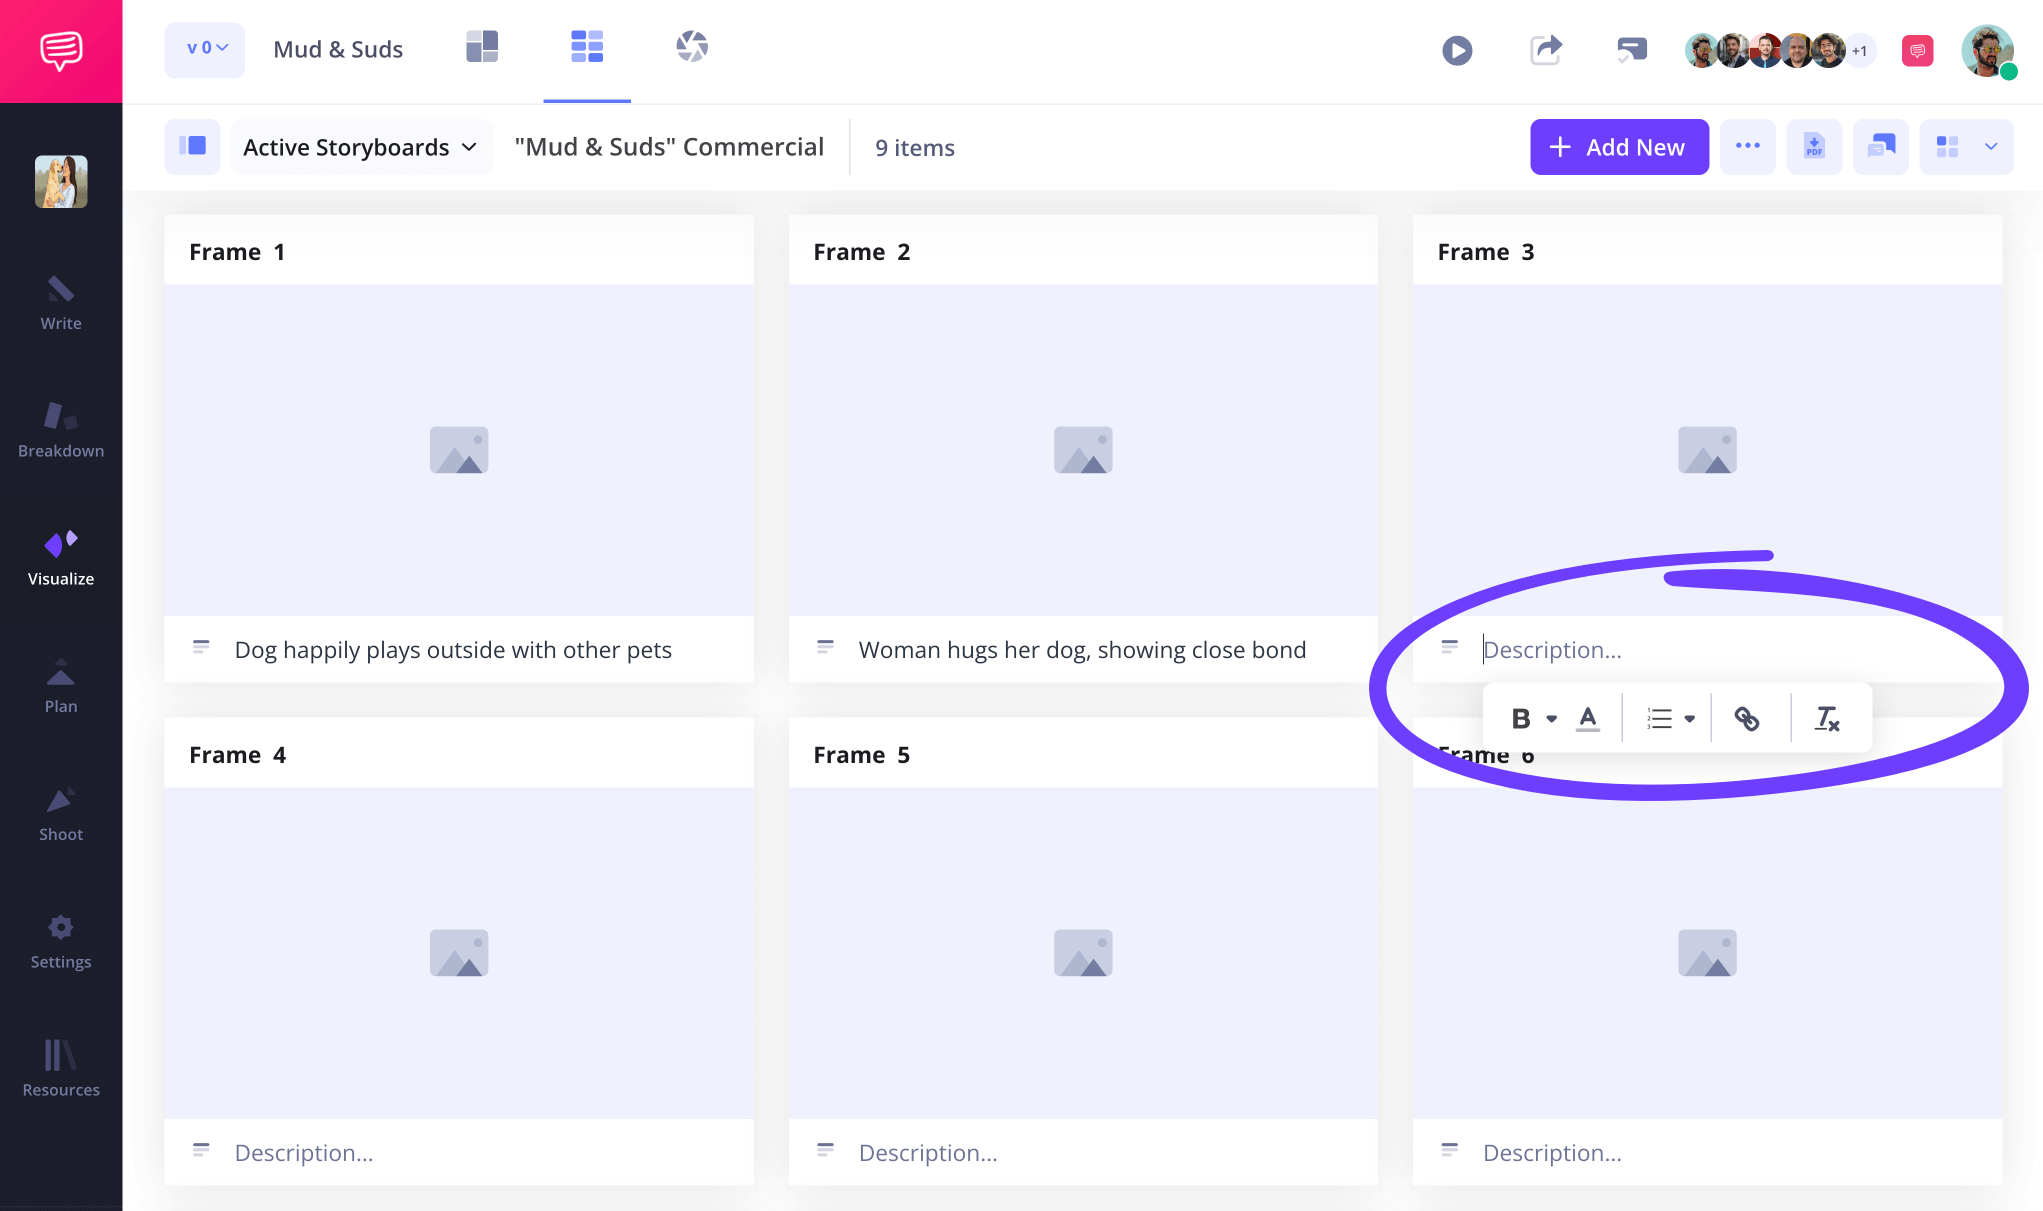
Step 2
2. Add visuals
Now that you’ve pinned down the key information below each frame of your storyboard video, it’s time to start adding images. Depending on your available resources, you may be uploading hand-drawn sketch images, digitally illustrated images, or even pictures from the internet that reflect the tone and mood you’re aiming for.
Either way, adding an image is as simple as clicking Upload on any blank panel.
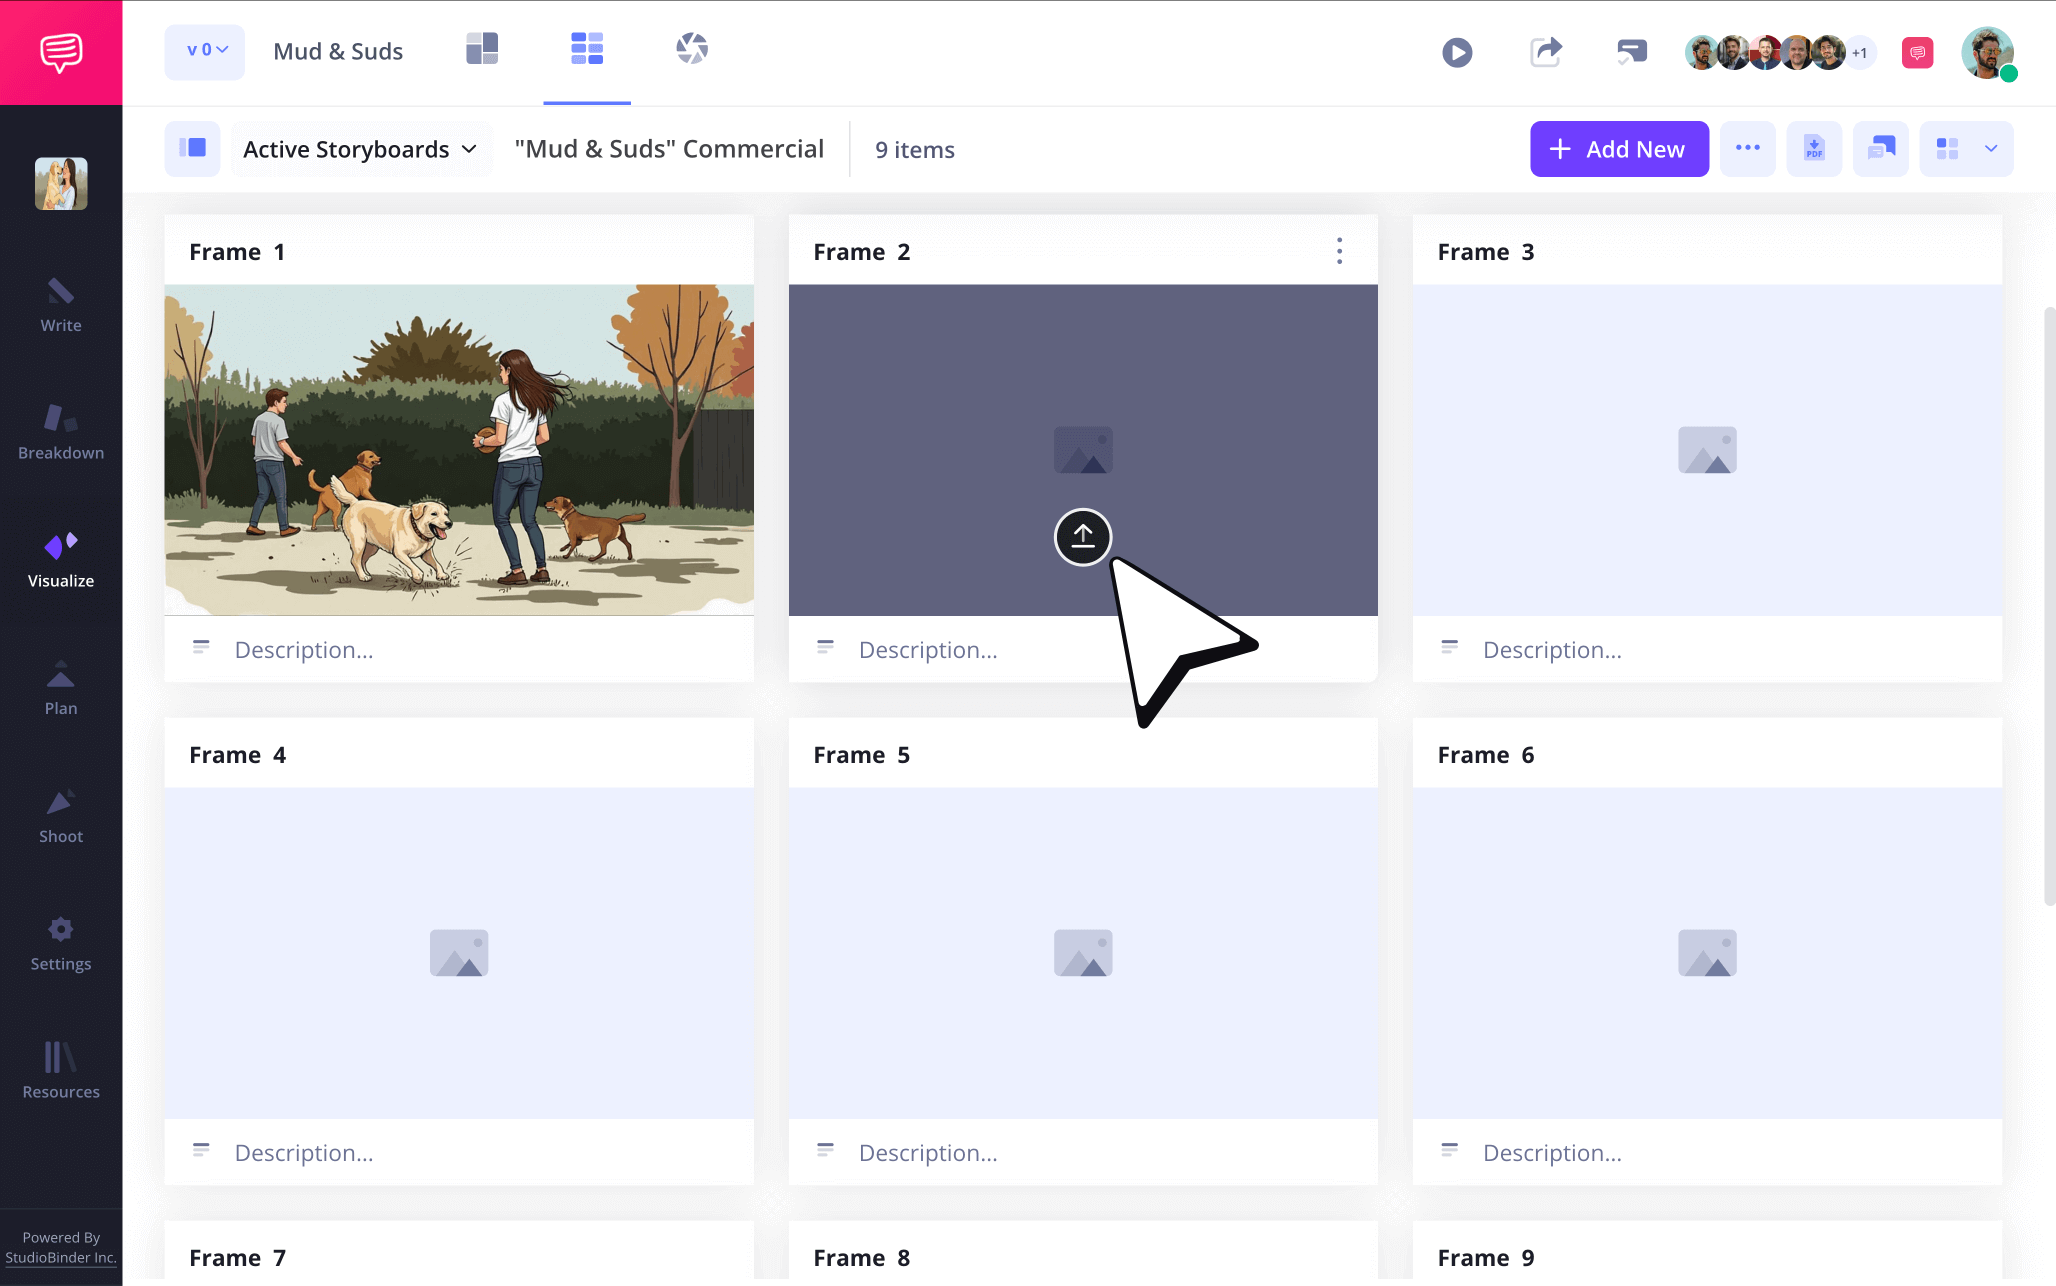
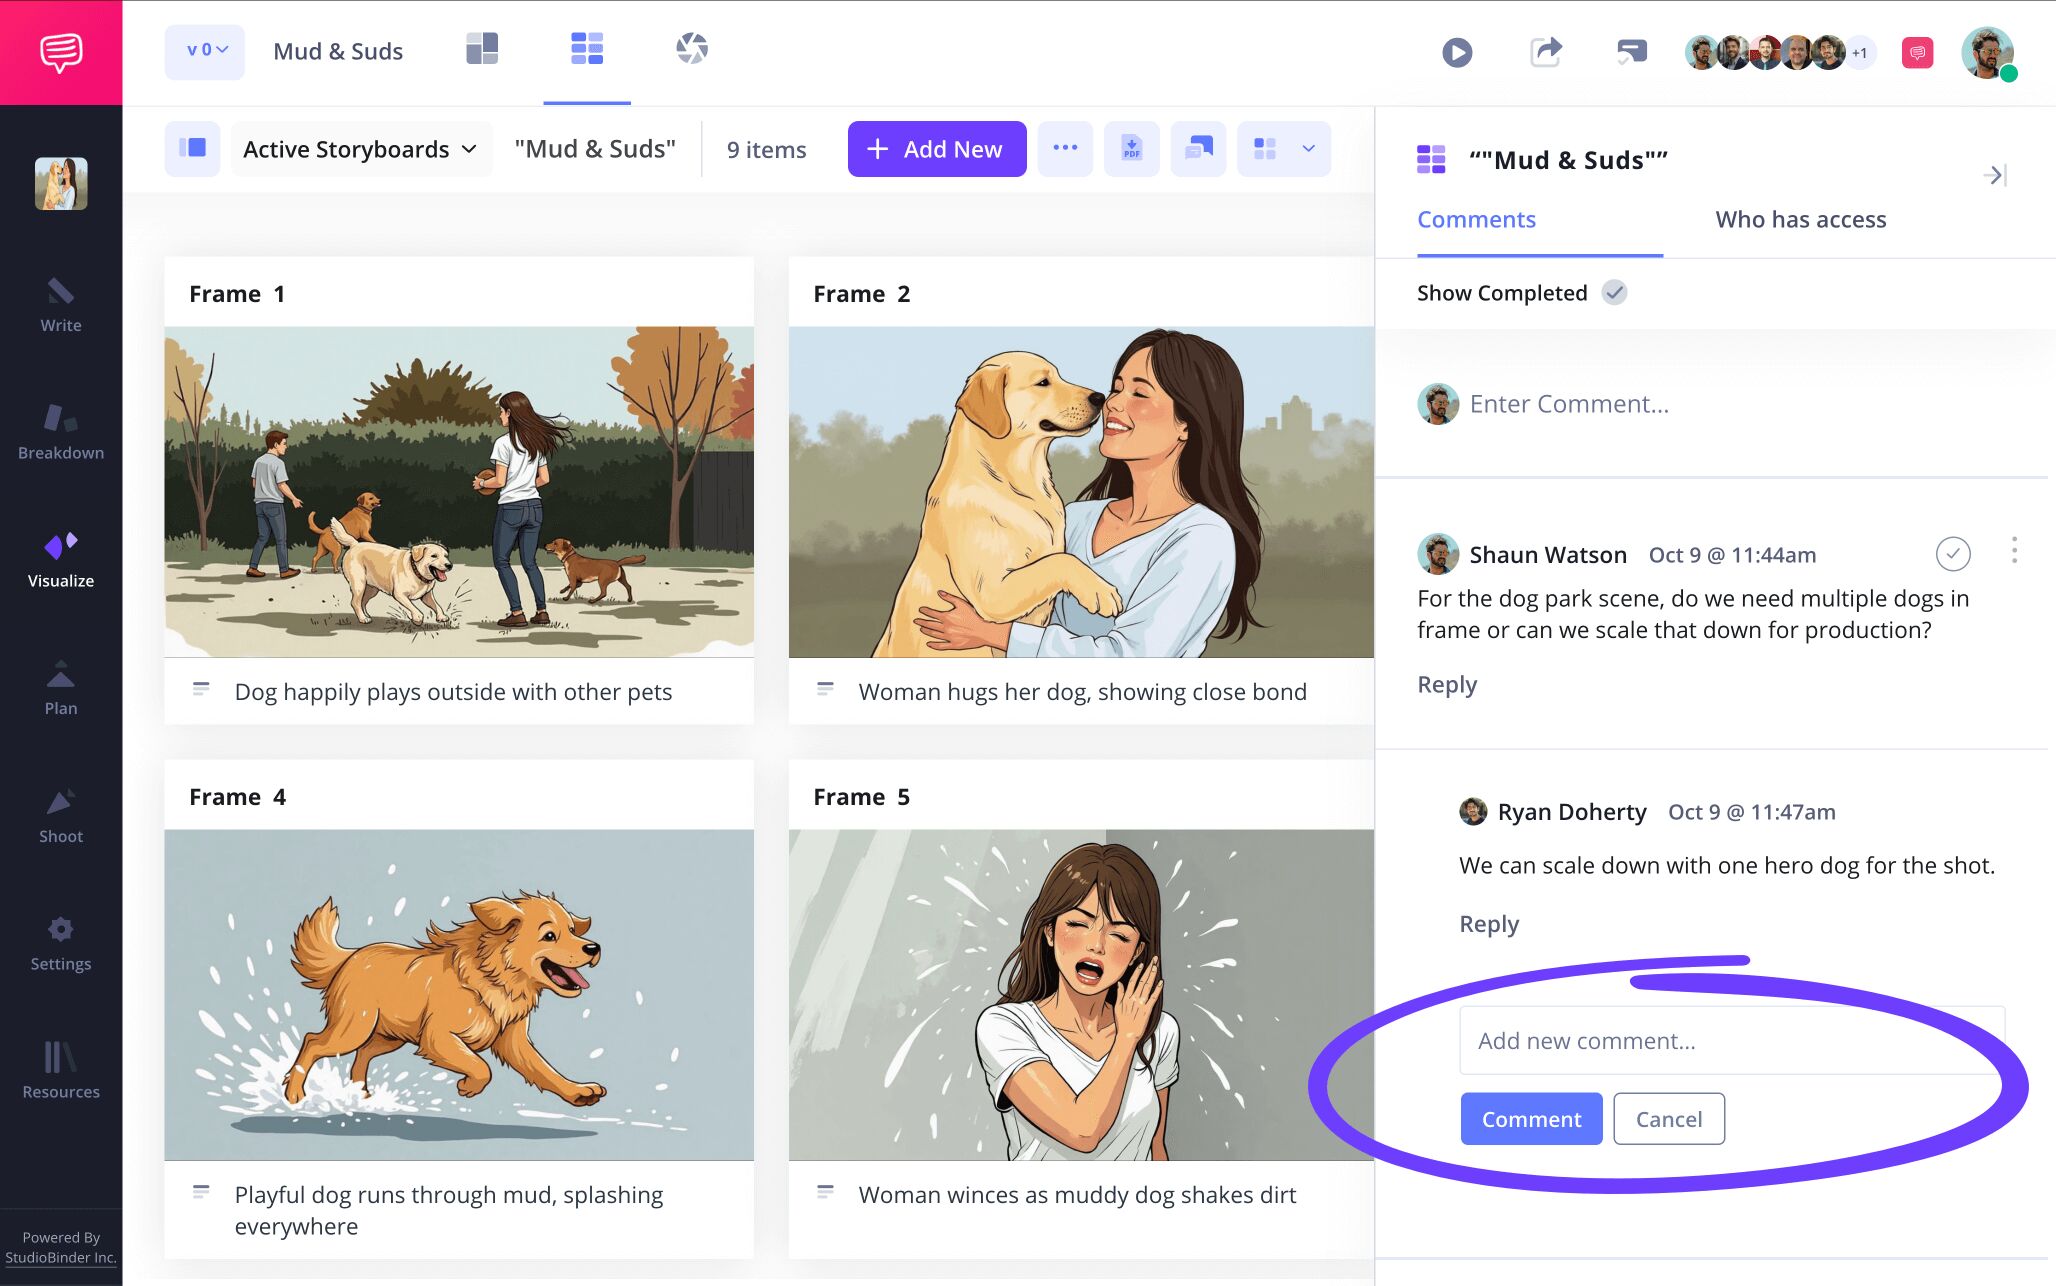
But creating a storyboard for a video is rarely a one-person process. Once your template starts taking shape with images, you may want to start getting some feedback. Whether you need input from creative partners, clients, or film producers, you can initiate a dialogue over your video storyboard by opening the comments tab to the right.
Step 3
3. Highlight action with arrows
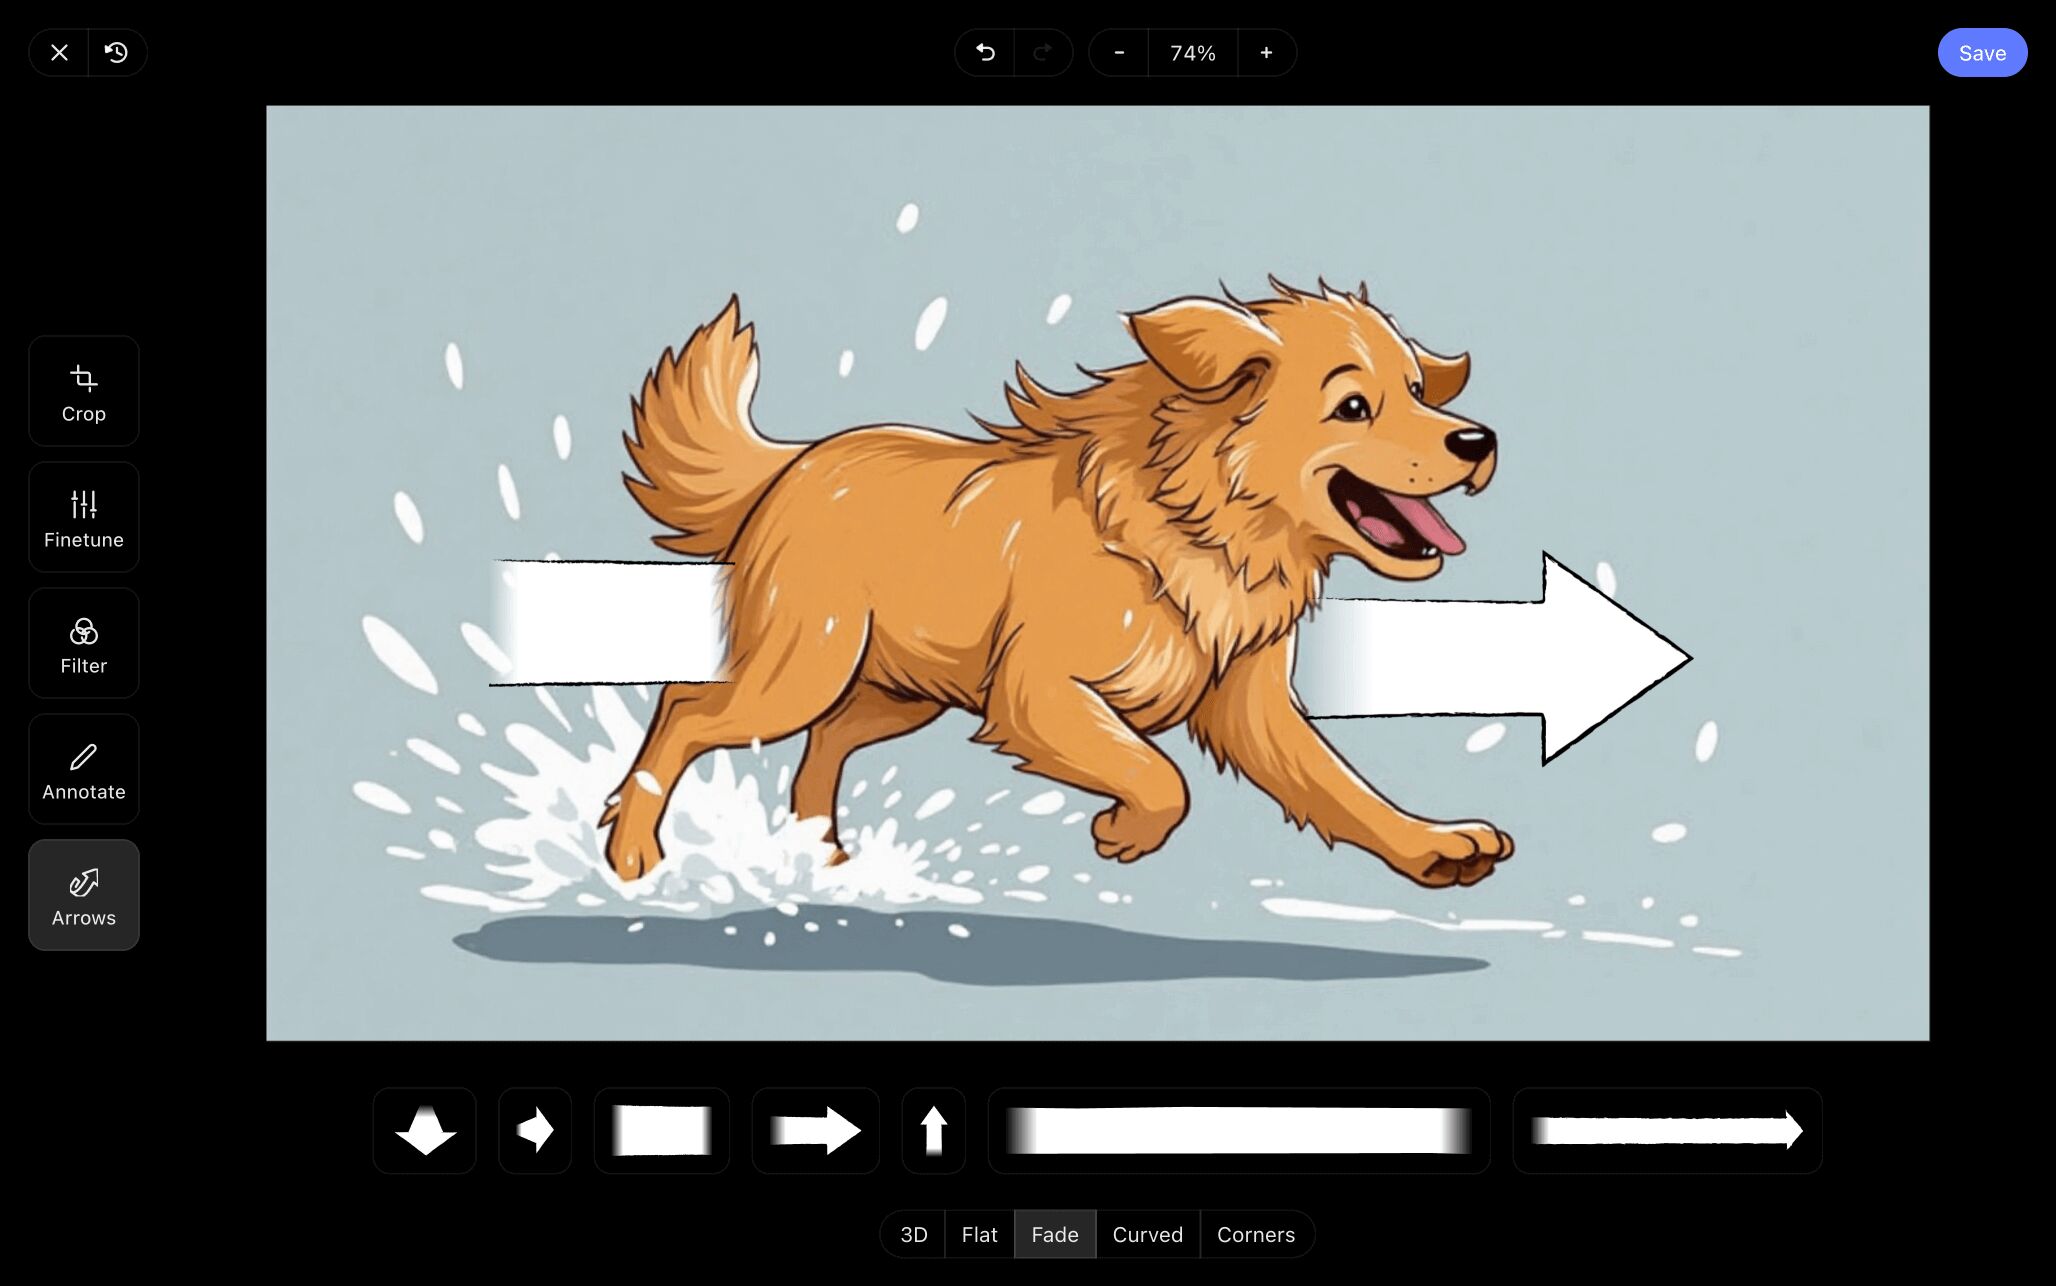
Part of video storyboarding is communicating a sense of pacing within your visuals. In our storyboard example, we want to emphasize just how fast our star dog is meant to be running in one of our shots. The image alone doesn’t quite capture our fluffy friend’s speed, so we’ll use StudioBinder’s image editing feature to help highlight his quick action.
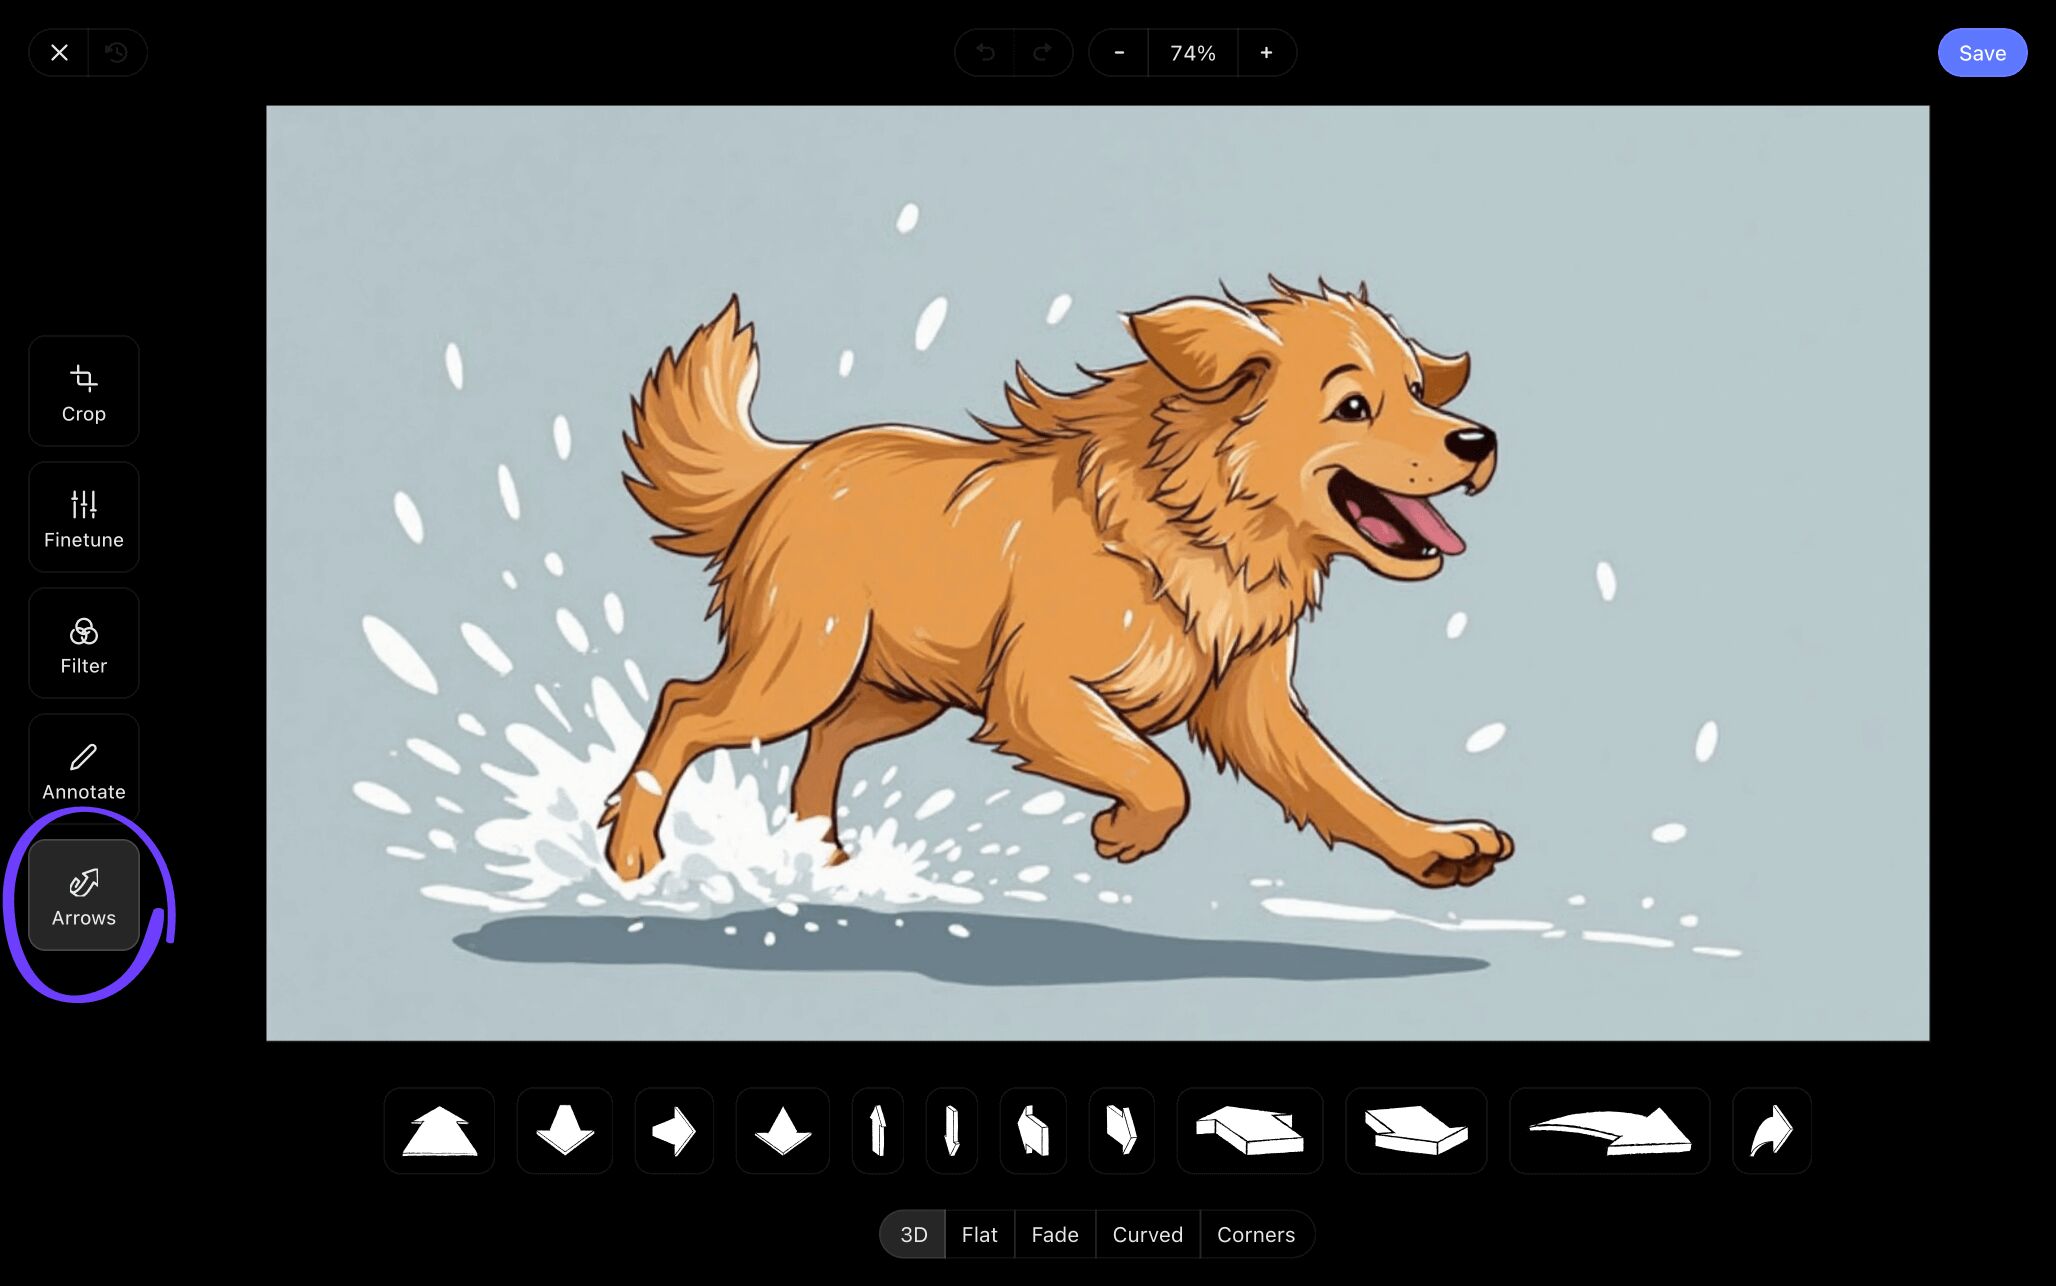
In the storyboard arrows tab, you can choose from a number of arrow types that can be customized with length and text options. In our example, we applied one of the fade arrows to help draw attention to our canine protagonist’s speed.
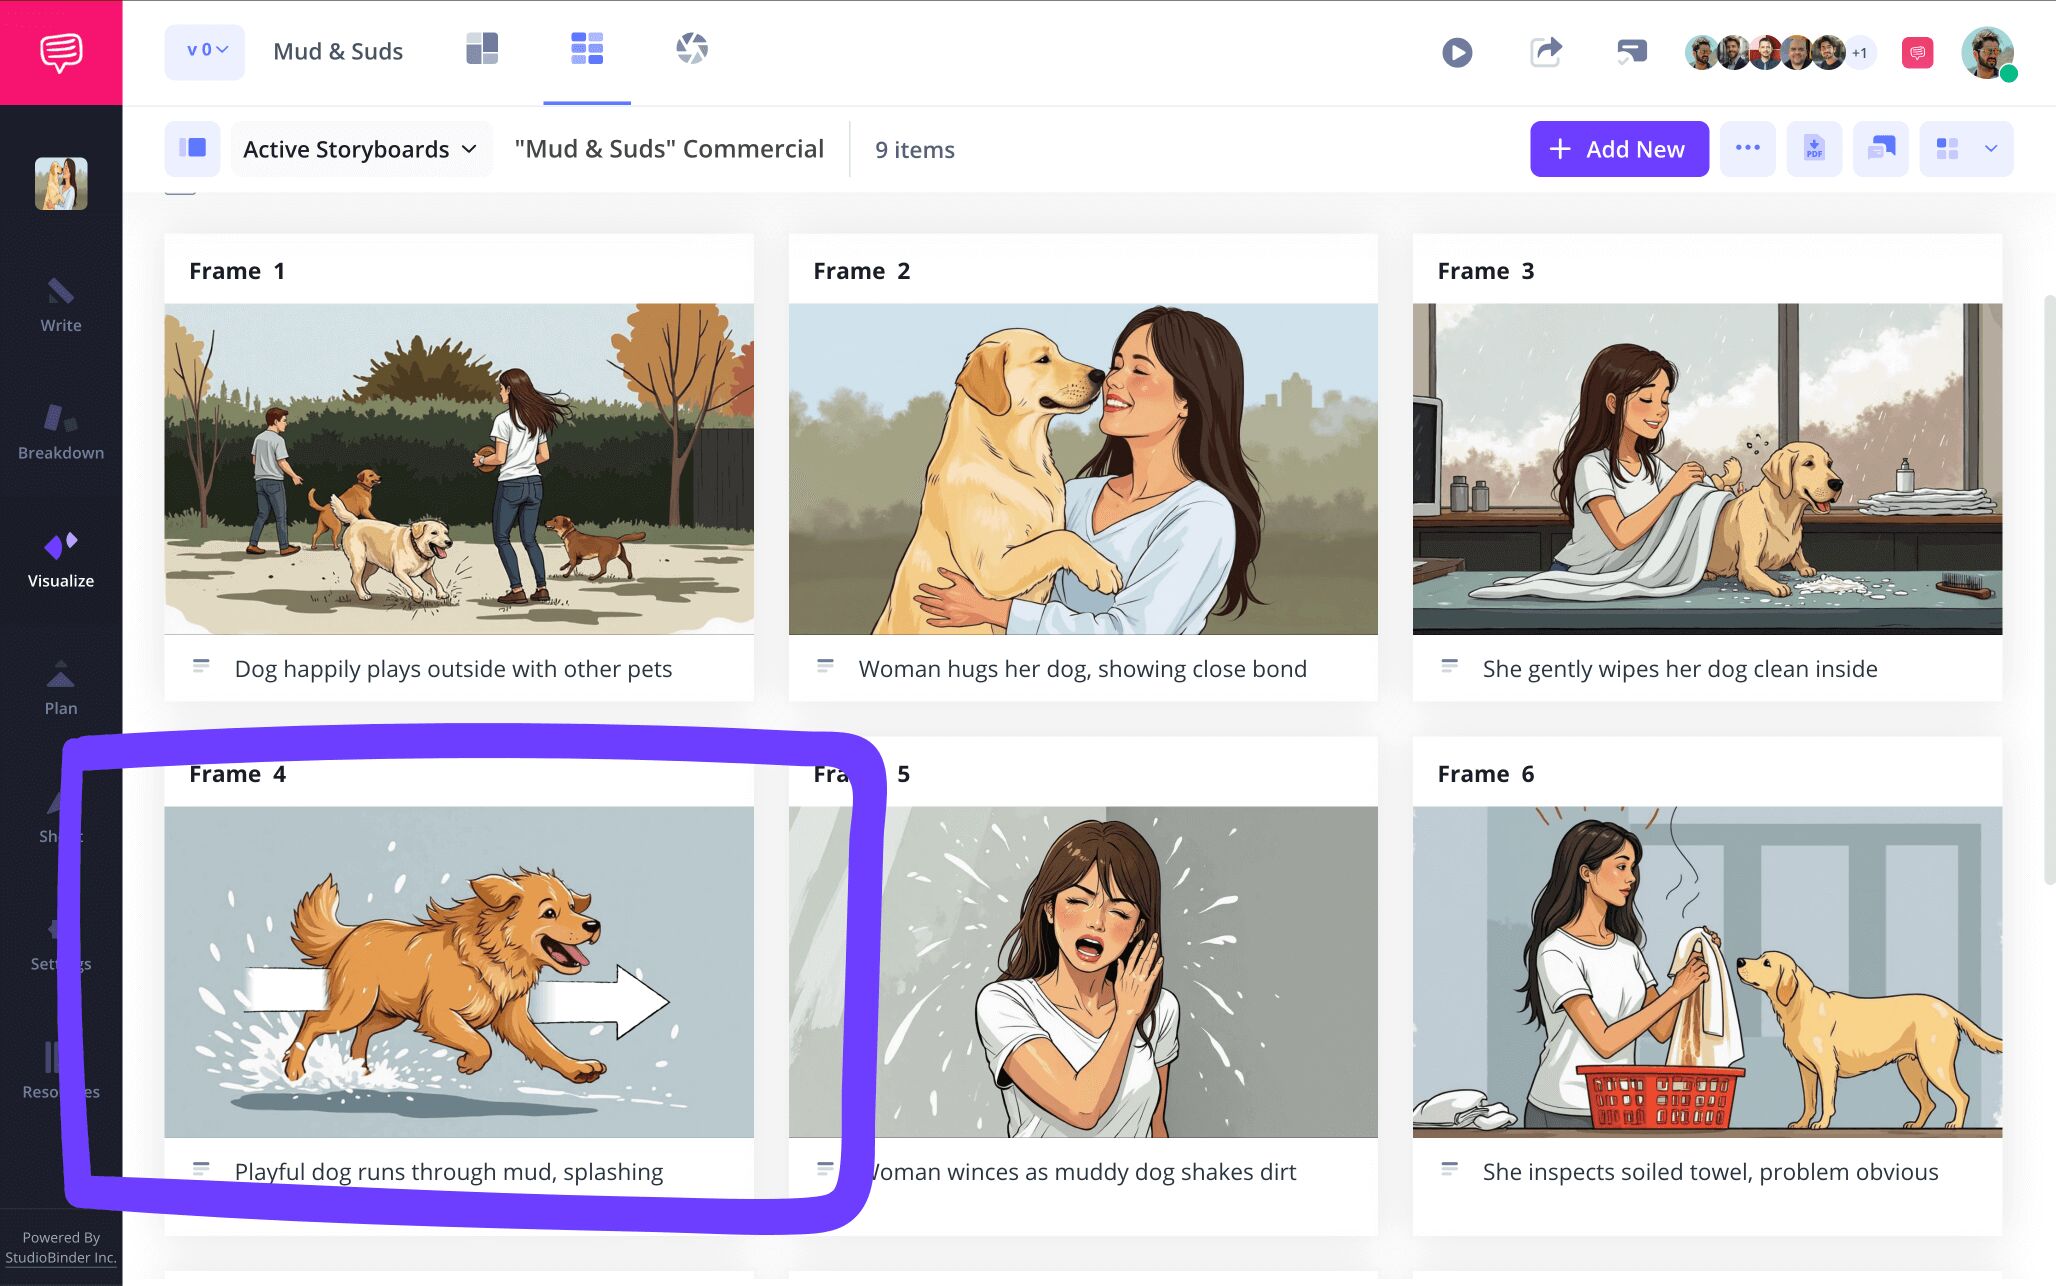
Once you’re finished applying one or multiple arrows to your image, all you have to do is click save and your newly edited image will be applied to your video storyboard.
Step 4
4. Collaborate your storyboard PDF
Collaboration really defines all of pre-production in filmmaking, and the storyboarding stage is no exception. At a certain point, you’ll want to bring in second opinions to make sure your storyboard video project is hitting all the right marks.
With a view-only link, you can invite anyone to simply look at your storyboard without any other interactive features.
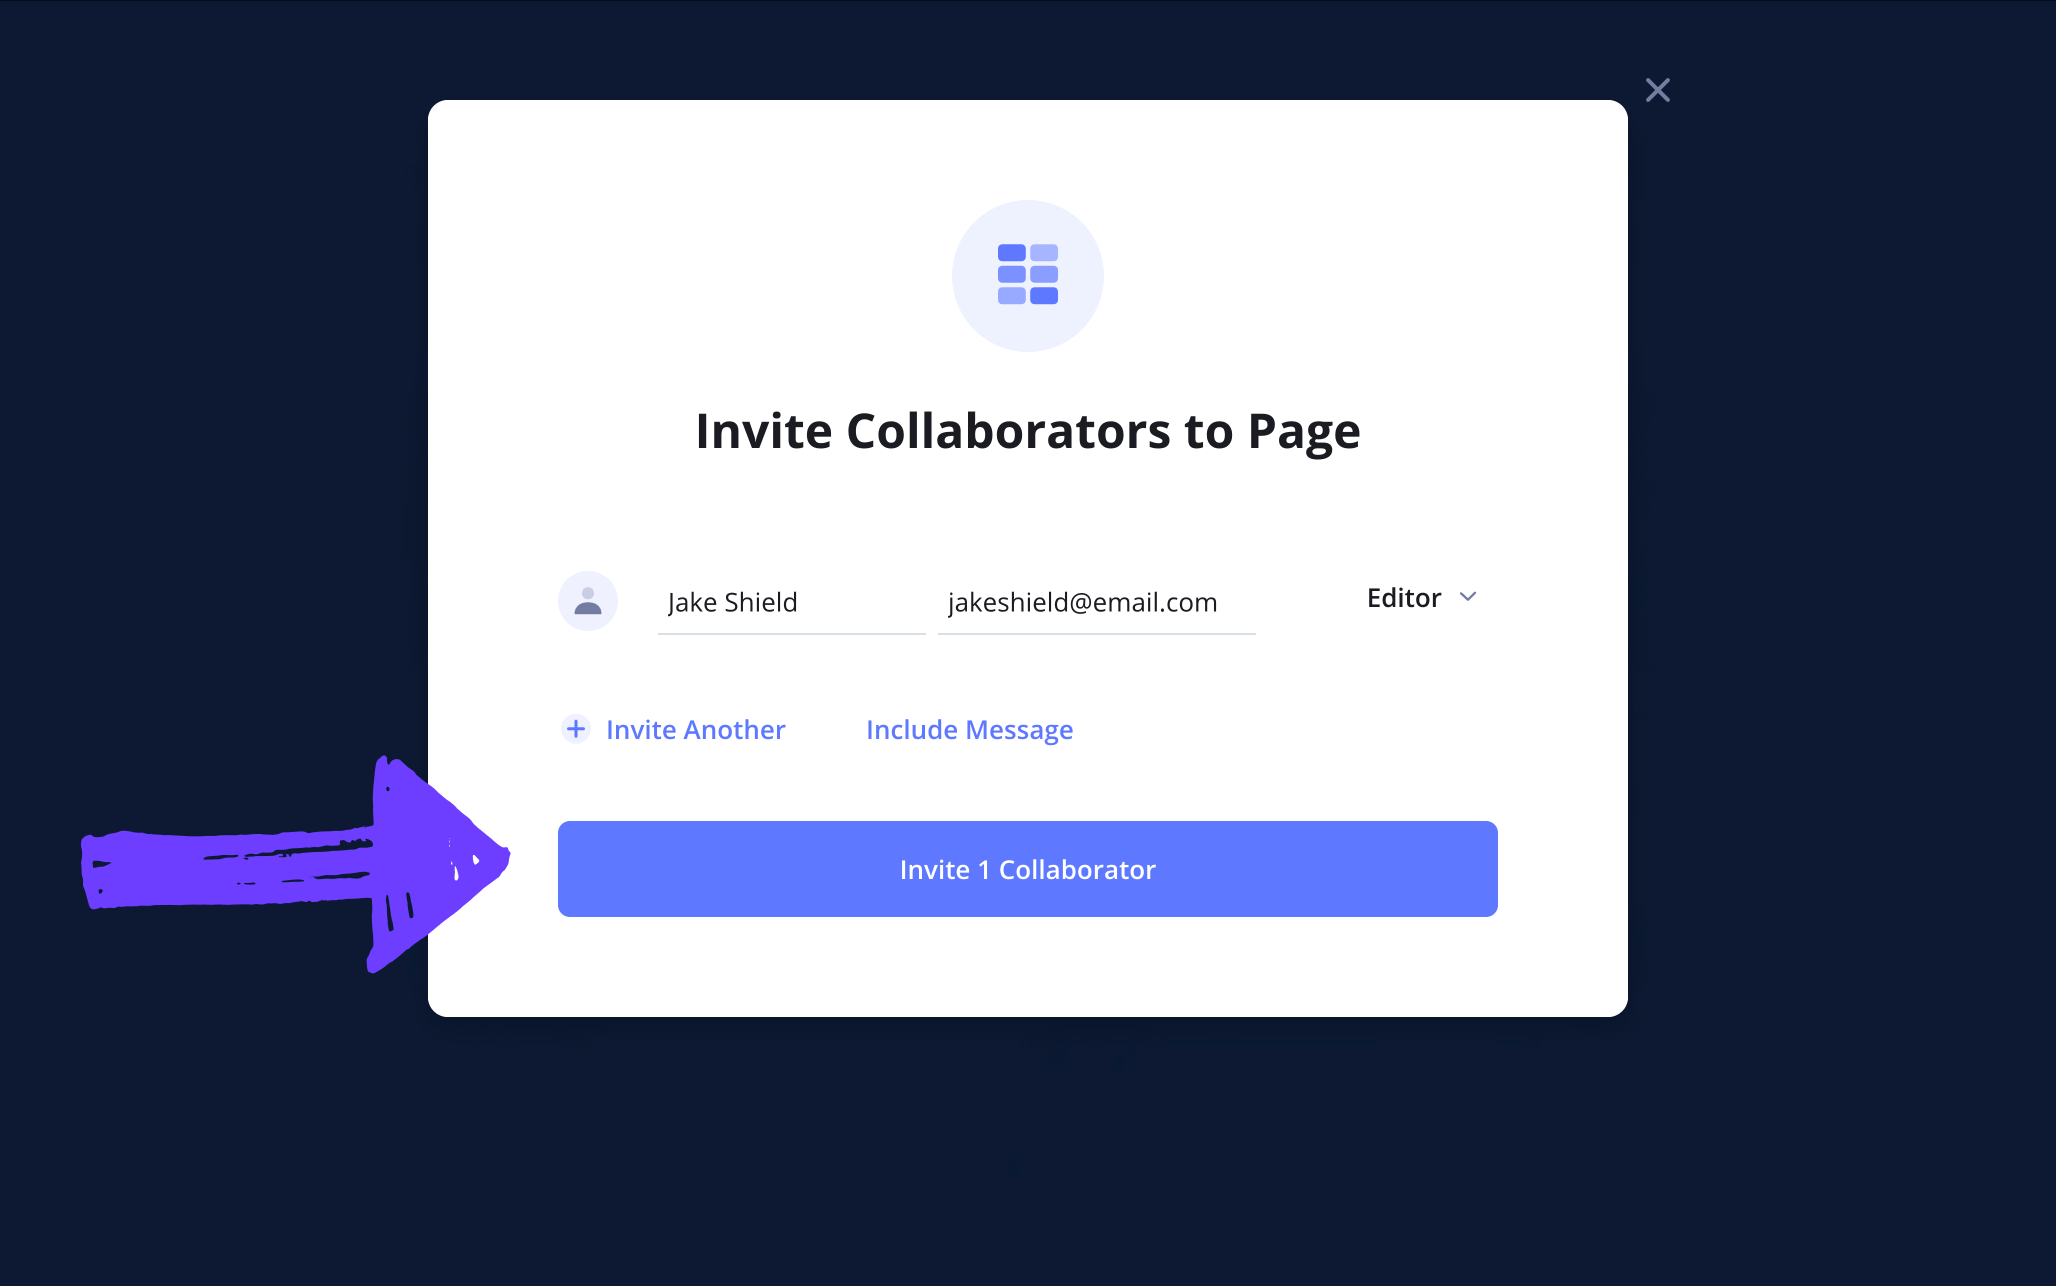
But StudioBinder also allows you to set the individual terms for whoever’s looking over your video storyboard template. Once you enter your invitee’s information, you can set their permissions to either viewer, commenter, or editor.
Step 5
5. Share your storyboard PDF
Once you’ve collaborated with your team and finalized your storyboard for a video, it’s time to save it as a PDF and print some hard copies for the whole production crew. Different departments may have unique preferences for how they want their storyboard document to look, which is why StudioBinder provides all your essential PDF customization needs.
On the generate PDF page you’ll find an array of customizable options, like the style tab, where you can adjust details such as print color and font size.
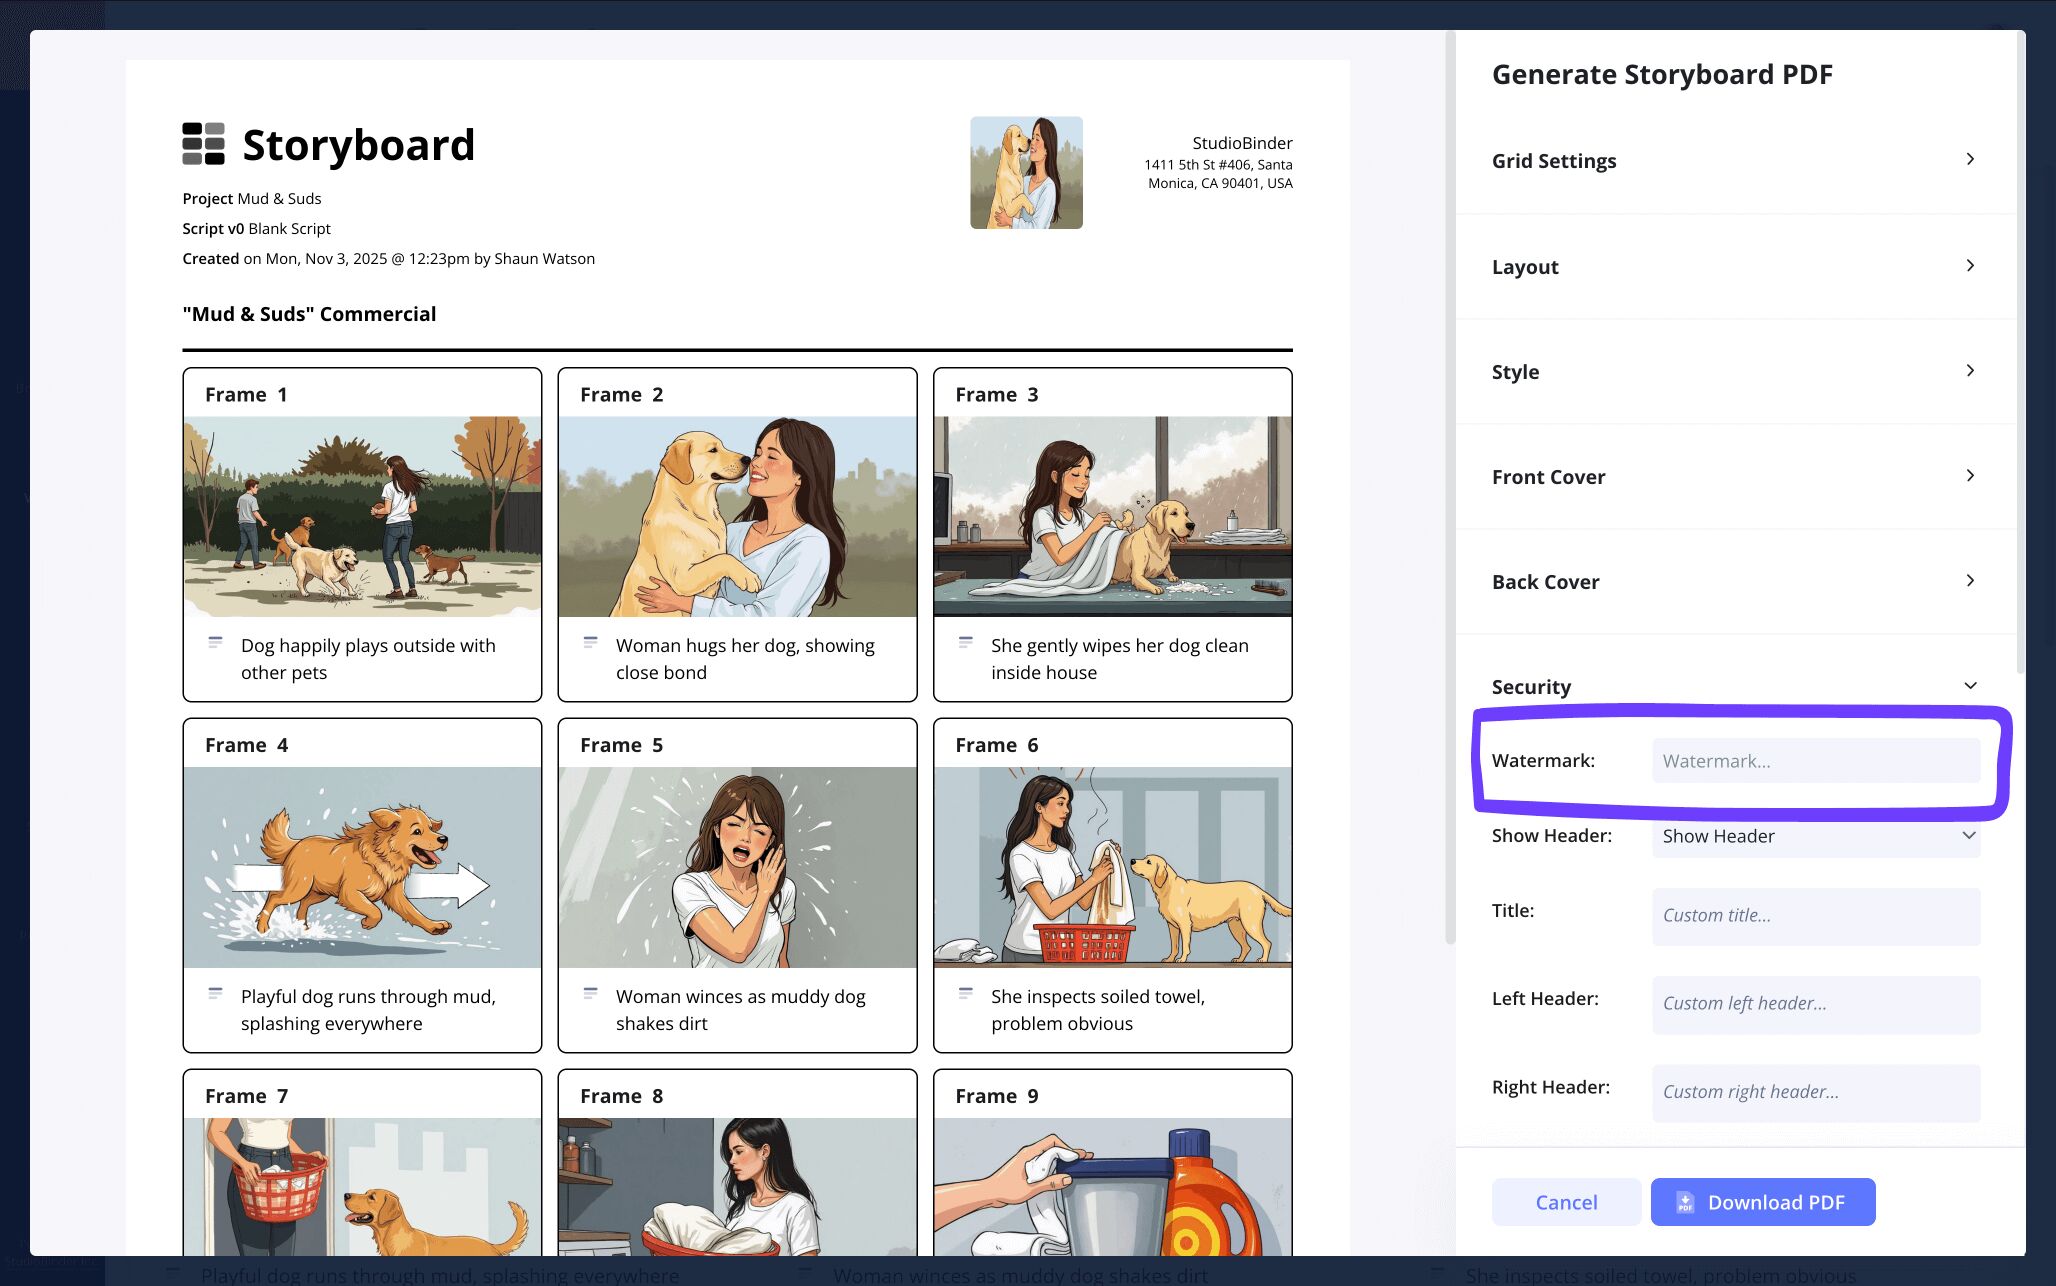
The security tab is where you can add some extra security and viewer specificity to your PDF storyboard by including a watermark and custom title, for example.
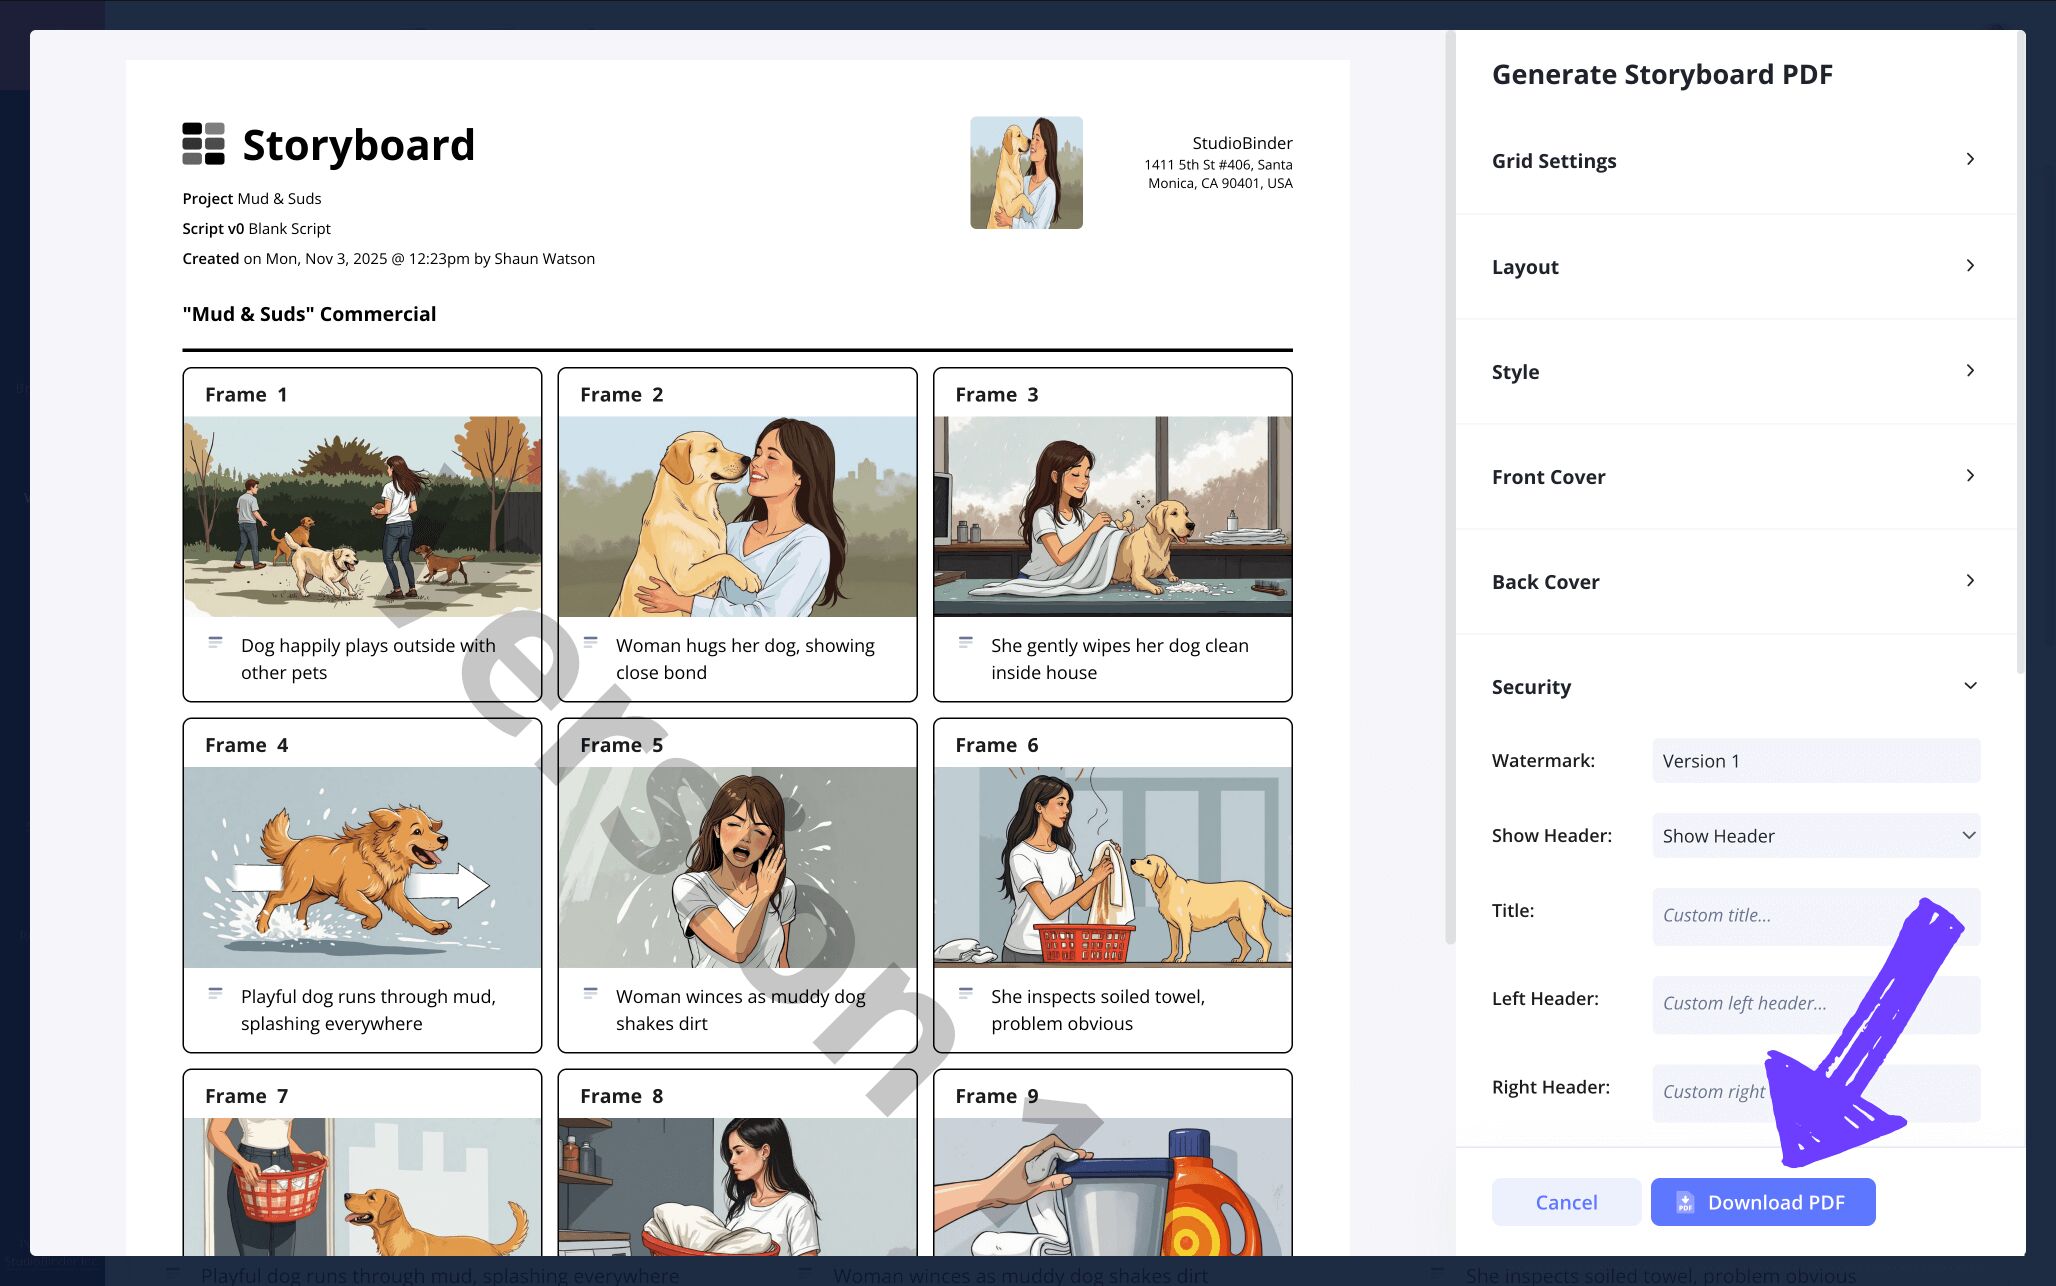
Now all you need to do is click Download PDF and your video storyboard is officially ready to print!
Conclusion
Finished!
Now that you have all the essential steps to building a video storyboard template nailed down, you’re ready to make your own video project dreams a reality!
But storyboard video projects aren’t the only kind of storyboarding template StudioBinder offers. You can take a look into our other free storyboard templates that we offer.
Frequently Asked Questions
Your questions, answered
Knowing where to start when building your own video storyboard template may seem overwhelming at first, but all video storyboarding can really be boiled down to five essential steps:
- Start with a blank storyboard template
- Write out your narrative beats under each panel
- Sketch or use reference images to bring each frame to life
- Have your team view your storyboard and provide notes
- Edit another draft of your storyboard based on notes
The term ‘video storyboard’ encapsulates a pretty broad concept of storyboarding. Video can essentially refer to any kind of video production, from a one-person creator using their phone camera, to a mega budget Hollywood film. Meanwhile, storyboards are used to map out a film sequence shot for shot, much like a comic book, during pre-production.
There isn’t one component of a video storyboard that wouldn’t be considered important. Still, what tends to get past most first-time storyboard creators is not considering how your storyboard looks to a fresh eye for the first time. Since it’s easy to get overly immersed in the process of creating a storyboard for a video, you may forget to consider how your visual narrative flows logically and emotionally to someone else. Detaching from your own perspective to consider someone else’s is challenging, but hugely helpful in the storyboarding process.
The look of a video storyboard is comparable to the look of a comic book. A pre-planned film scene is laid out through a series of panels on a page. The viewer reads the visual narrative from left to right and top to bottom. Each panel represents a shot in the scene, and underneath each panel is a description of the shot that will include any relevant information from scene description, dialogue, lighting, shot setup, or anything else that might be essential for the actual shooting of the scene.
