home → TEMPLATES → Storyboard
Documentary Storyboard Template
Documentary storyboard template
Though the documentary film process is largely made possible by capturing unexpected moments on film, you can still use a documentary storyboard template to help you plan around certain scenarios throughout. As you brainstorm what you hope to discover on your documentary journey, and maybe even begin gathering some interview and b-roll footage, you can use a documentary storyboard to make the best and most effective use of that footage and those broad ideas. Making a documentary storyboard isn’t like storyboarding a narrative film, because it’s less about making a fixed plan from a fixed story, and more about putting together the best shots, footage and ideas you have in one place and discovering what could fit best, and in what order, before you start editing.
With the below guide, we’ll take you through the broadest storyboarding steps and how they’ll help you build the best storyboard documentary template. We’ll be using our own documentary storyboard example made with StudioBinder’s Storyboard Creator, but you can use whichever kind of storyboard works best for you to follow along.
Step 1
1. Format your template
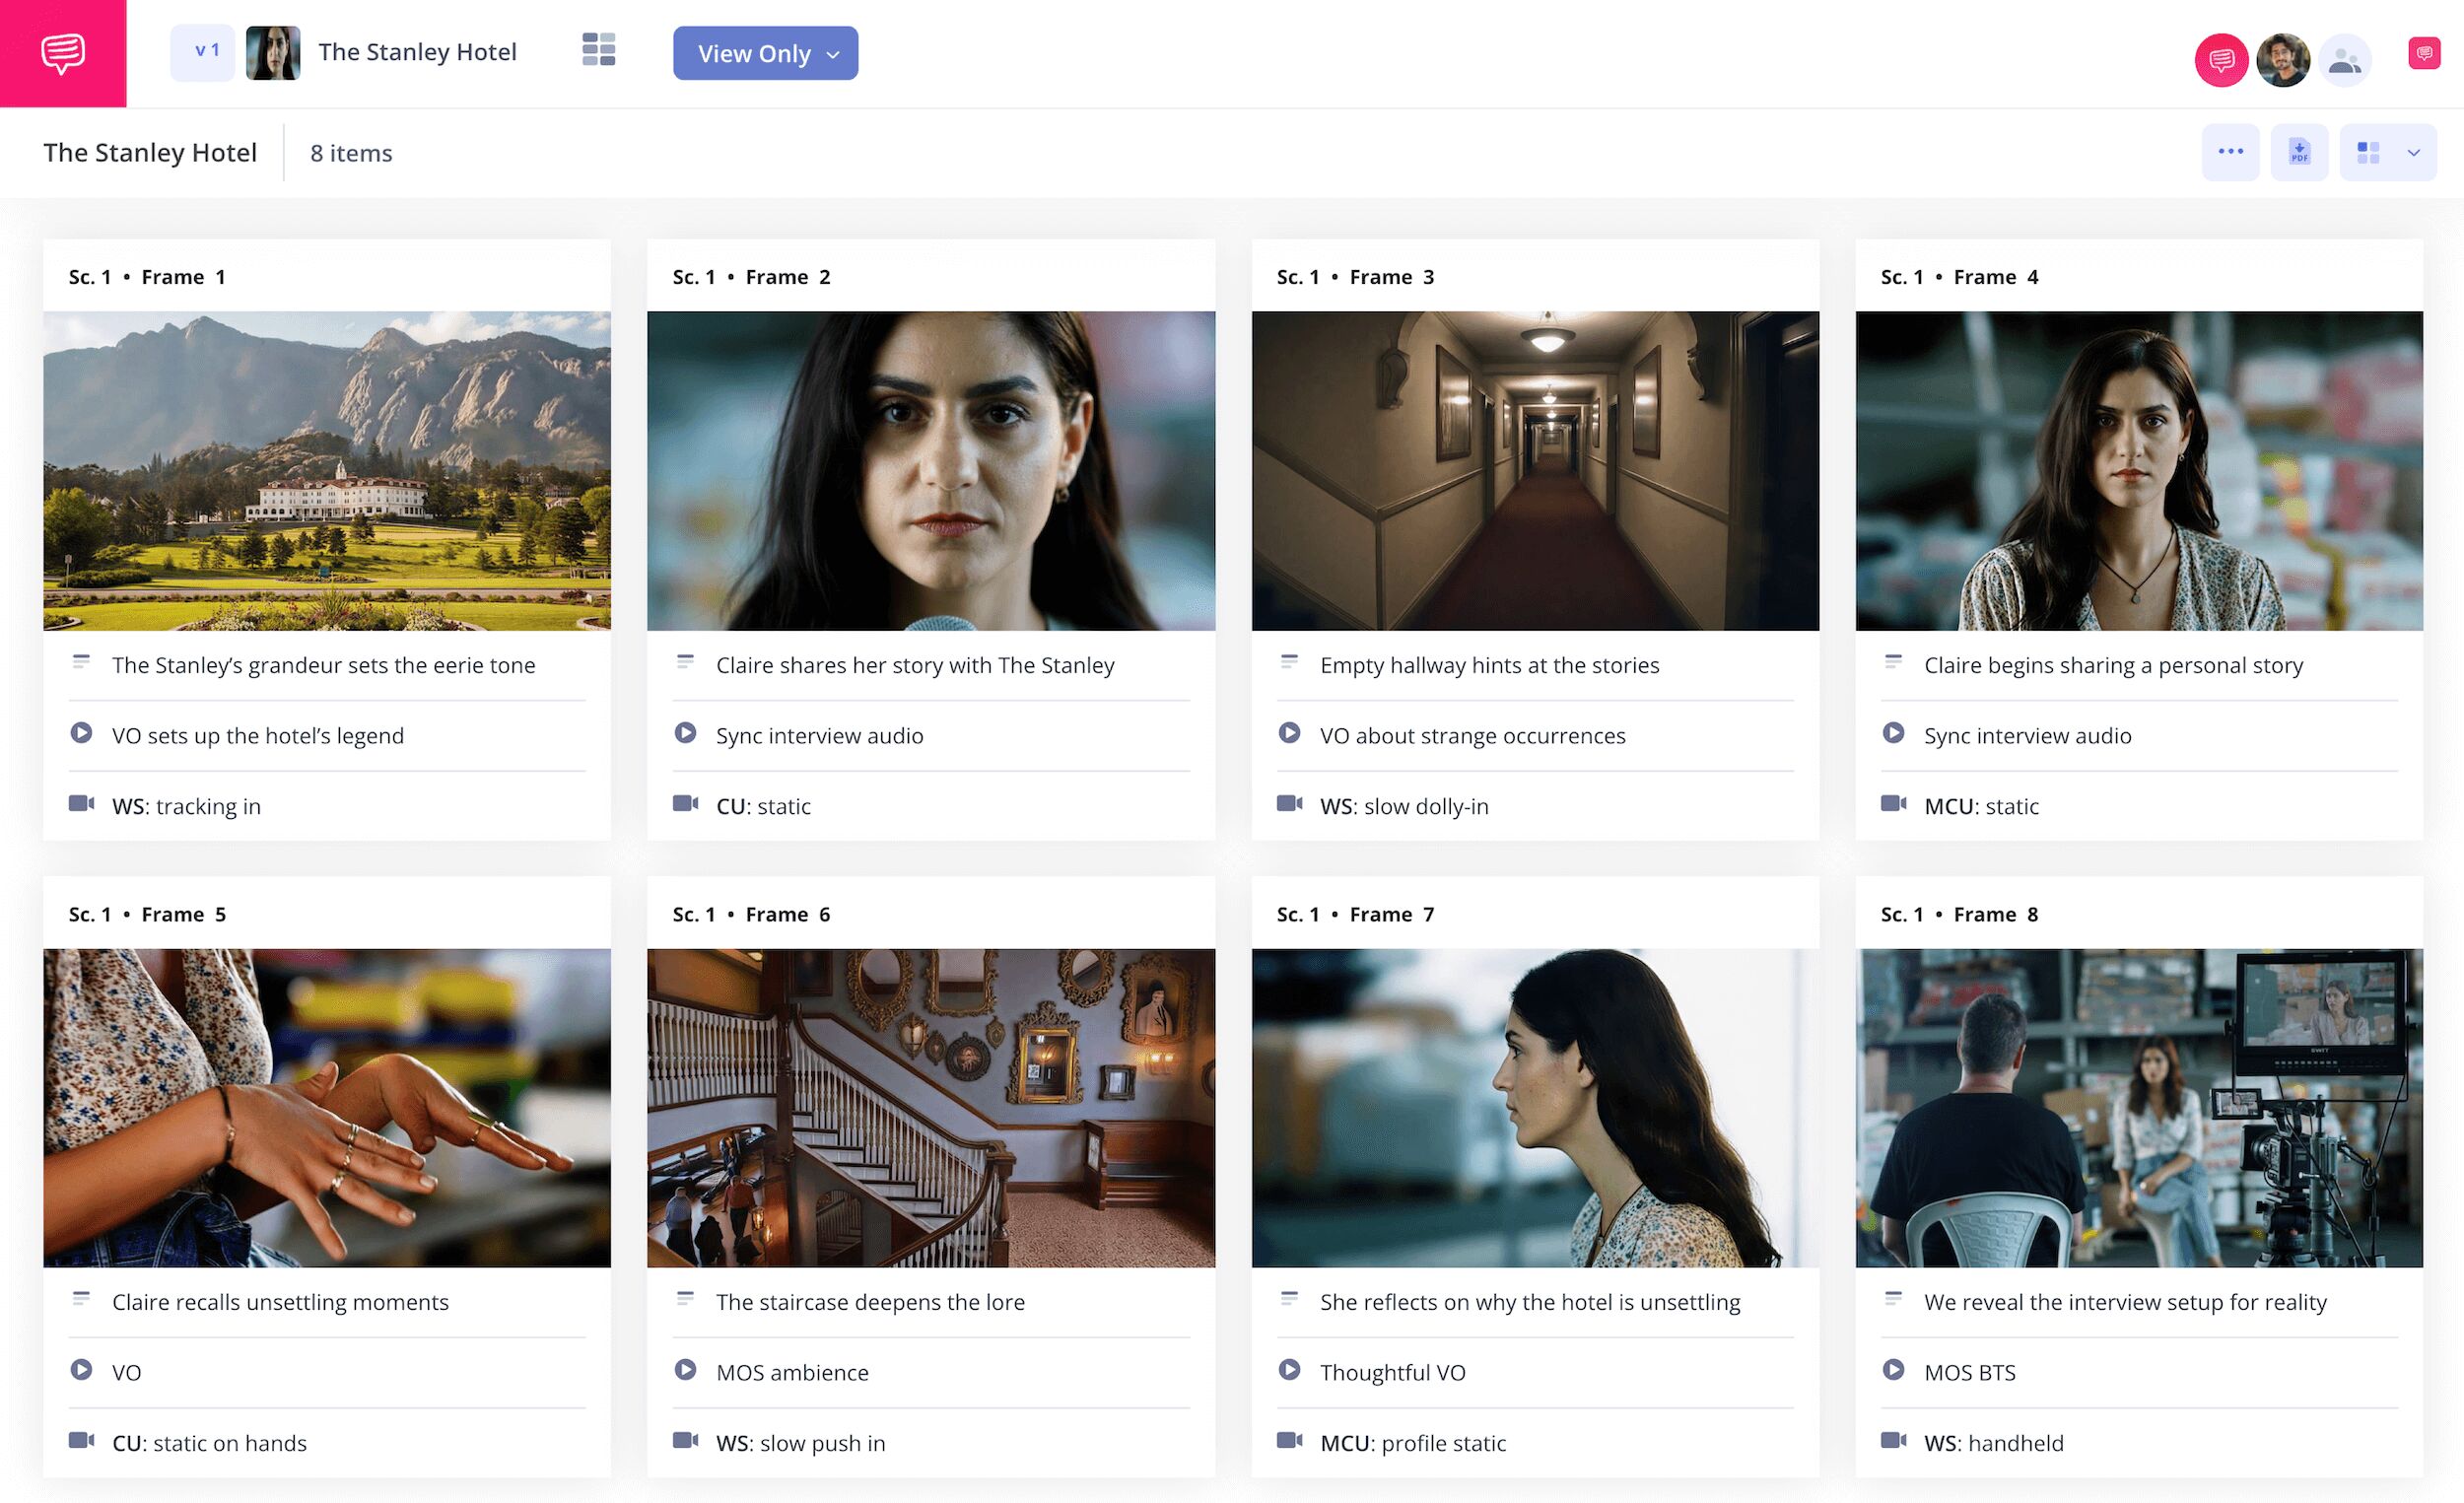
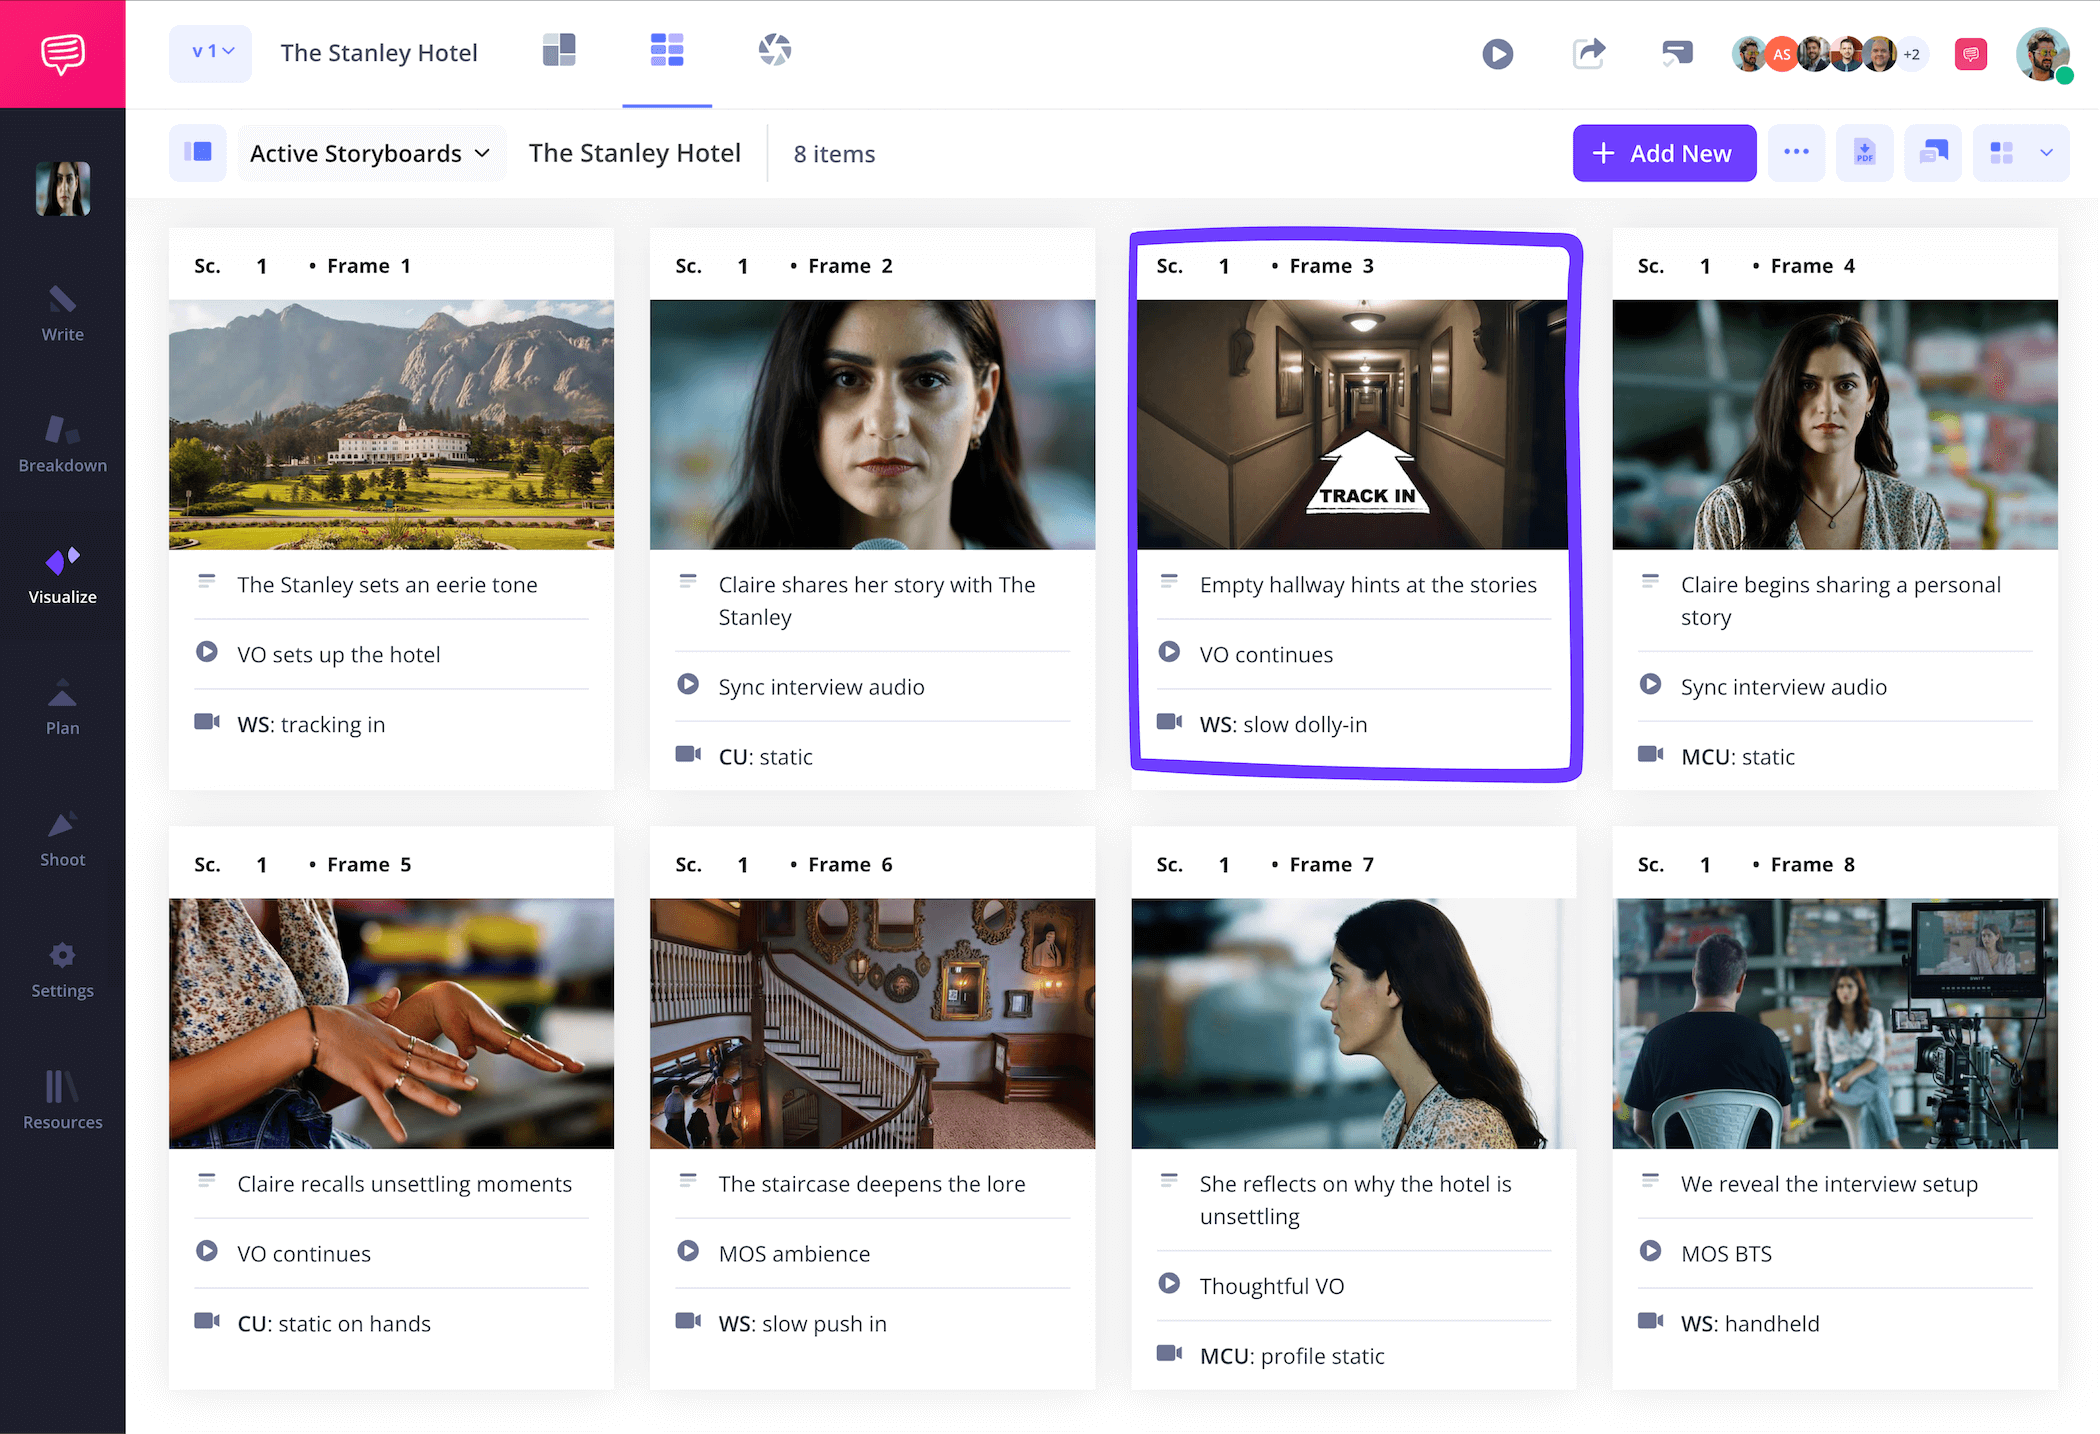
You’ll want to start by formatting your documentary storyboard template with the framing and aspect ratio that fits your shooting style best. For example, if you want to mix in b-roll footage during an interview, a wide angle lens shot of the environment being described could really capture the scope of the location, along with the viewer’s attention. When you start up a new storyboard project in StudioBinder, you’re prompted to set up a variety of custom framing and column options. But since documentary shooting is constantly evolving, you’ll always have the option to change your customizations in the settings at any time. Once you’re done, your storyboard documentary template will look something like this:

At this point you may have a set of questions ready for an interview you haven’t filmed yet, or maybe you already filmed the interview and want to plan out what lines of dialogue from the interview would pair best with specific B-roll shots. Write these lines in the empty description fields below each panel.
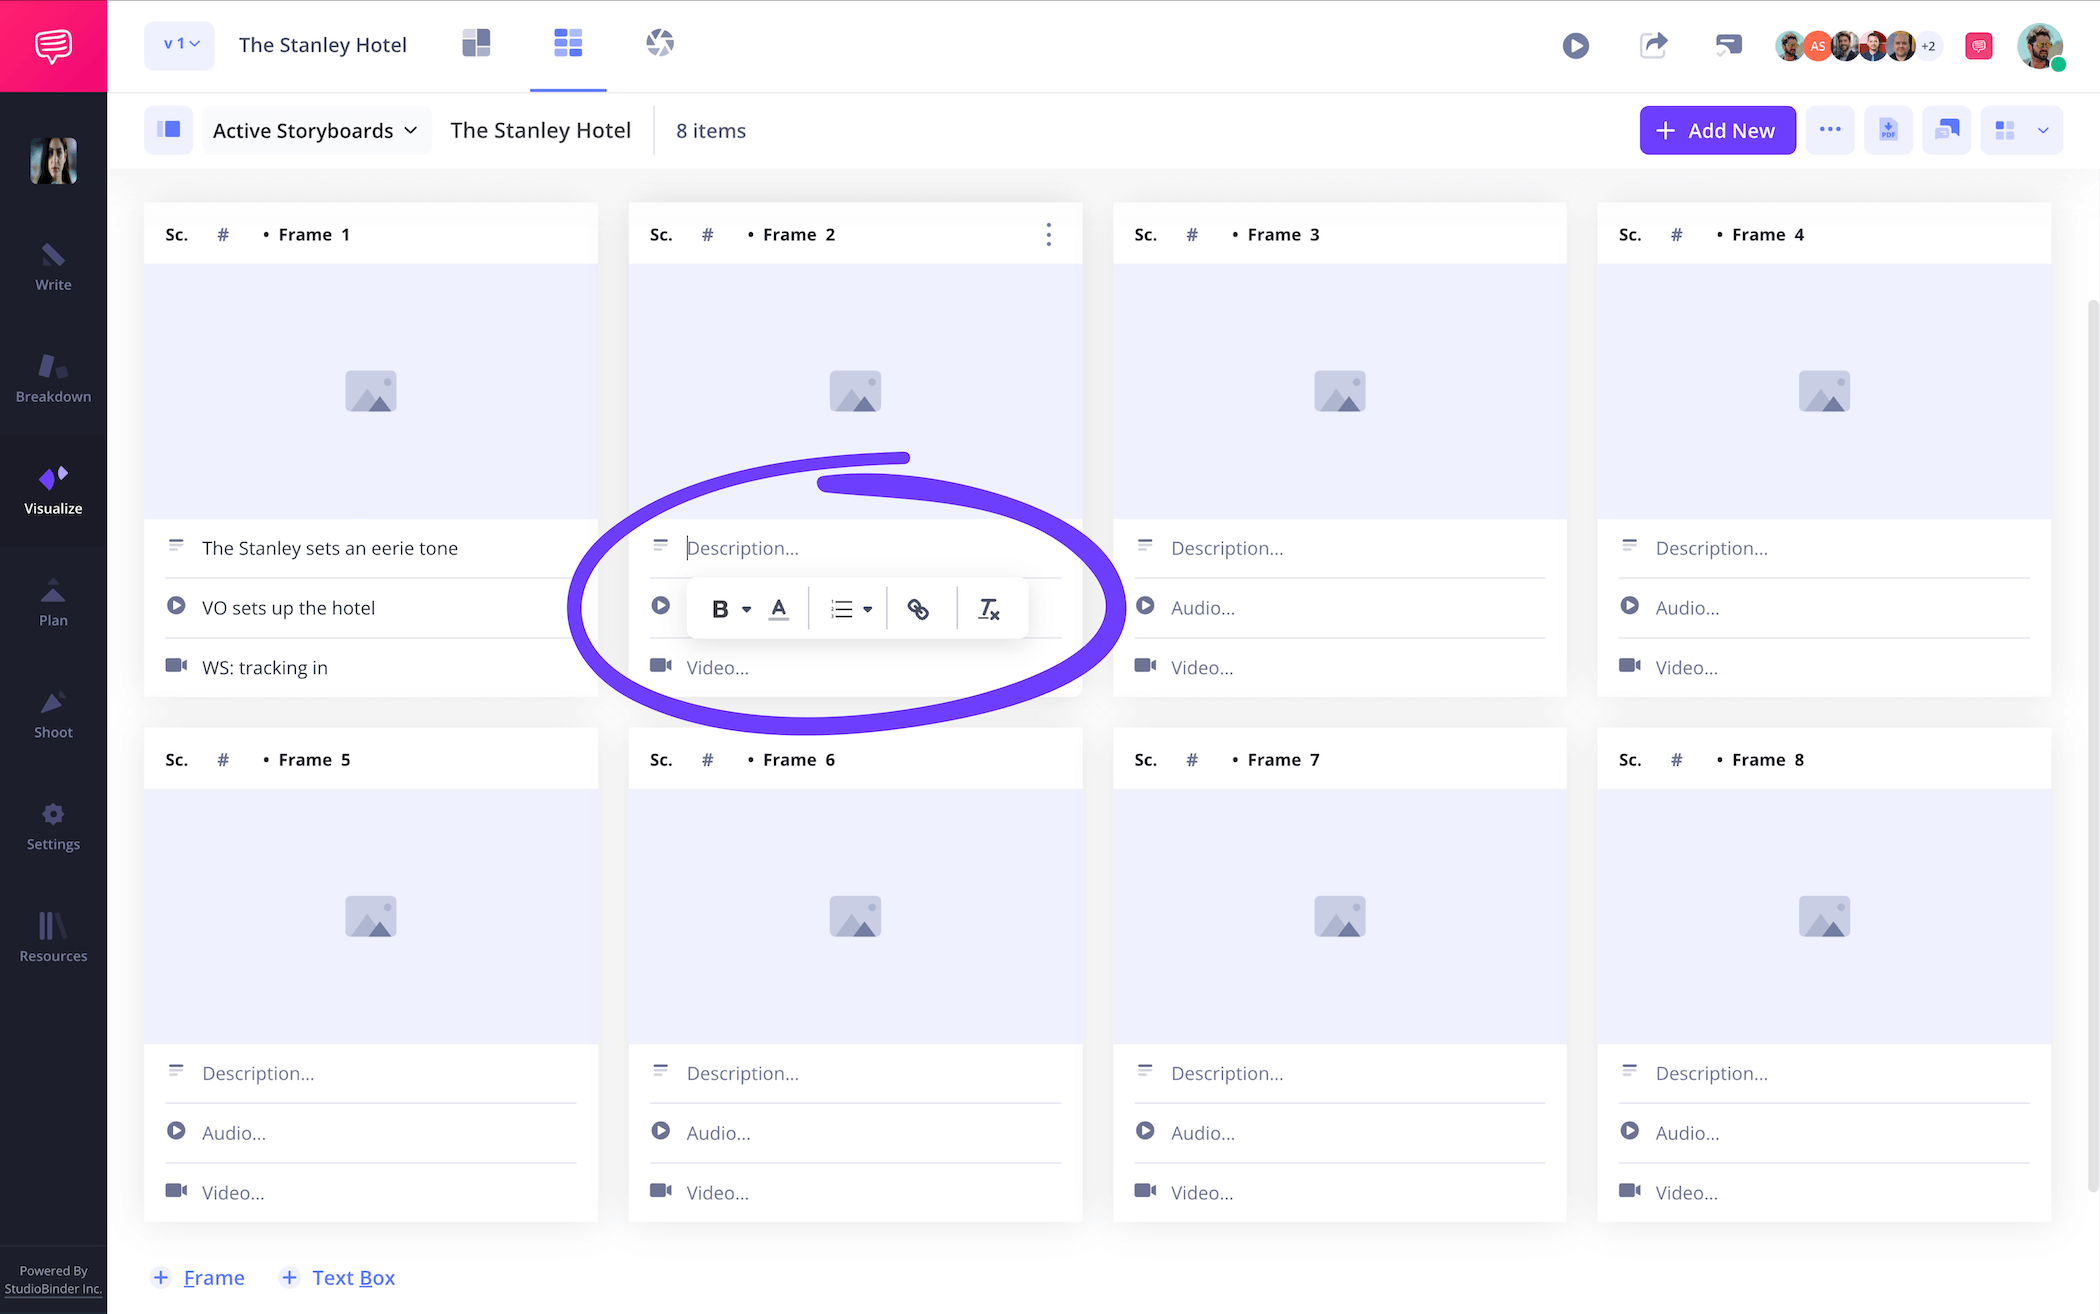
Step 2
2. Upload images
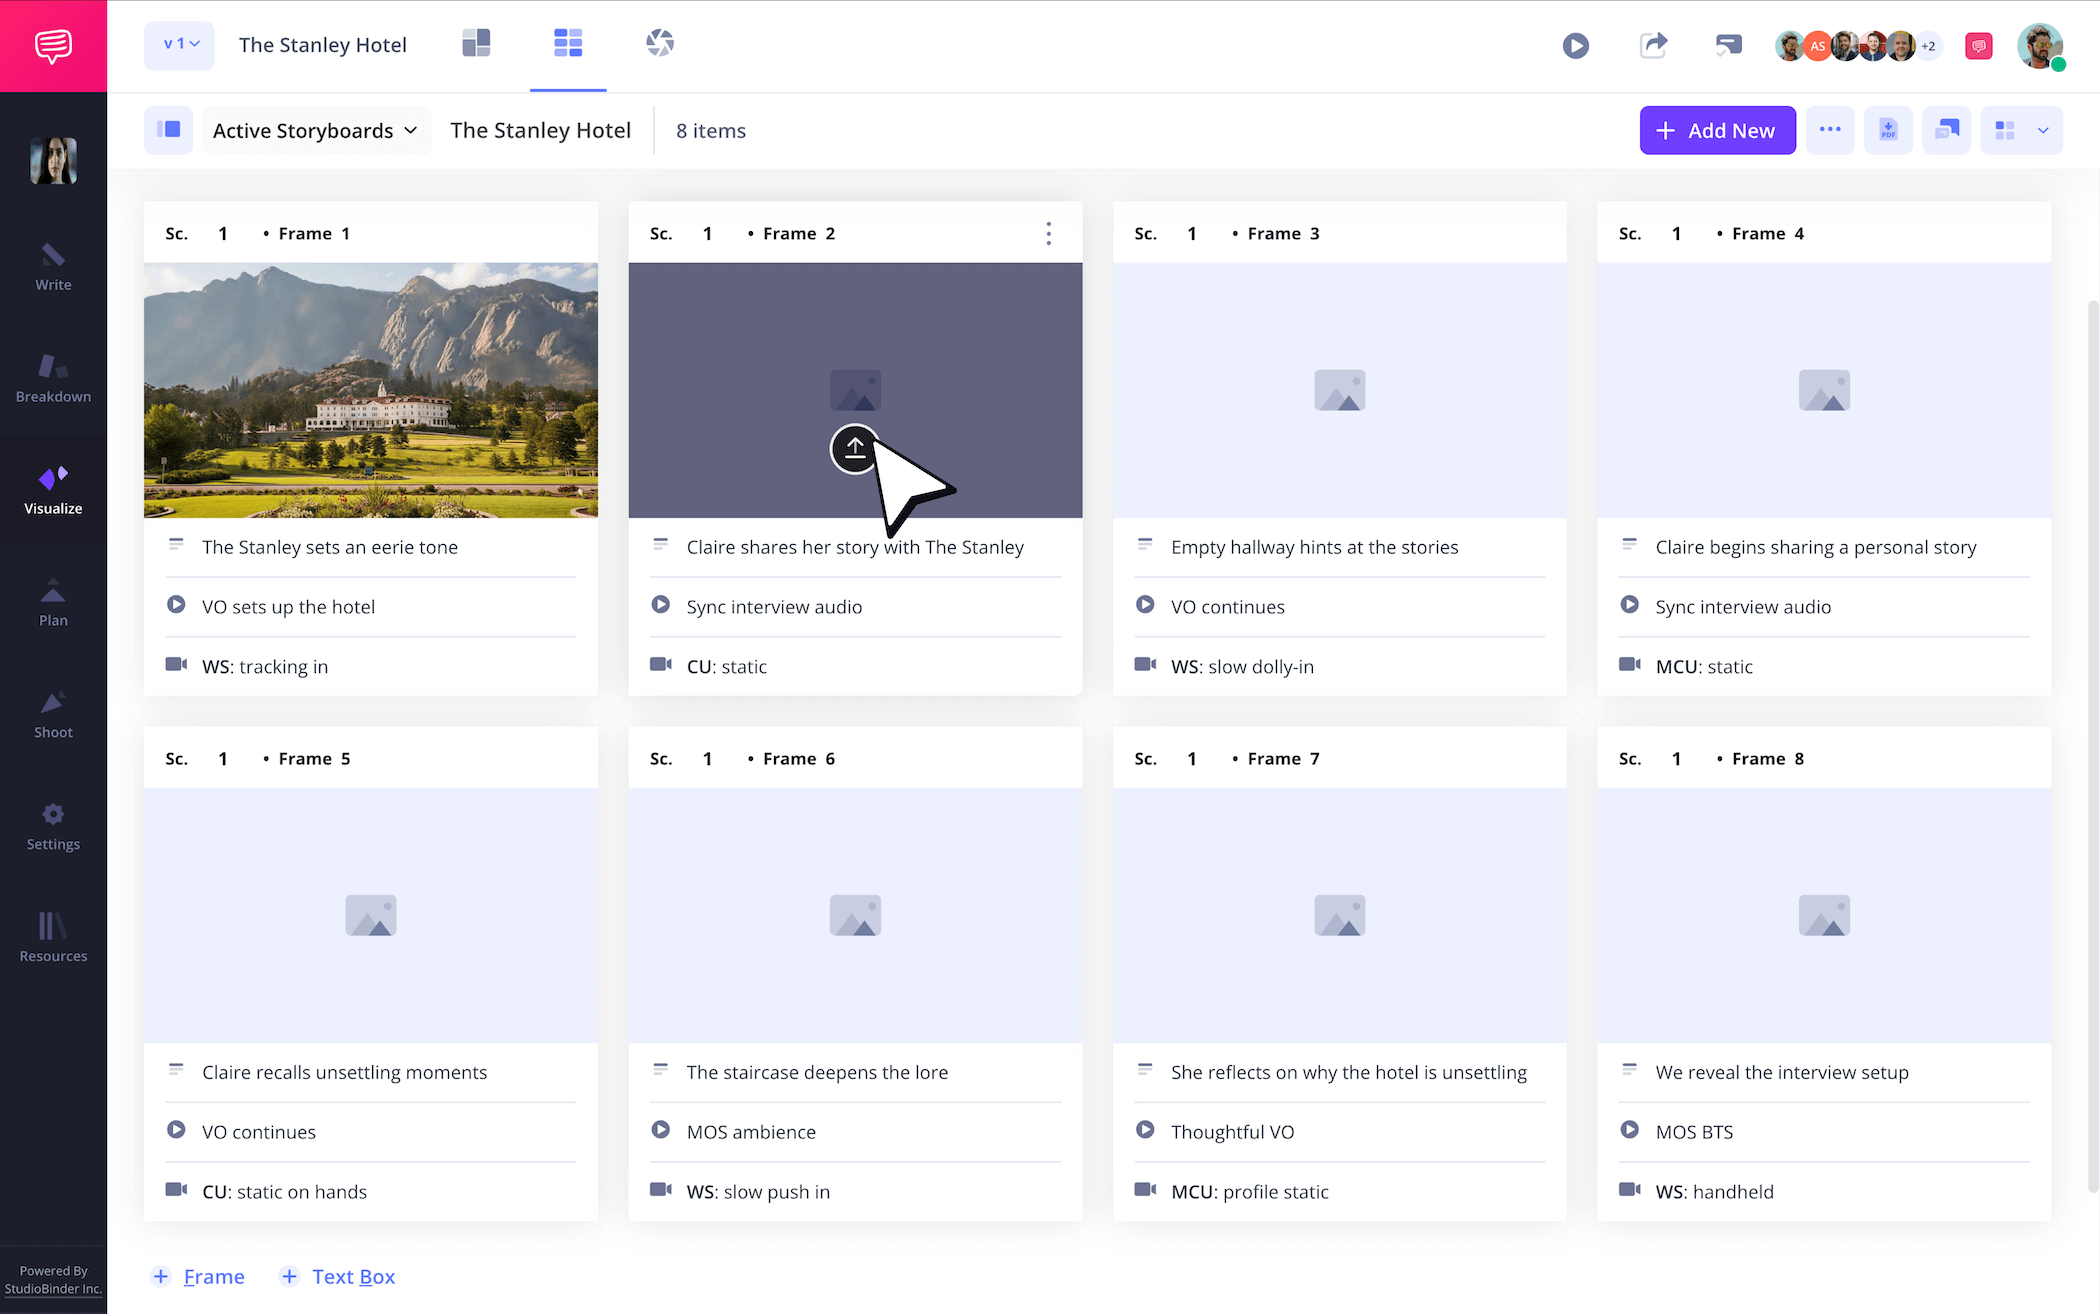
You’ll have plenty of options when it comes to applying images to your storyboard for a documentary. If you have some B-roll and interview footage for example, you can insert screenshots to indicate which of your shots you want to include in each frame. If you haven’t started shooting yet, but have a general idea of what you hope to capture, you can use placeholder images from the internet to plan out shots you want to show during narrator exposition or interview questions.
Whatever your creative approach, adding your images into your documentary storyboard is as easy as clicking upload on any frame.
Step 3
3. Plan with arrows
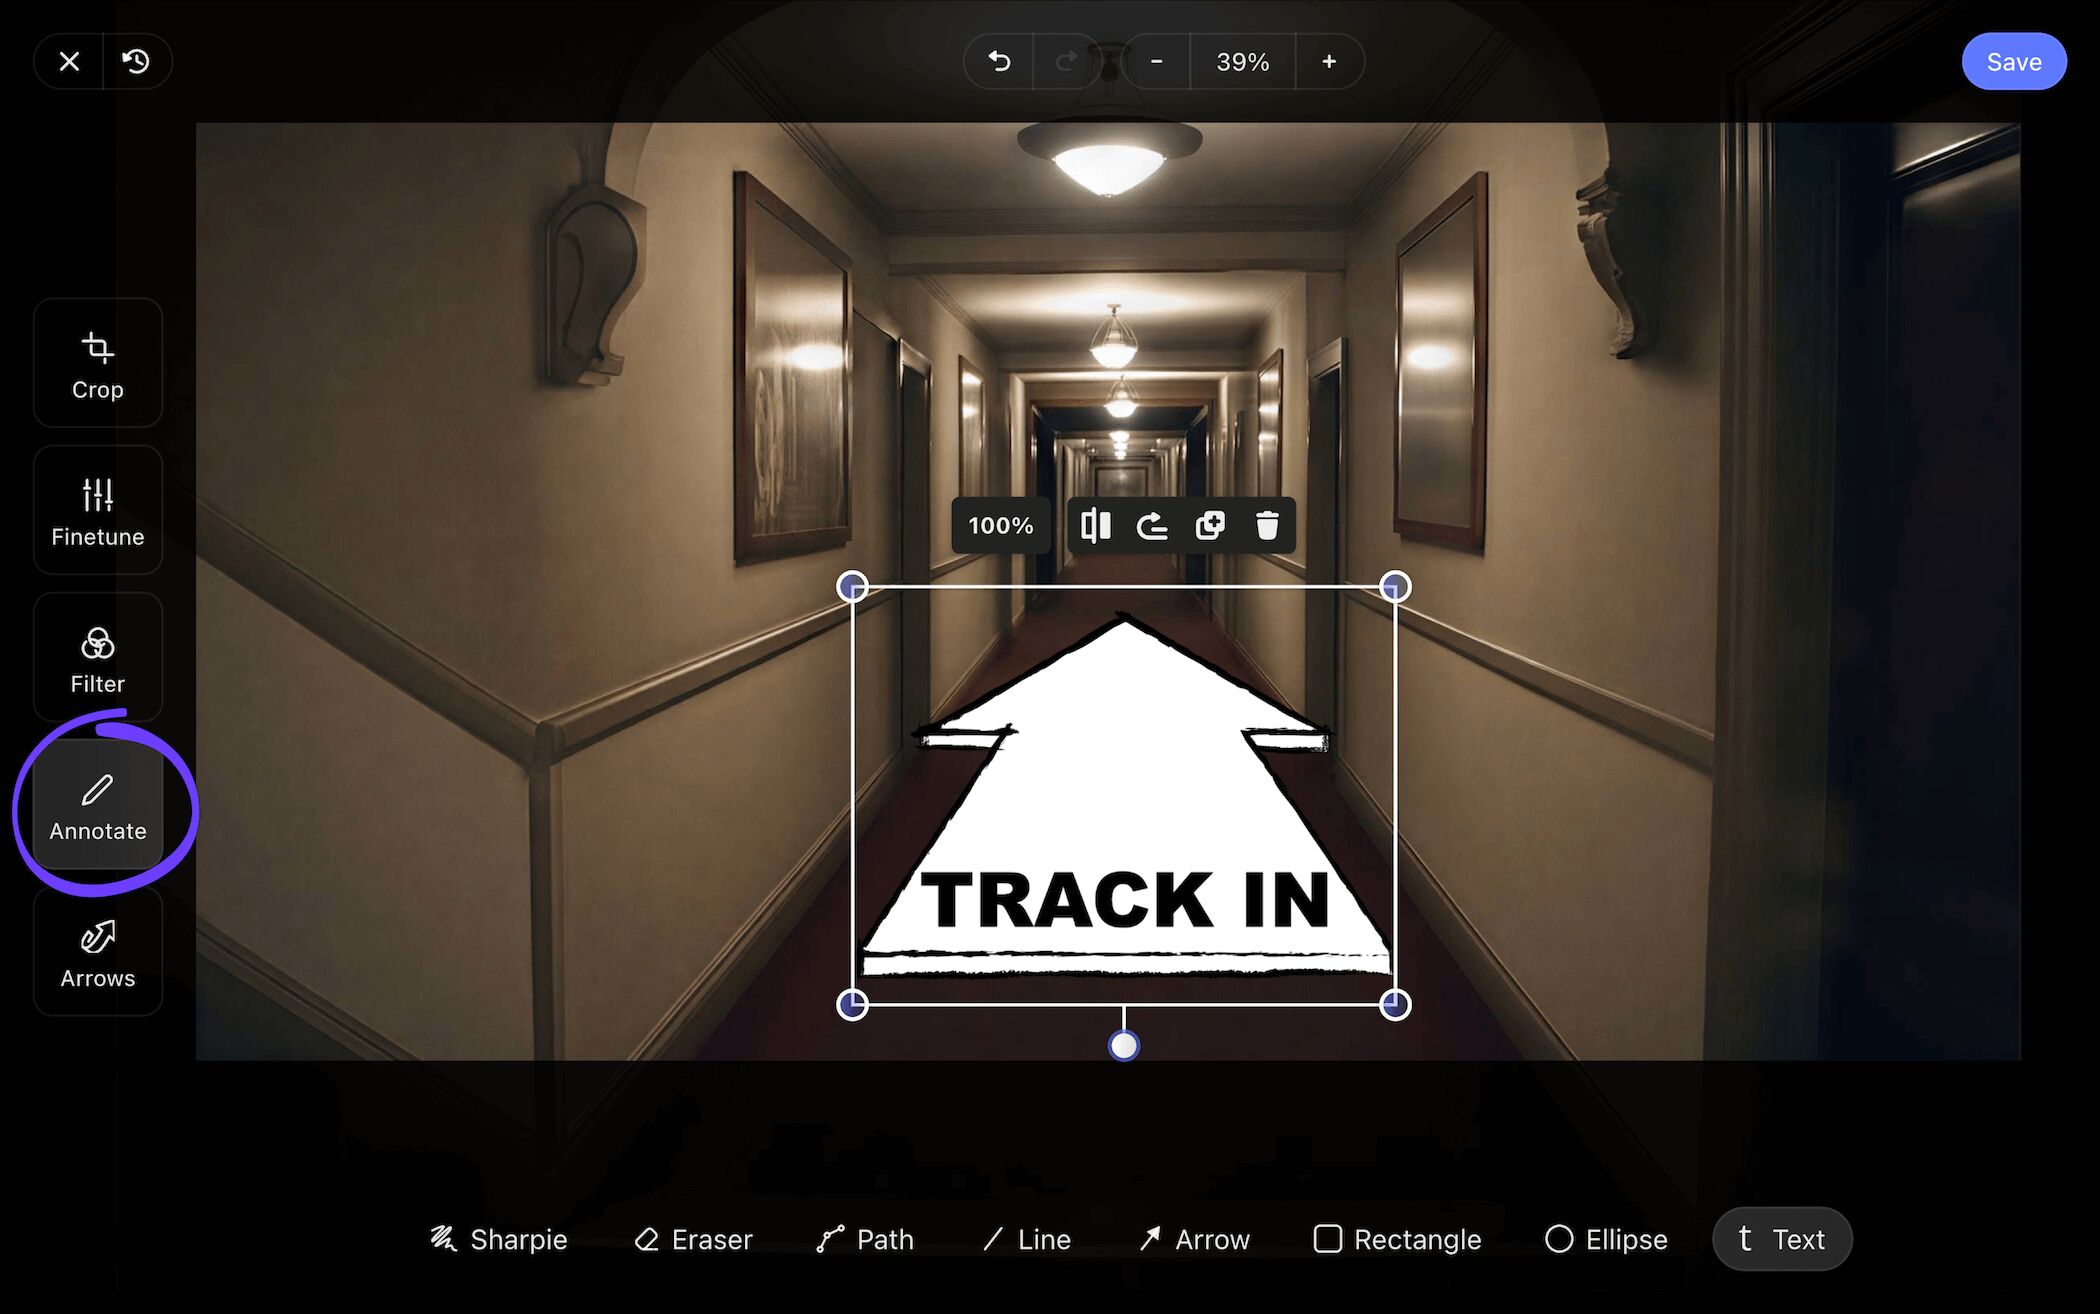
Storyboard arrows can be used for many purposes while building your documentary storyboard template. If you’re going to capture footage at an important location soon, you might want to sketch out or use a reference image for the type of shot you plan to capture. Then you can use arrows to indicate what that camera shot needs to be. Or, if you plan to interview at a specific site, you can use photographs of that site and indicate with arrows where you plan to walk while interviewing.
For our documentary storyboard example, we used StudioBinder’s custom image editor to add a flat arrow that indicates a dolly shot forward. Now we know exactly what to capture on shooting day.
Once you’ve taken full advantage of StudioBinder’s image editing suite to highlight all relevant details, all you have to do is click save, and as you can see in our documentary storyboard, the edited image has been added to our project.
Step 4
4. Collaborate and share
Storyboarding a documentary is rarely done in a vacuum. Even if you’re lone wolfing through most of the process, you may find it helpful to share your work with those you’re shooting the documentary with, or even with the subjects of the documentary. This can be useful for making sure you’re conveying the events, location, and overall story with accuracy and respect. For these kinds of situations, you can send a view-only-link to let anyone in on how your storyboard is looking.
But let’s say you want to make constructing your documentary storyboard template a more collaborative process. In StudioBinder, you have the option to set your invitee’s permissions to either commenter or editor. This way they can be just as hands-on with the creation of your storyboard for a documentary as you are.
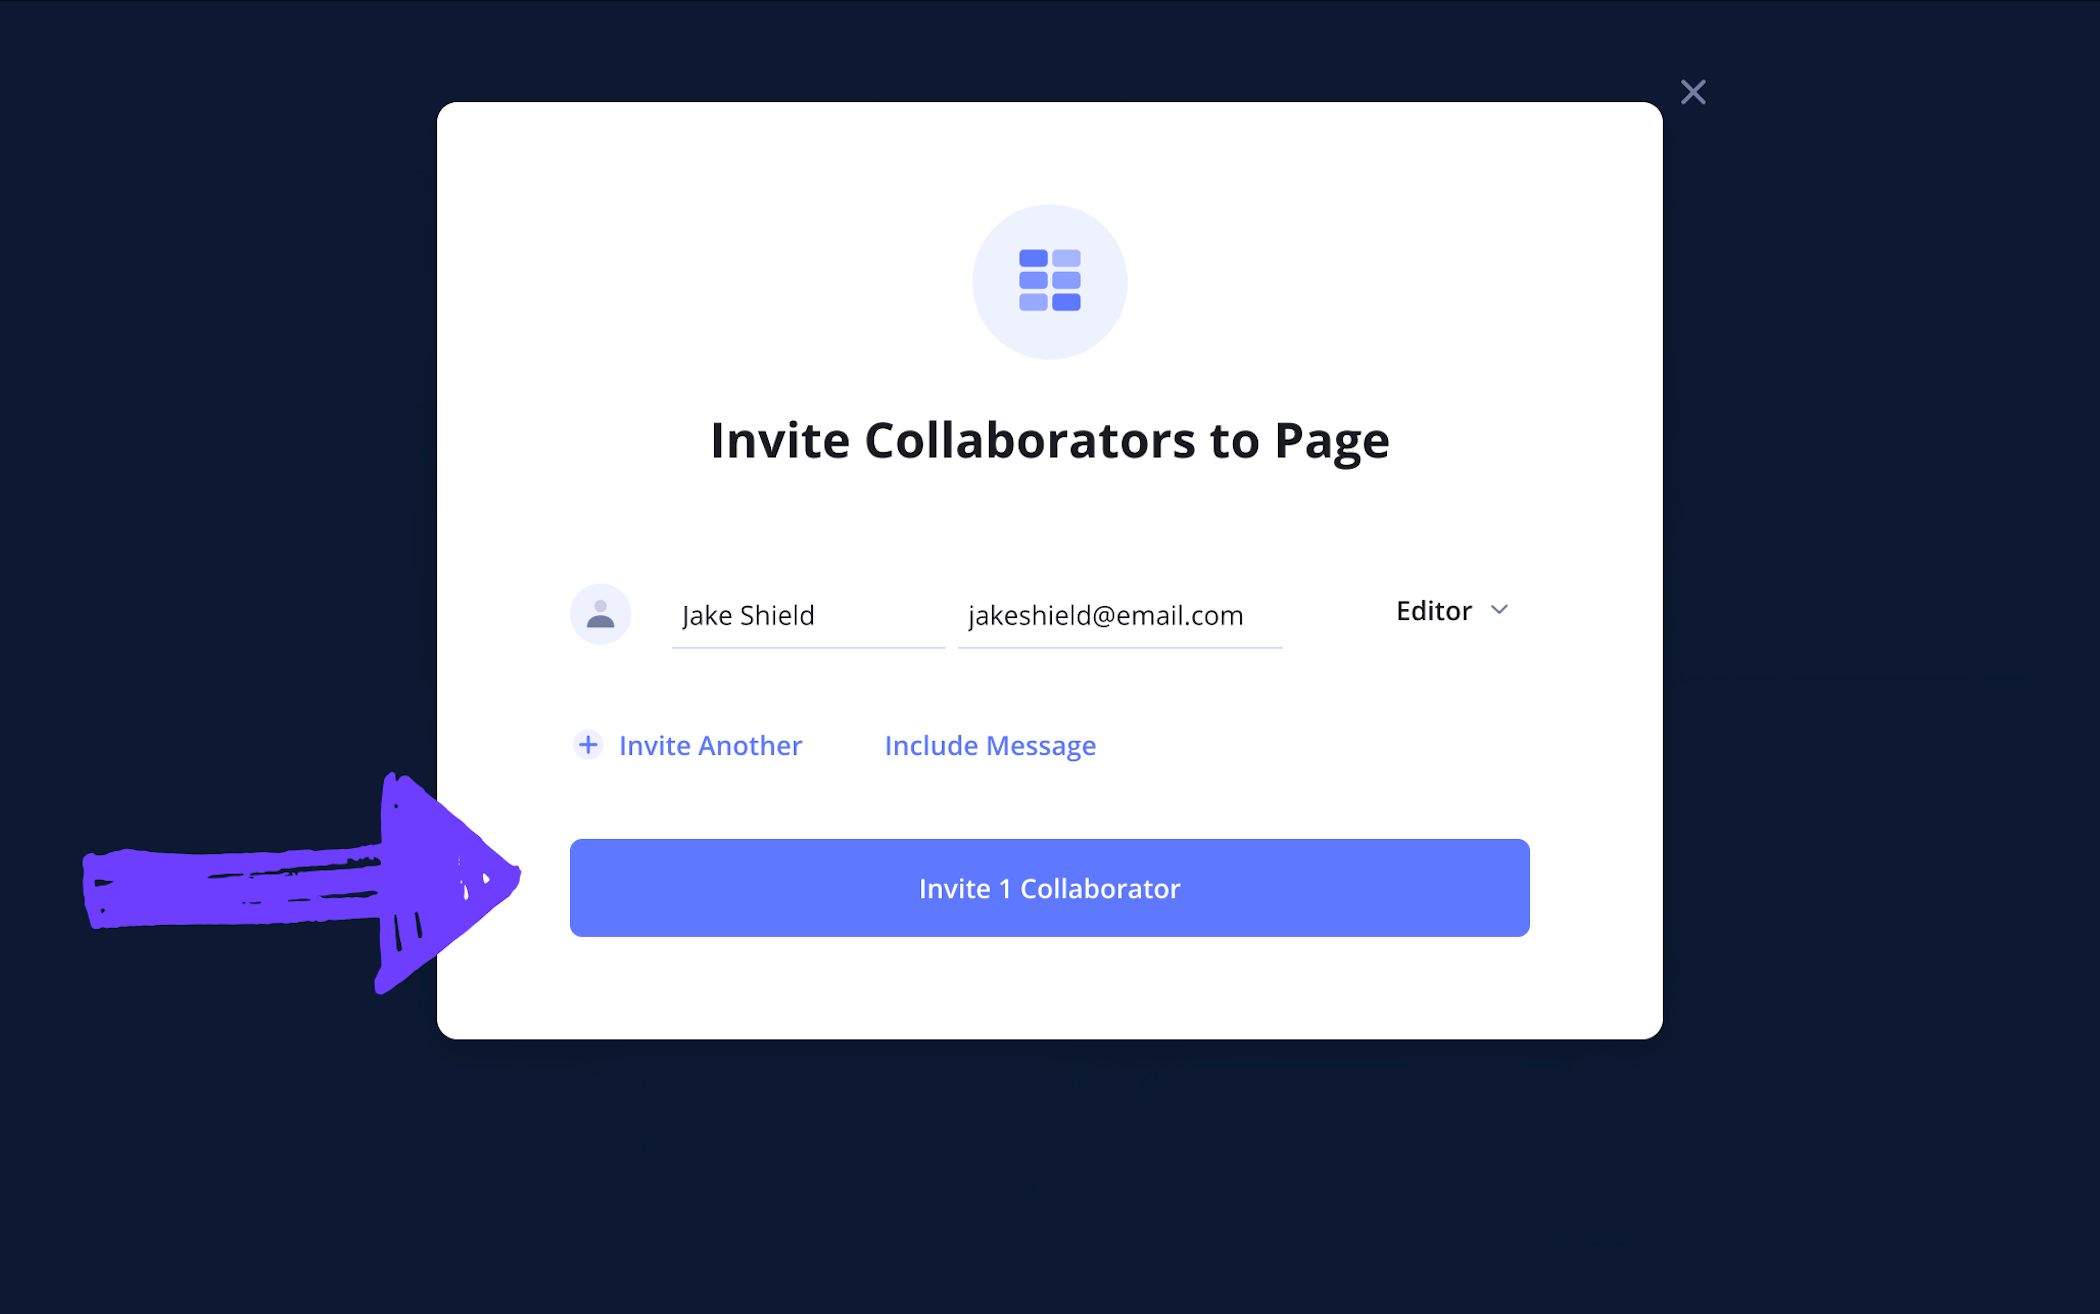
If feedback is what you’re looking for, then be sure to remind your commenter and editor invitees that they can leave their notes by opening up the comments tab. You can even respond back and start a productive dialogue.

Step 5
5. Download your storyboard PDF
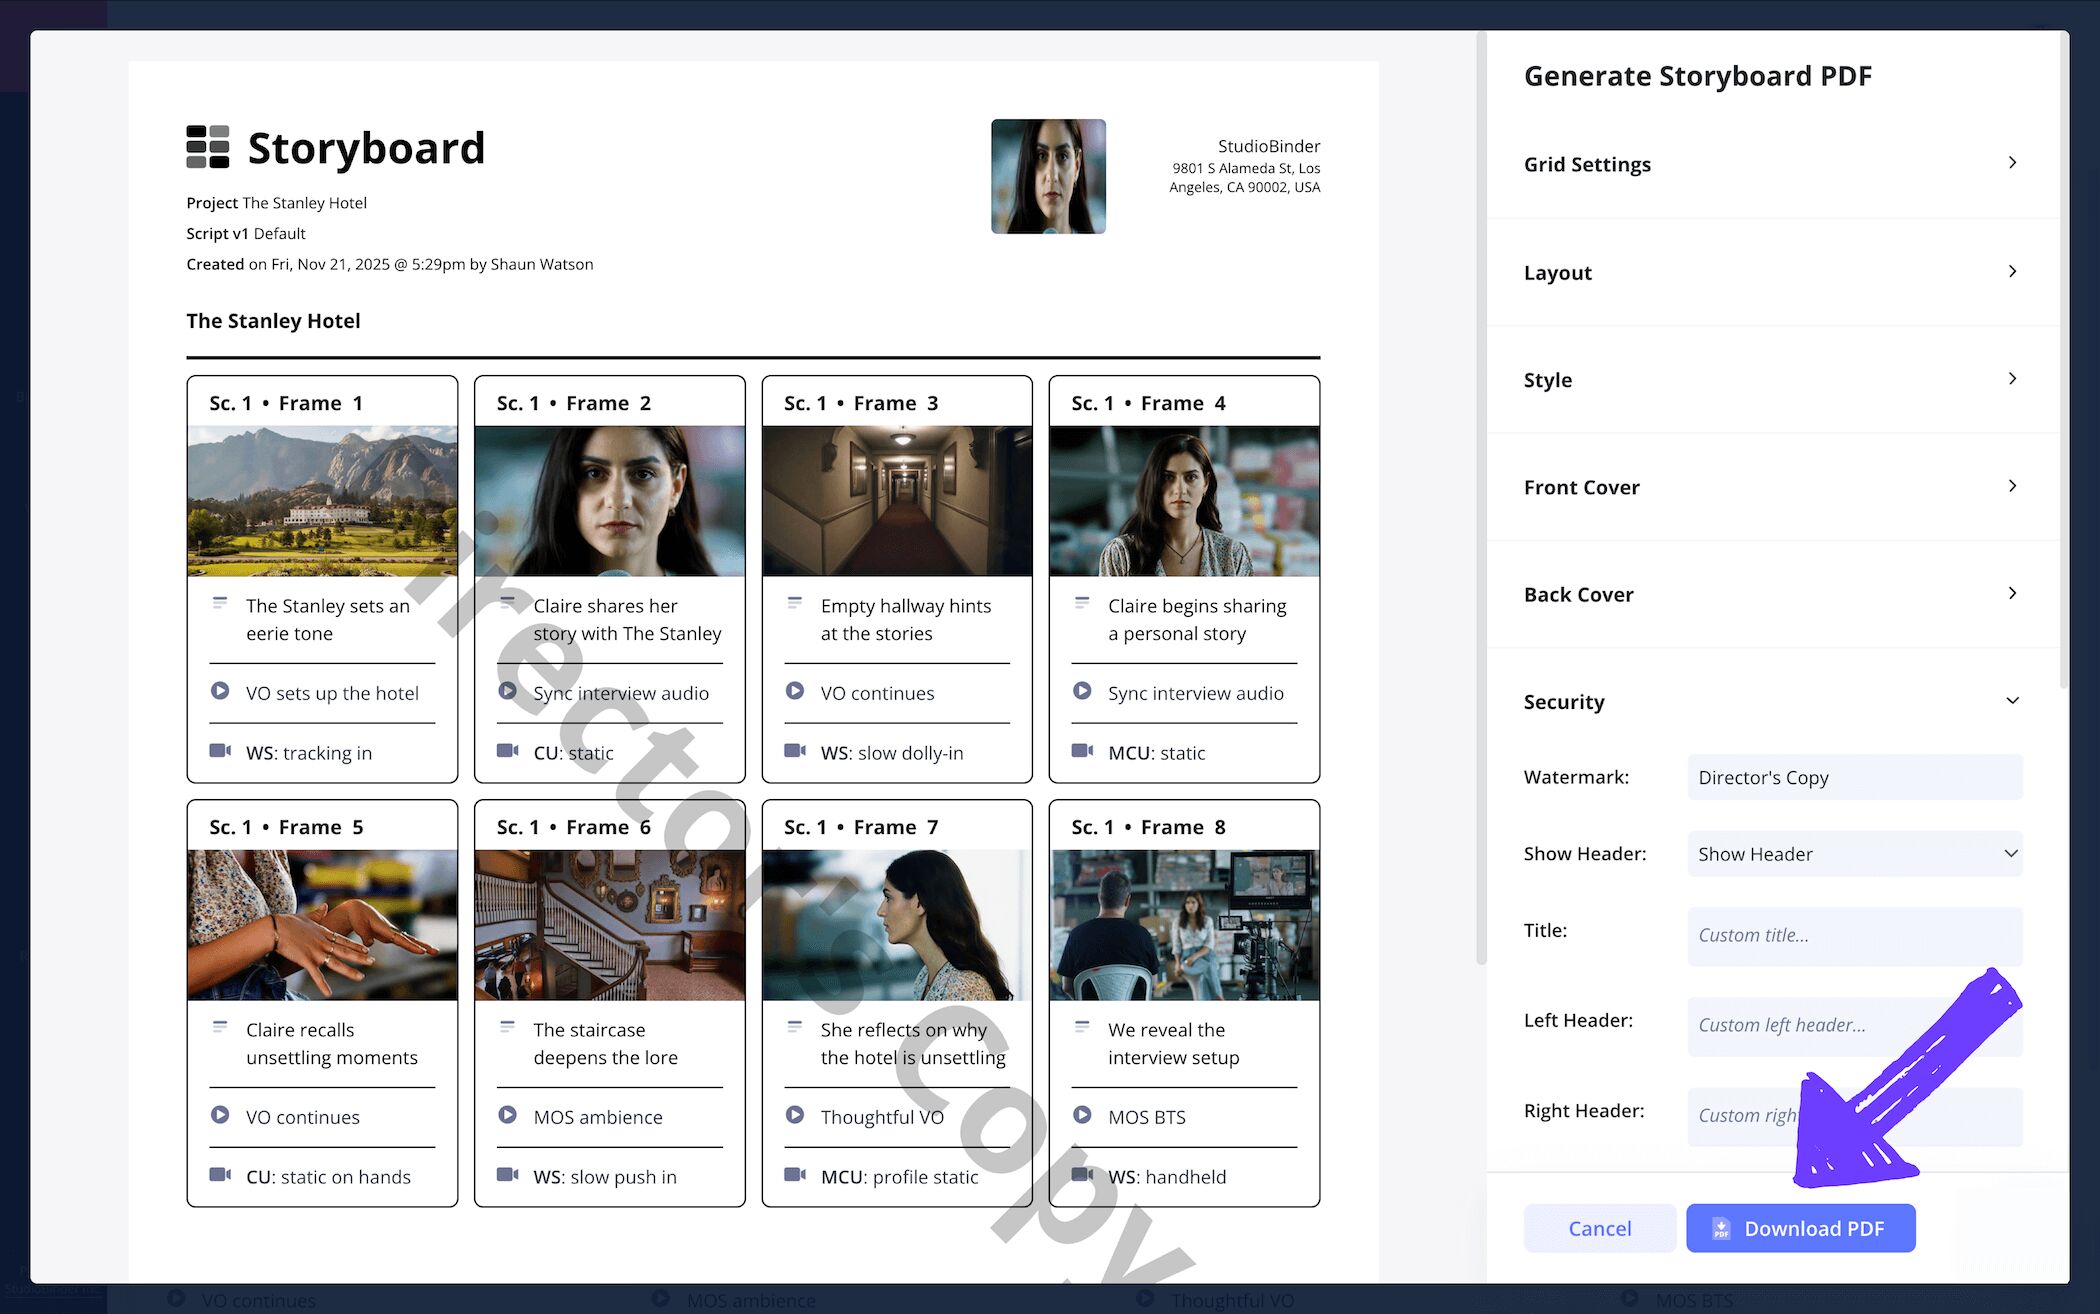
After you’ve completed your documentary storyboard, you’ll benefit greatly from converting it into a PDF. When it comes to documentary filmmaking, having multiple copies of your storyboard in PDF format is helpful for both film location shoots and the editing process. Your film editor can use the storyboard documentary template as a guide for where to cut and when, and your crew will have it on hand to make sure you’re getting all the right shots and interview prompts.
In StudioBinder’s generate PDF page, you can customize many aspects of your document, from the grid settings to the overall style and layout. For our documentary storyboard example, we wanted to be extra cautious around who our storyboard PDF gets sent to, so we added a watermark and custom title for optimal security.
Conclusion
Done!
Now that you’re finished following along the broadest and most important steps to creating your own documentary storyboard template, you should have a better idea of how you’ll want to use a storyboard for your own unique documentary creations needs. But beyond learning from these documentary storyboard examples, you can also check out the many more free storyboard templates we have to offer.
Frequently Asked Questions
Your questions, answered
To create your own storyboard for a documentary, you’ll want to first ask yourself certain questions around your plan of action. Are you going into the documentary with the intent of discovering a narrative? Or are you going into the documentary with a set narrative plan? If you’re discovering your documentary story as you explore locations and conduct interviews, you can use your storyboard as a way of collecting the best shots, statements and interviews, and arranging them on your documentary storyboard template in a way that presents the best narrative. If you already have a narrative plan, you can use your storyboard before capturing any documentary footage, essentially setting a plan for where you’ll go, what kind of shots you’ll want to capture, and why.
Storyboarding a documentary comes with a handful of benefits. Below, we listed out some of the best reasons for why you should use a documentary storyboard template:
- The storyboard can be used to help plan an interview. How long it should be, when to cut, what questions to ask, etc.
- With a digital storyboard, you can bring your documentary collaborators in to provide feedback and make edits.
- As you take B-roll, you can lay your shots out on your storyboard to find the best visual flow.
- A storyboard for a documentary helps your editor immensely. Instead of sifting through hours of footage, they can use your storyboard as a guide.
- Before you capture B-roll footage, your storyboard can help you plan and remember where you want to shoot and what kind of camera lenses and angels you plan to use.
A documentary storyboard template is a tool you can use throughout the creation of your documentary. Unlike narrative filmmaking, where the storyboard is traditionally created before the shoot, you can use the storyboard before, during, or even after the shooting process. With a documentary storyboard, you can lay out footage or reference images, and start establishing a visual flow and tone. This is also immensely helpful for the editor, who will have hours and hours of footage to go through, with your storyboard acting as their visual guide.
When storyboarding for a documentary, the storyboard itself can be used to help plan a location shoot day. You likely have a set of interview questions, so you can insert those questions into the description fields. Then you can apply the images of locations you want to show during the interview, acting as a plan for what kind of camera shots and lenses you’ll use at that location.
