Film Shot List Template
What is a film shot list template?
A film shot list is a detailed production document that outlines every shot required to capture on a shooting day. In filmmaking, a camera shot list acts as a visual blueprint, detailing camera angles, camera movements, framing, and shot order. A shot list for film ensures that every scene is covered from the right perspectives, helping the team anticipate equipment needs, lighting setups, and actor positioning.
How to use our shot list template
Following our guide to learn how to create a shot list for film in StudioBinder, the top film project management software for filmmakers.
Step 1
1. Import your screenplay
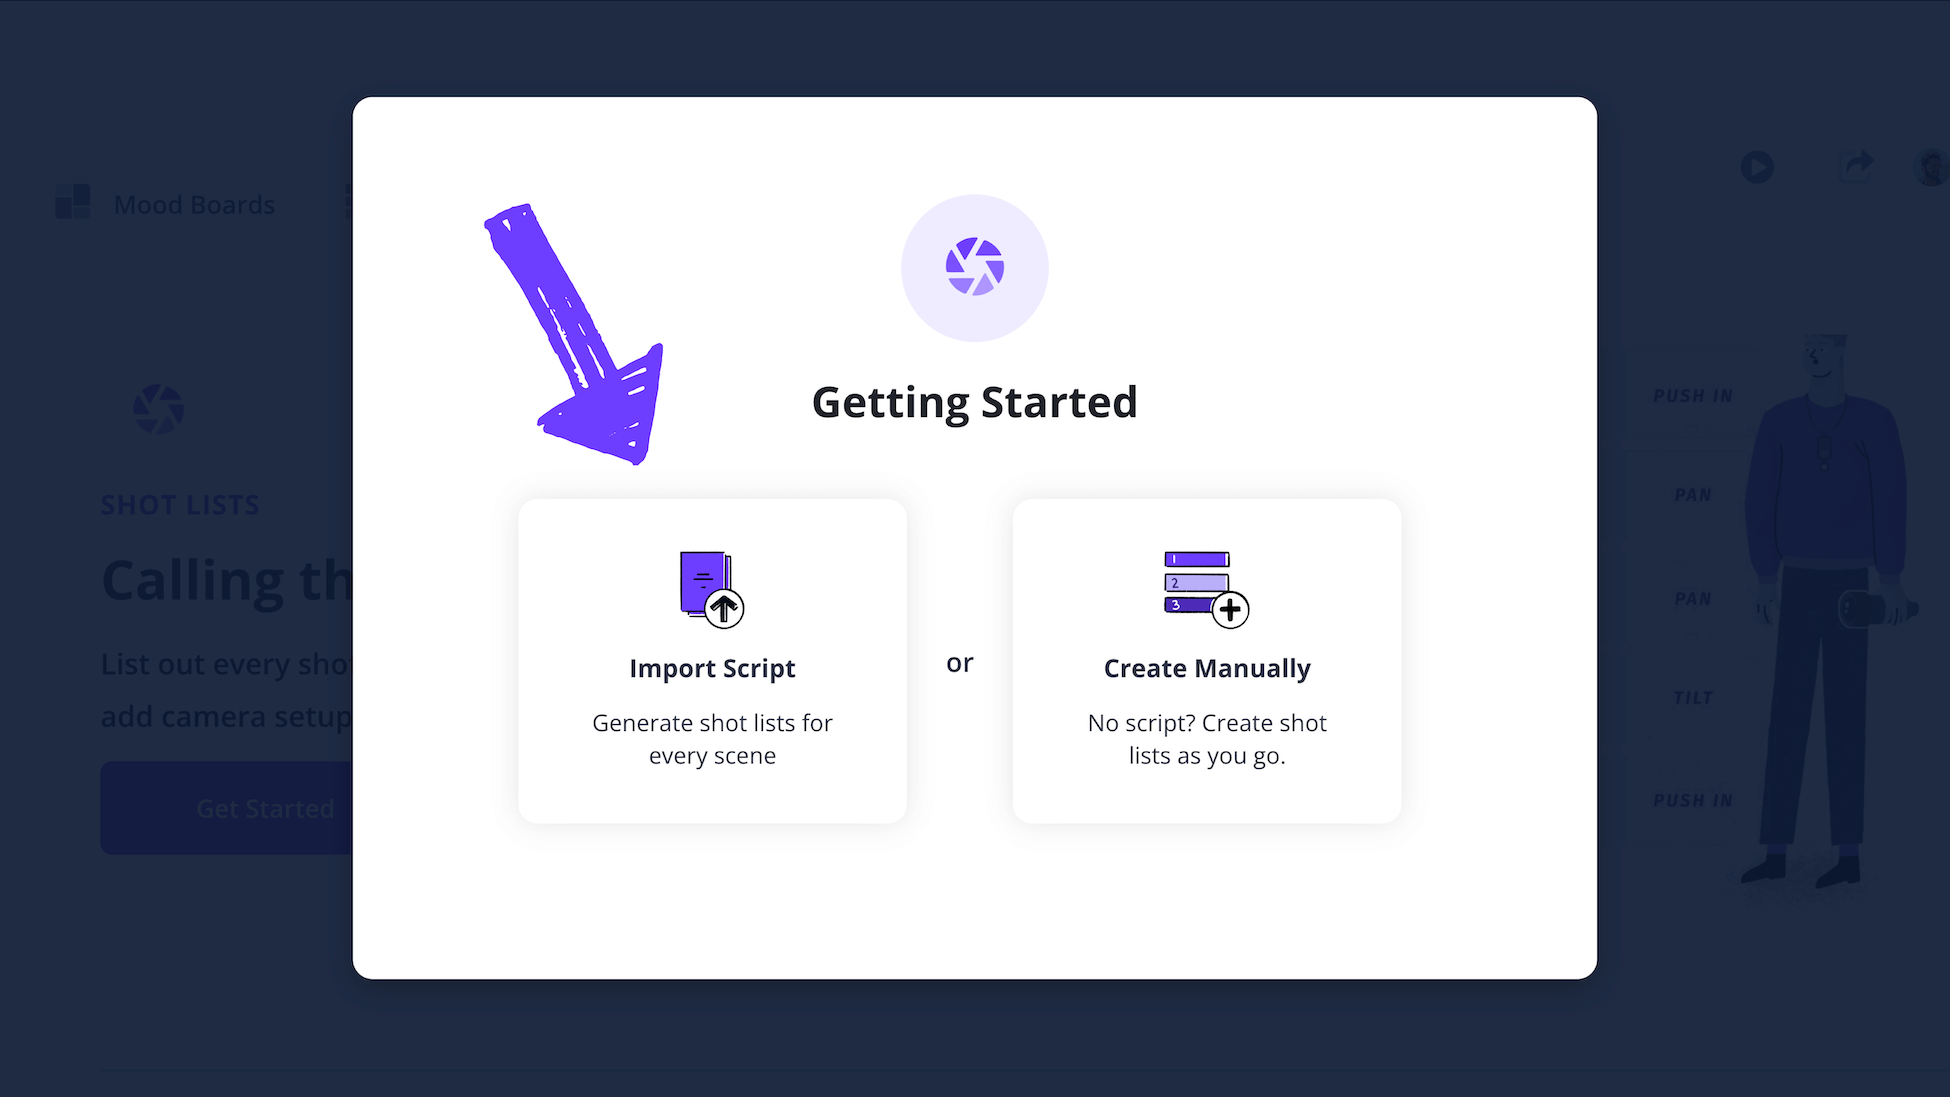
The first step in creating your film shot list with our template is by importing you screenplay into StudioBinder (or you can create a video shot list without a script). The advantage of importing your script is that our software will automatically break down your screenplay into scenes which makes it easy to build your shot list for film without starting from scratch.
Another added benefit is that you can actually "shot tag" your scenes which will contain the description of the scene (we'll cover this more later).
Step 2
2. Upload reference visuals in bulk
When your screenplay is imported, you'll notice a list of all the scenes in your story on the left side. When you click Preview Scene, you can also view the details of that scene which will inform your video shot list.
There are multiple ways to creating a shot list, which includes uploading reference photos in bulk.
Just click Upload Shots to add visual references, sketches, location scouting images or anything else.
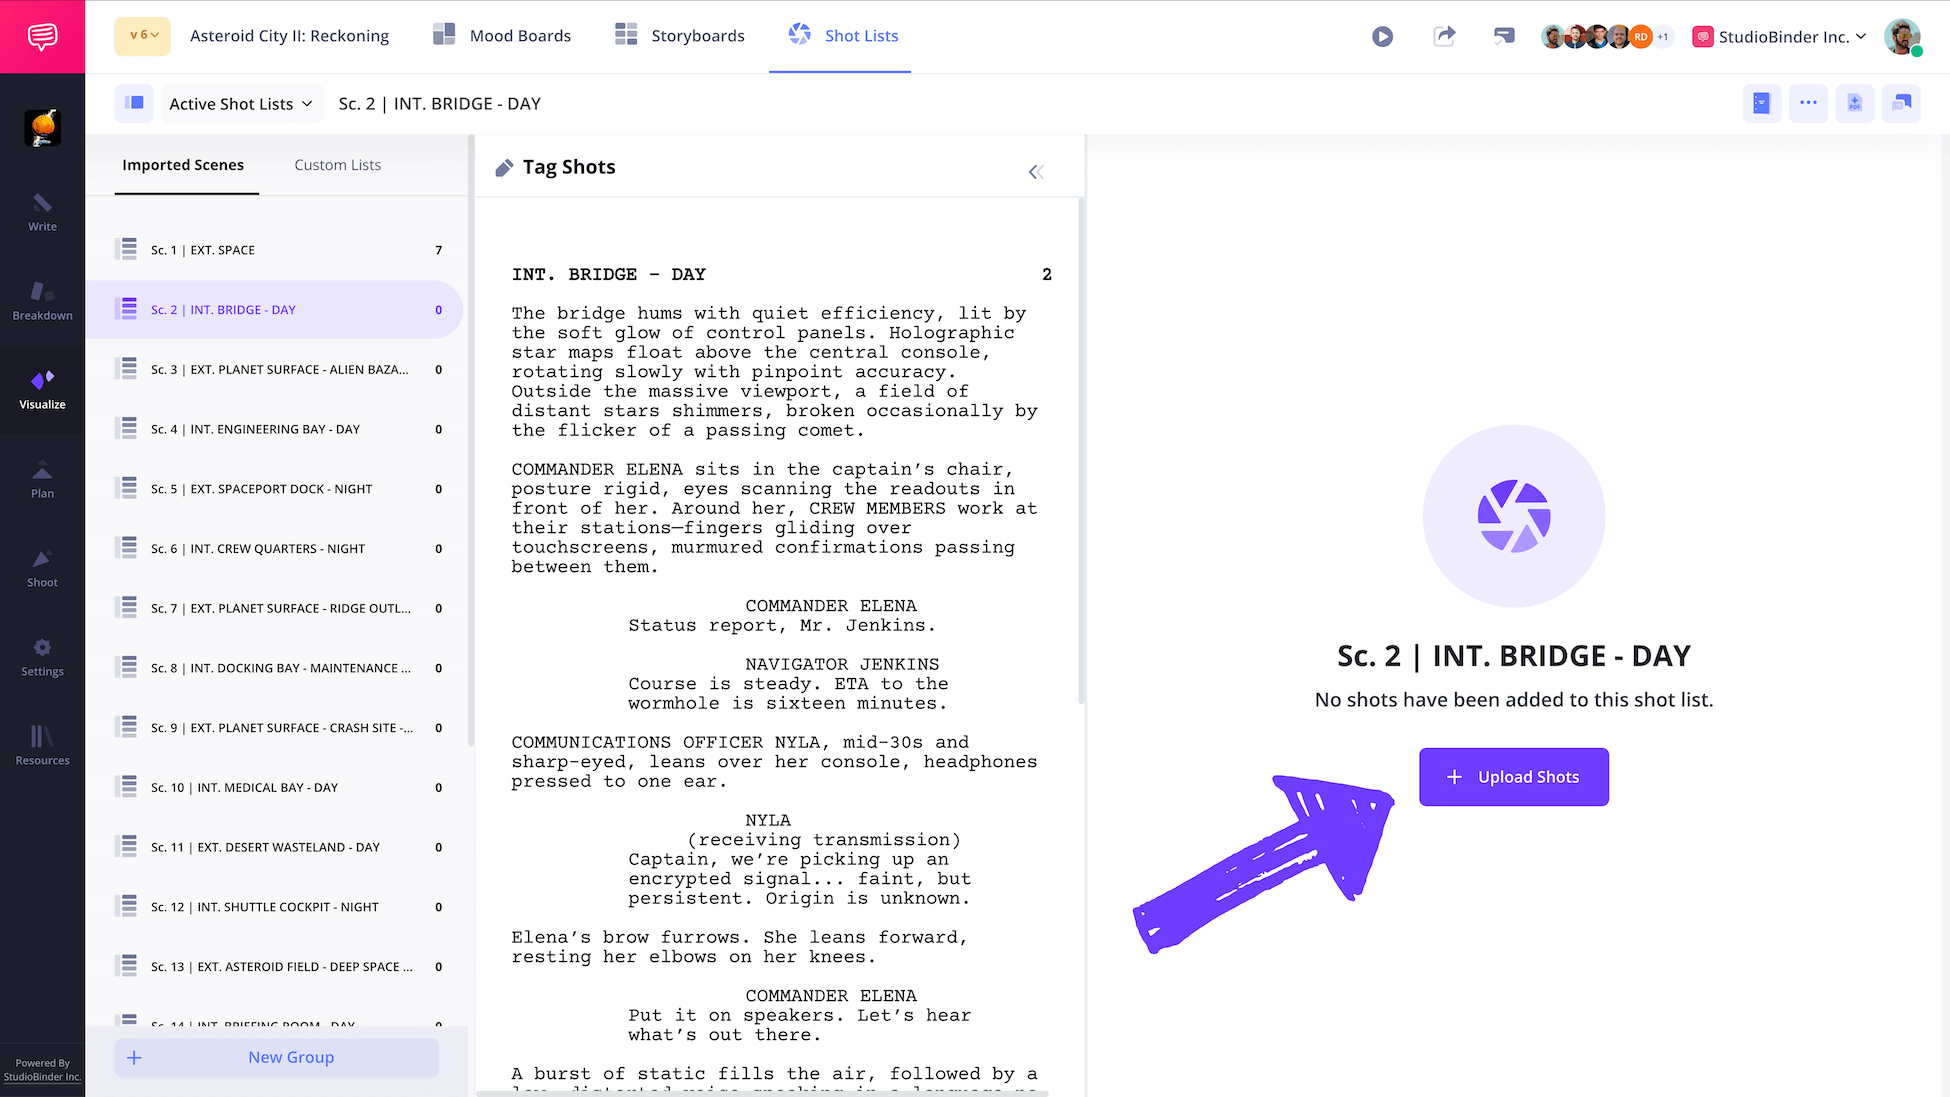
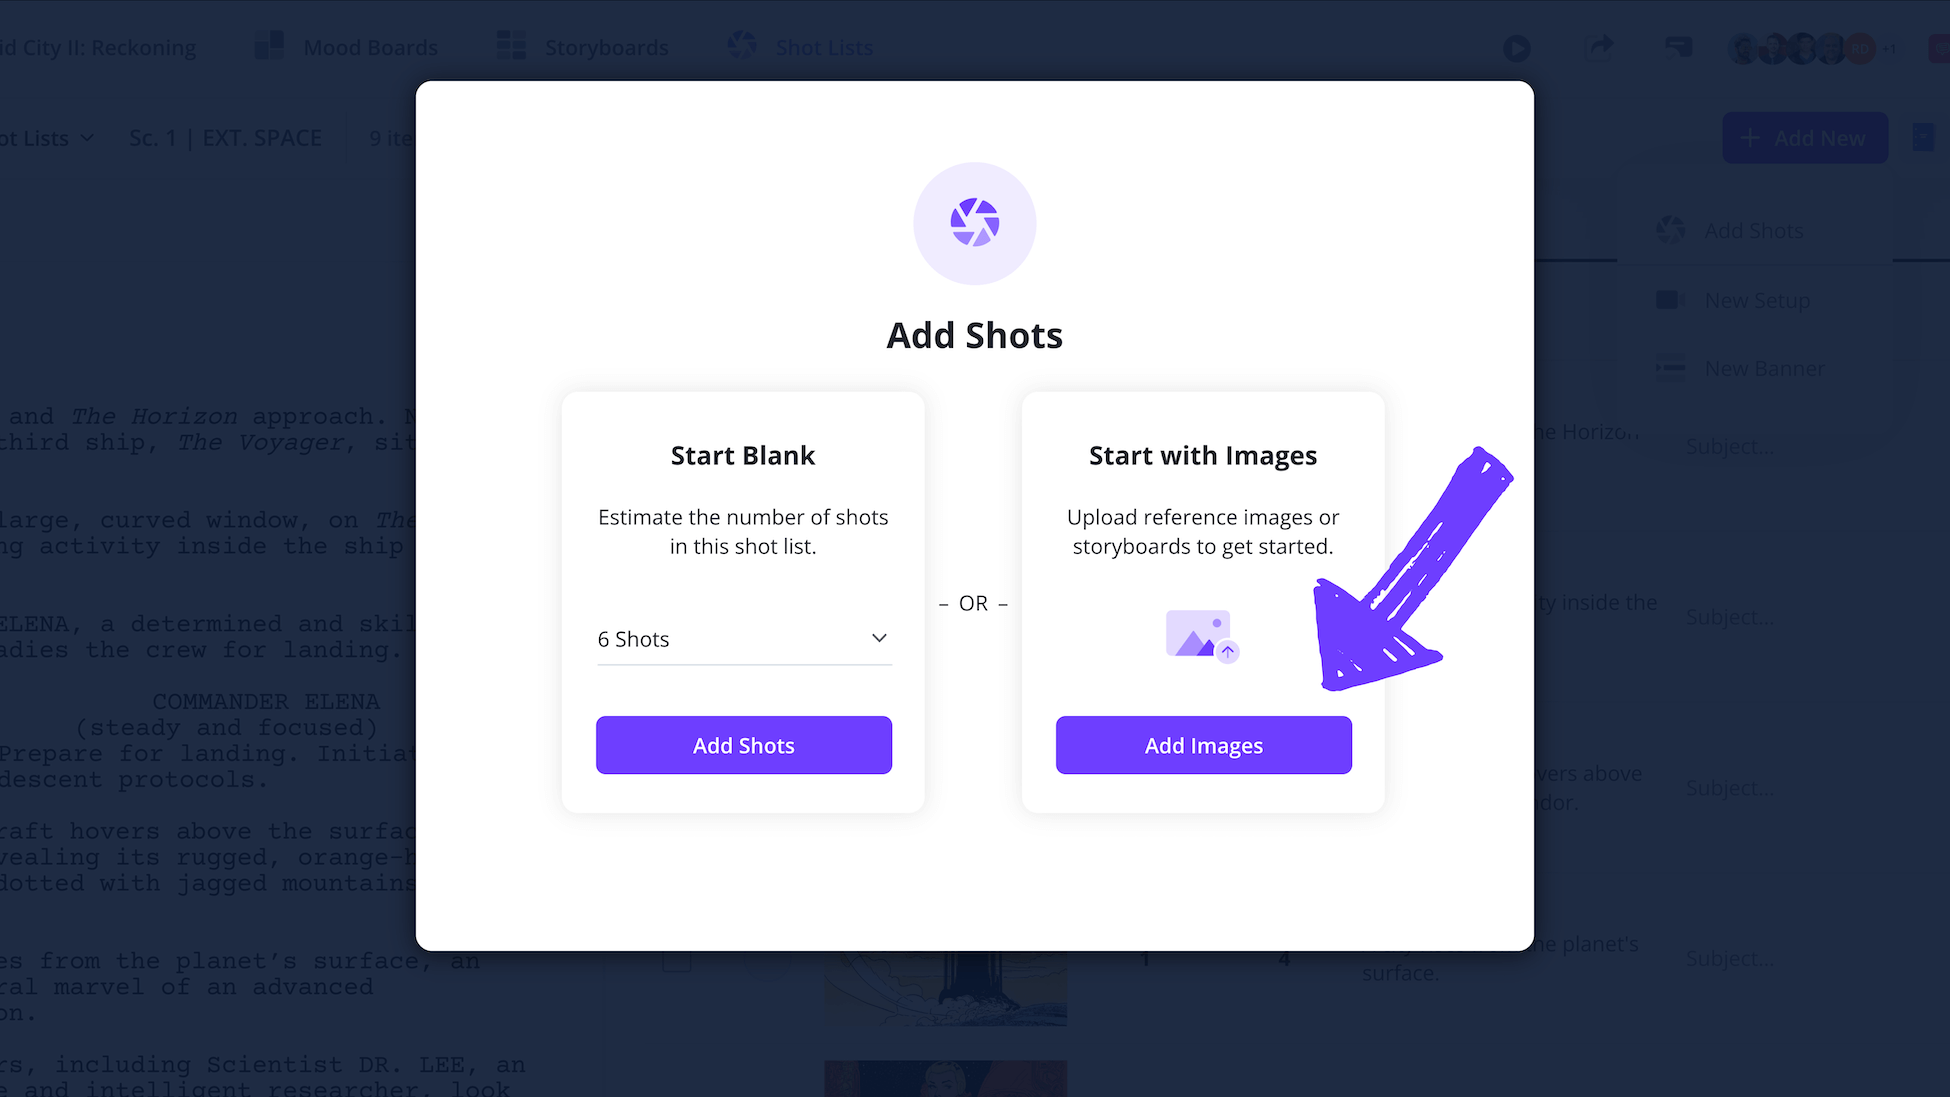
You can now either quickly add blank shots or you can add shots with images. In our case, this will be the fastest option to populate our shot list scenes.
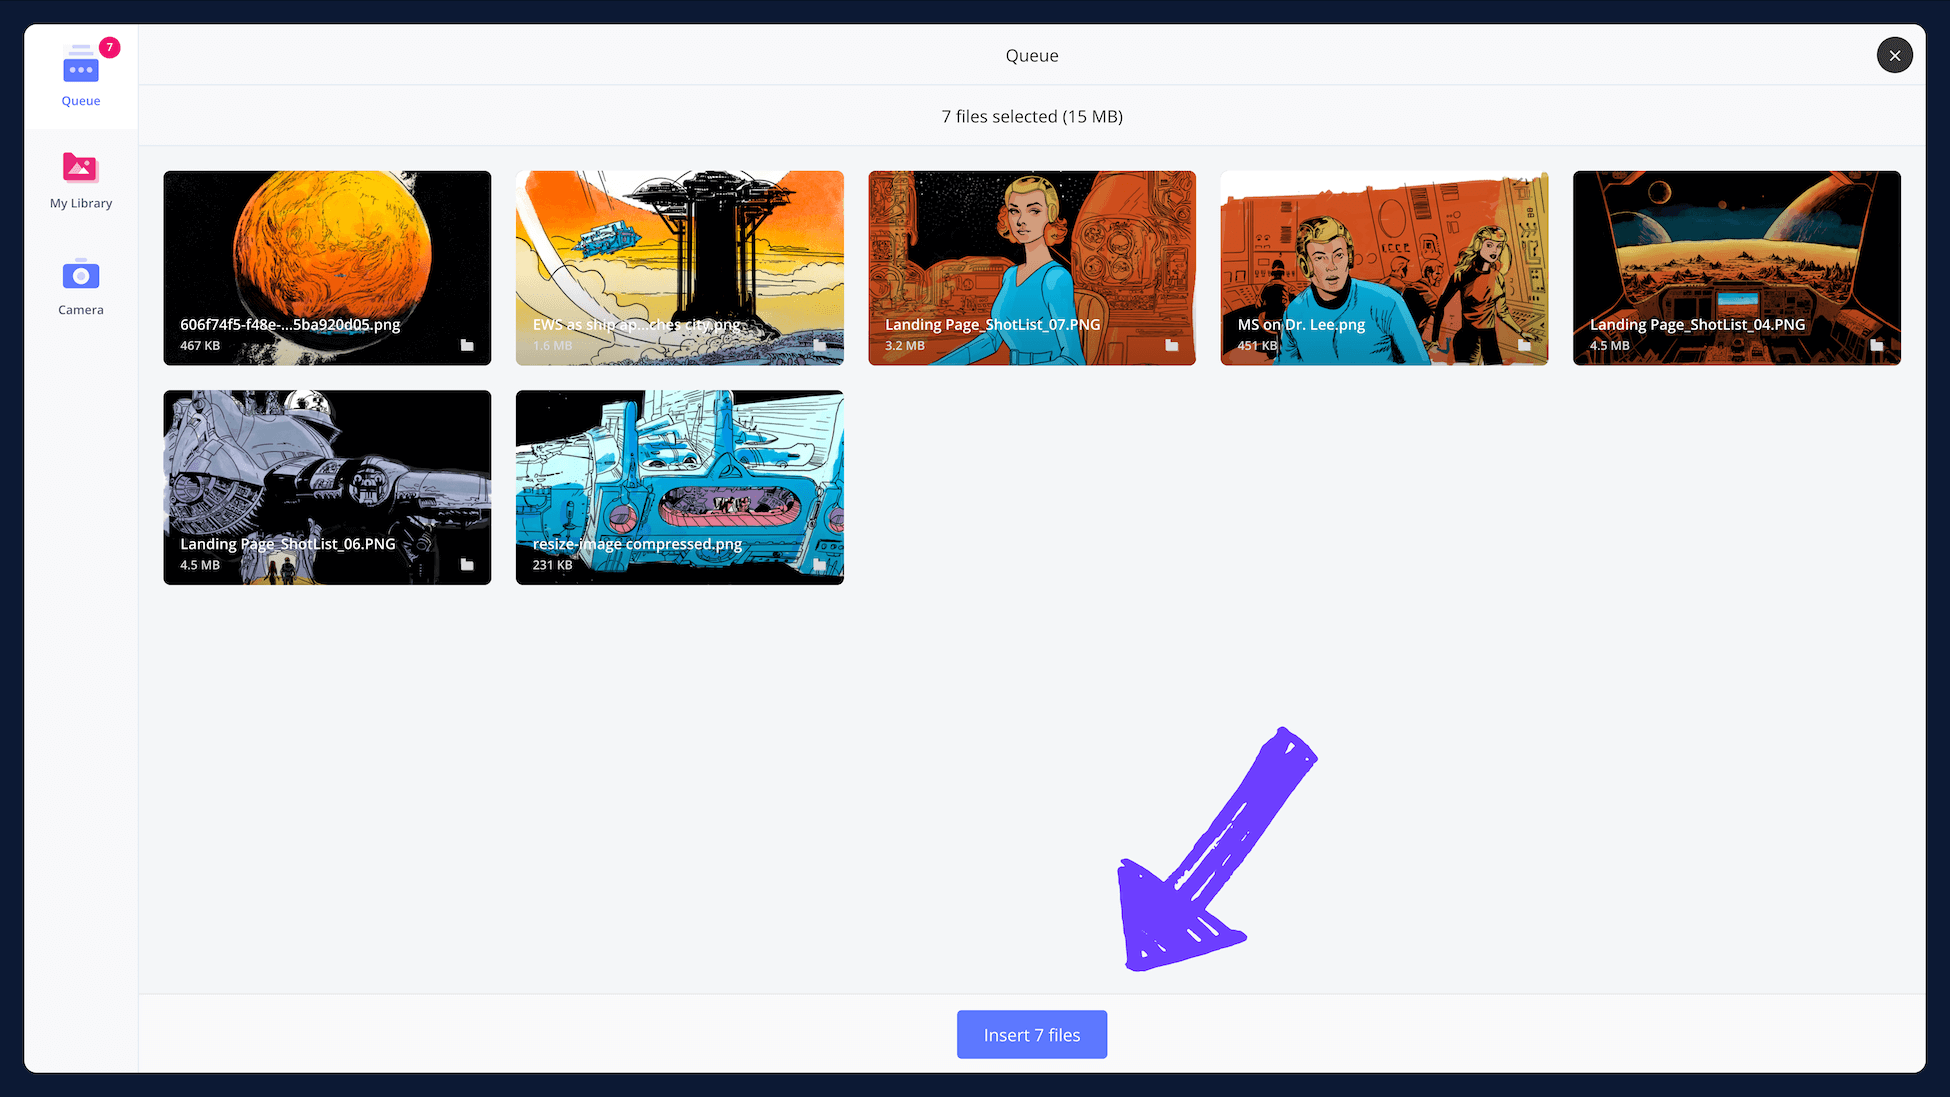
When the media library appears, just select your images and click Insert Files to import your images as individual shots.
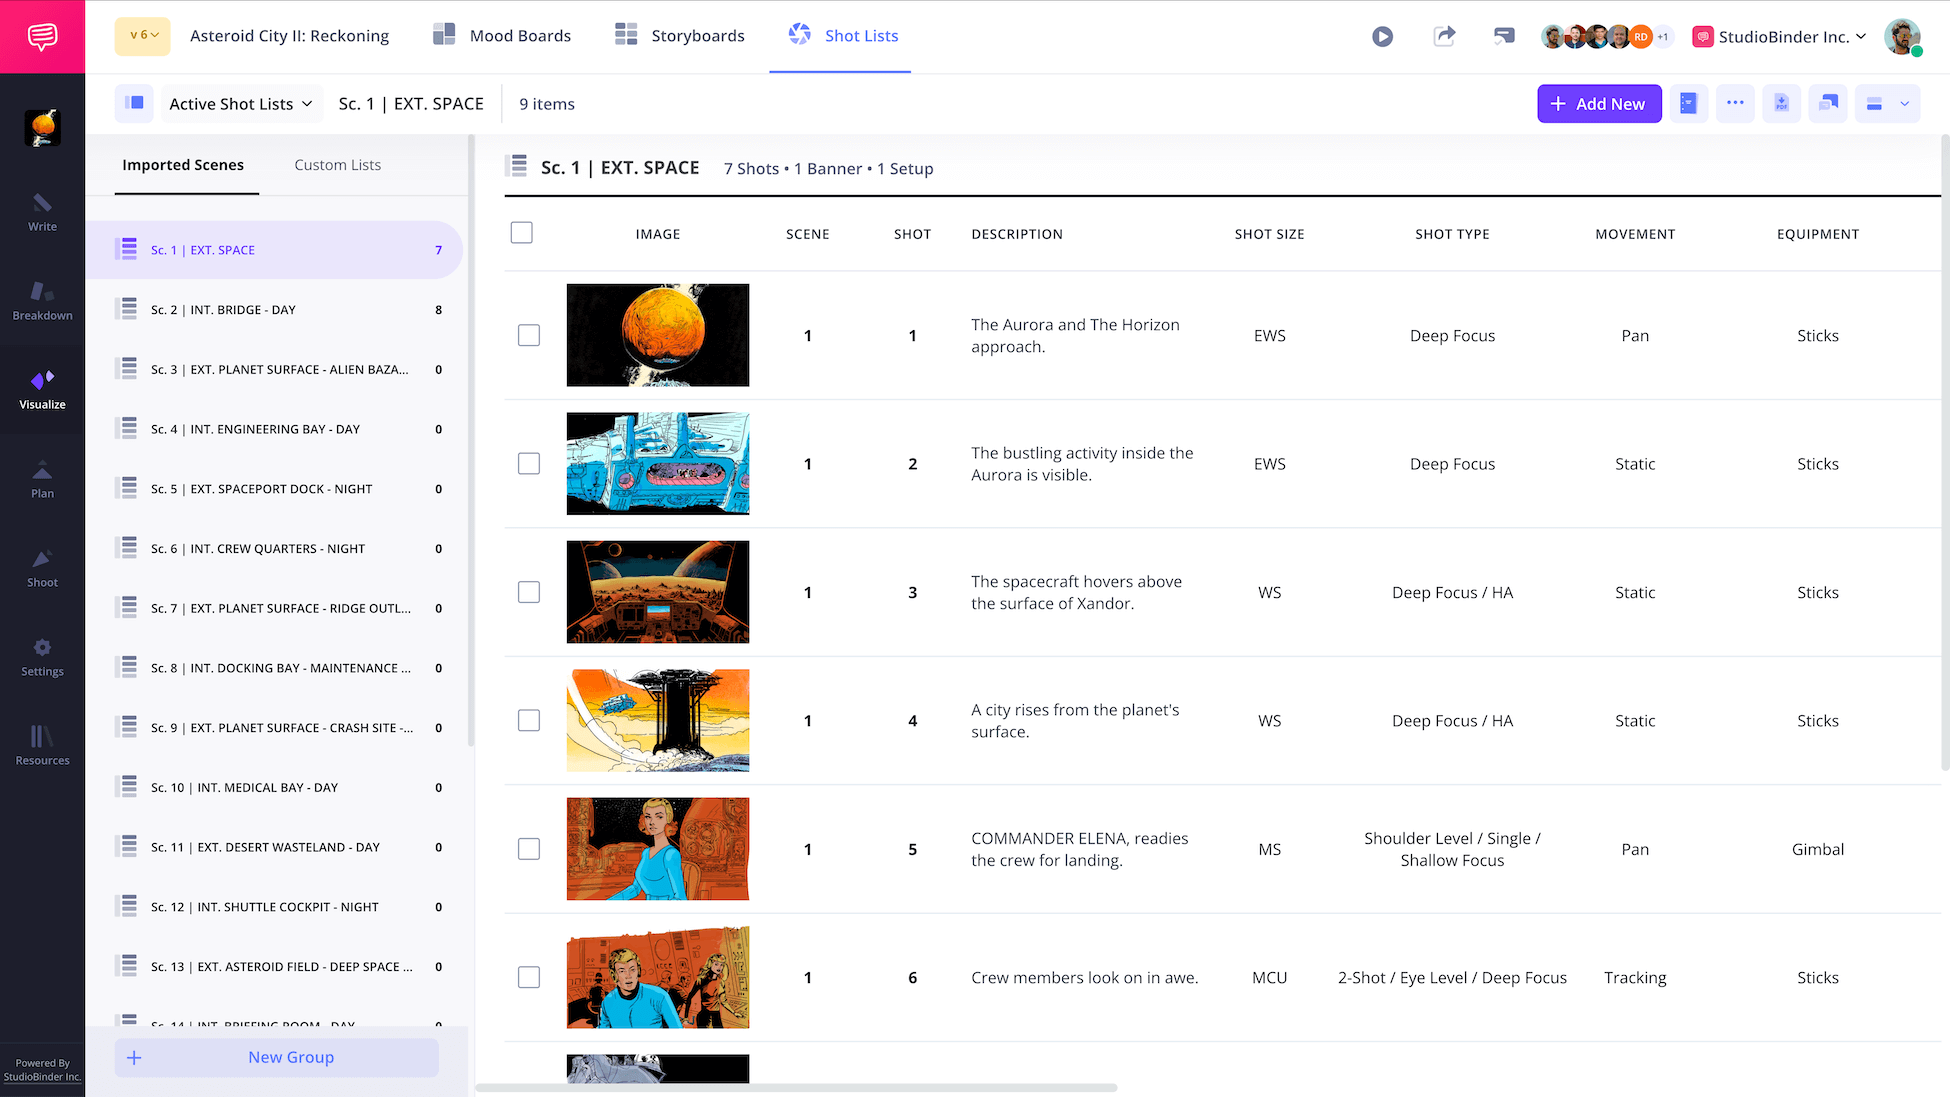
And just like that, you've got all your images uploaded per individual shot on your shot sheet template.
This will give your team a clear visual direction before a single shot is taken.
Step 3
3. Tag shots directly from your script
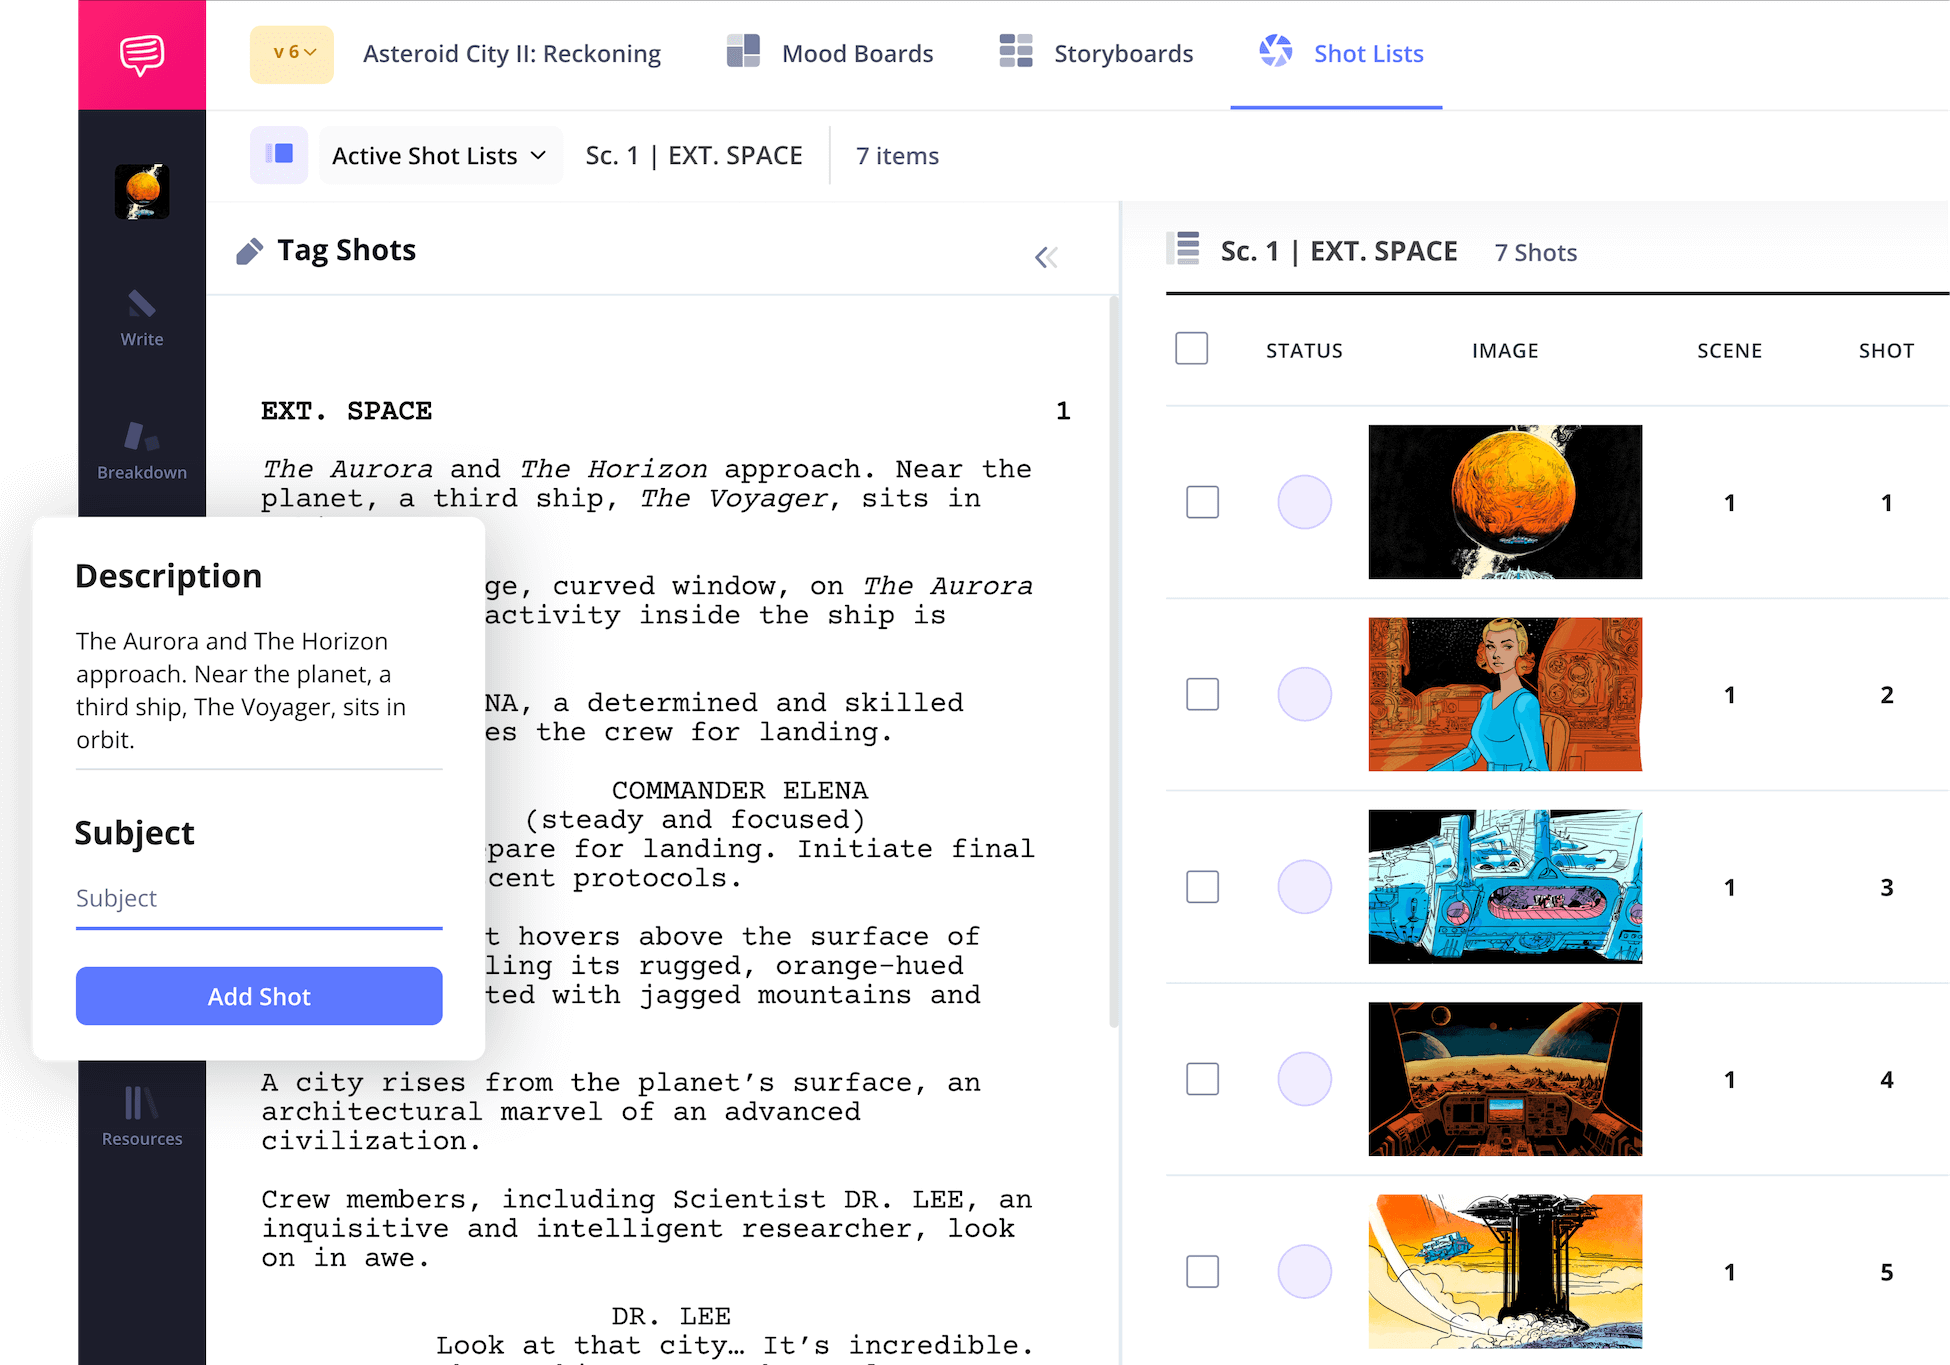
After you've uploaded the bulk of your shots and after previewing your scenes, you may notice a scene might be missing a shot. This is where Shot Tagging becomes extremely helpful.
You can tag specific actions, props, and visual moments within your script to generate shots automatically. StudioBinder links your tags directly to the shot list template, so you can efficiently plan coverage without missing key beats.
Simply open the Preview Scene module, click on text inside your scene and you'll see a pop-up with the description automatically filled to save you even more time. Enter a subject for that specific shot and click Add Shot to add this new shot to the list.
Step 4
4. Customize your film shot list template
Before you add all the creative and technical details, StudioBinder allows you tailor your film shot list template to match your production. This ensures you only see the information that matters most to your production.
You can easily change the aspect ratio to match your video project's final output. This is going to help your team visualizing the framing and composition while planning out the shots.
For example, you can select aspect ratios that go from 16:9 which is most common for TV and video streaming to 1:85 which is standard widescreen for most feature films found in theaters.
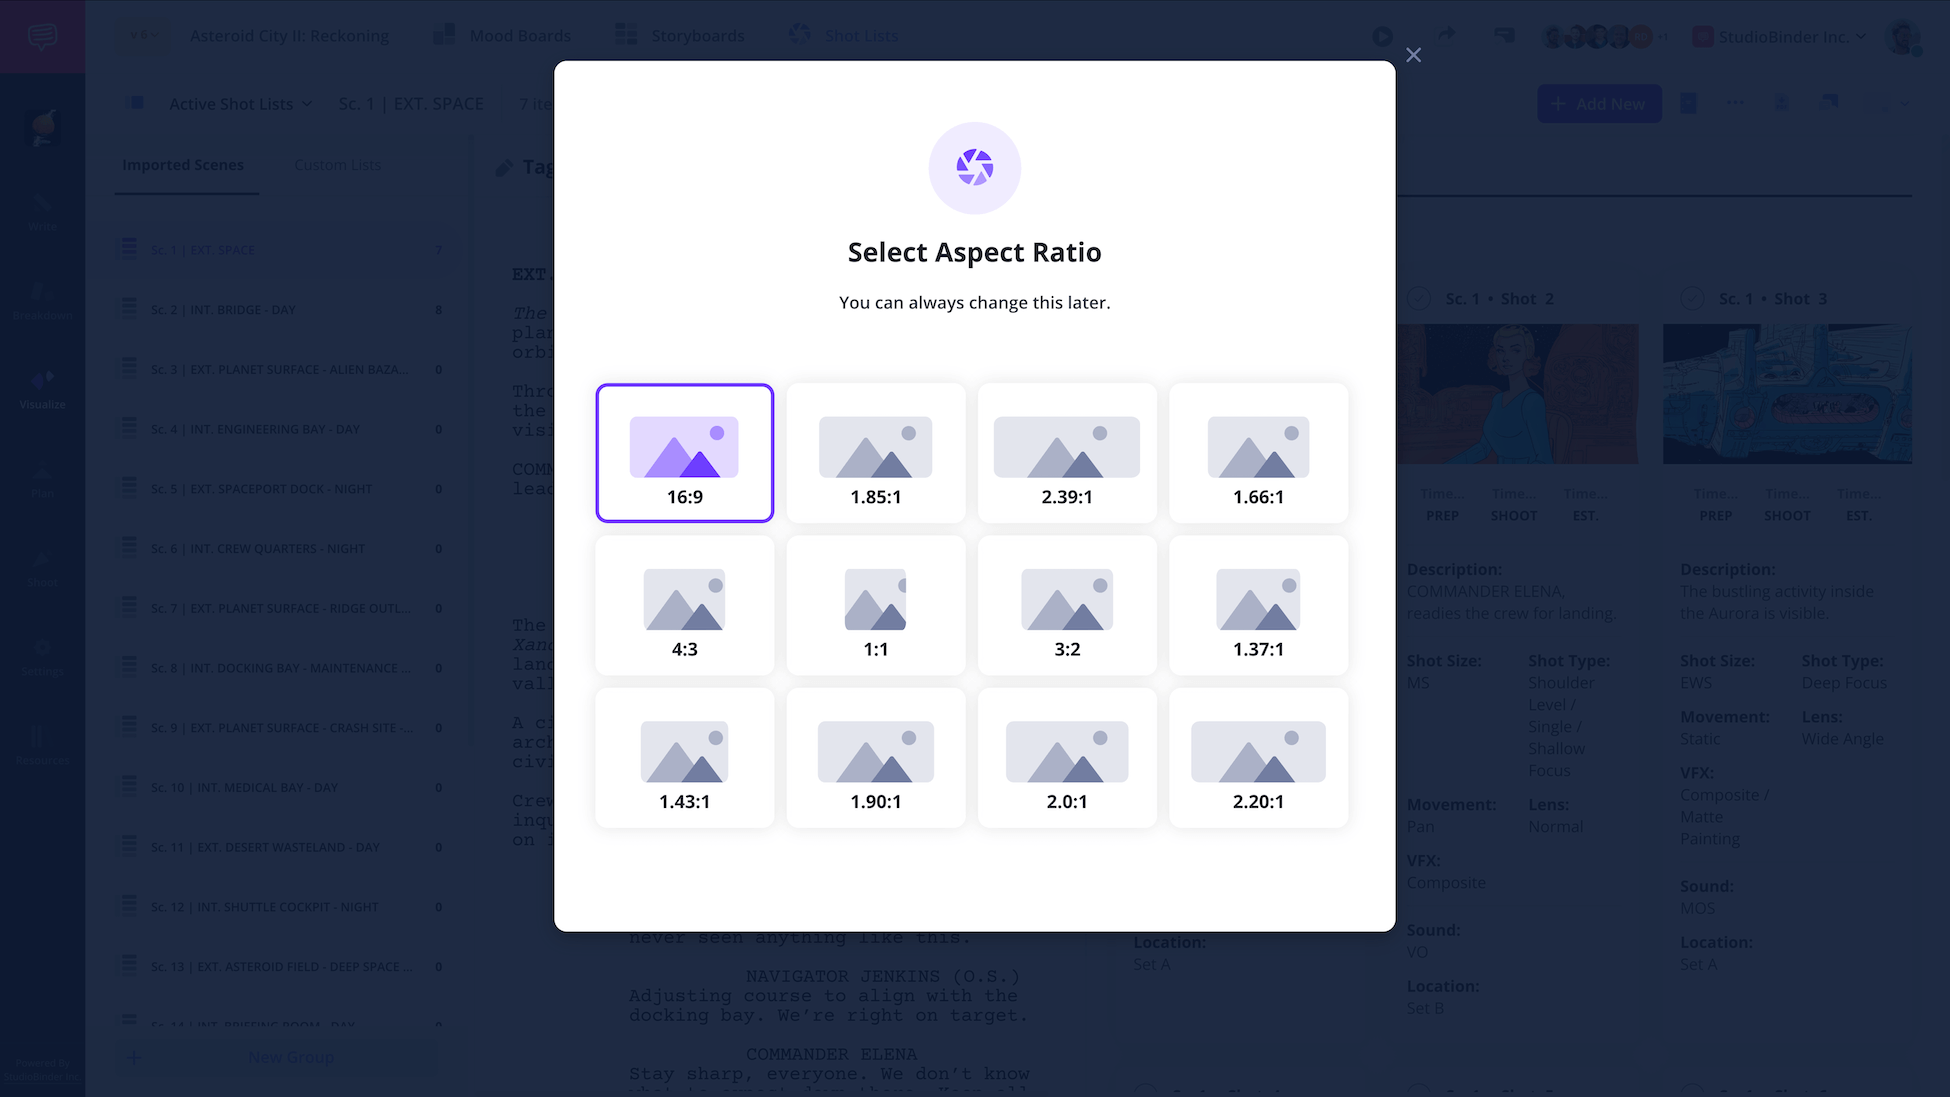
You can also adjust the scene numbering type between alphabetical or numerical. Depending on the video production, you may prefer scene number or shot number in alphabetical (i.e. A, B, C, etc.) while others prefer numbers for simplicity.
Lastly, you can even show/hide which columns are displayed on your short film shot list template which will align with your specific needs. With this flexibility, you can ensure that your movie shot list is clear and relevant whether you're shooting a short film, feature, branded or social media content.
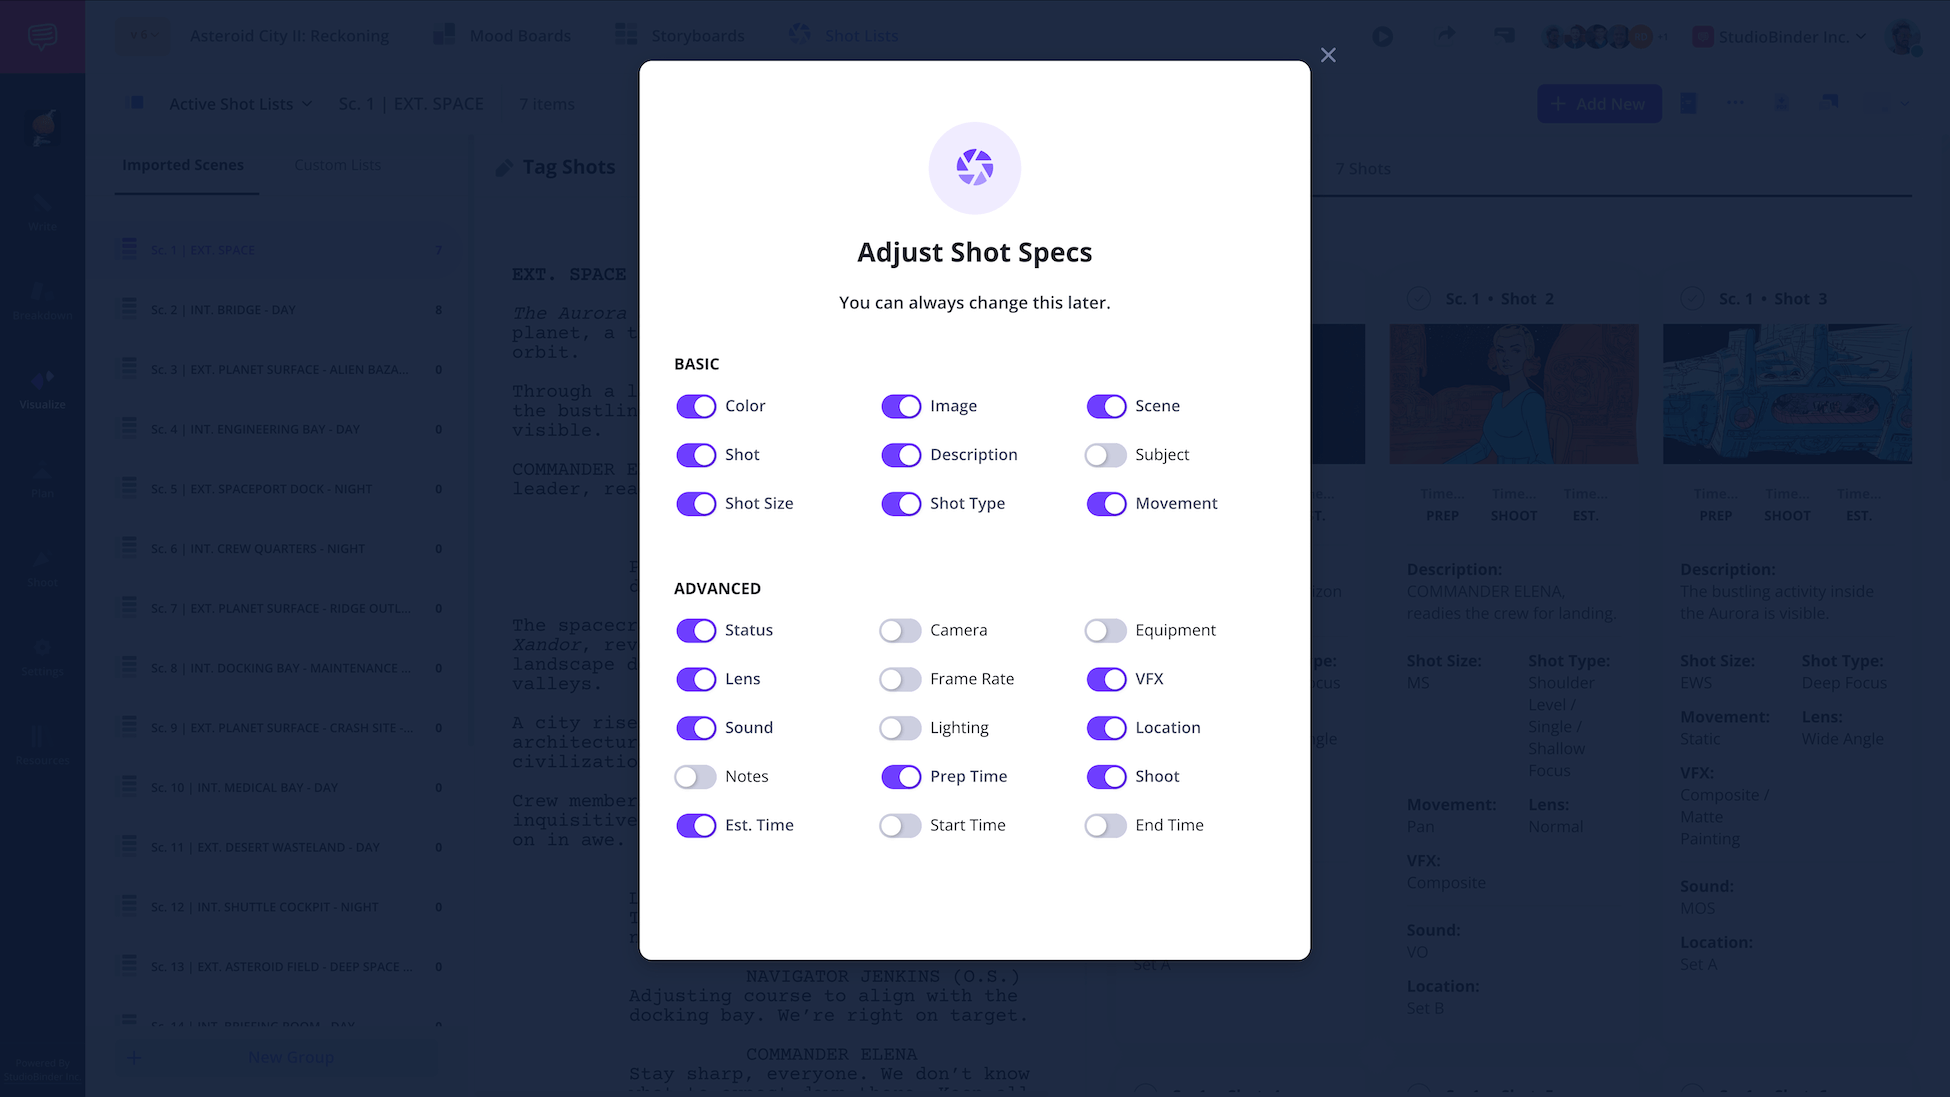
Step 5
5. Add key shot details
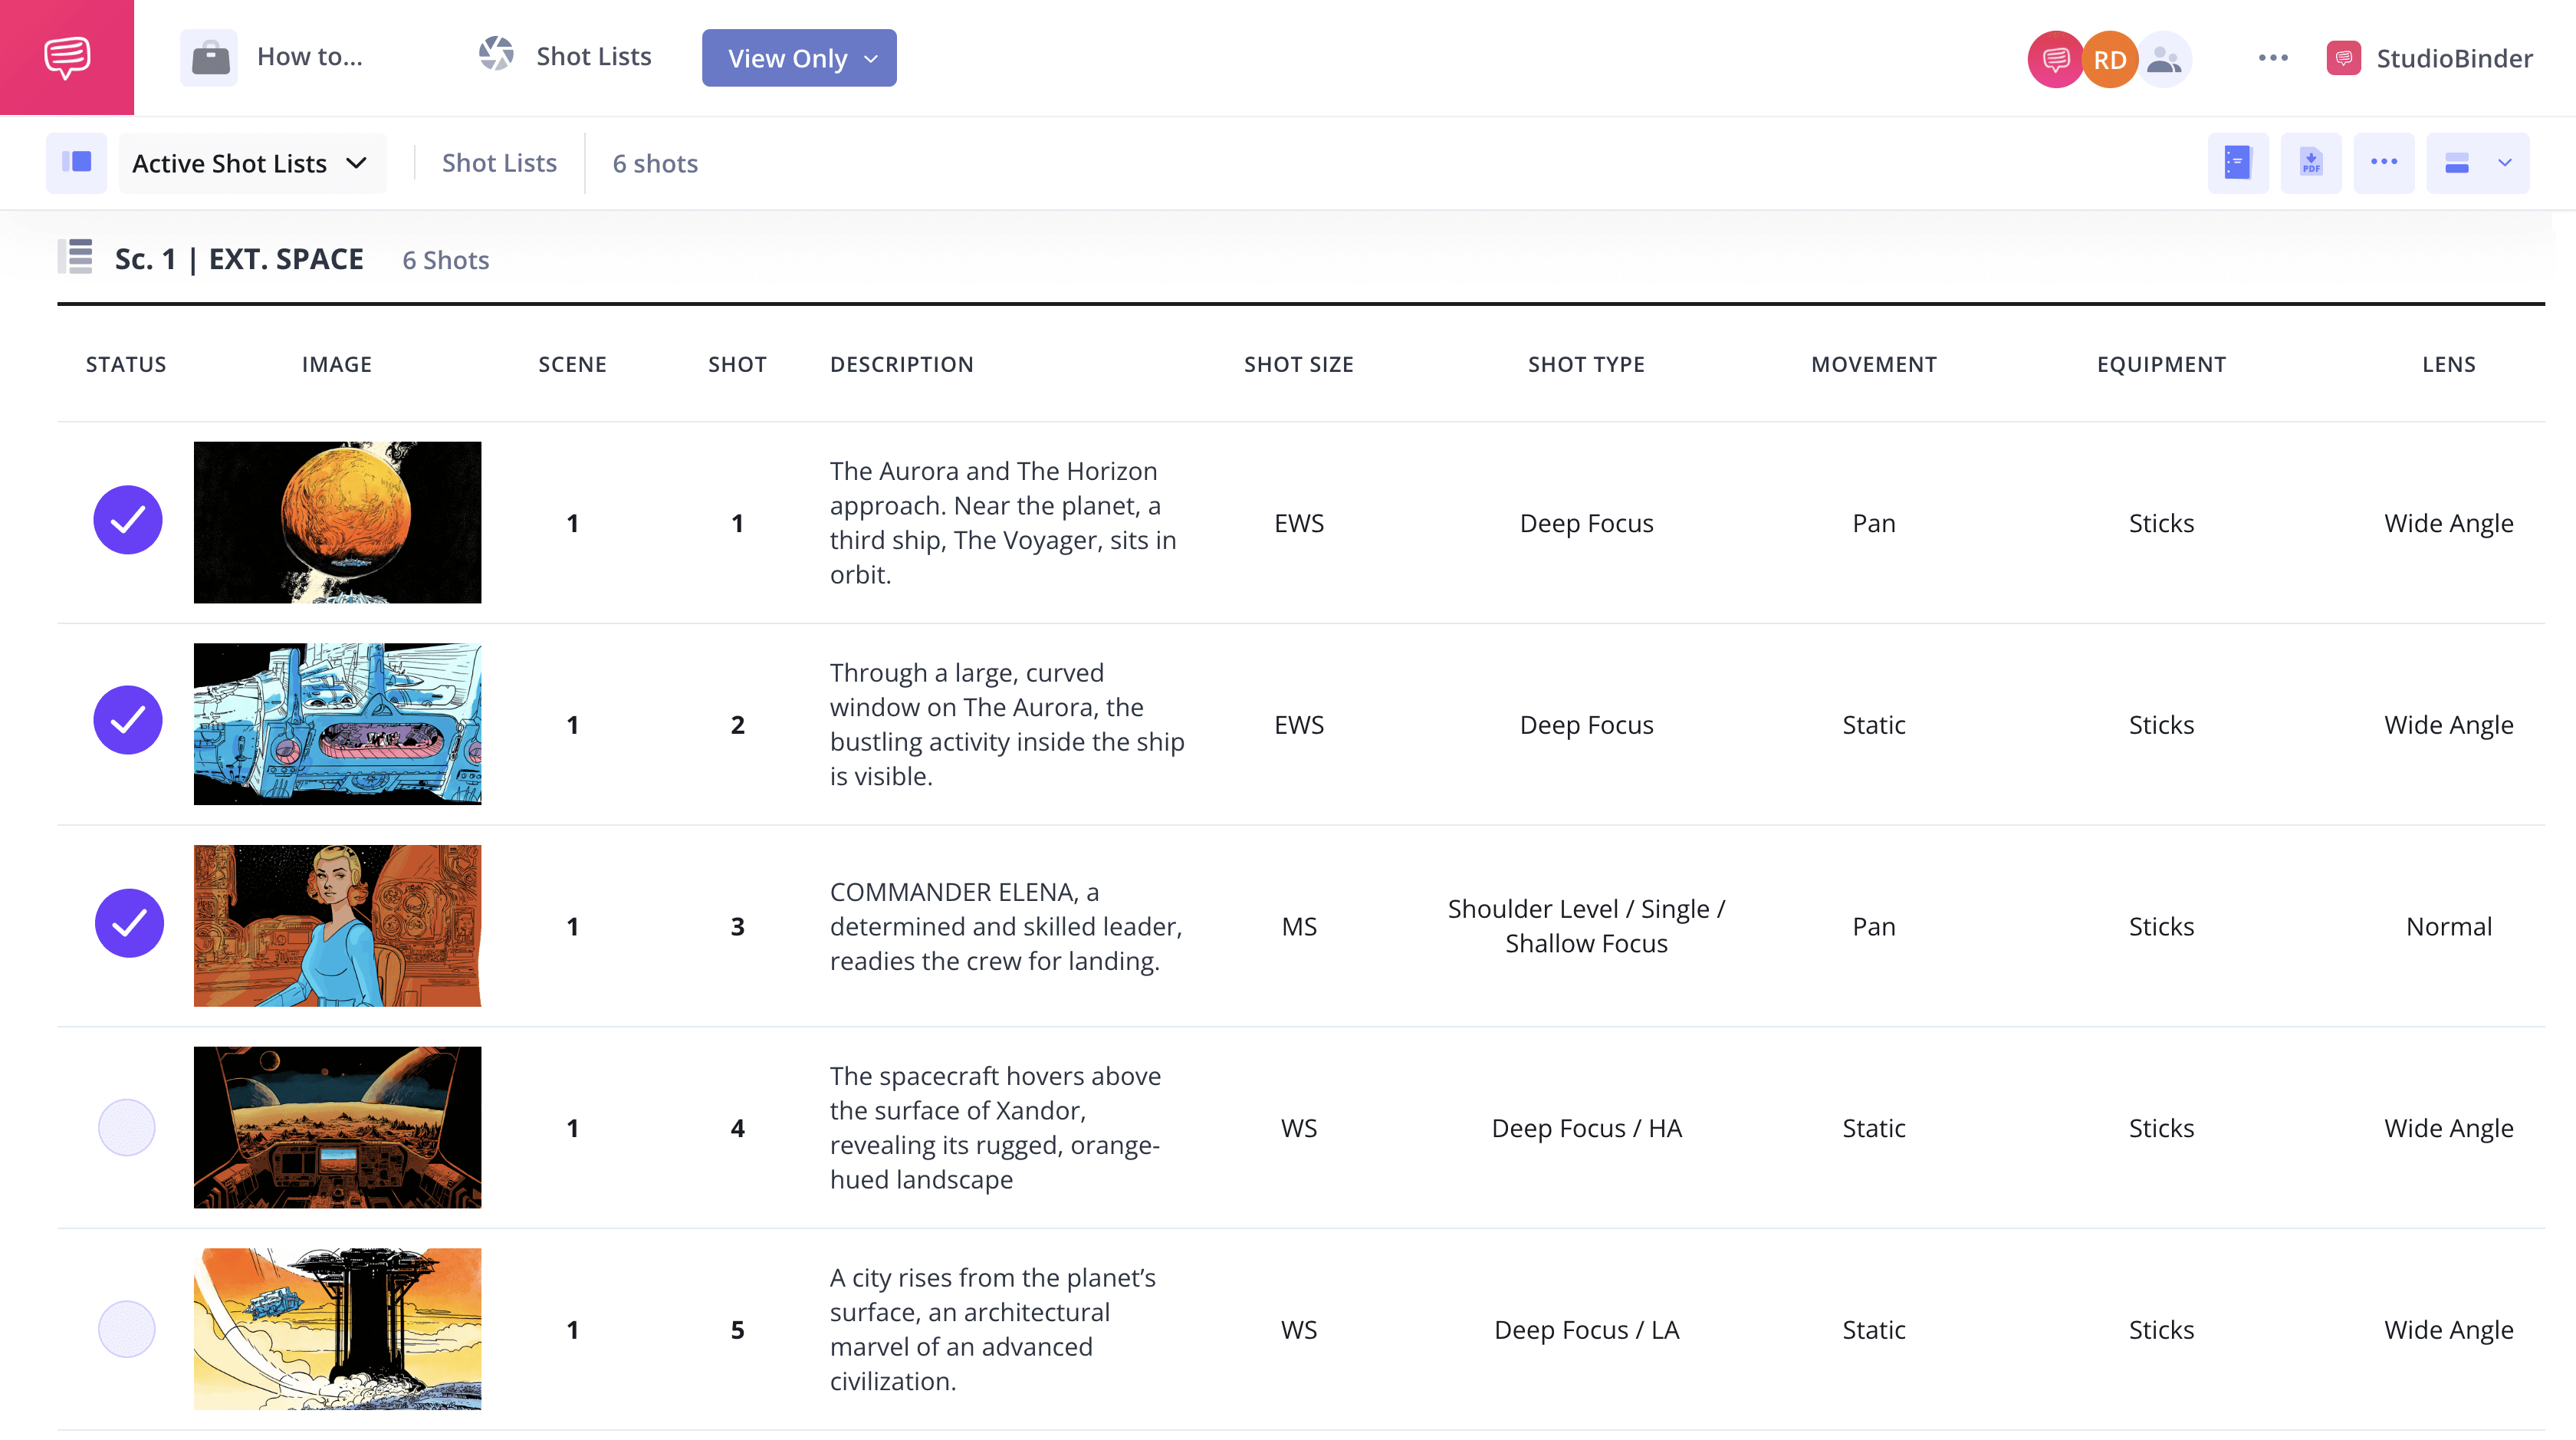
Your film shot list template is more than a basic checklist of shots needed for the day. It's fully customizable and allows you to specify every technical and creative detail of each shot. As you define these columns, you'll rest easy knowing your crew has all the information they need to execute your vision accurately (and efficiently).
Each shot will allow you to specific the camera angles (wide, medium shot, close-up, over-the-shoulder, etc), camera movements (dolly, handheld, crane, etc.), shot type, lenses, focal lengths, framing, composition and more.
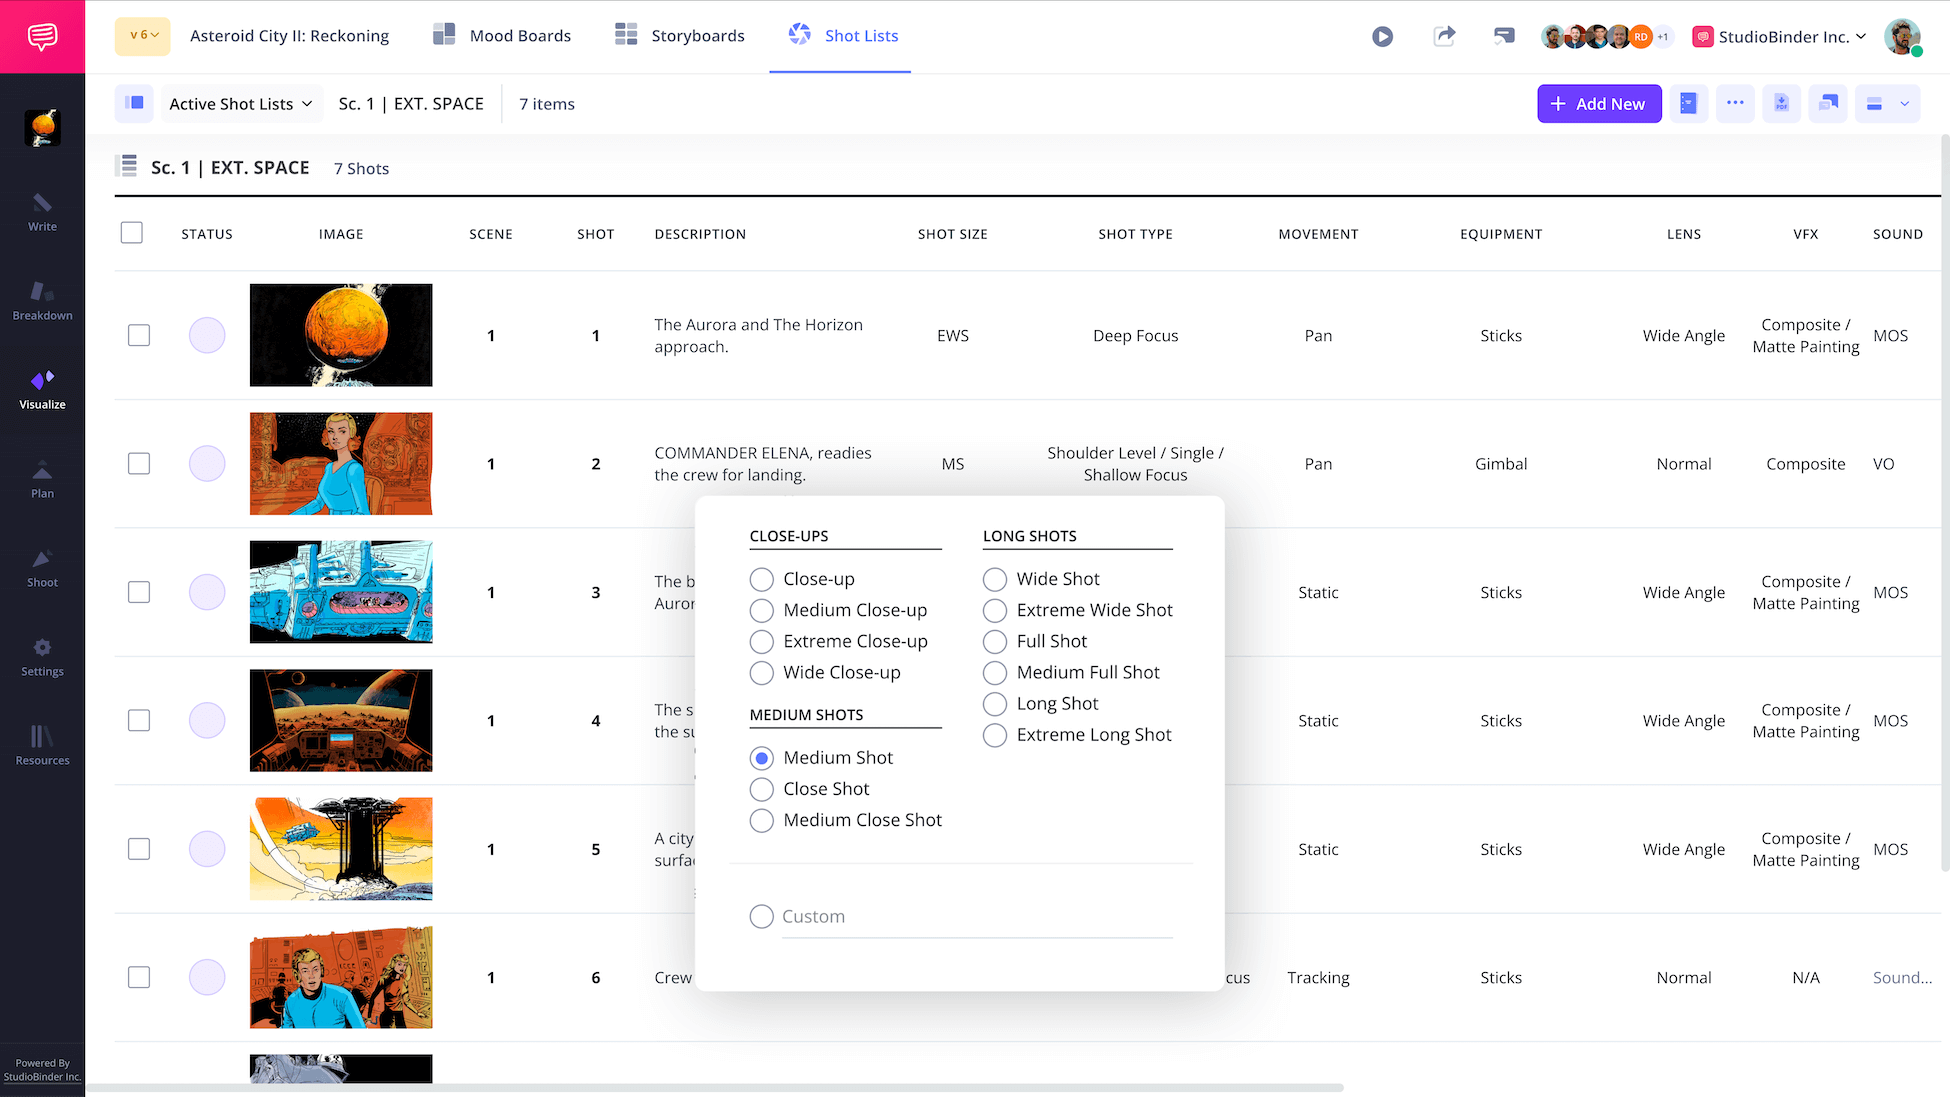
These details turn a filming shot list template for film into a production-ready plan. With all the customization options available, you'll be able to tailor the shot list to fit your needs, whether it's a short film or a feature film production.
Step 6
6. Create camera setups
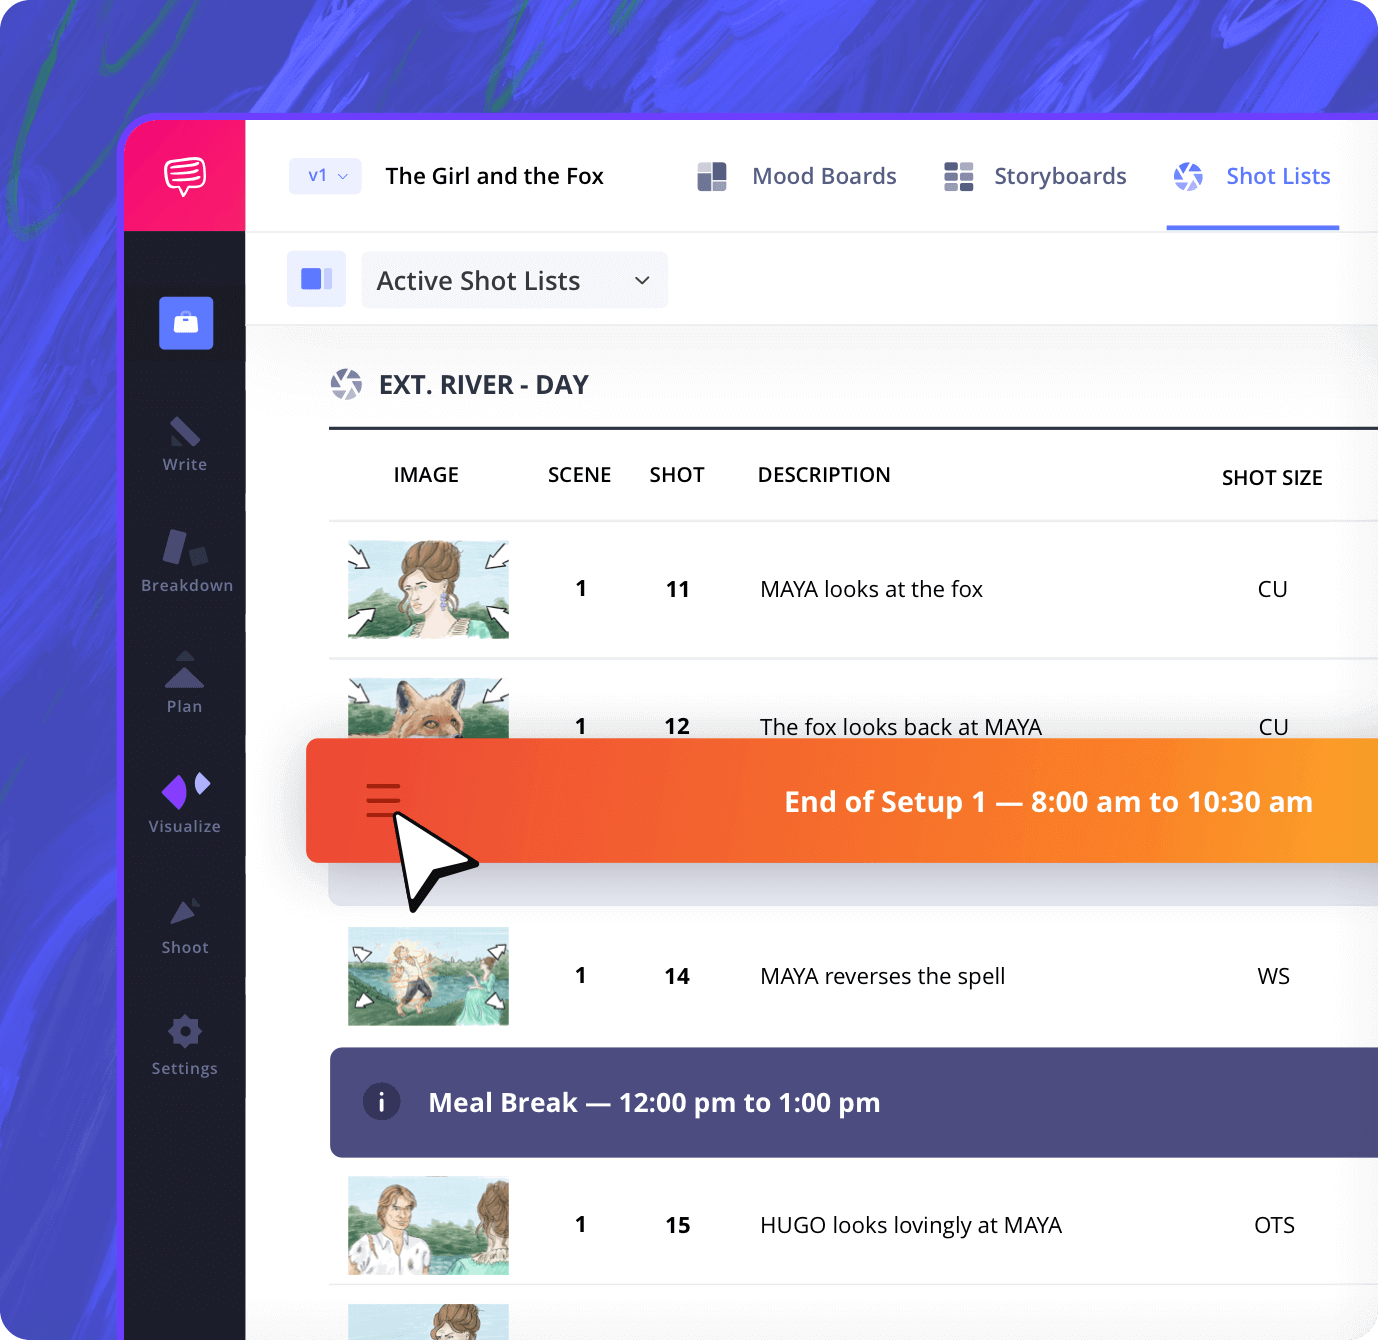
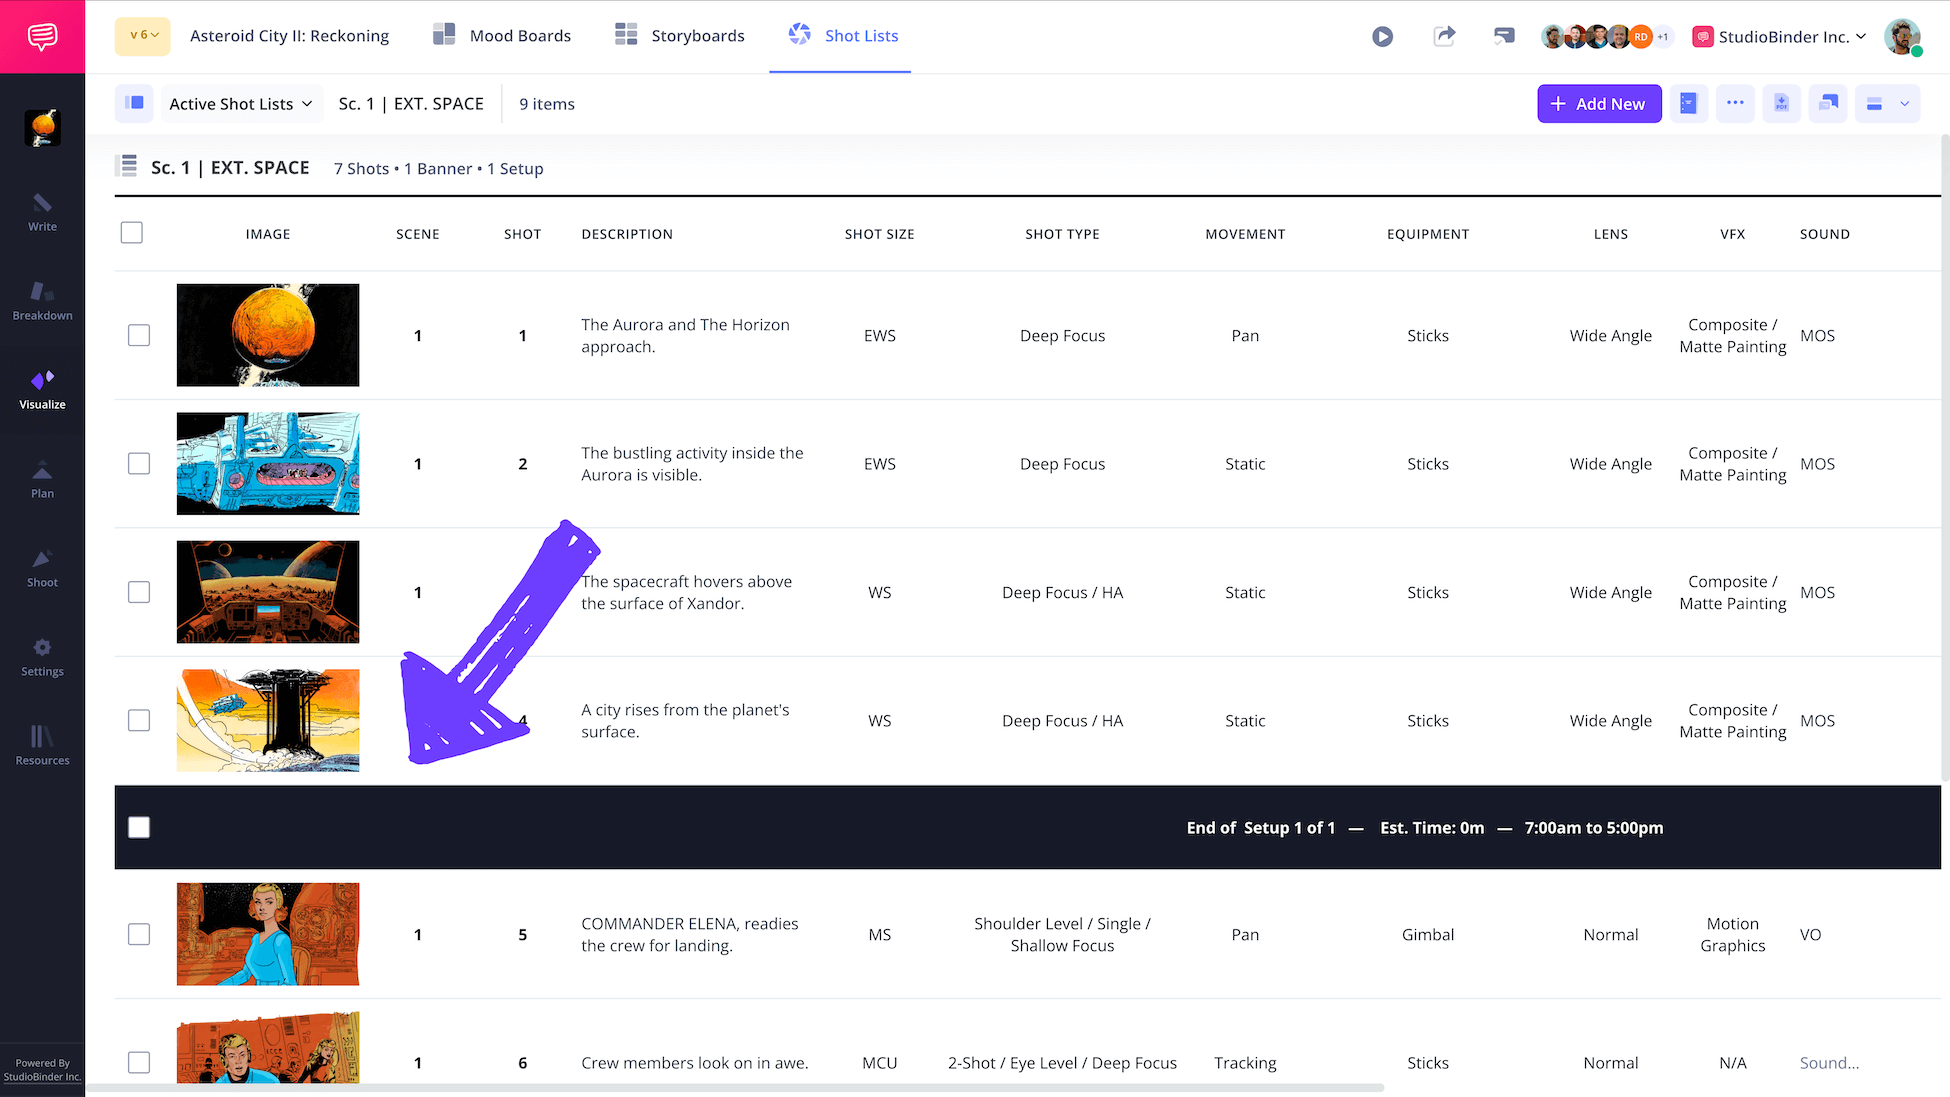
Any good shot list template for film must have a row specified for camera setups. This will allow your team to know how much time to allocate for a series of shots. That way, you'll be able to grab all the shots and calculate the production time needed more accurately.
Just click + Add New and click New Setup. Enter a description and a start time for the camera setup and click Add Setup.
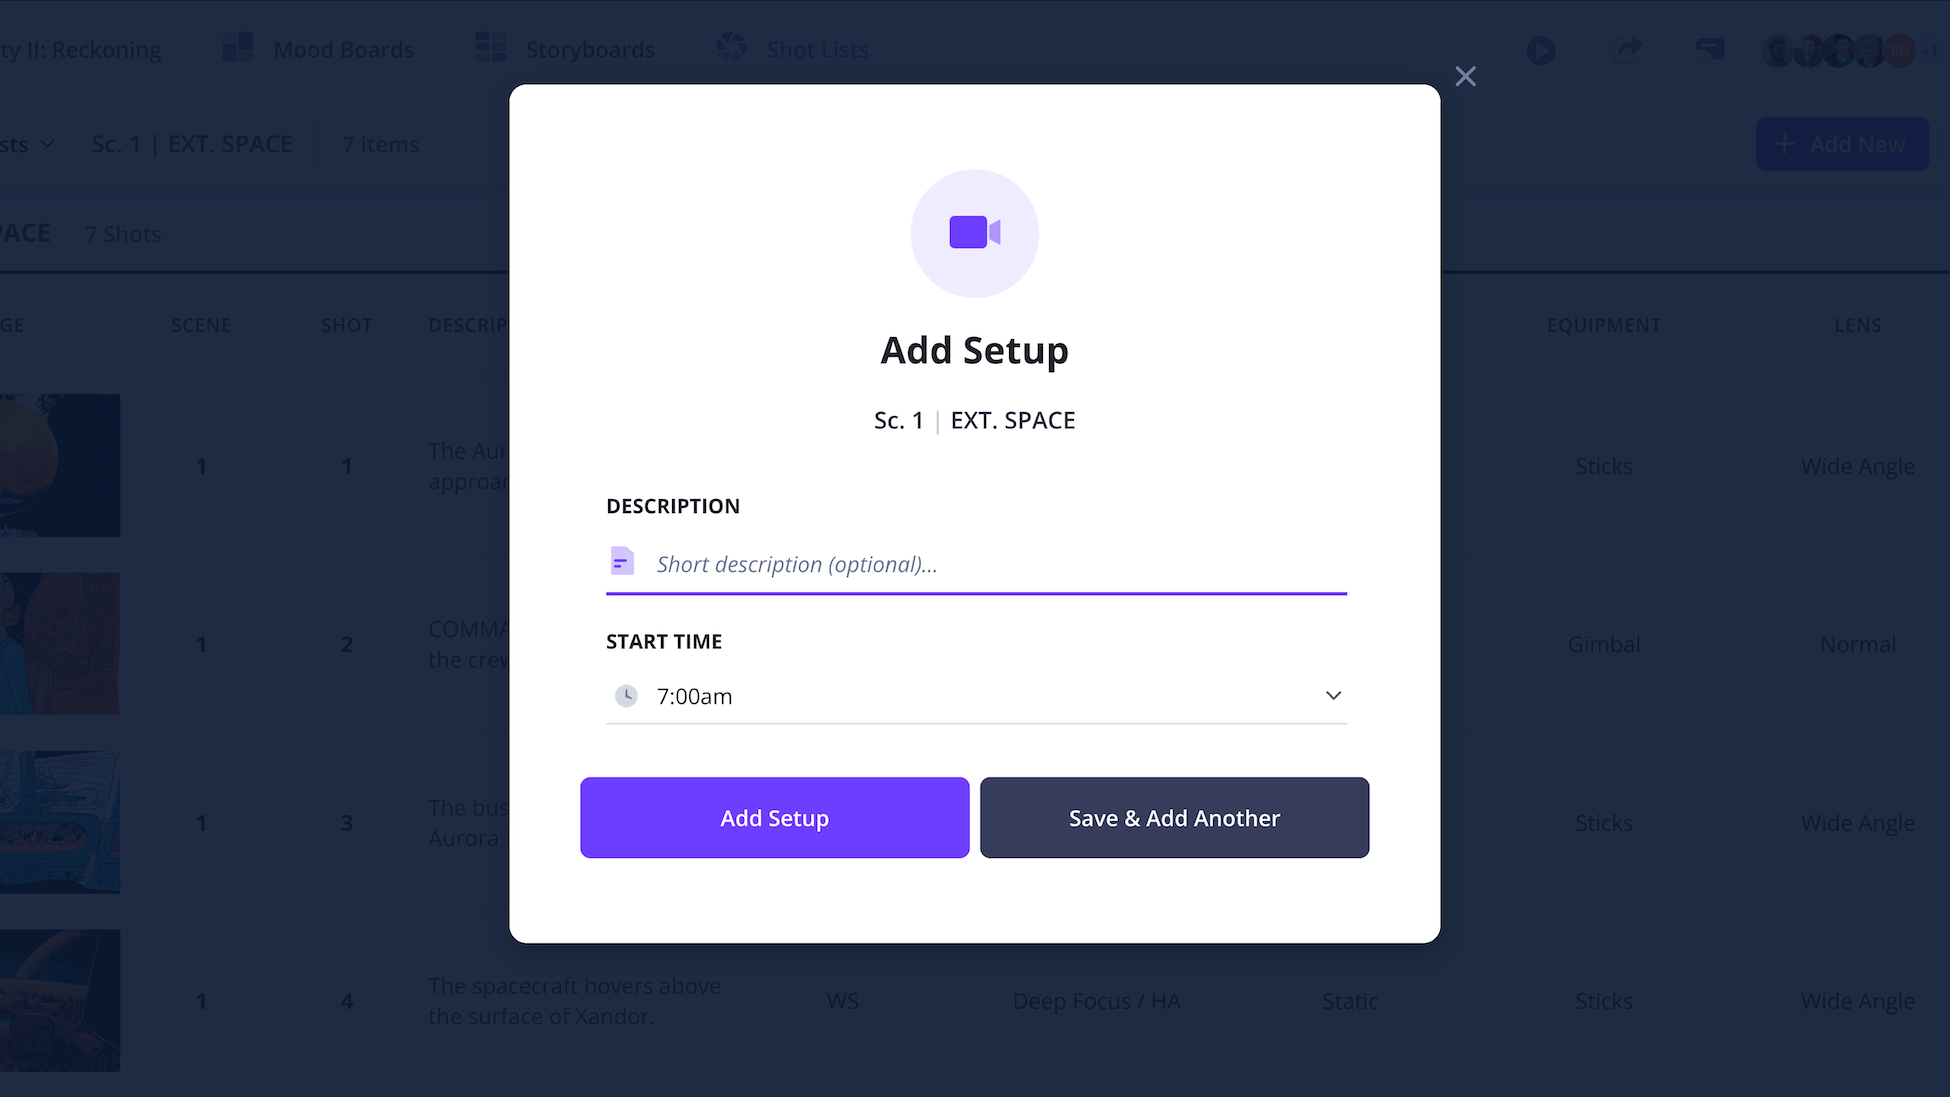
Your camera setup bar will now appear and you can easily drag that bar in between camera shots. It will also auto-calculate the estimated time needed to cover the shots above the camera setup bar.
Step 7
7. Collaborate with your team on shots
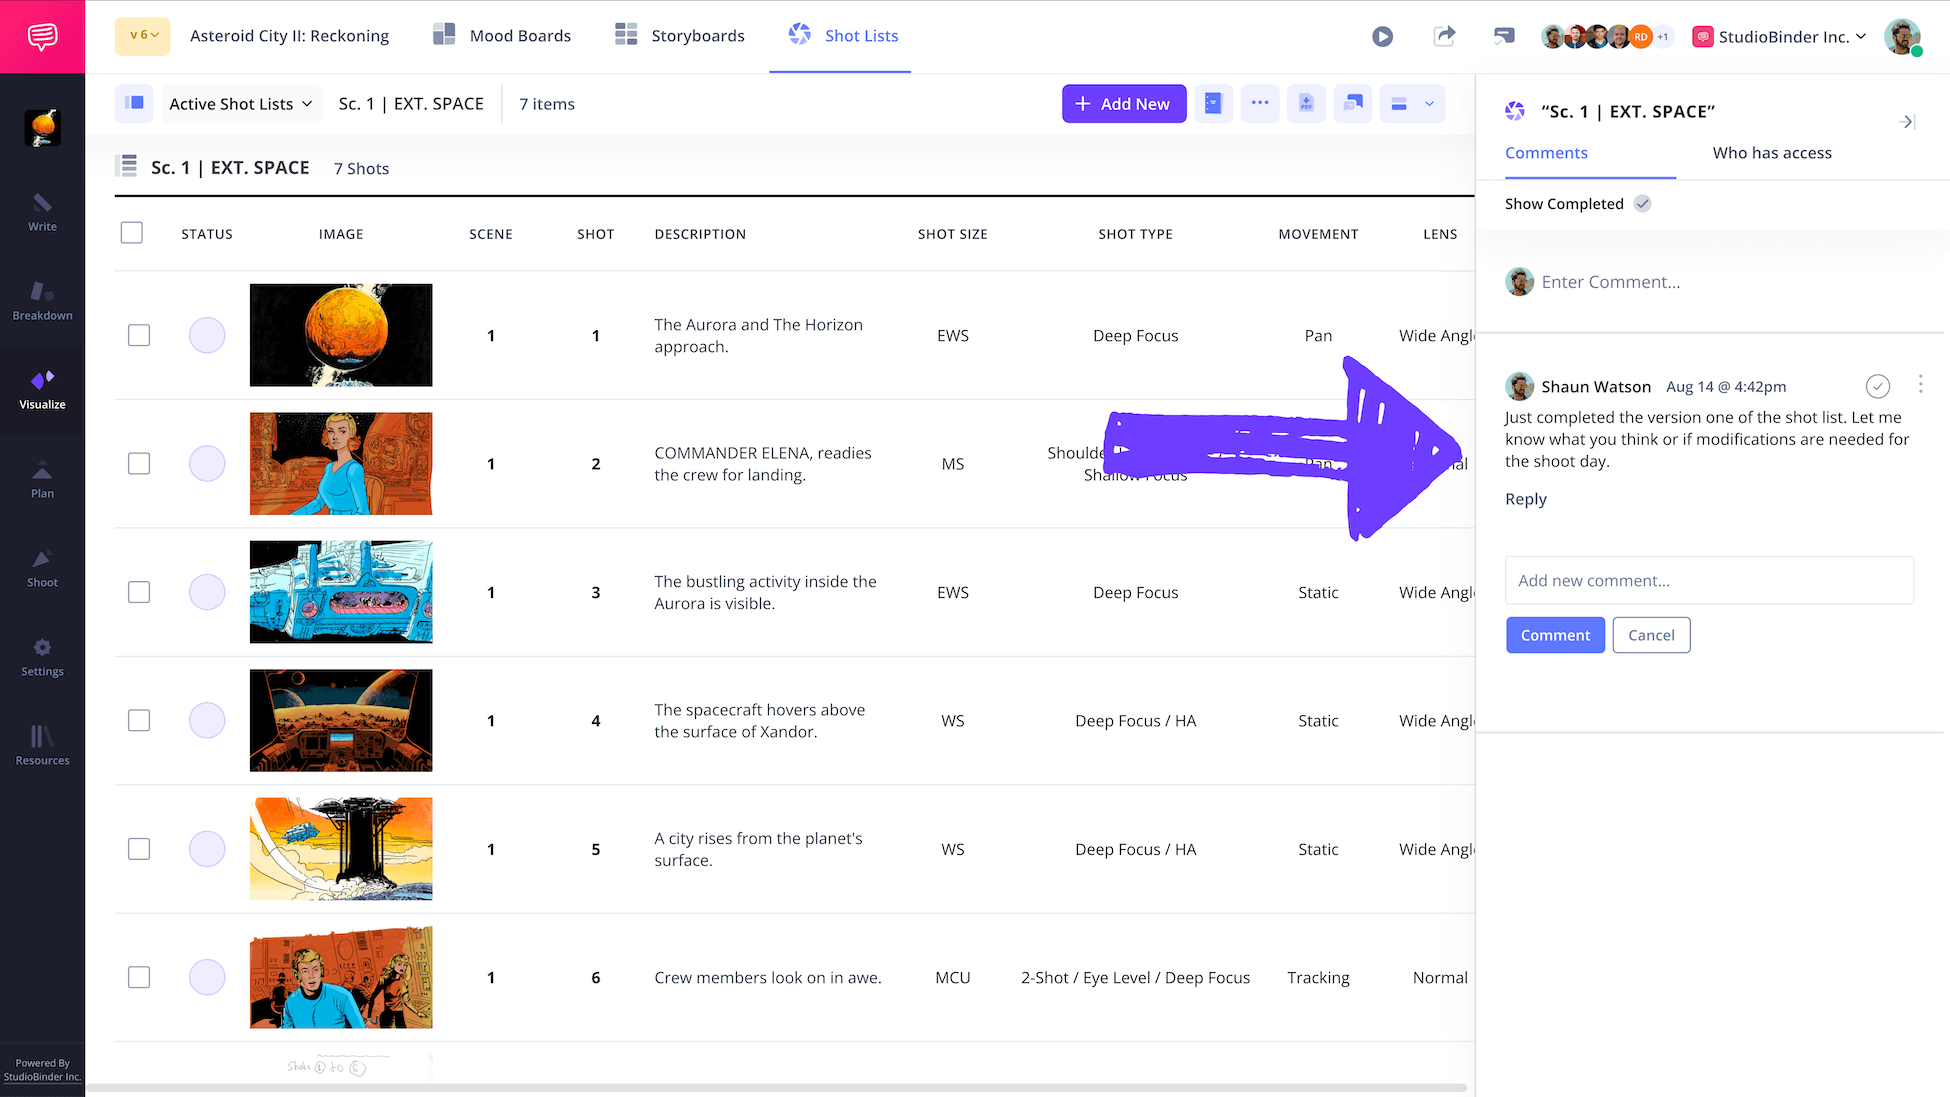
In terms of shot listing, just go through all of your scenes and create shots using the methods we already covered. For additional feedback on your shot list, you can invite your team to view and comment on your shot list before it's finalized.
You can invite your directory of photography (DOP), assistant director (AD), or producers to view and comment on your film shot list template.
Just click Comments on the right-side and you'll notice a comment drawer open where you and your team can add comments on your shot list.
Step 8
8. Print or share your film shot list
When your film shot list is complete, you can either export your shot list as a PDF for on-set use, or share a digital link with your crew. The printed copies are still handy for marking off completed shots during production.
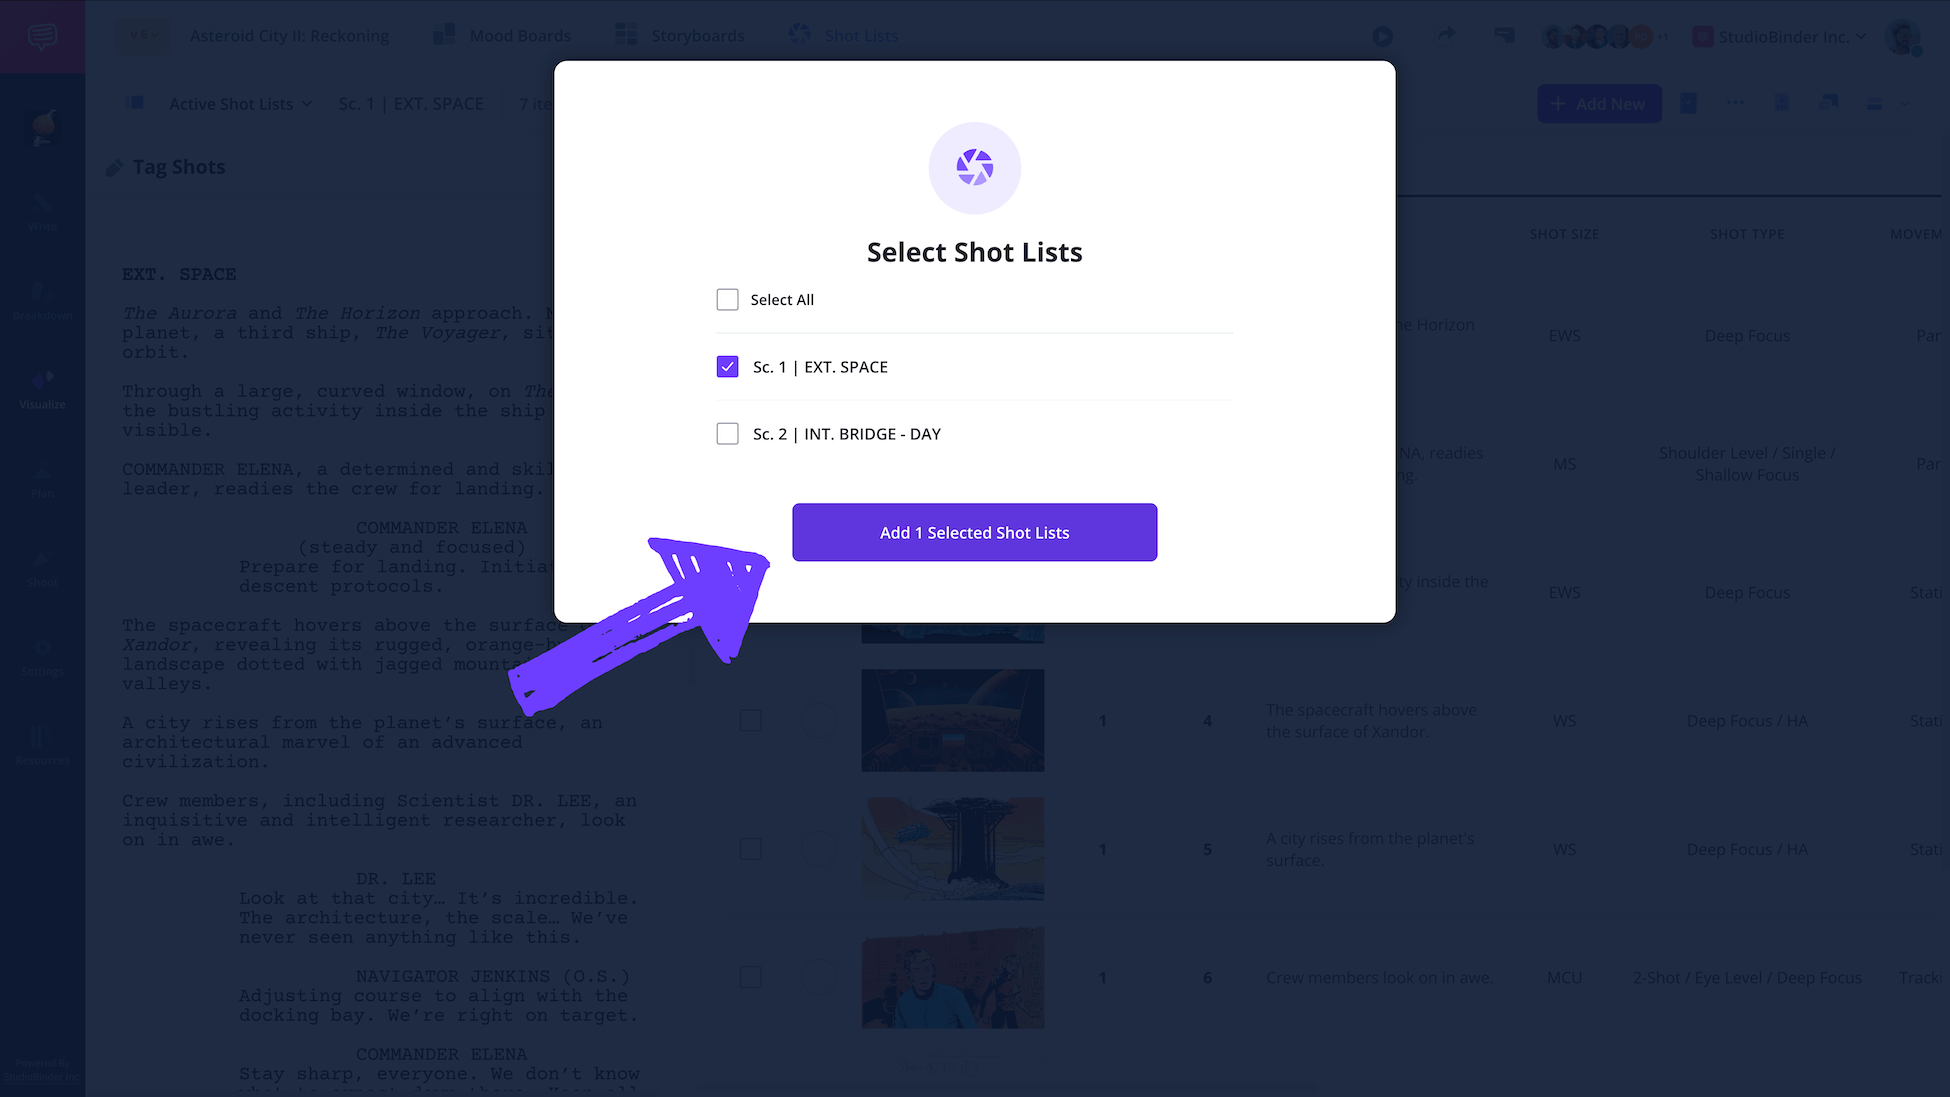
Just click Generate PDF and the pop-up will ask you to select the shot lists to combine in one PDF shot list document.
Then, click Add Selected Shot Lists.
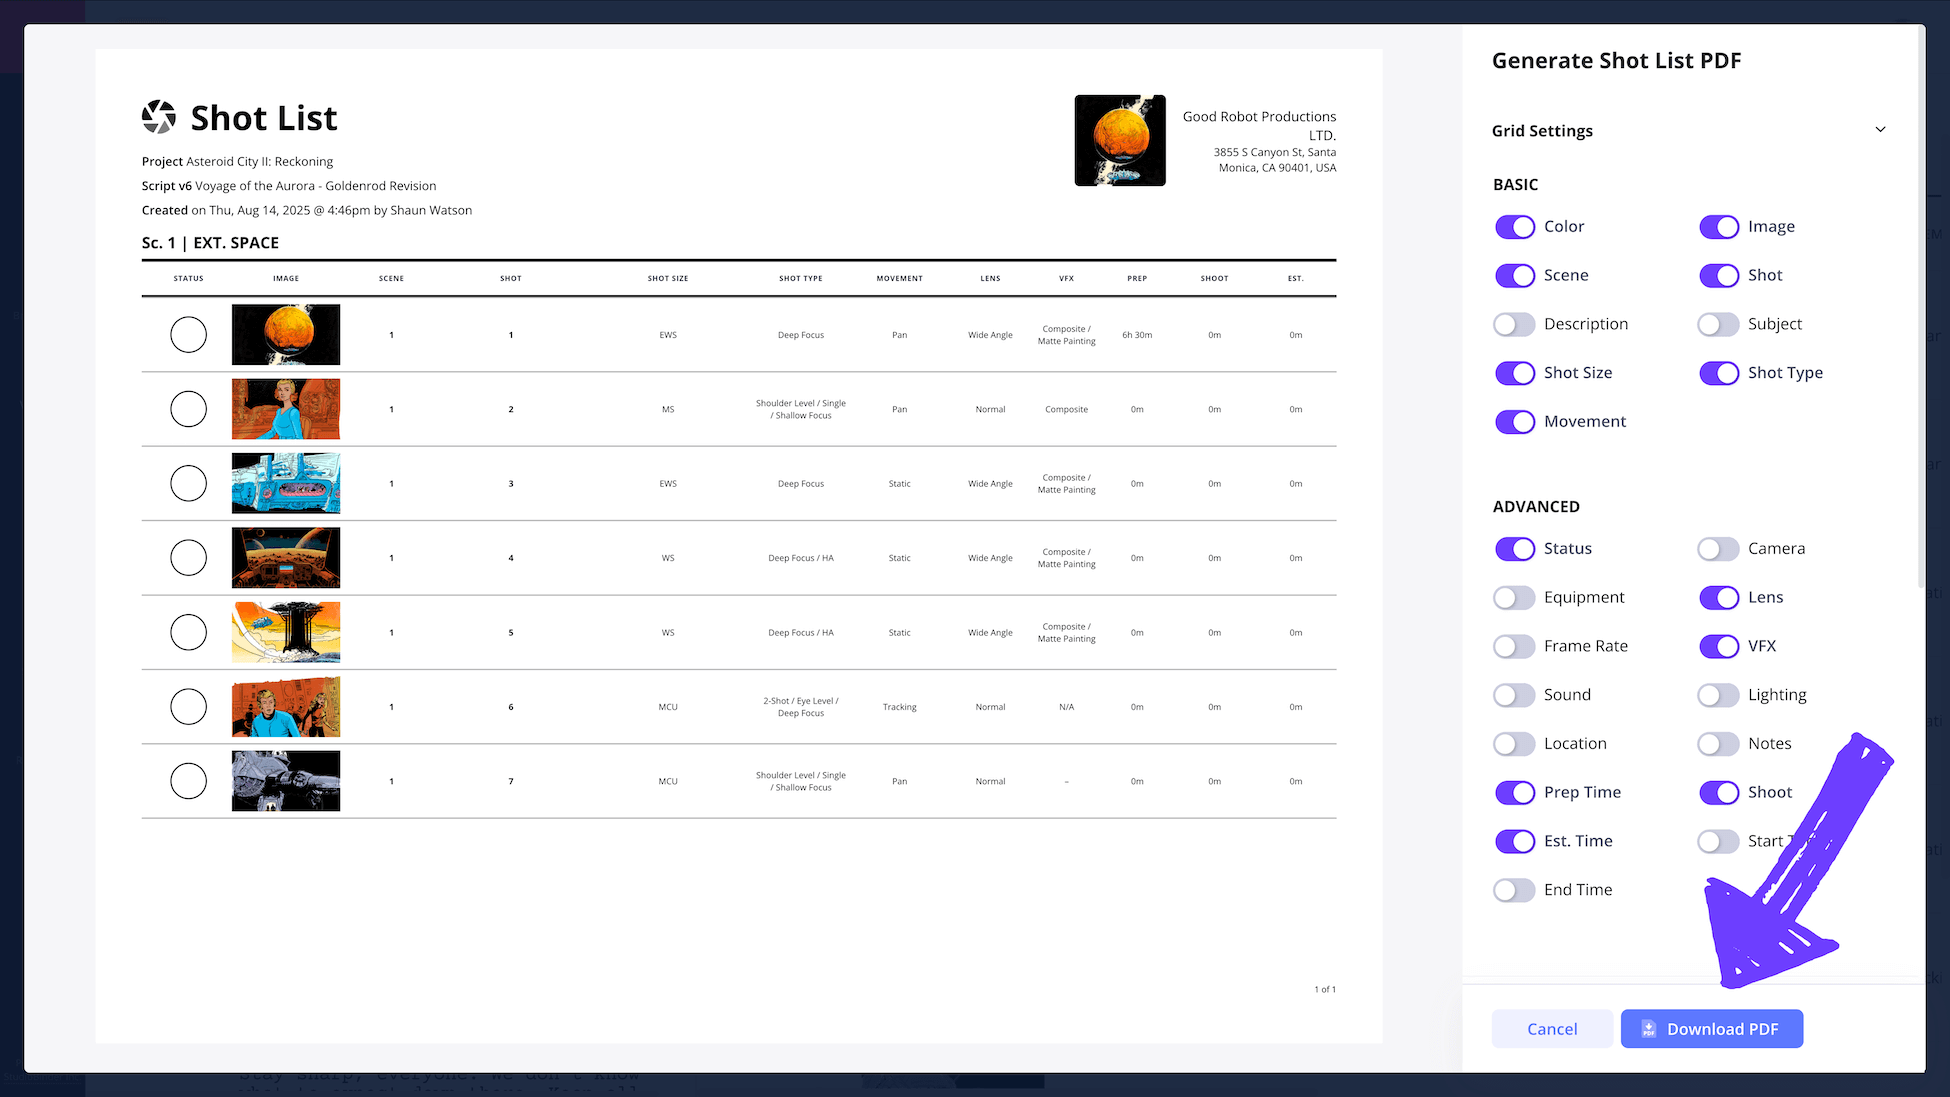
In this pop-up, you can customize the columns to fit your needs.
For example, you can enable the Status to enable a checklist-approach so you can actually check off shots as you go during your video production.
You can even enable/disable the image option depending on your preference. The shot list PDF can be completely customizable to fit your needs.
Conclusion
Your film shot list is done
Your shot list for film is now completed and you can walk on set with confidence knowing that every shot has been accounted for. Whether you're shooting a feature film, short film, video commercial, this will ensure your vision translates to the screen successfully.
Free Shot List Templates FAQs
Free shot list templates explained
A shot list template is a blank shot list for you to fill out with all your shots, including specifications such as shot size, framing, camera lens, movement, special equipment, etc.
Creating a shot list for film is a very straightforward process. A thorough and detailed shot list will help ensure that your time and energy on set are used efficiently, where last-minute decisions can be kept to a minimum. Here is a quick step-by-step process for creating a shot list:
- Start with a blank page or shot list template
- Add each shot for a particular scene to your list
- Make sure to include details such as shot size, camera angle, focal length, etc.
- Then arrange your shots into the most efficient shooting order, typically by location, time of day, etc.
- Estimate the time it will take to execute each shot
- Build your shooting schedule
There are a few different shot list programs out there, like StudioBinder, where you can create a shot list. All of the details can be added, the estimated time can be calculated, and the shooting schedule can easily be generated.
In StudioBinder, making a shot list PDF is just a couple of clicks away. You can create a custom layout, add watermarks, create front and back covers, and more.
There is no set format for a shot list. This document is for you and your crew, so whatever is most clear and efficient will work. That being said, there are some elements you'll want to include:
- Scene and shot numbers
- Shot size, framing, camera angle, etc.
- Estimated time for each shot
No, a shot list is not the same as a storyboard. They are both pre-production documents to help ideate and organize the different shots in a project, but they look and function a bit differently.
A storyboard is a visualization of the script, where each shot is represented by a single image.
A shot list is a written list of the shots that includes technical specifications like shot size, camera angle, framing, movement, etc.
How to make a shot list in film?
Open StudioBinder on your browser.
Click on the Shot Lists tab on the project homepage.
Click the "Get Started" button and either click Import Script or Create Manually.
If you create manually, give your shot list a name, customize the columns, and add shots in bulk or select reference images.
Add shot details to each shot such as the description, shot size, shot type, camera movement, camera equipment, camera lens, focal length and more.
Invite collaborators to view and comment on your shot list
Generate a PDF shot list and customize the layout, color options, quality, etc.
Save your film shot list PDF and distribute with key team members and bring it on set to get all the shots you need for the day.
