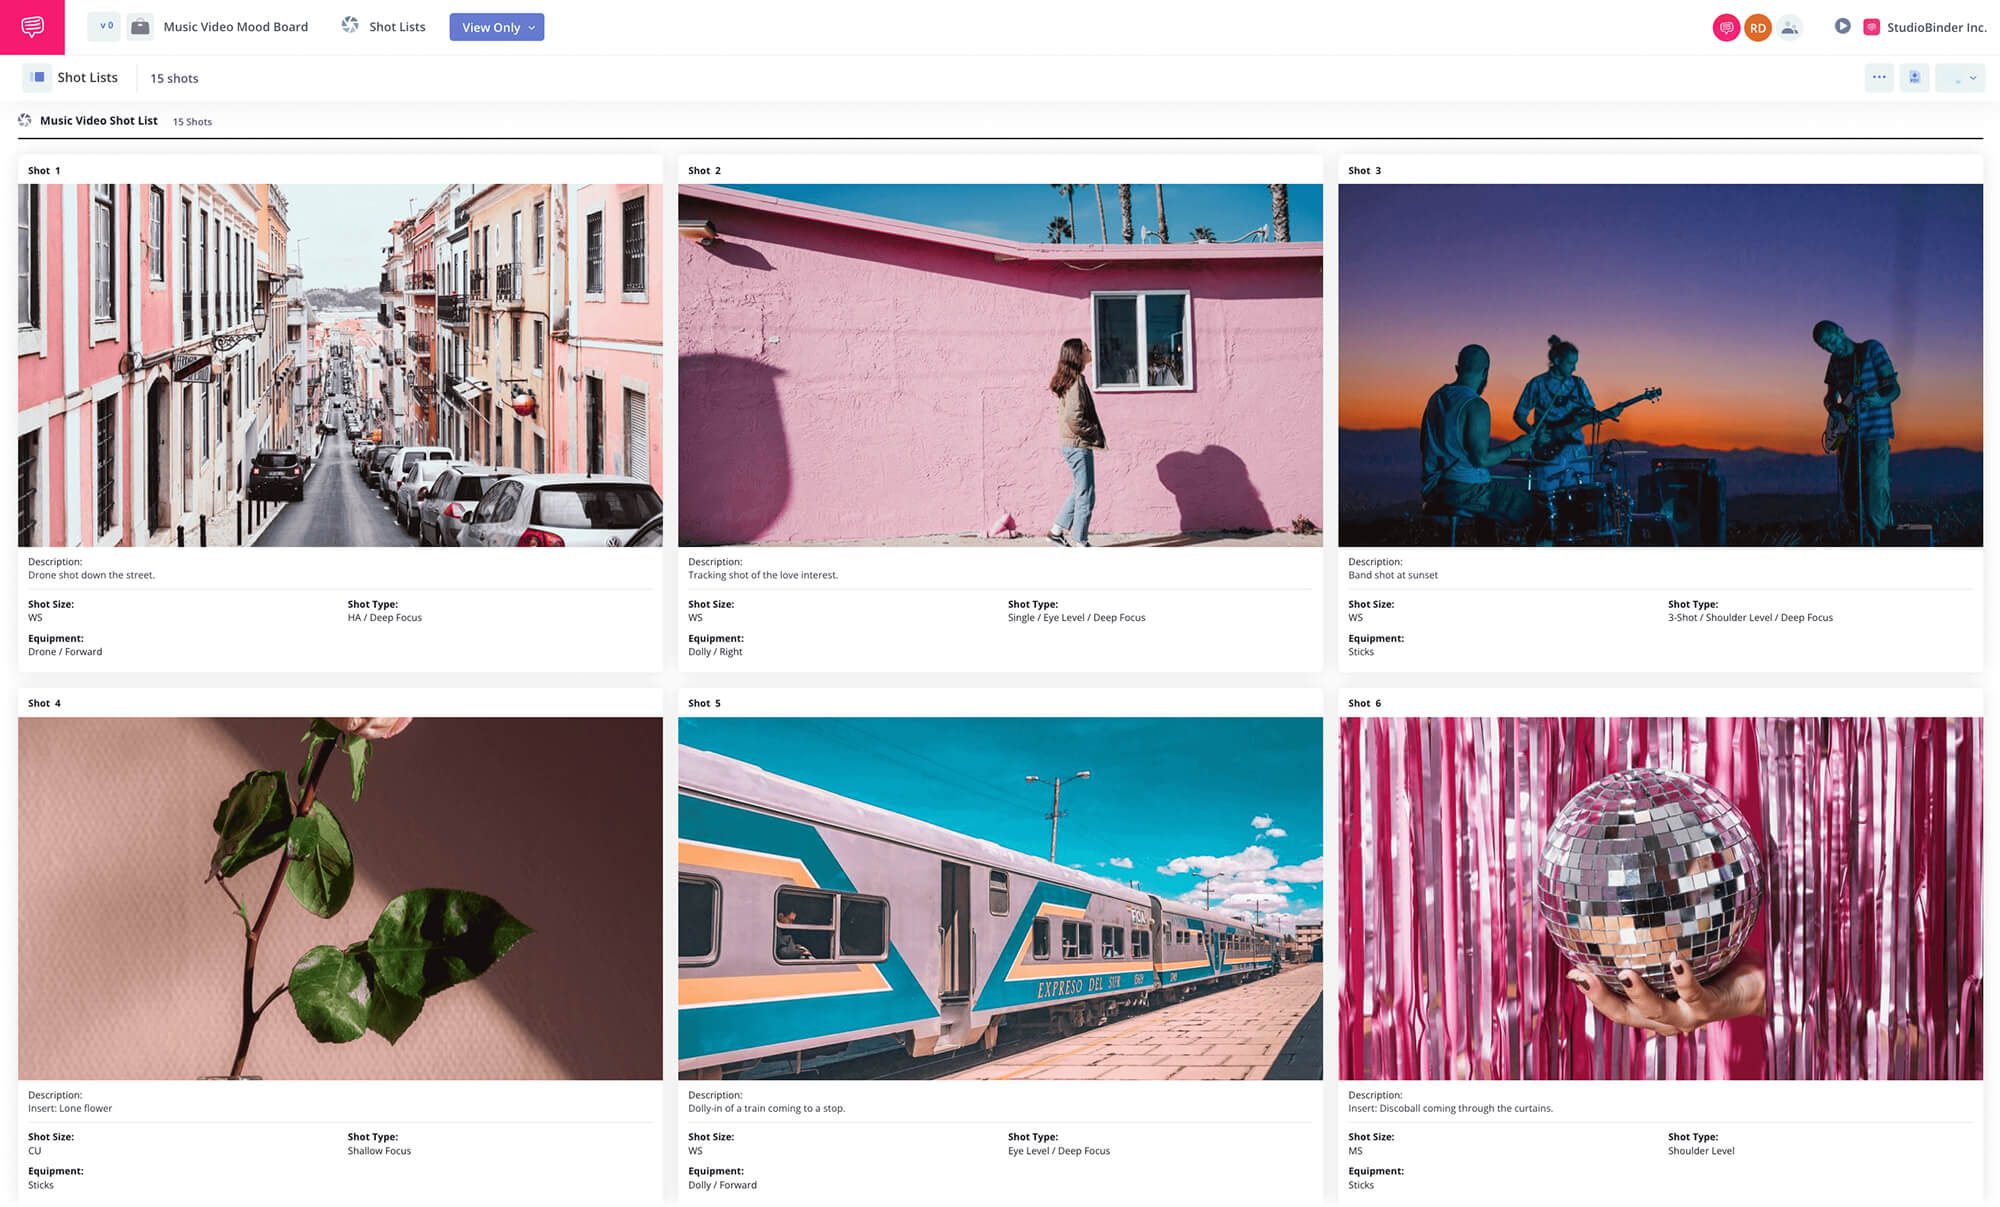
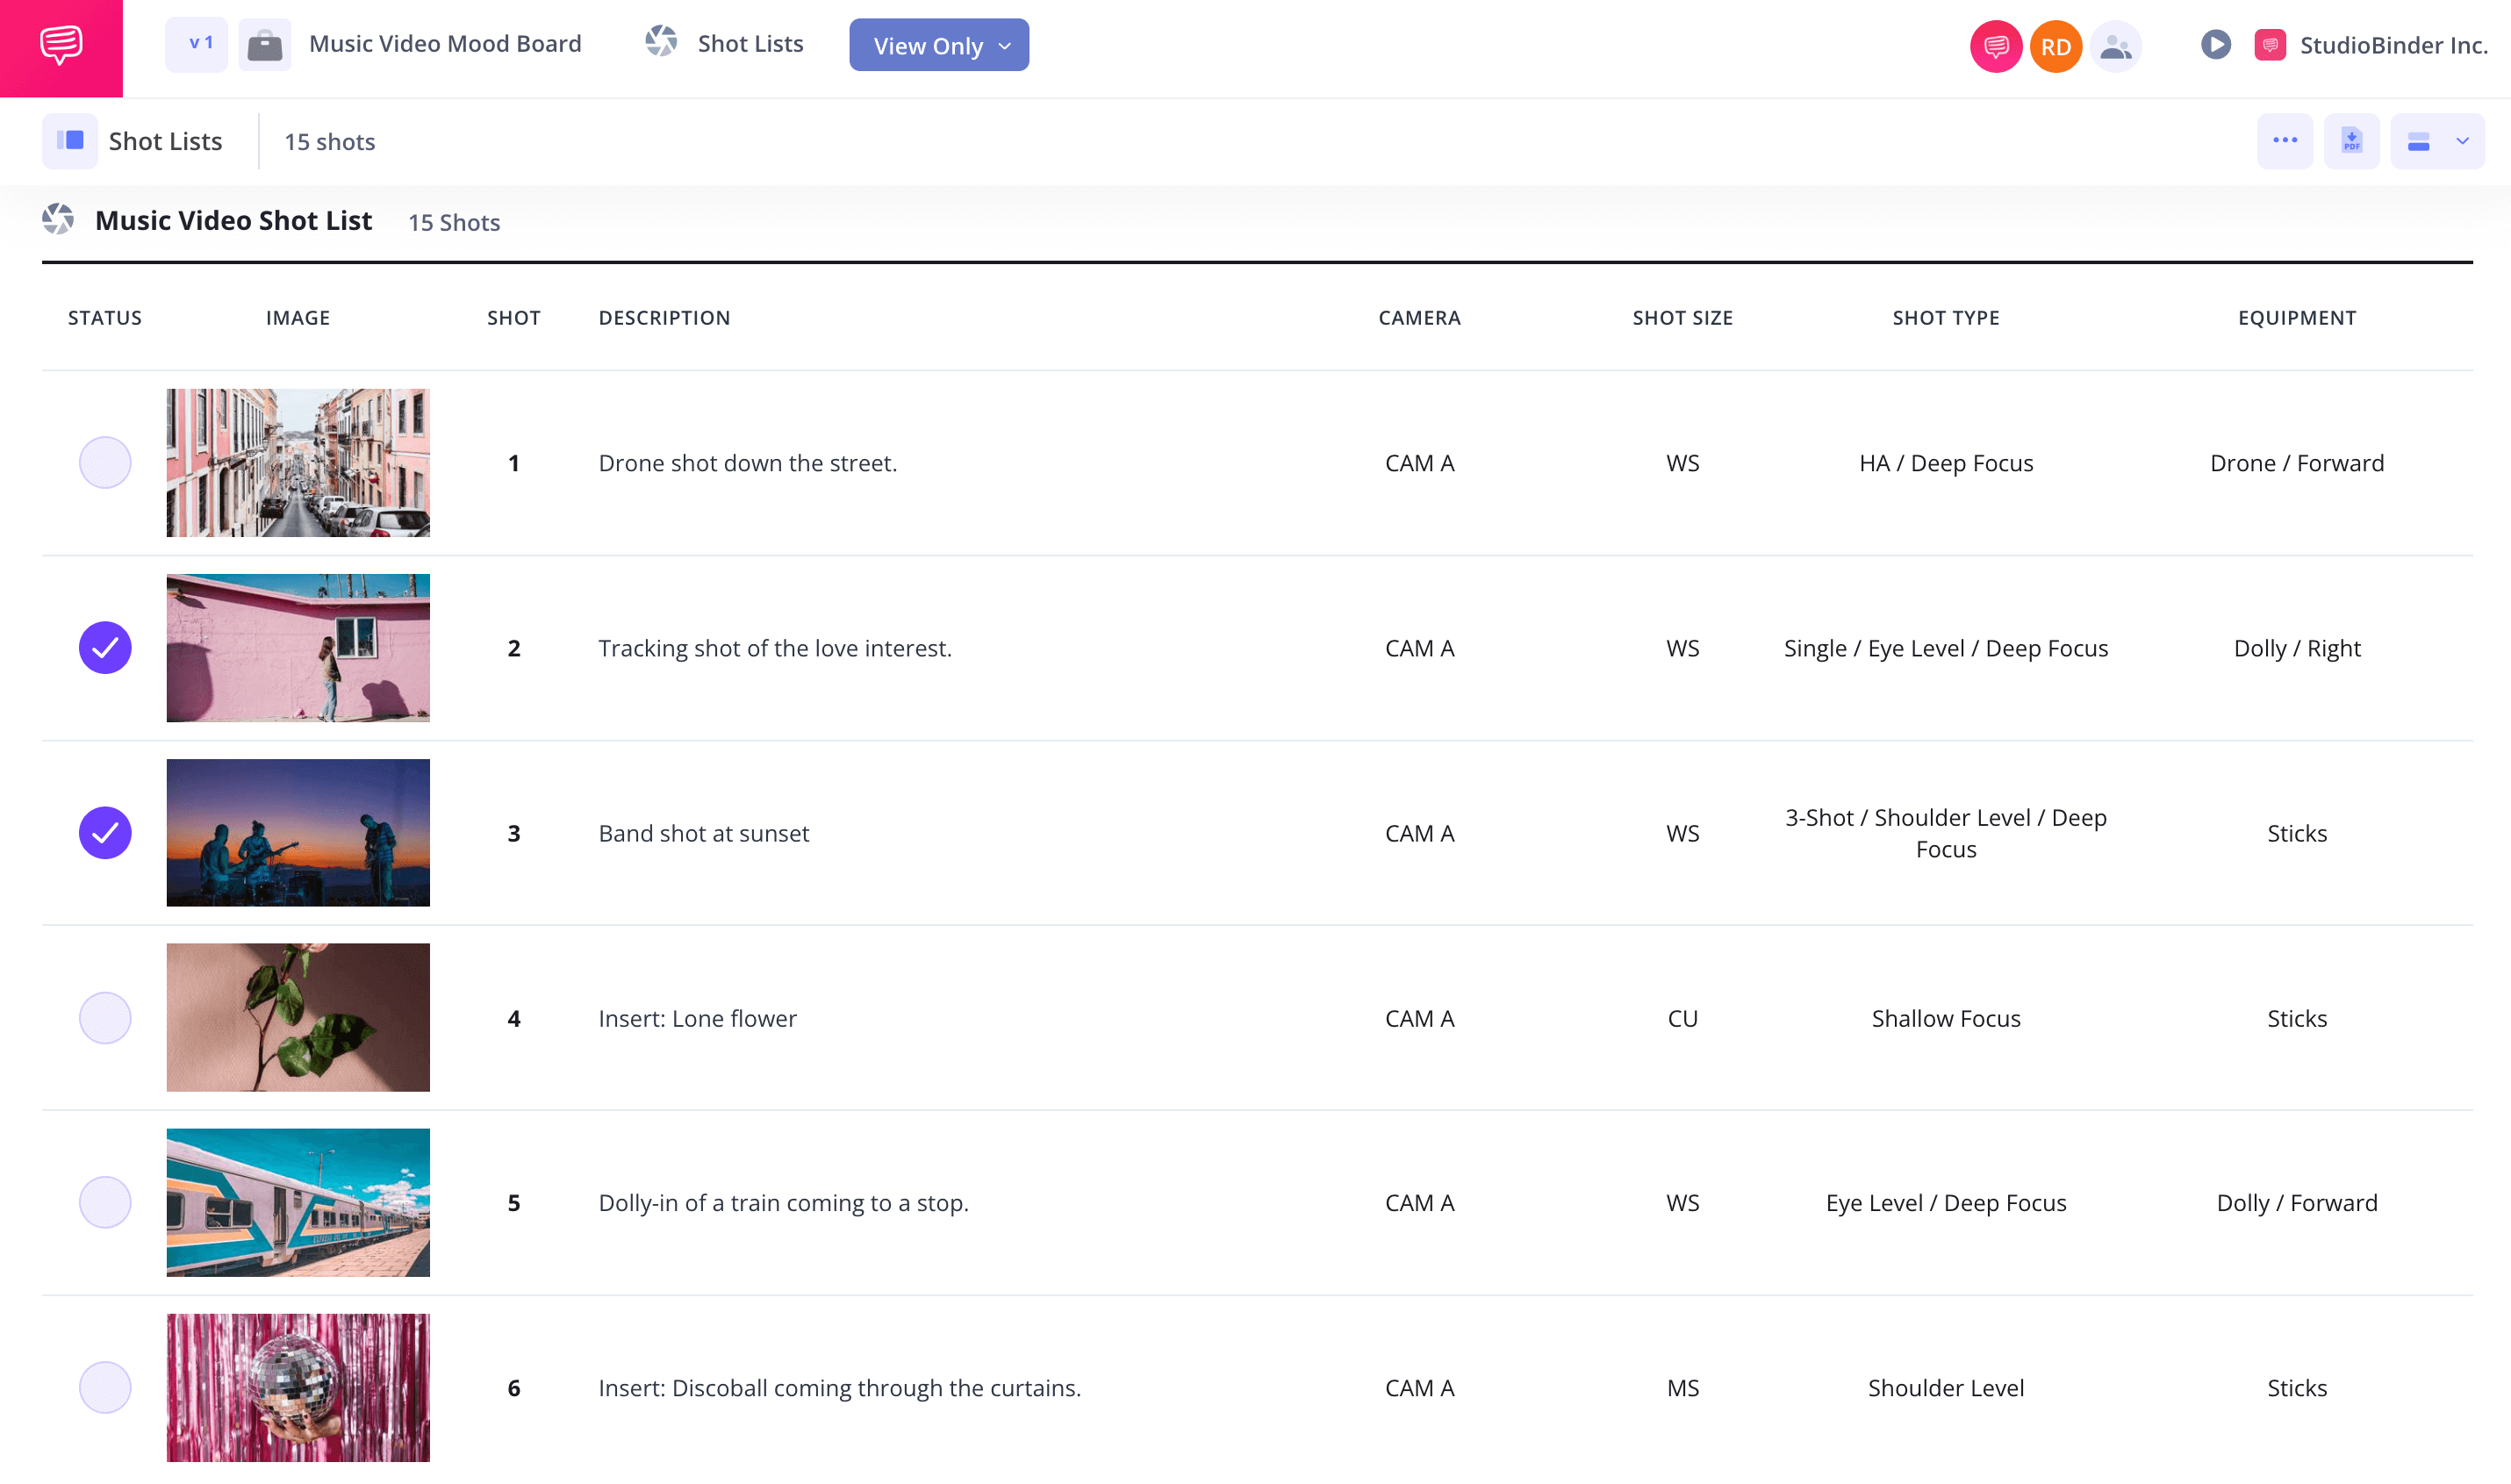
B-Roll Shot List Template
Plan Your B-Roll Shots
Putting together a solid B-roll shot list is key for getting that extra footage that really boosts your main story.
This guide will take you through the process step-by-step. While we'll be using StudioBinder’s shot list software, the steps apply universally so feel free to use whichever method you prefer.
Steps in this guide
Step 1
1. Define the Purpose of Your B-roll
Before getting into the details, think about what your B-roll should achieve. Consider the story your main footage tells and how B-roll can boost it, the mood or tone you want to create, and any themes or motifs you'd like to highlight. This may start with a screenplay, treatment, storyboard, or just a general idea for the main footage.
How to do this in StudioBinder
- Upload and tag shots directly within a script to bring them into a shot list.
Step 2
2. Consider the Shots
When it comes to B-roll, get creative with your shots. Try capturing your subjects from diverse camera angles to add some visual flair.
Incorporating dynamic camera movements or techniques like slow motion or time-lapse can really make your visuals pop. Don't forget about close-ups; focusing on small, telling details can reveal a lot that might not be obvious in the main footage. Also, including shots that showcase the environmental context helps establish the setting or atmosphere beautifully.


How to do this in StudioBinder
- Select from dozens of shot spec options, lens, shot angle, shot size, subject, location, and more.
Step 3
3. Collaborate with Your Team
Get your key creative team involved in the planning. Cinematographers and ADs can share valuable insights on cinematography techniques and shooting schedules, while early input from editors ensures that the footage will be versatile for post-production. Be open to their ideas and suggestions for the best visual storytelling.


How to do this in StudioBinder
- Share and collaborate within the comments feature of your shot list.
Step 4
4. Group into Setups
To streamline your B-roll shots, organize them by locations to save time, lighting conditions for capturing different moods throughout the day, and equipment needs so you know what gear—like gimbals or drones—you'll need for each shot. This way, you’ll be more efficient and creative with your filming.


How to do this in StudioBinder
- Organize your shot list in a way that is most efficient for shooting.
Step 5
5. Print It
Make a physical version of your shot list by exporting a detailed PDF of your B-roll shots. Share copies with the whole team to keep everyone on the same page.


How to do this in StudioBinder
- Access your shot list from anywhere with an internet connection.
- Customize PDFs with StudioBinder for a more compact layout.
SteP 6
6. Mark Shots as You Complete Them
Staying organized on set is key. Use a checklist to mark off completed shots and jot down any that need revisiting. If you're working digitally, keep your shot list updated on a device in real-time to easily track your progress.


How to do this in StudioBinder
- Check off each shot as you capture within the StudioBinder shot listing app.
Conclusion
B-Roll Shot List Complete
Shooting B-roll can be super spontaneous and full of unexpected creativity, but having a solid shot list helps you picture your ideal shots and gives you a structured plan to capture those spontaneous moments beautifully.
This shot list template is just one of several options you can choose from. Take a look at our Shot List Templates page to explore the full collection.