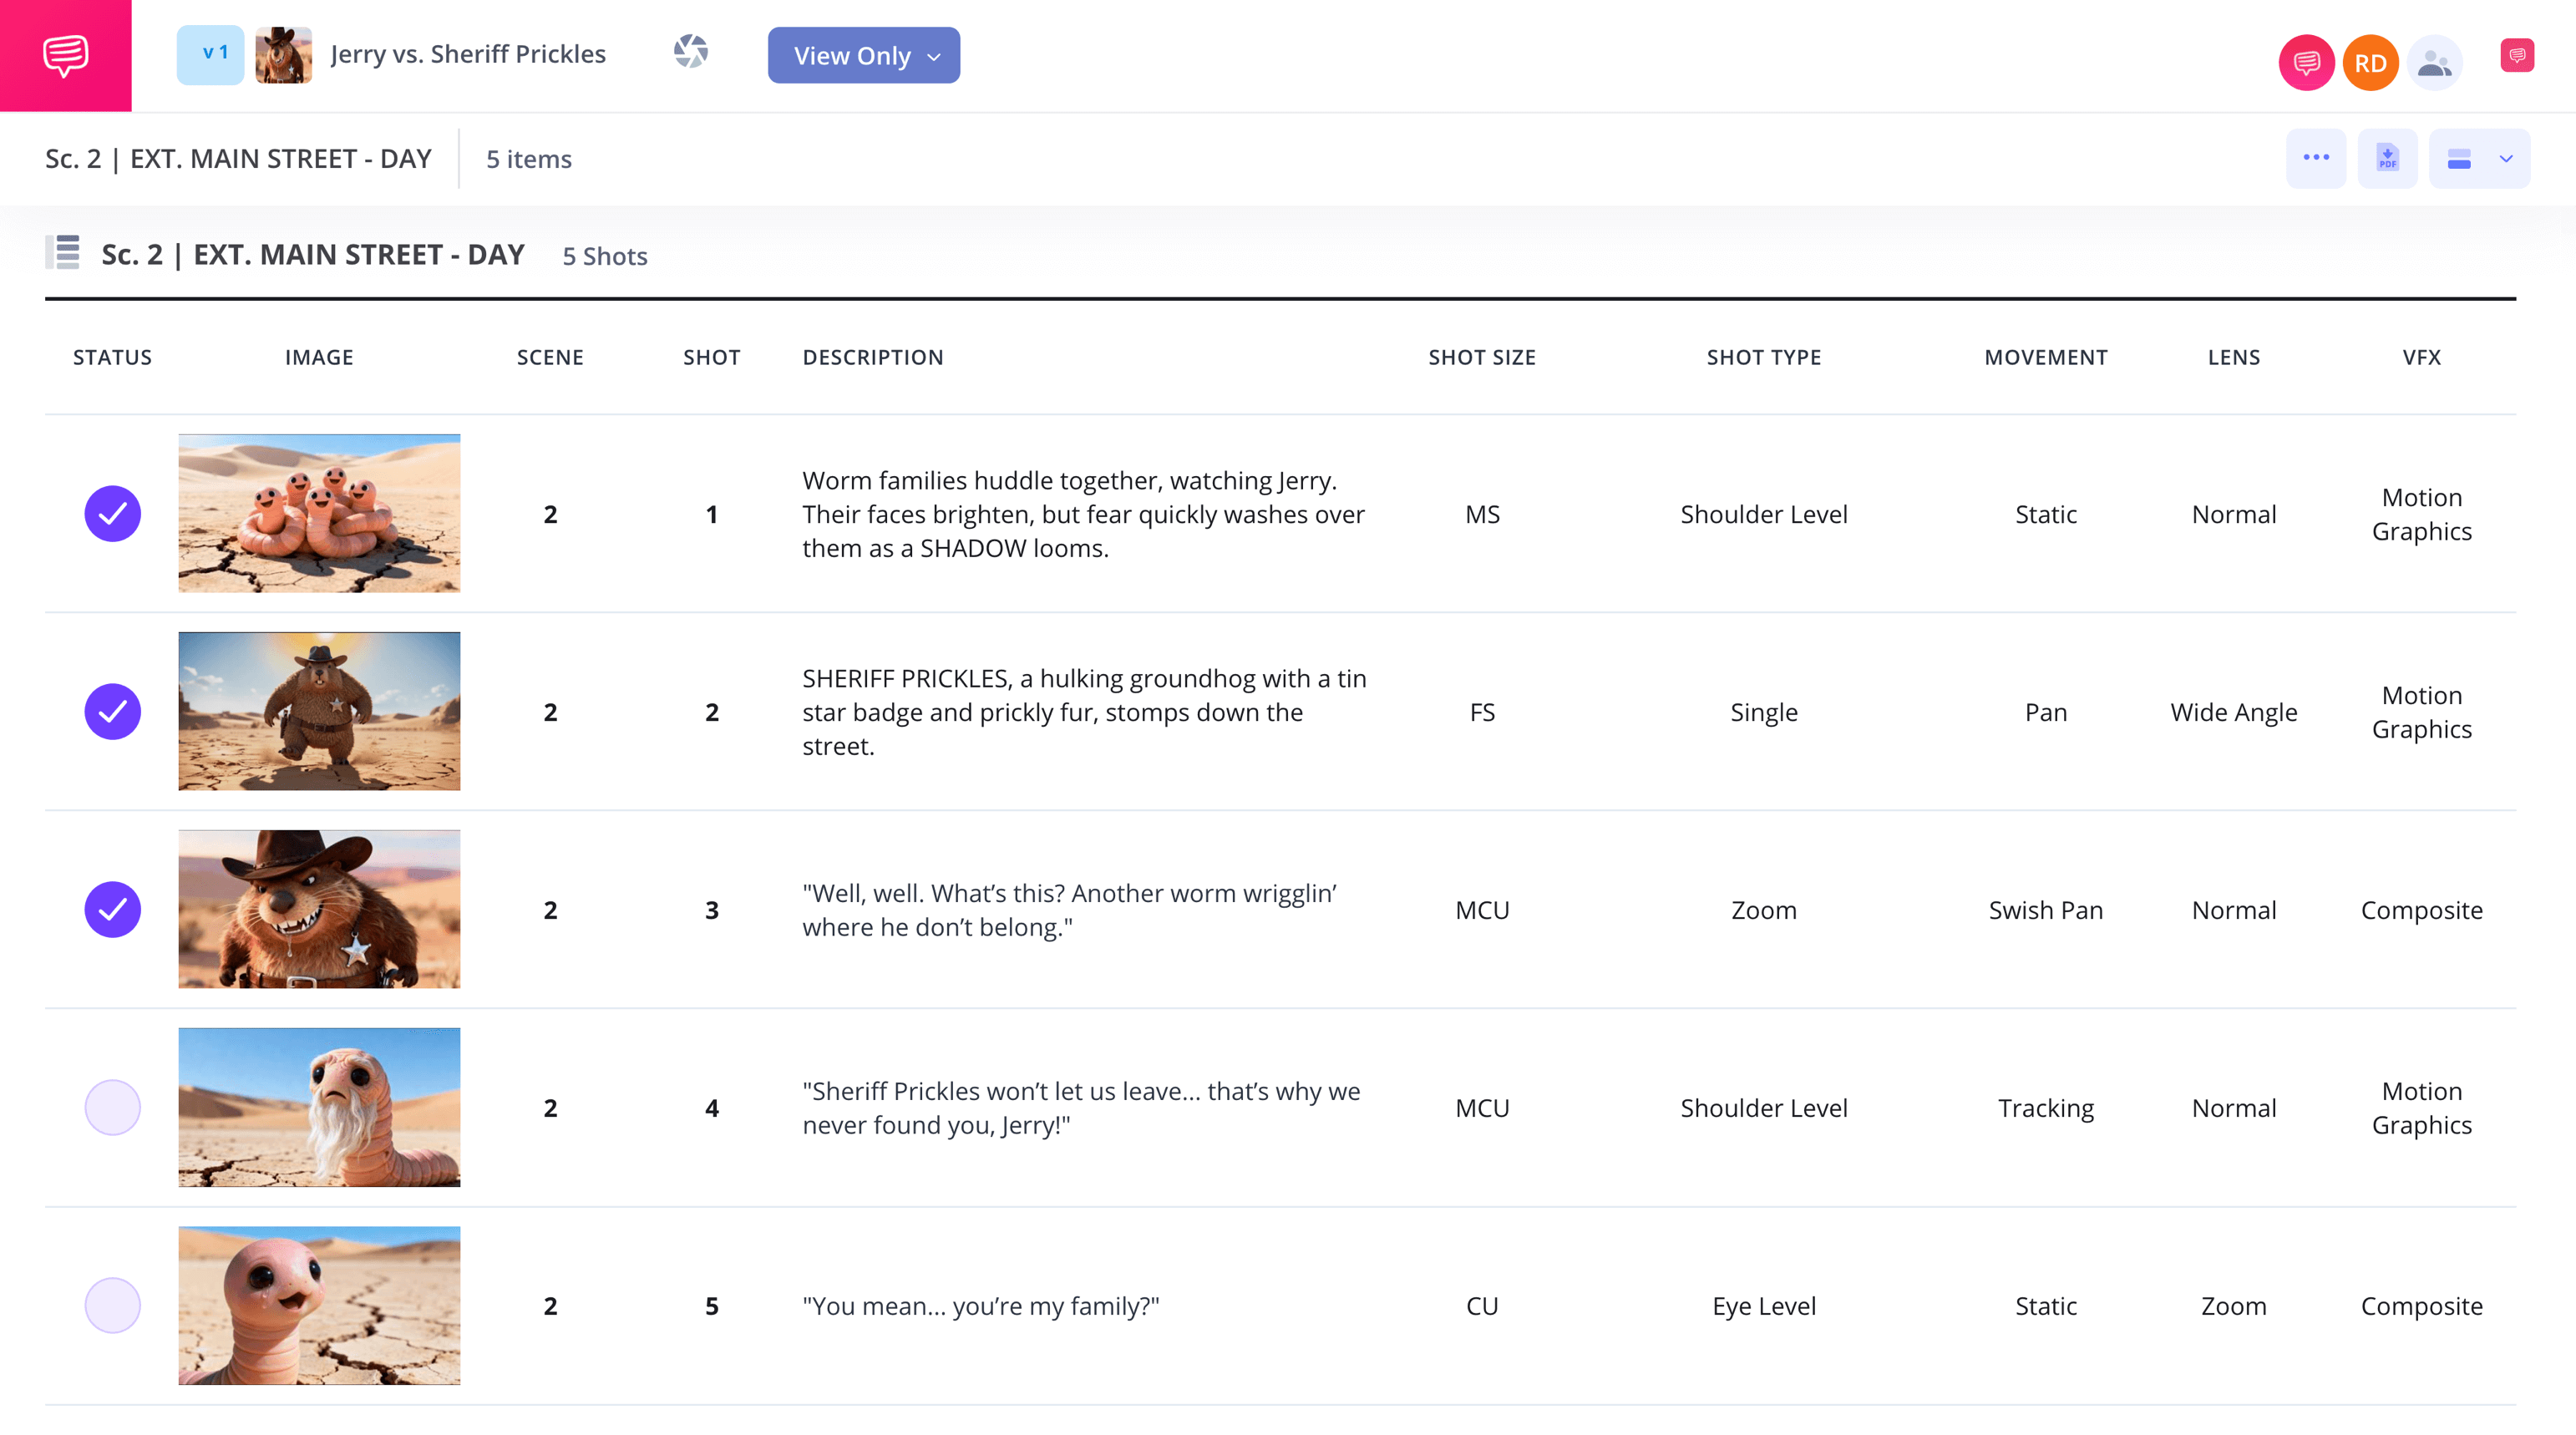
Animation Shot List Template
Animation shot list template
Creating a shot list for animation differs from creating a shot list for film in some pretty distinct ways. In animation, the shot list usually comes after extensive planning through storyboarding and animatics. Whereas in film, there may be pre-visualization with storyboards, but the shot list is more of a primary tool that guides the physical shoot.
Still, animation shot lists are highly important for animation directors and layout artists tasked with project management to know the ins and outs, as they becomes key for overall production pipeline control. As a result, you’ll require an animation shot list template you can rely on. StudioBinder has you covered, along with the below list of key steps to consider as you start your animation shot list journey.
Step 1
1. Detail the script
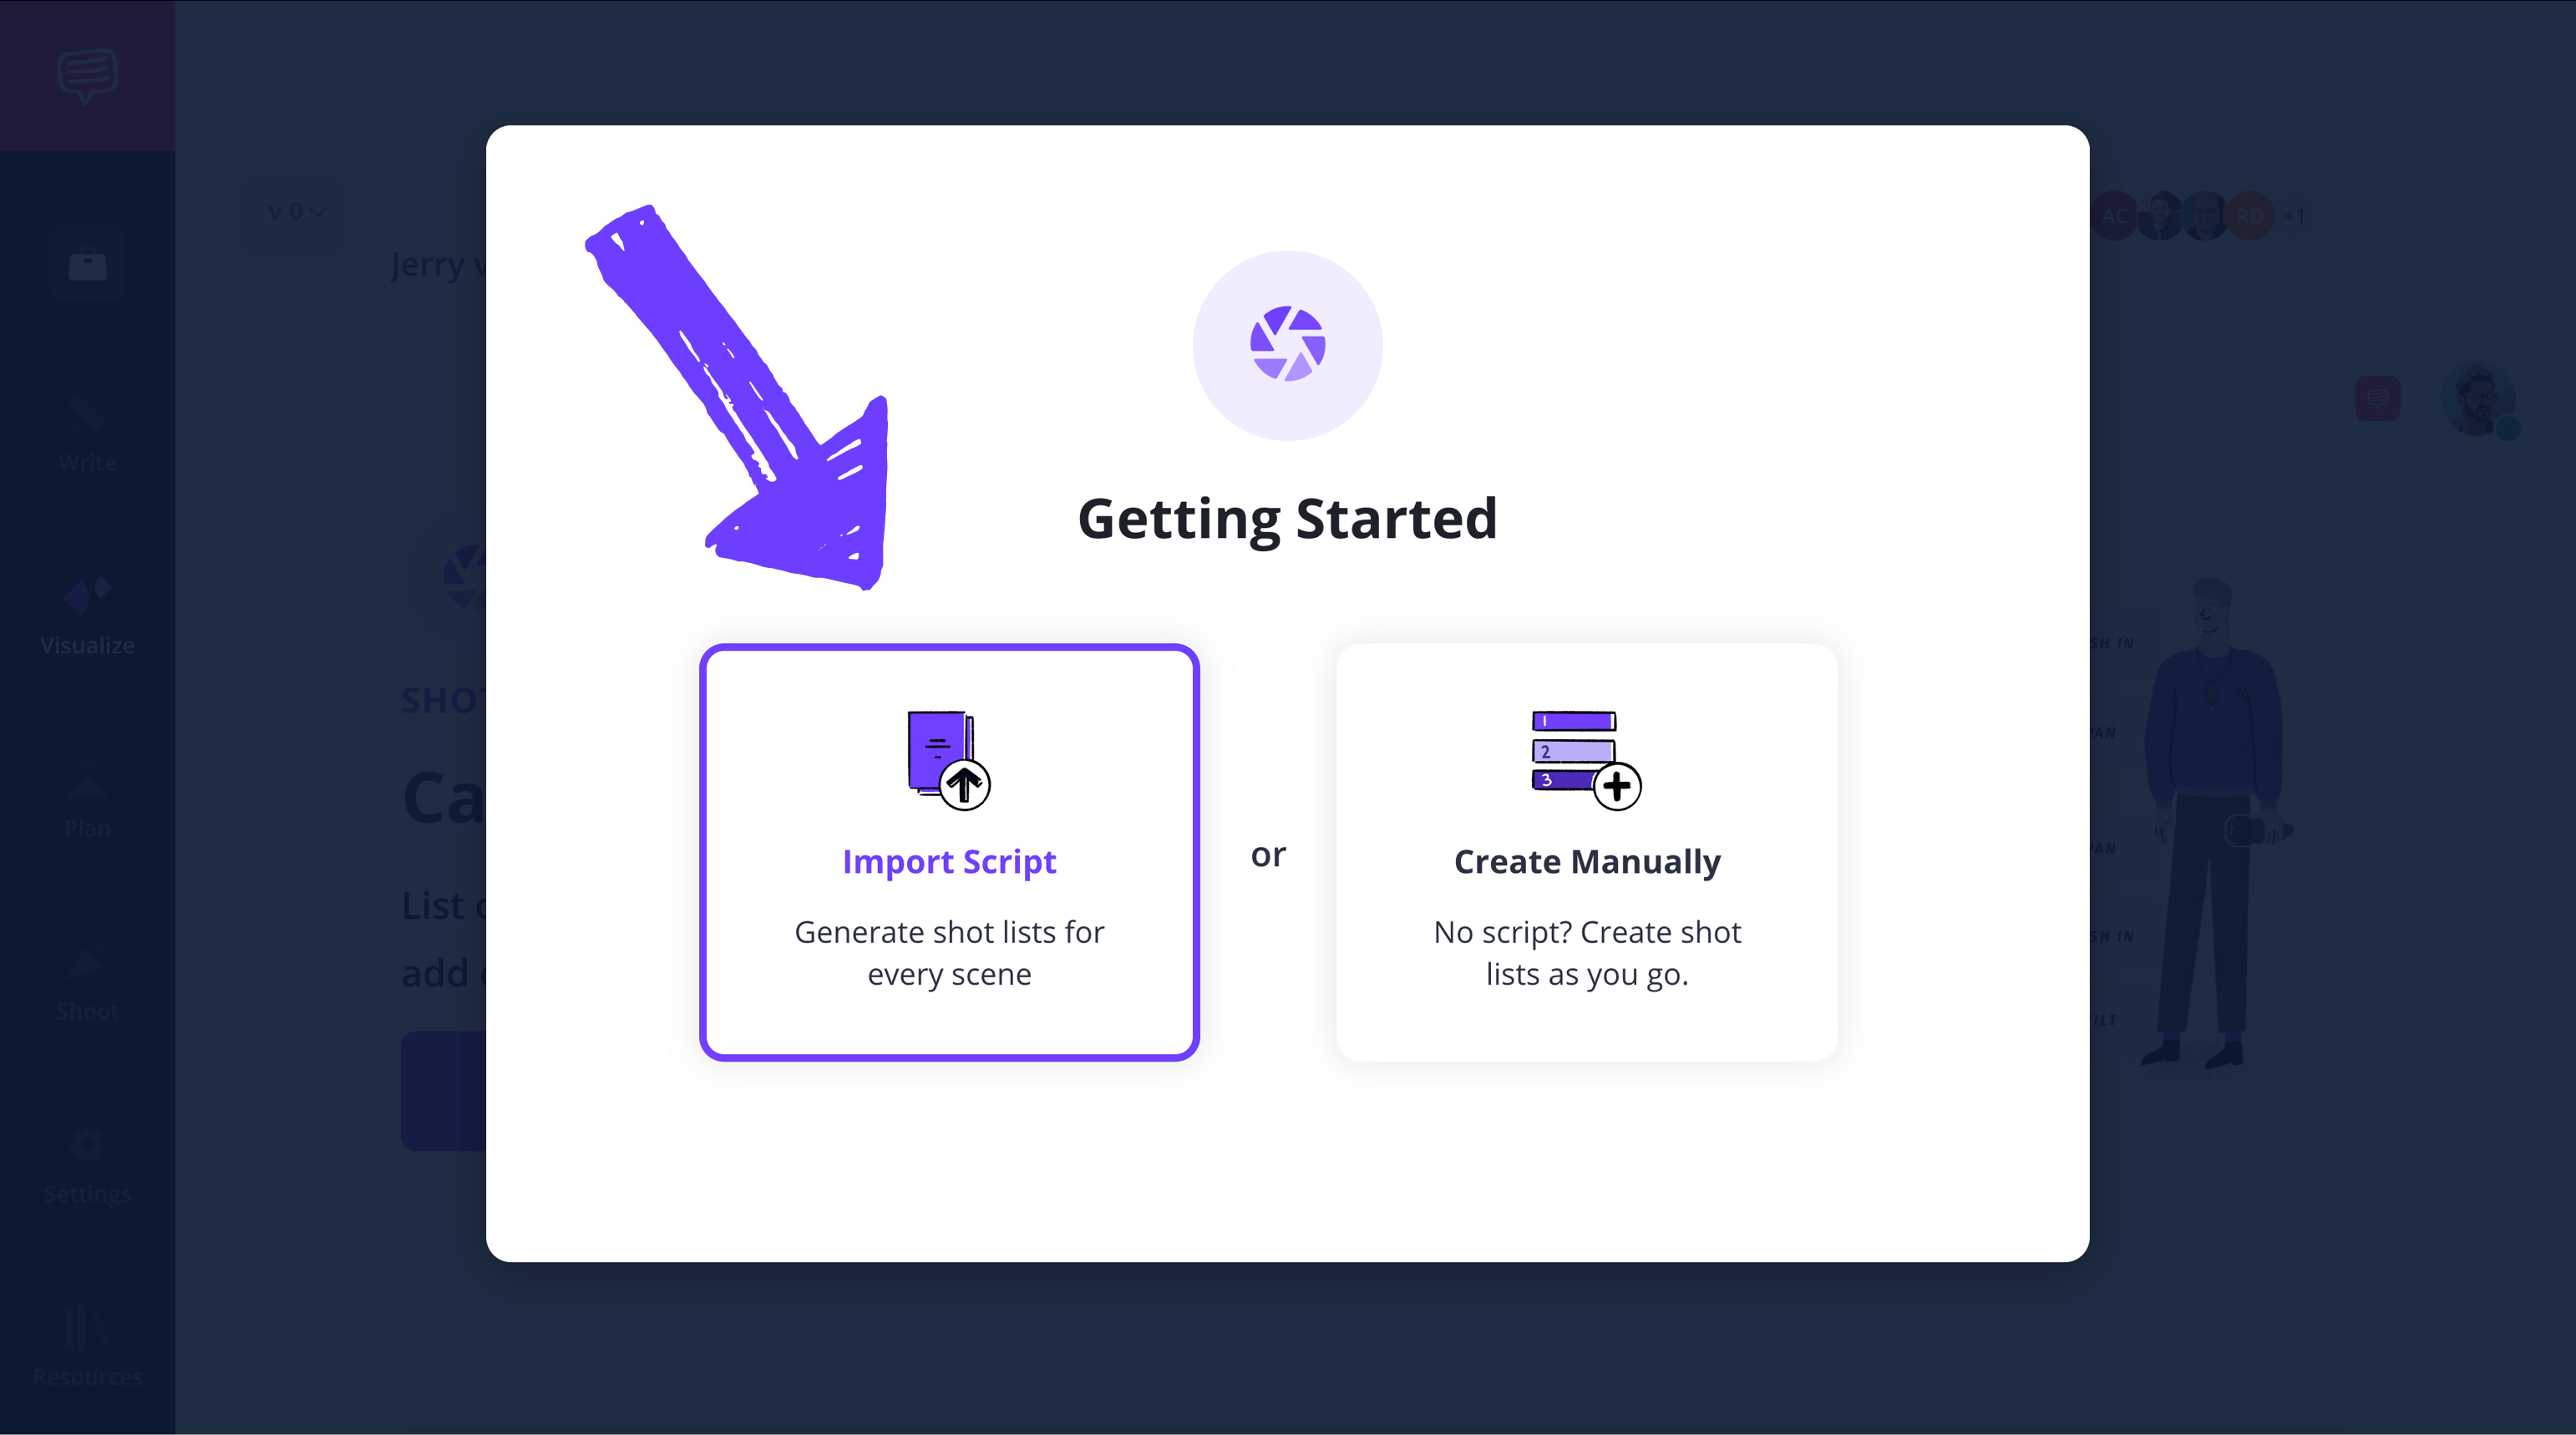
At this point you probably know your team’s screenplay like the back of your hand. Now it’s time to import the script so you can seamlessly break down scenes into shots within your shot list template for animation. After starting a new project in StudioBinder and navigating to the shot lists section, select import script to get started (or you can create a new shot list manually if you don’t have a script ready yet).
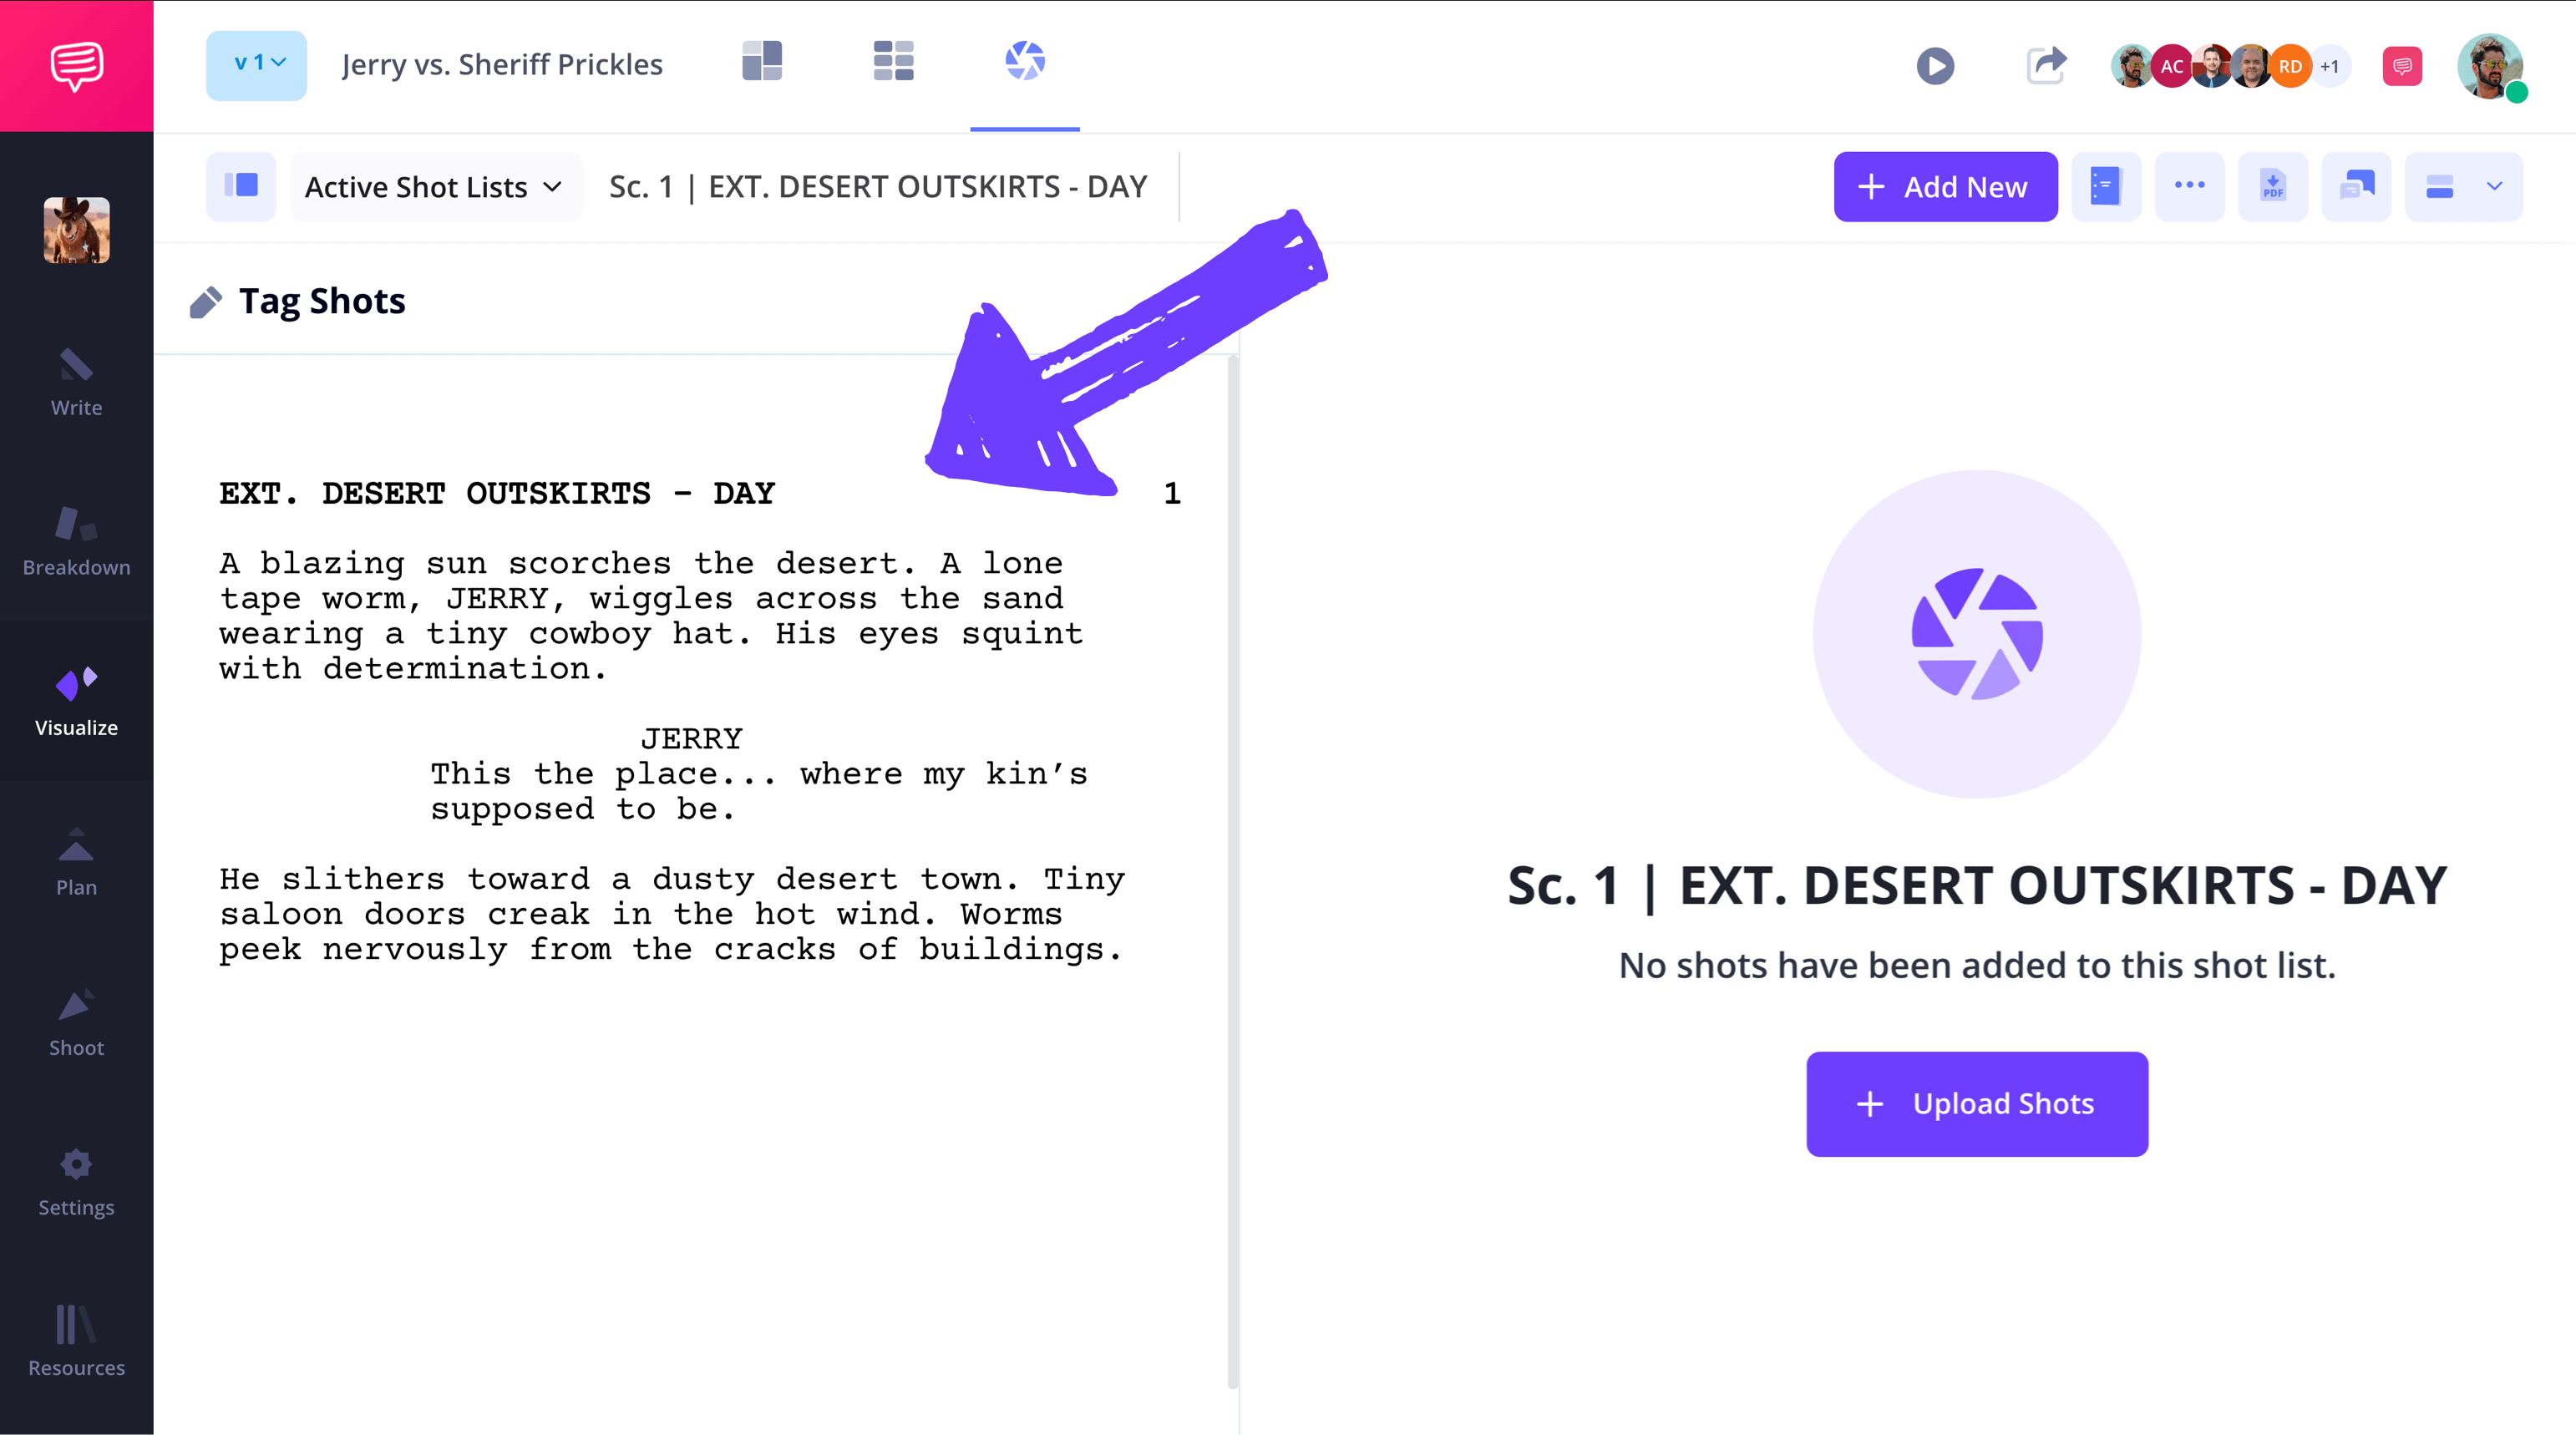
Once your script is imported, you can click preview scene at the top right to view your script side-by-side with your shot list. Here, you can select lines from the script and automatically turn them into shot list descriptions. For instance, if the script sets the mood for a setting, you’ll want to insert that description into the shot list so the animators know what tone to aim for.
Step 2
2. Consider the Shots
In animation, camera shots may not require physical set ups, but as you know, shot angle choices are still pivotal in communicating the core emotions and ideas behind a scene, which is why ensuring your team has a well-organized hub for shot options is super important.
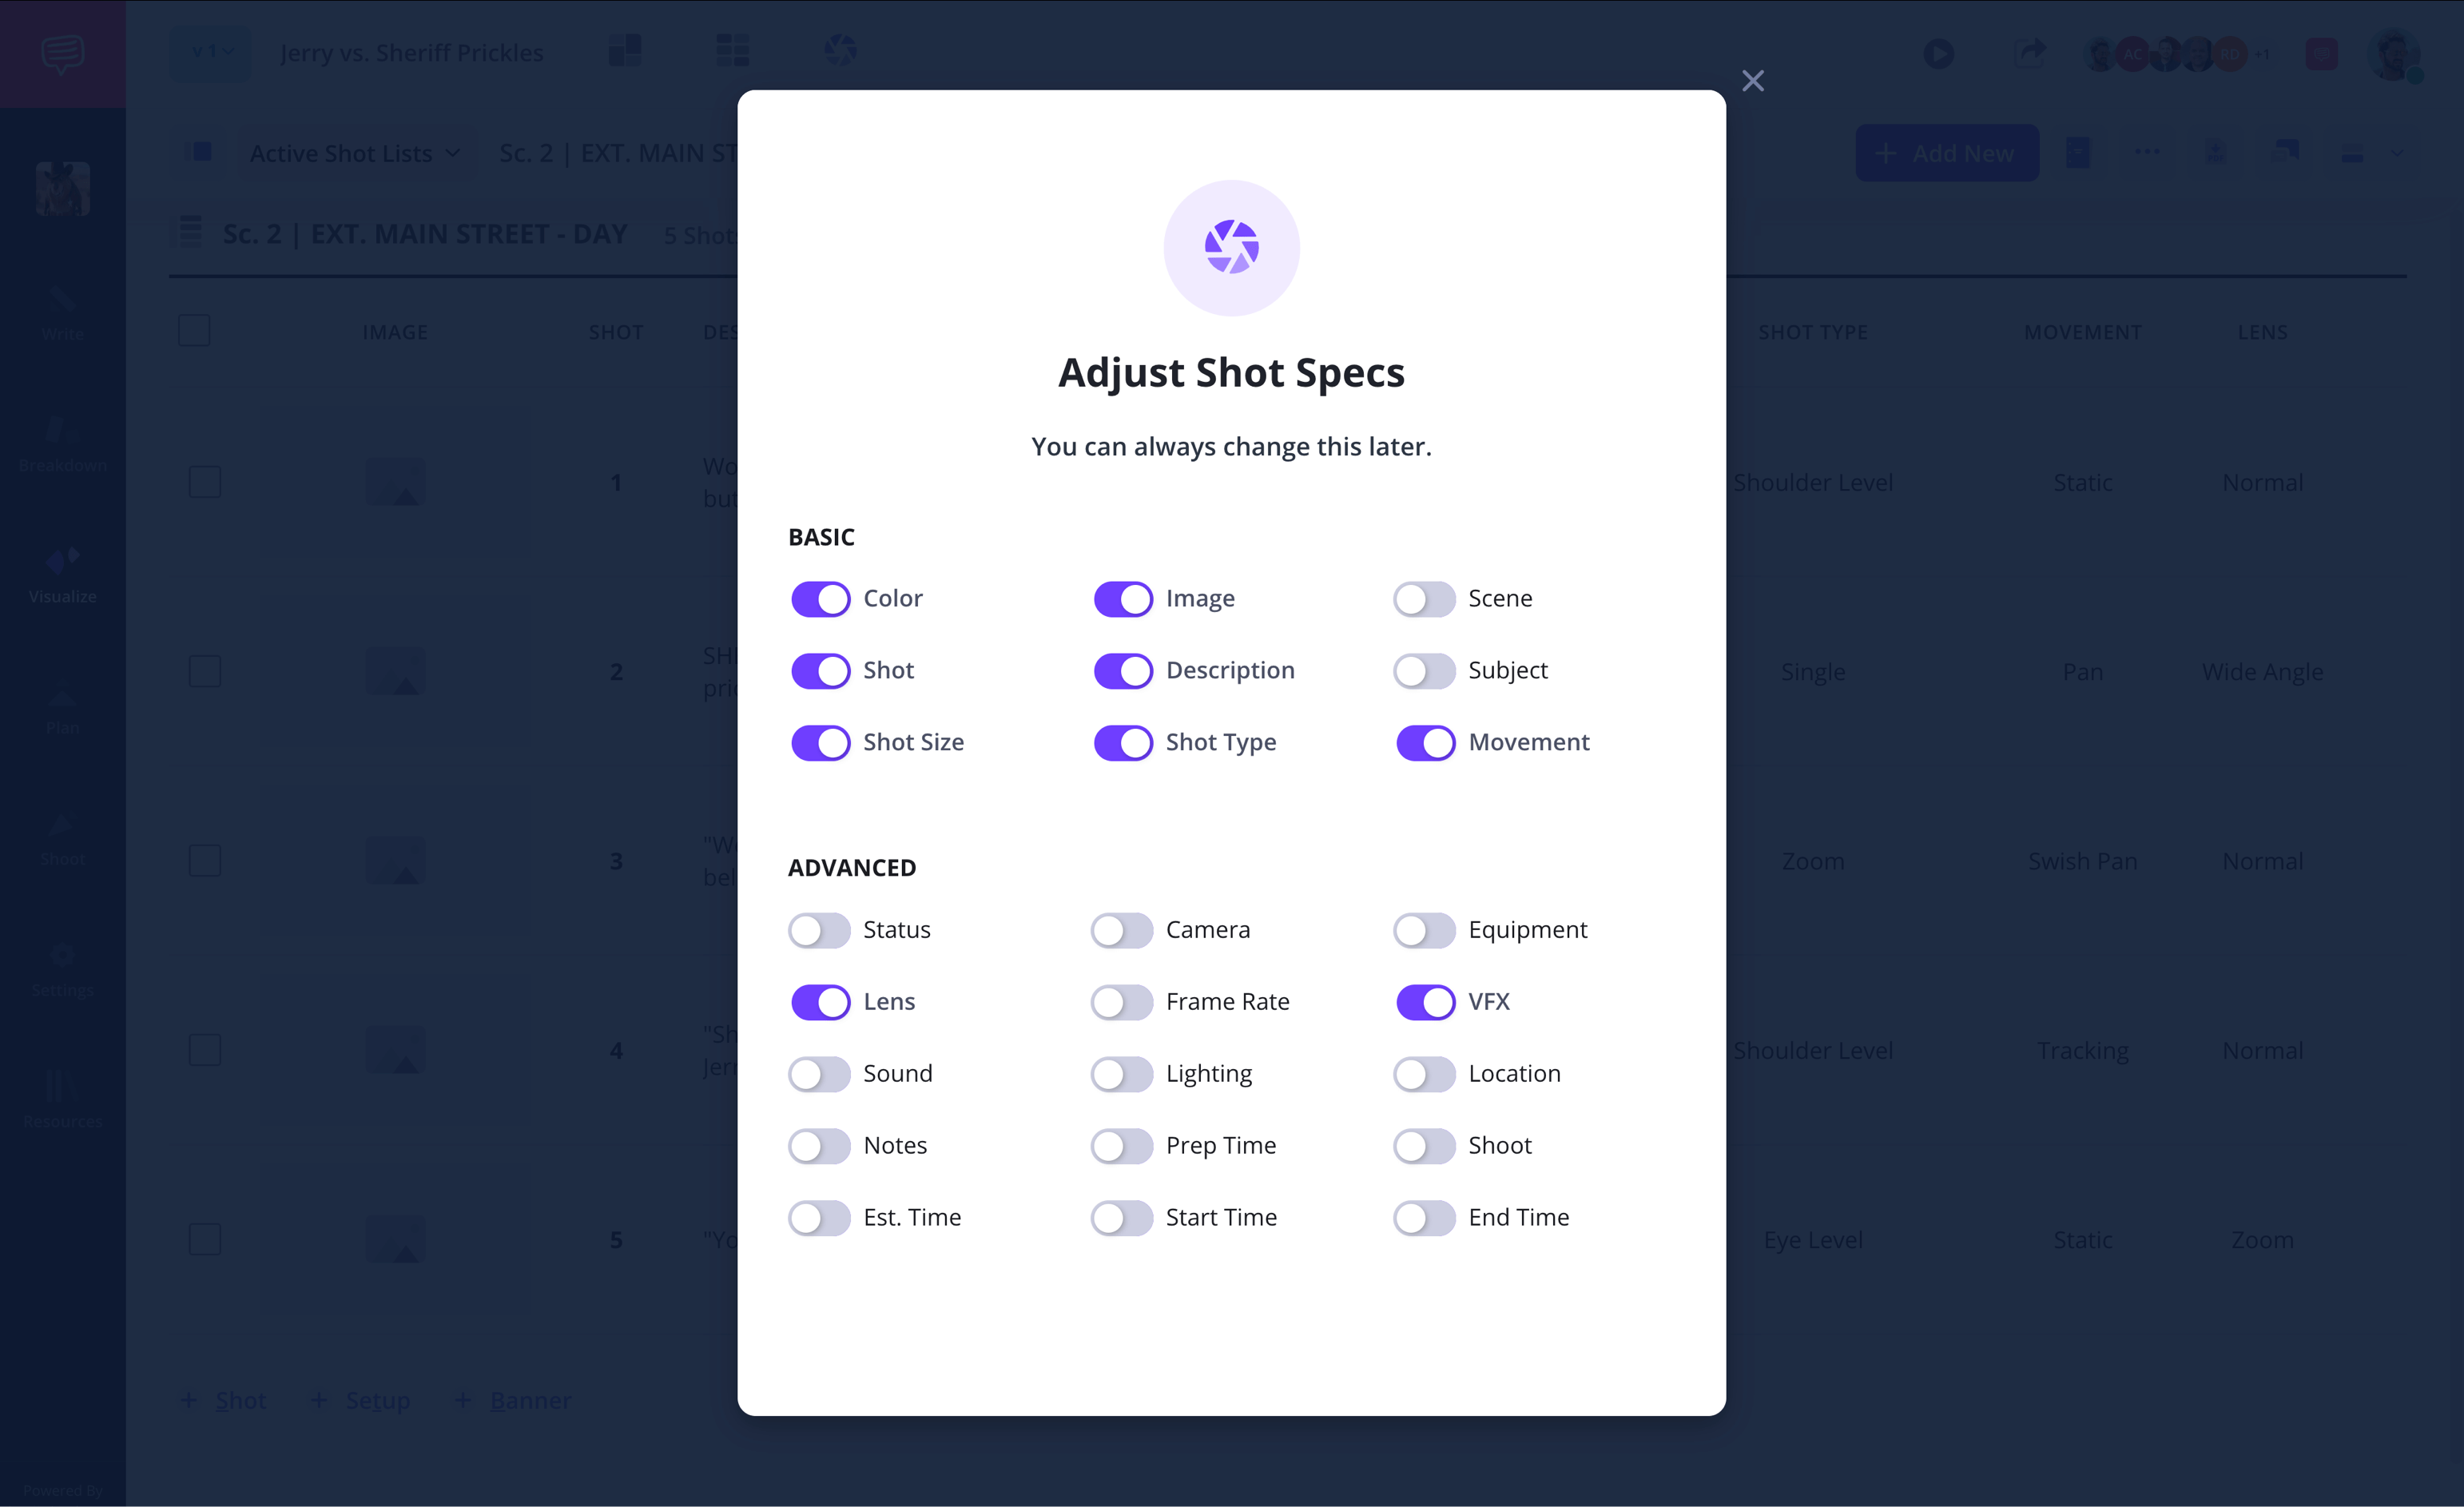
Experiment with the various camera angles, frame rates and VFX options StudioBinder offers by clicking on any of the shot options in each column.
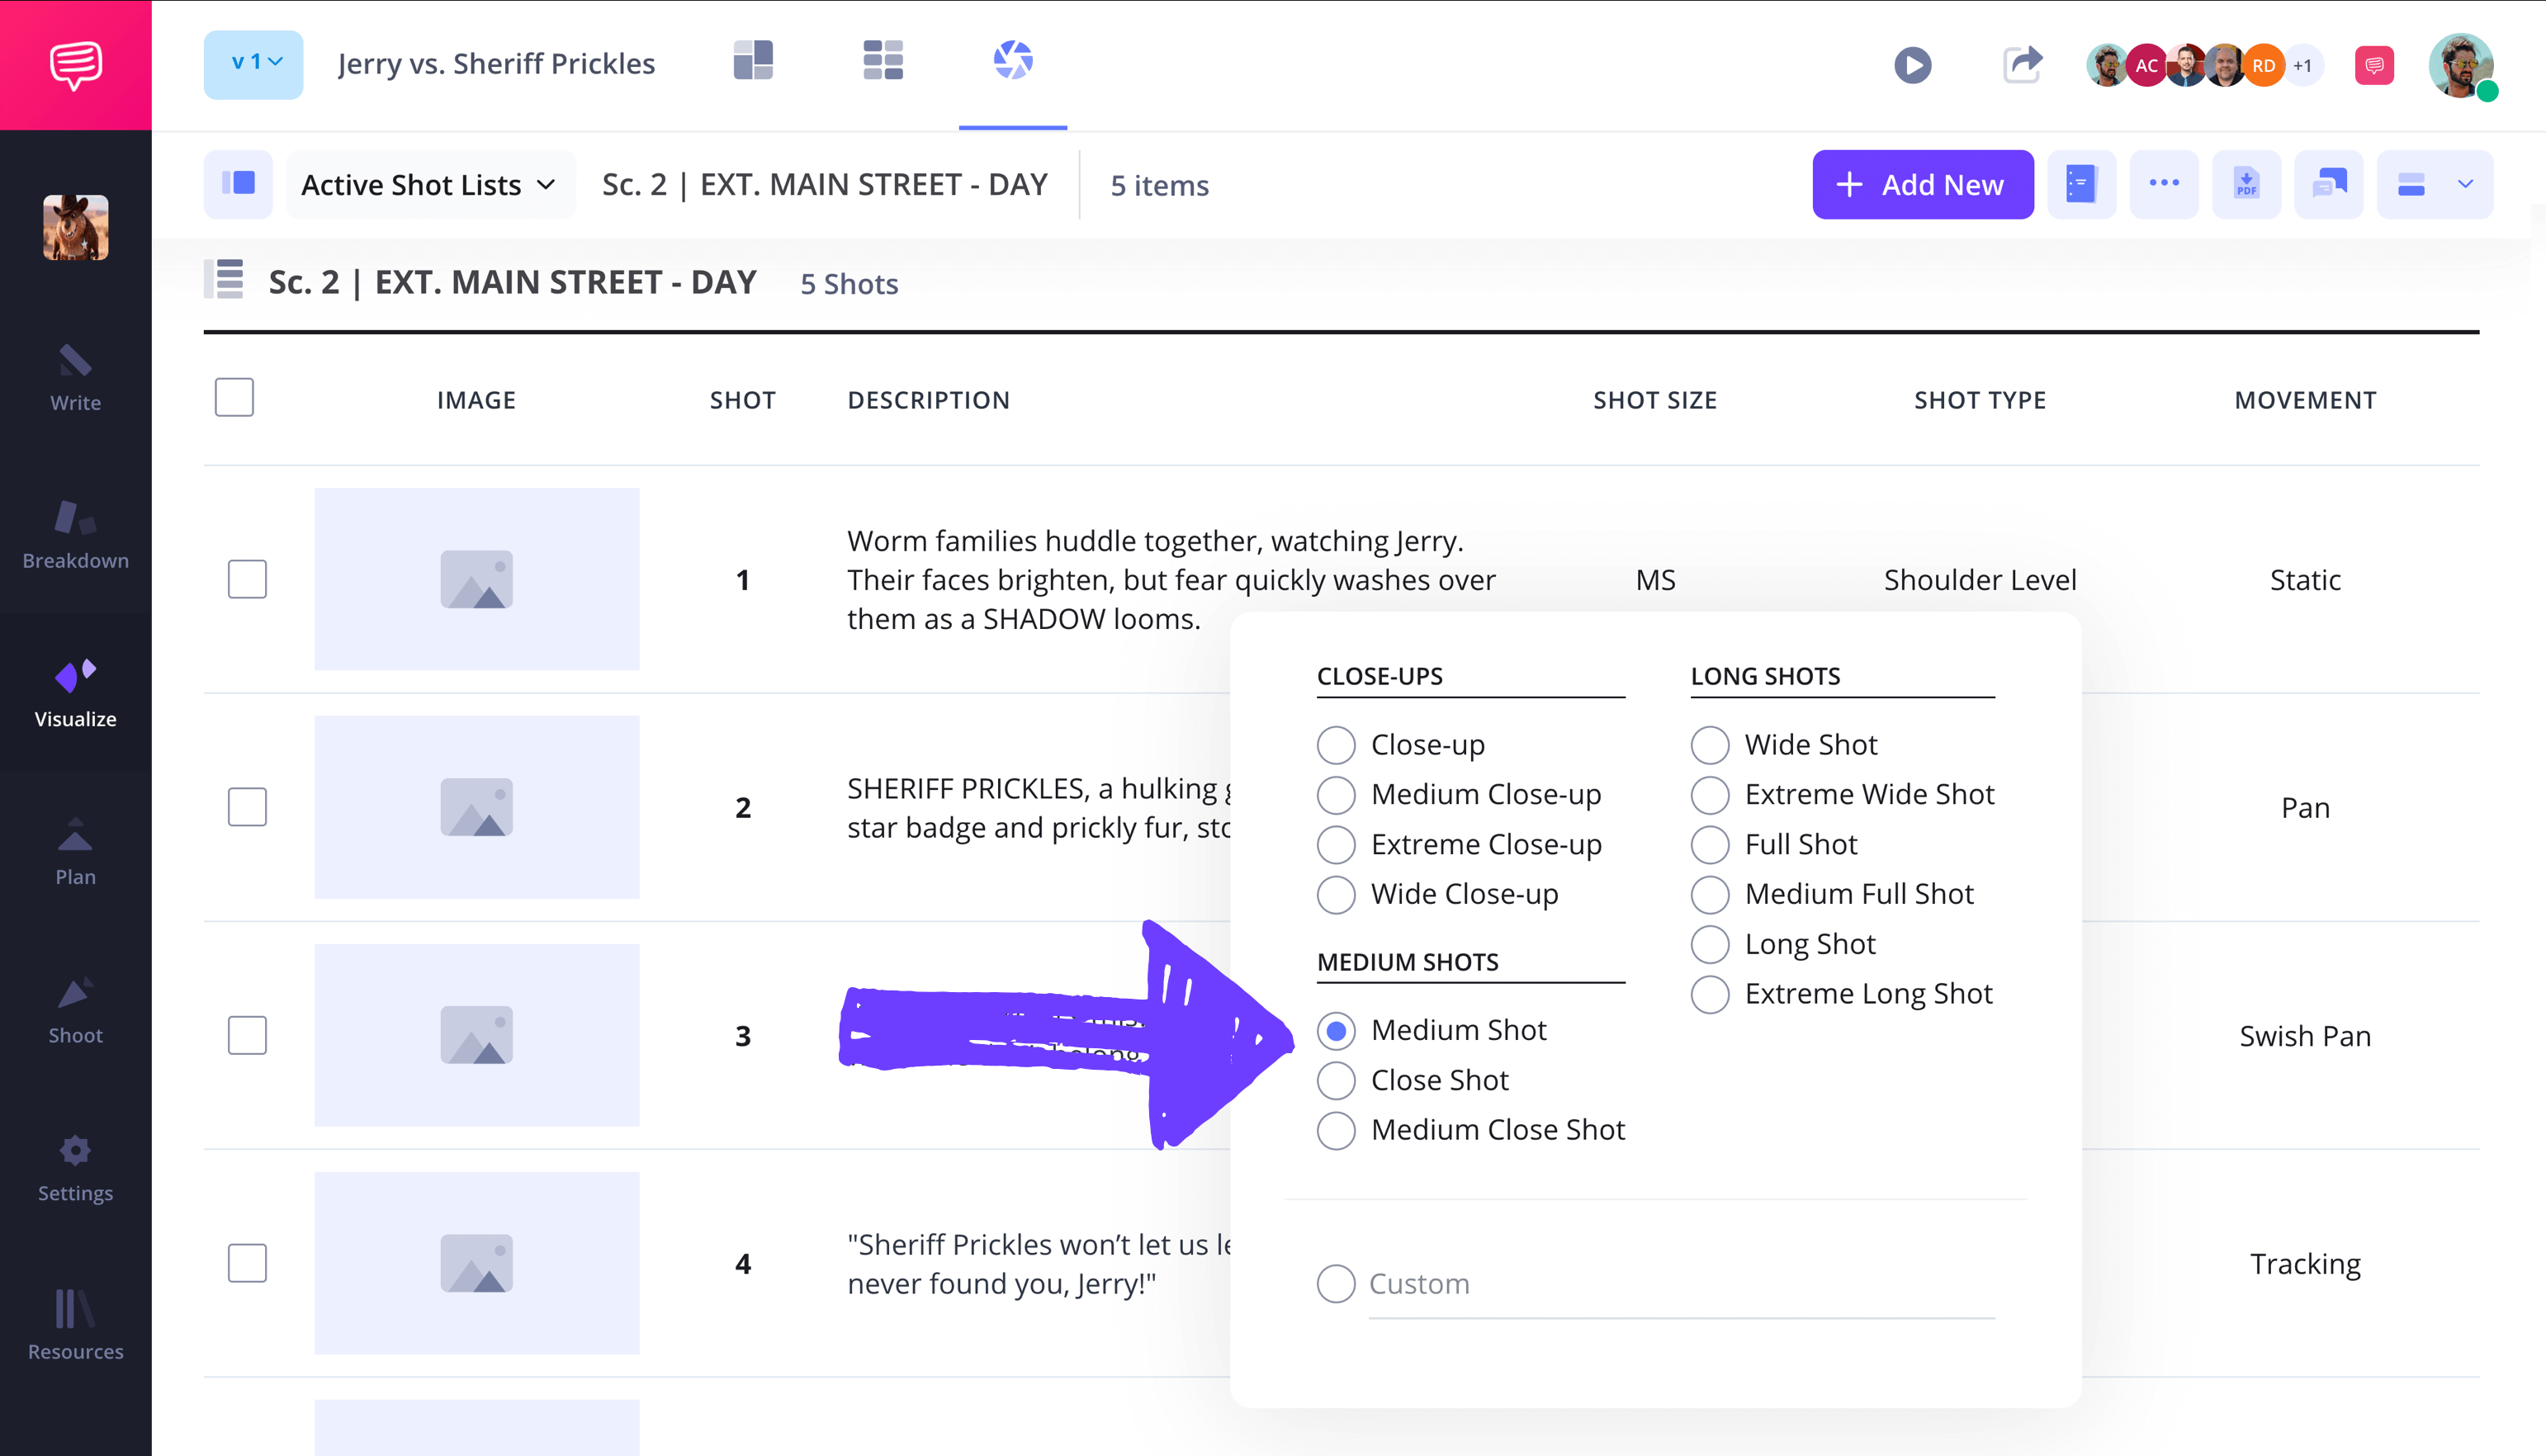
To remove or add more shot options to your columns, go to the settings tab on the top right and select customize columns. You can then select or deselect shot options from your shot list as needed.
Step 3
3. Include images
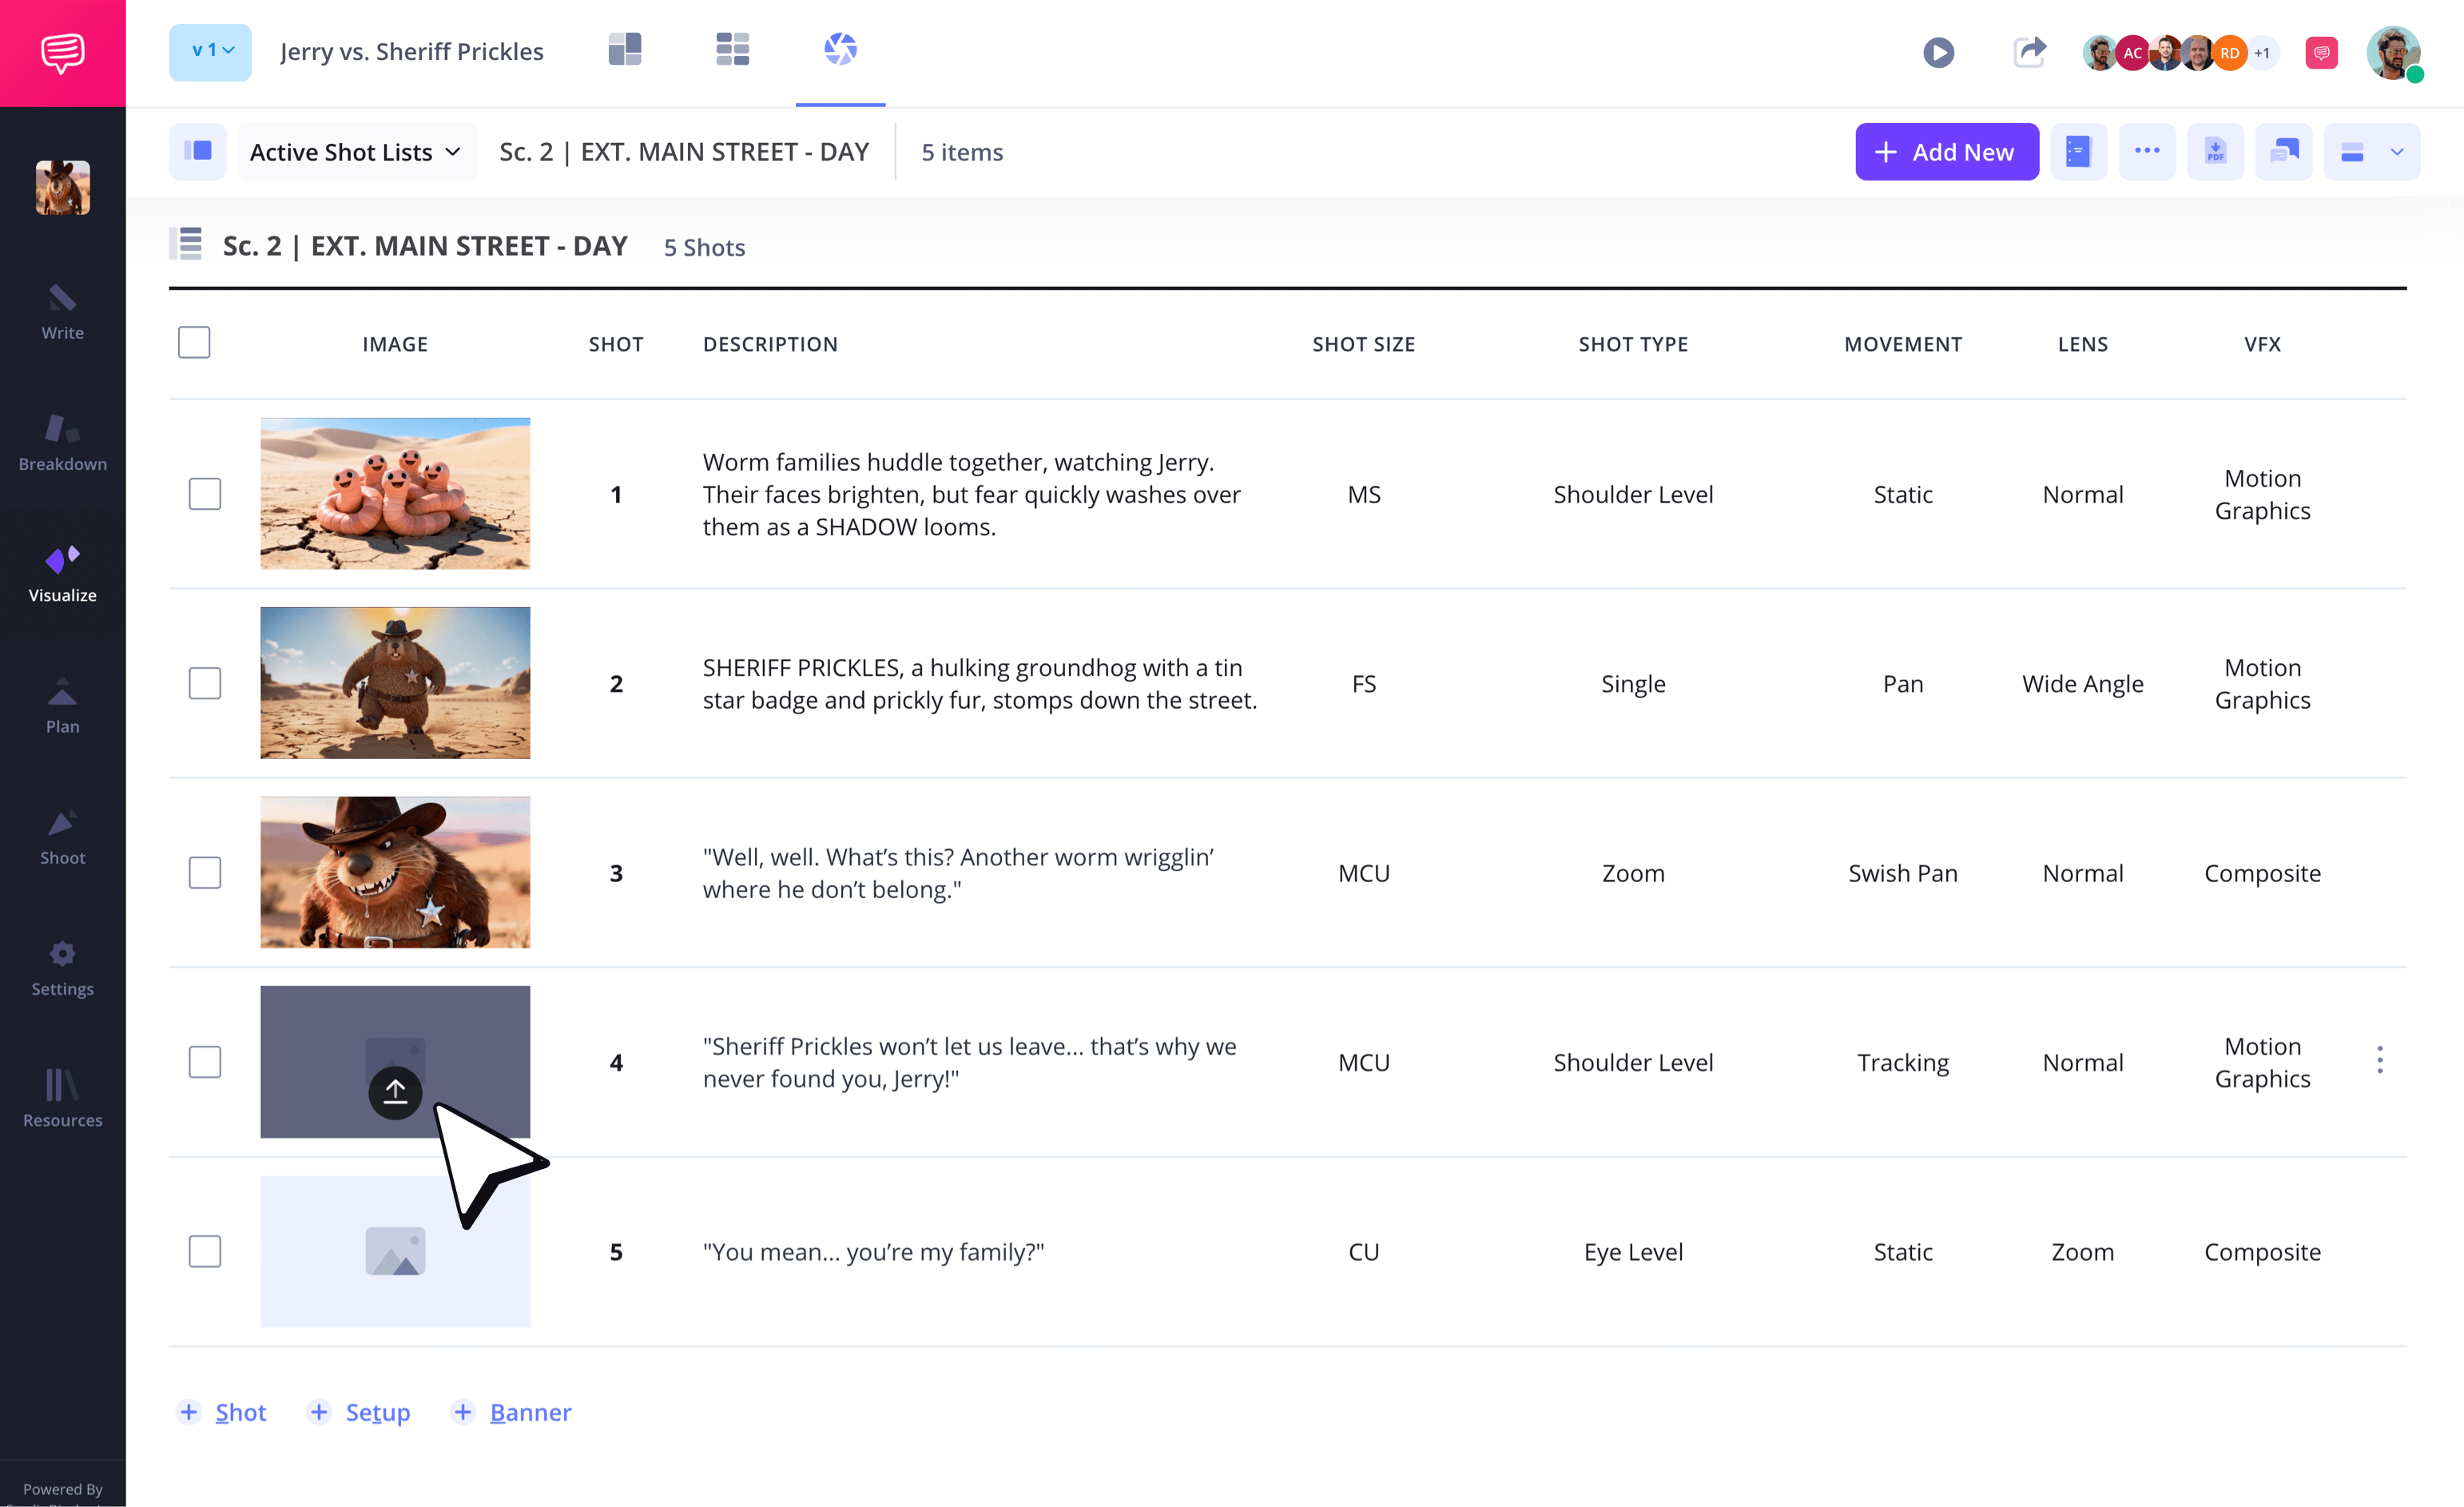
Now it’s time to populate your animation shot list template with all those beautiful storyboard images and animatics the artists on your team have been working on.
To add images, click the upload image icon on the blank frame of any column. Then you can simply drag and drop an image file, or upload it from your library.
Step 4
4. Group your shot list
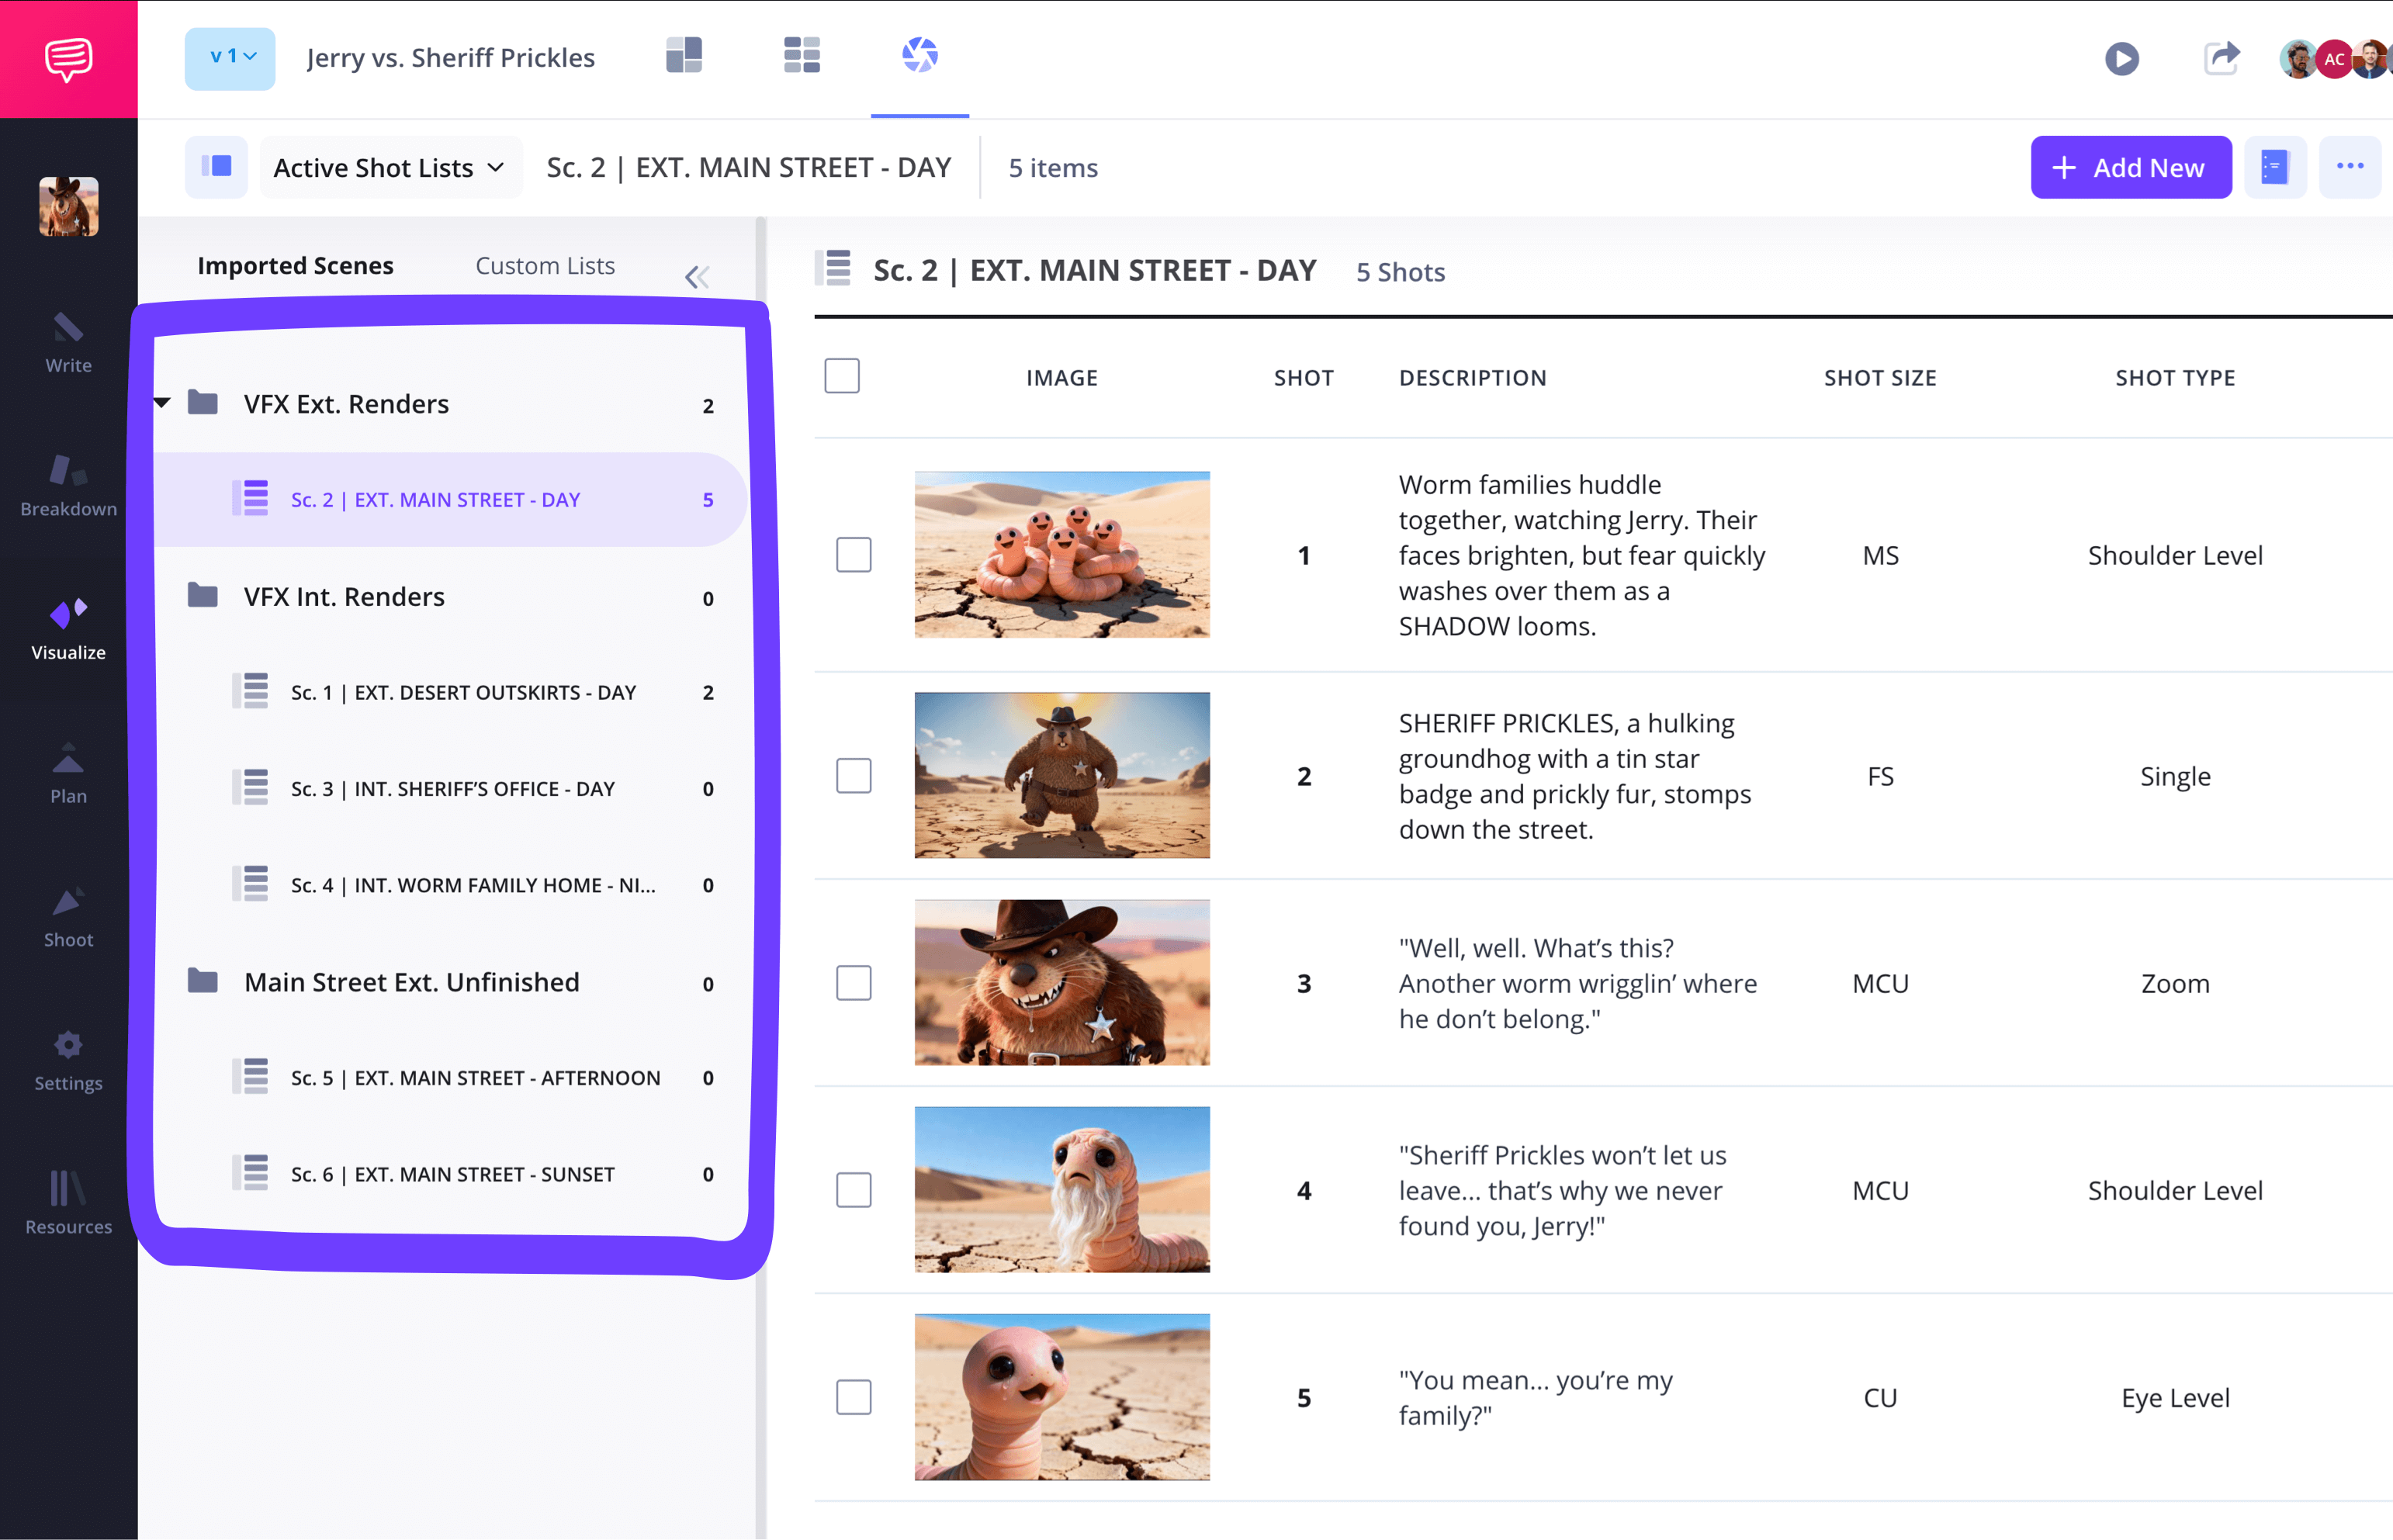
Grouping comes in many shapes and sizes throughout an animation production. Perhaps you want to group all the scenes that feature shots with the same illustrated background, or maybe your team requested a re-rendering of the story’s villain and you need to group all the villain scenes together.
To group your shot list as needed, open the left sidebar and click the options icon on your preferred shot list, then select add group under.
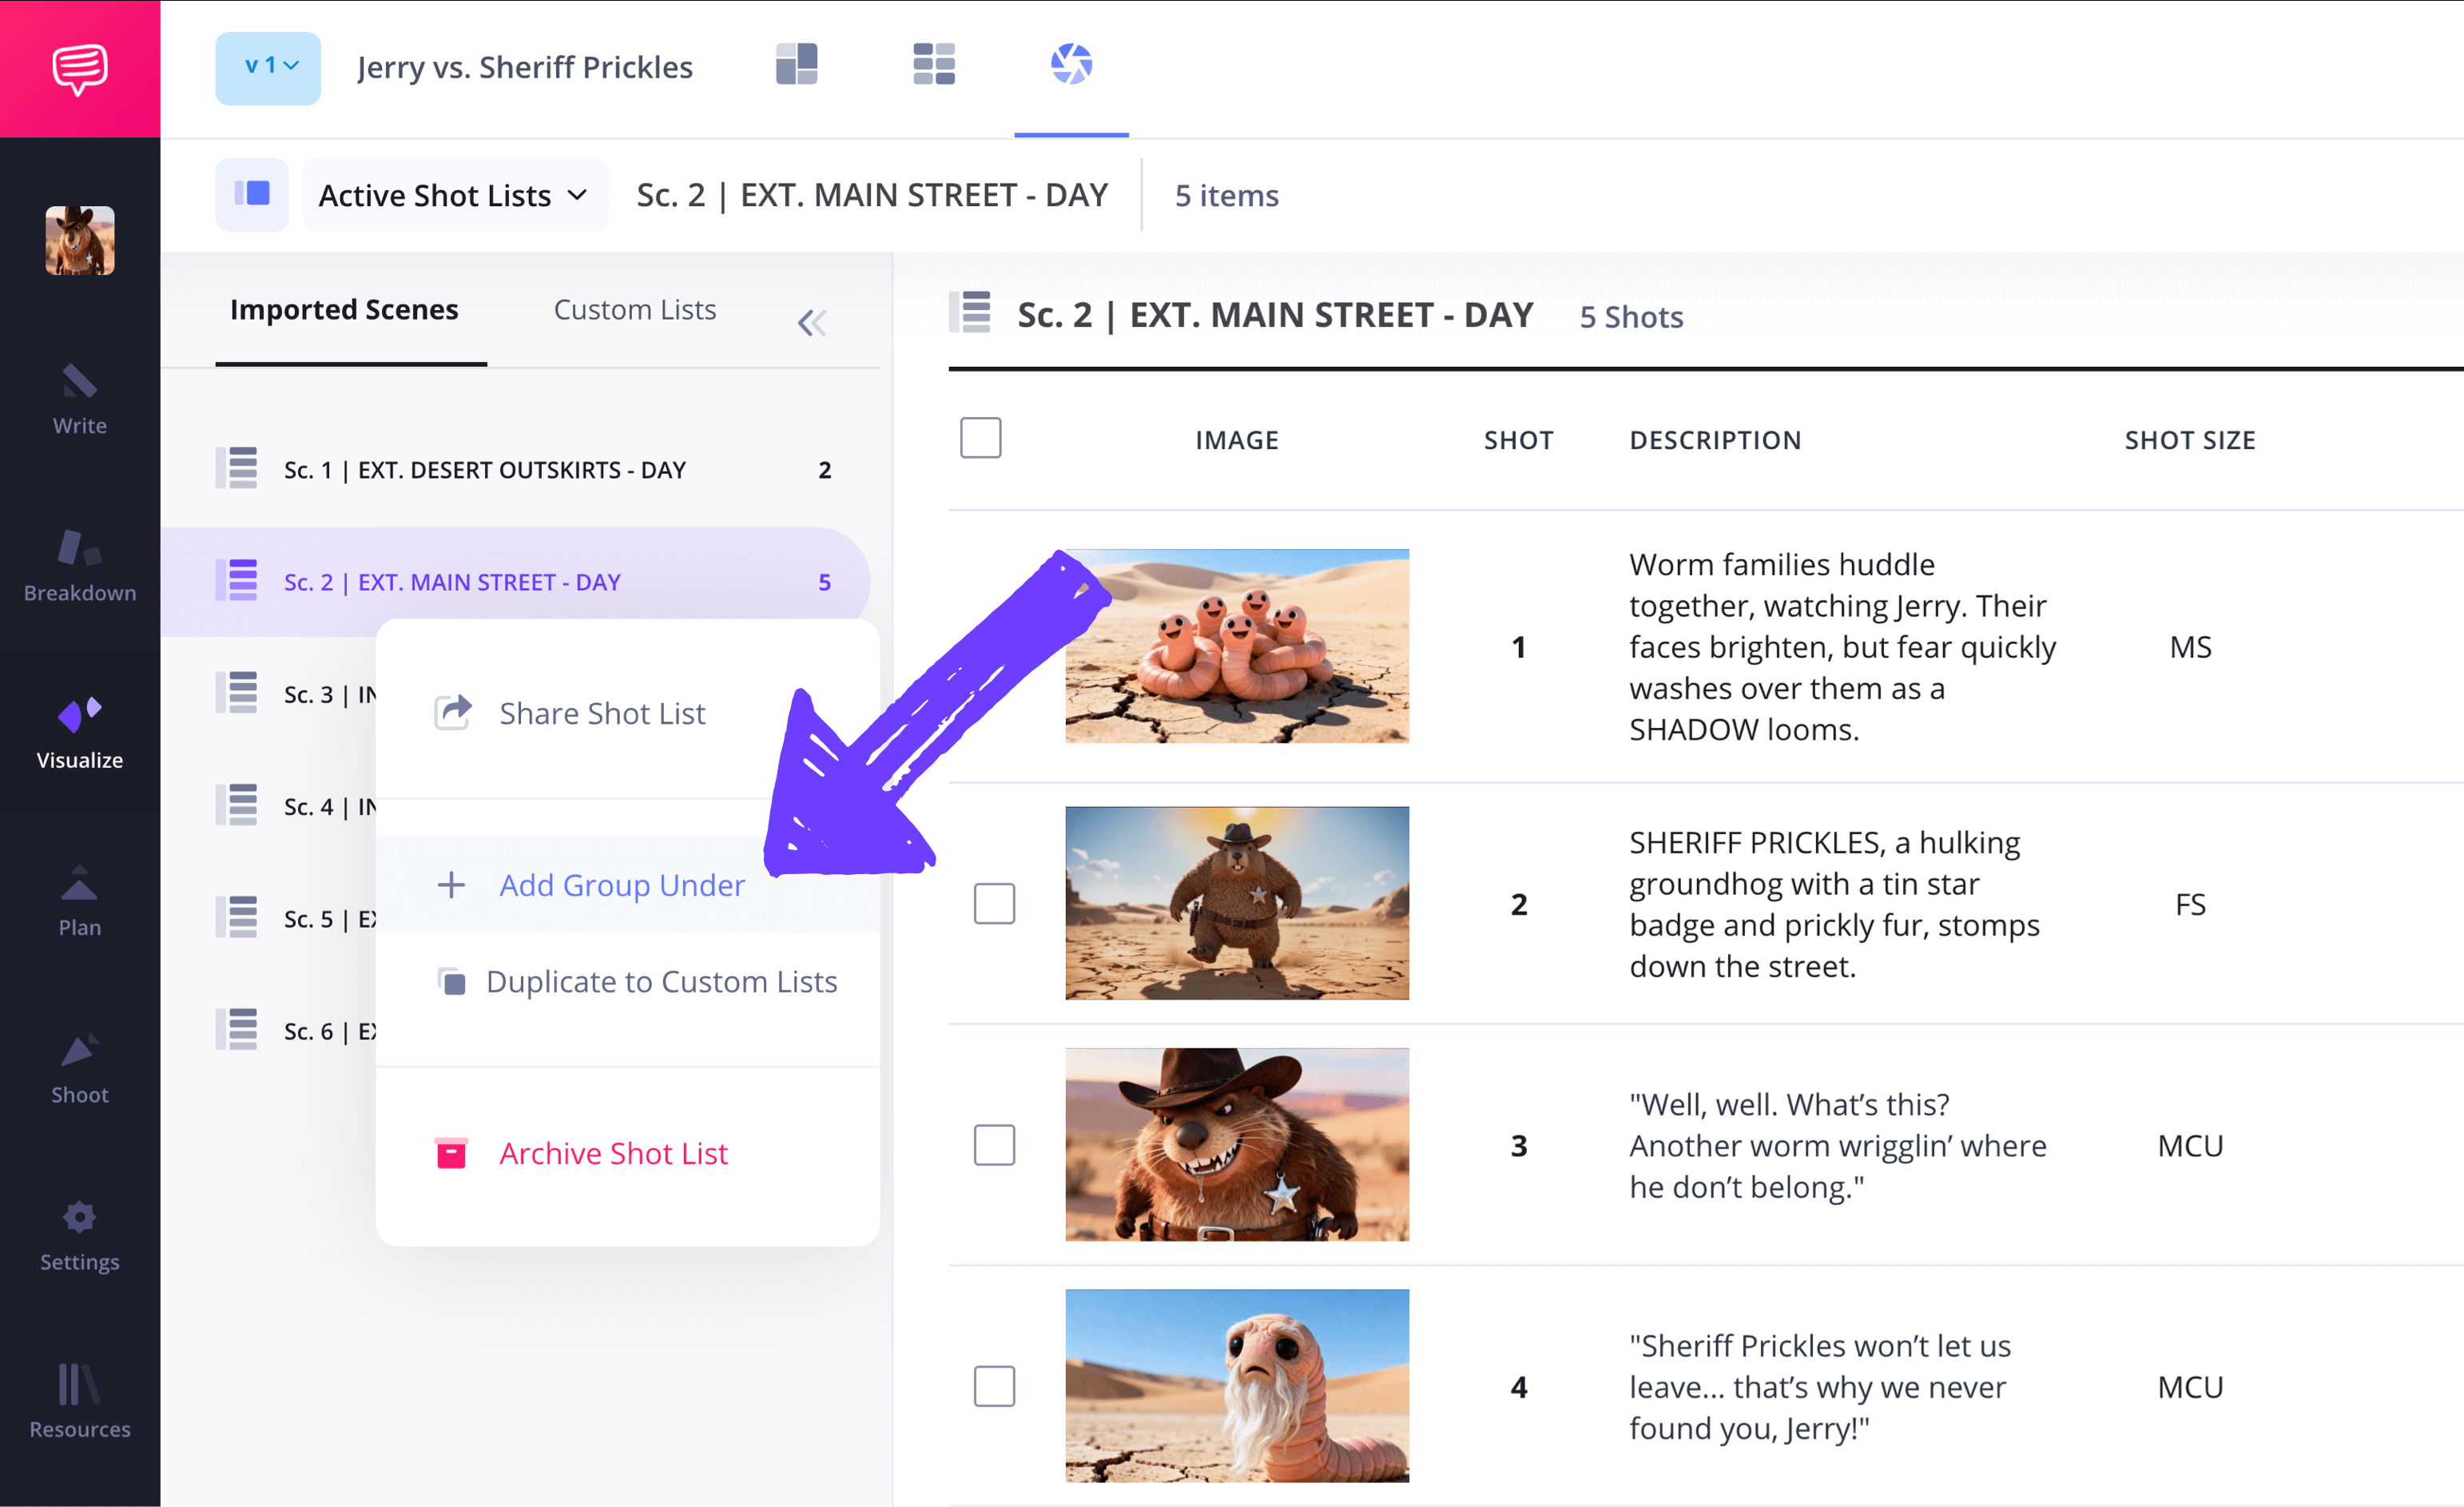
You can easily drag/drop, rename or duplicate groupings to fit your needs throughout the production process.
Step 5
5. Add notes
Communication is key when you’re working with the amount of collaborators required to keep an animation production train rolling. That’s why it’s important to have clear and concise notes written throughout your shot list.
StudioBinder allows easy access to notes for your animation shot list template in the customize columns section. After toggling notes on, you’ll see a notes icon appear in each column.
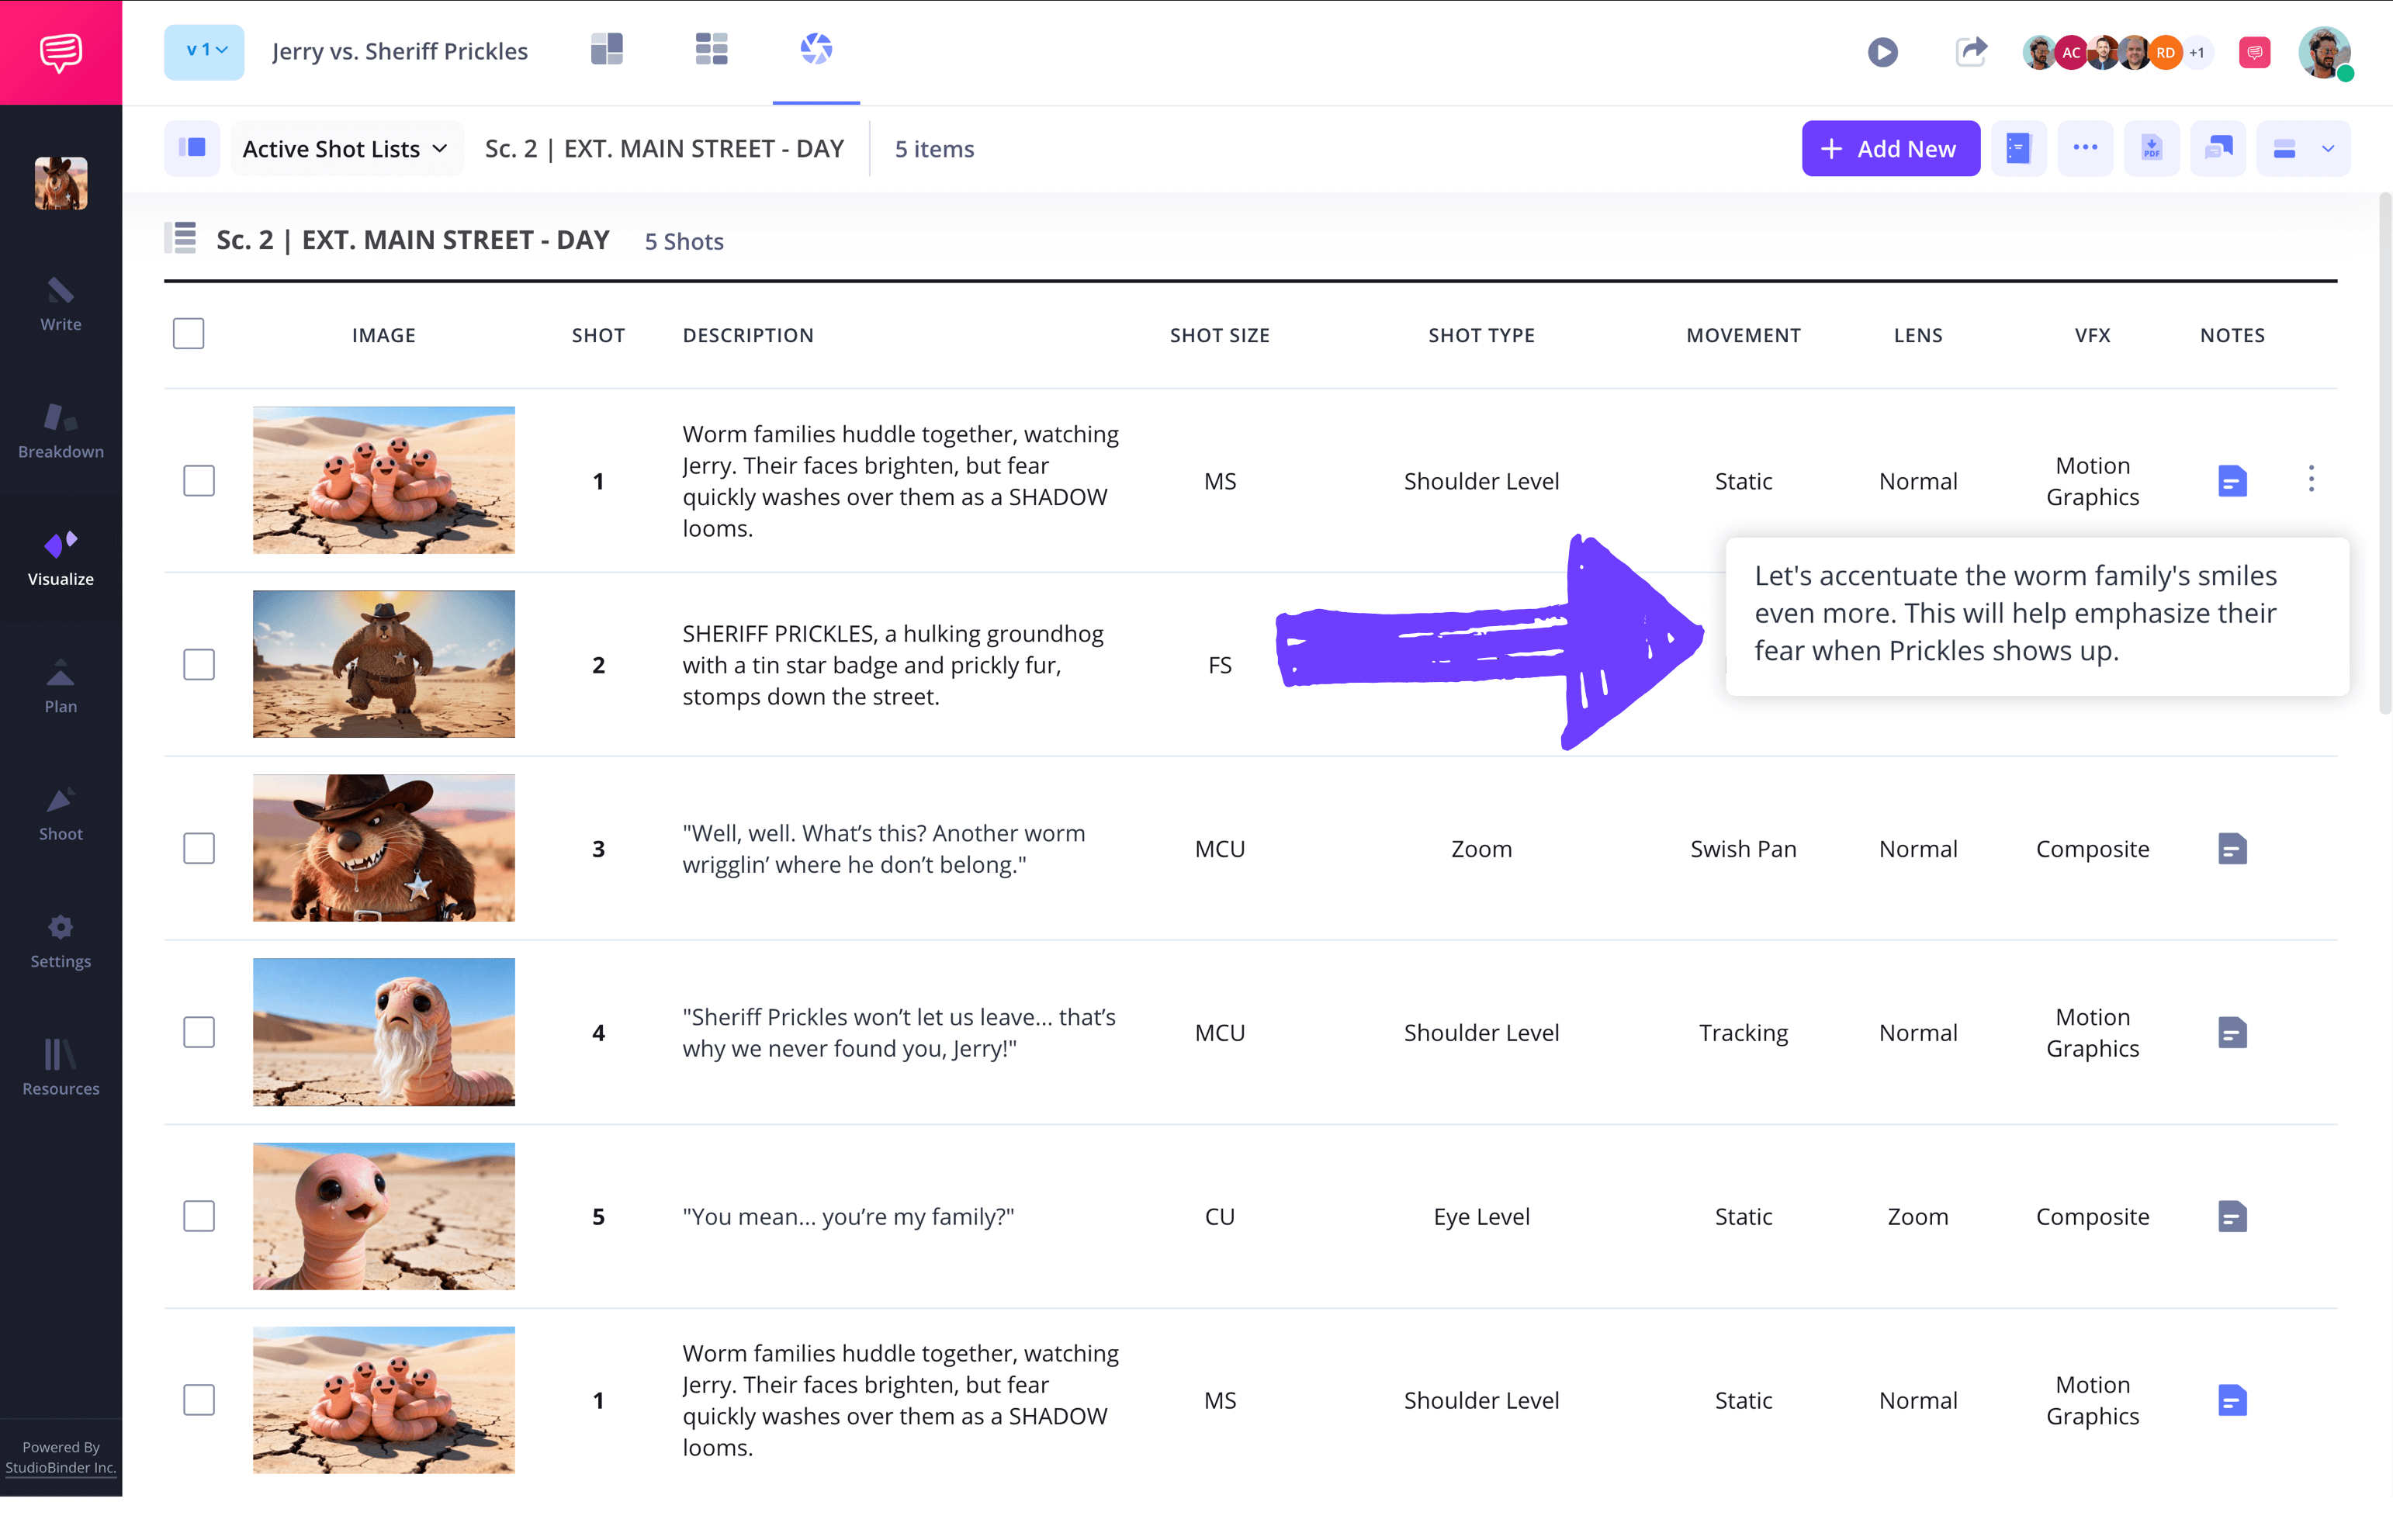
Now you can click on the notes icon and start writing as soon as a thought pops into your head. From here, collaborating departments will see your notes the moment you save them and can write their own responses within each note as well.
Step 6
6. Collaborate with team members
There’s no over-stressing the importance of team collaboration throughout an animation production. So of course, knowing how to use the lasso that will loop everyone into your shot list is vital.
Click the share shot lists page icon at the top to invite collaborators to edit your page and manage team permissions.
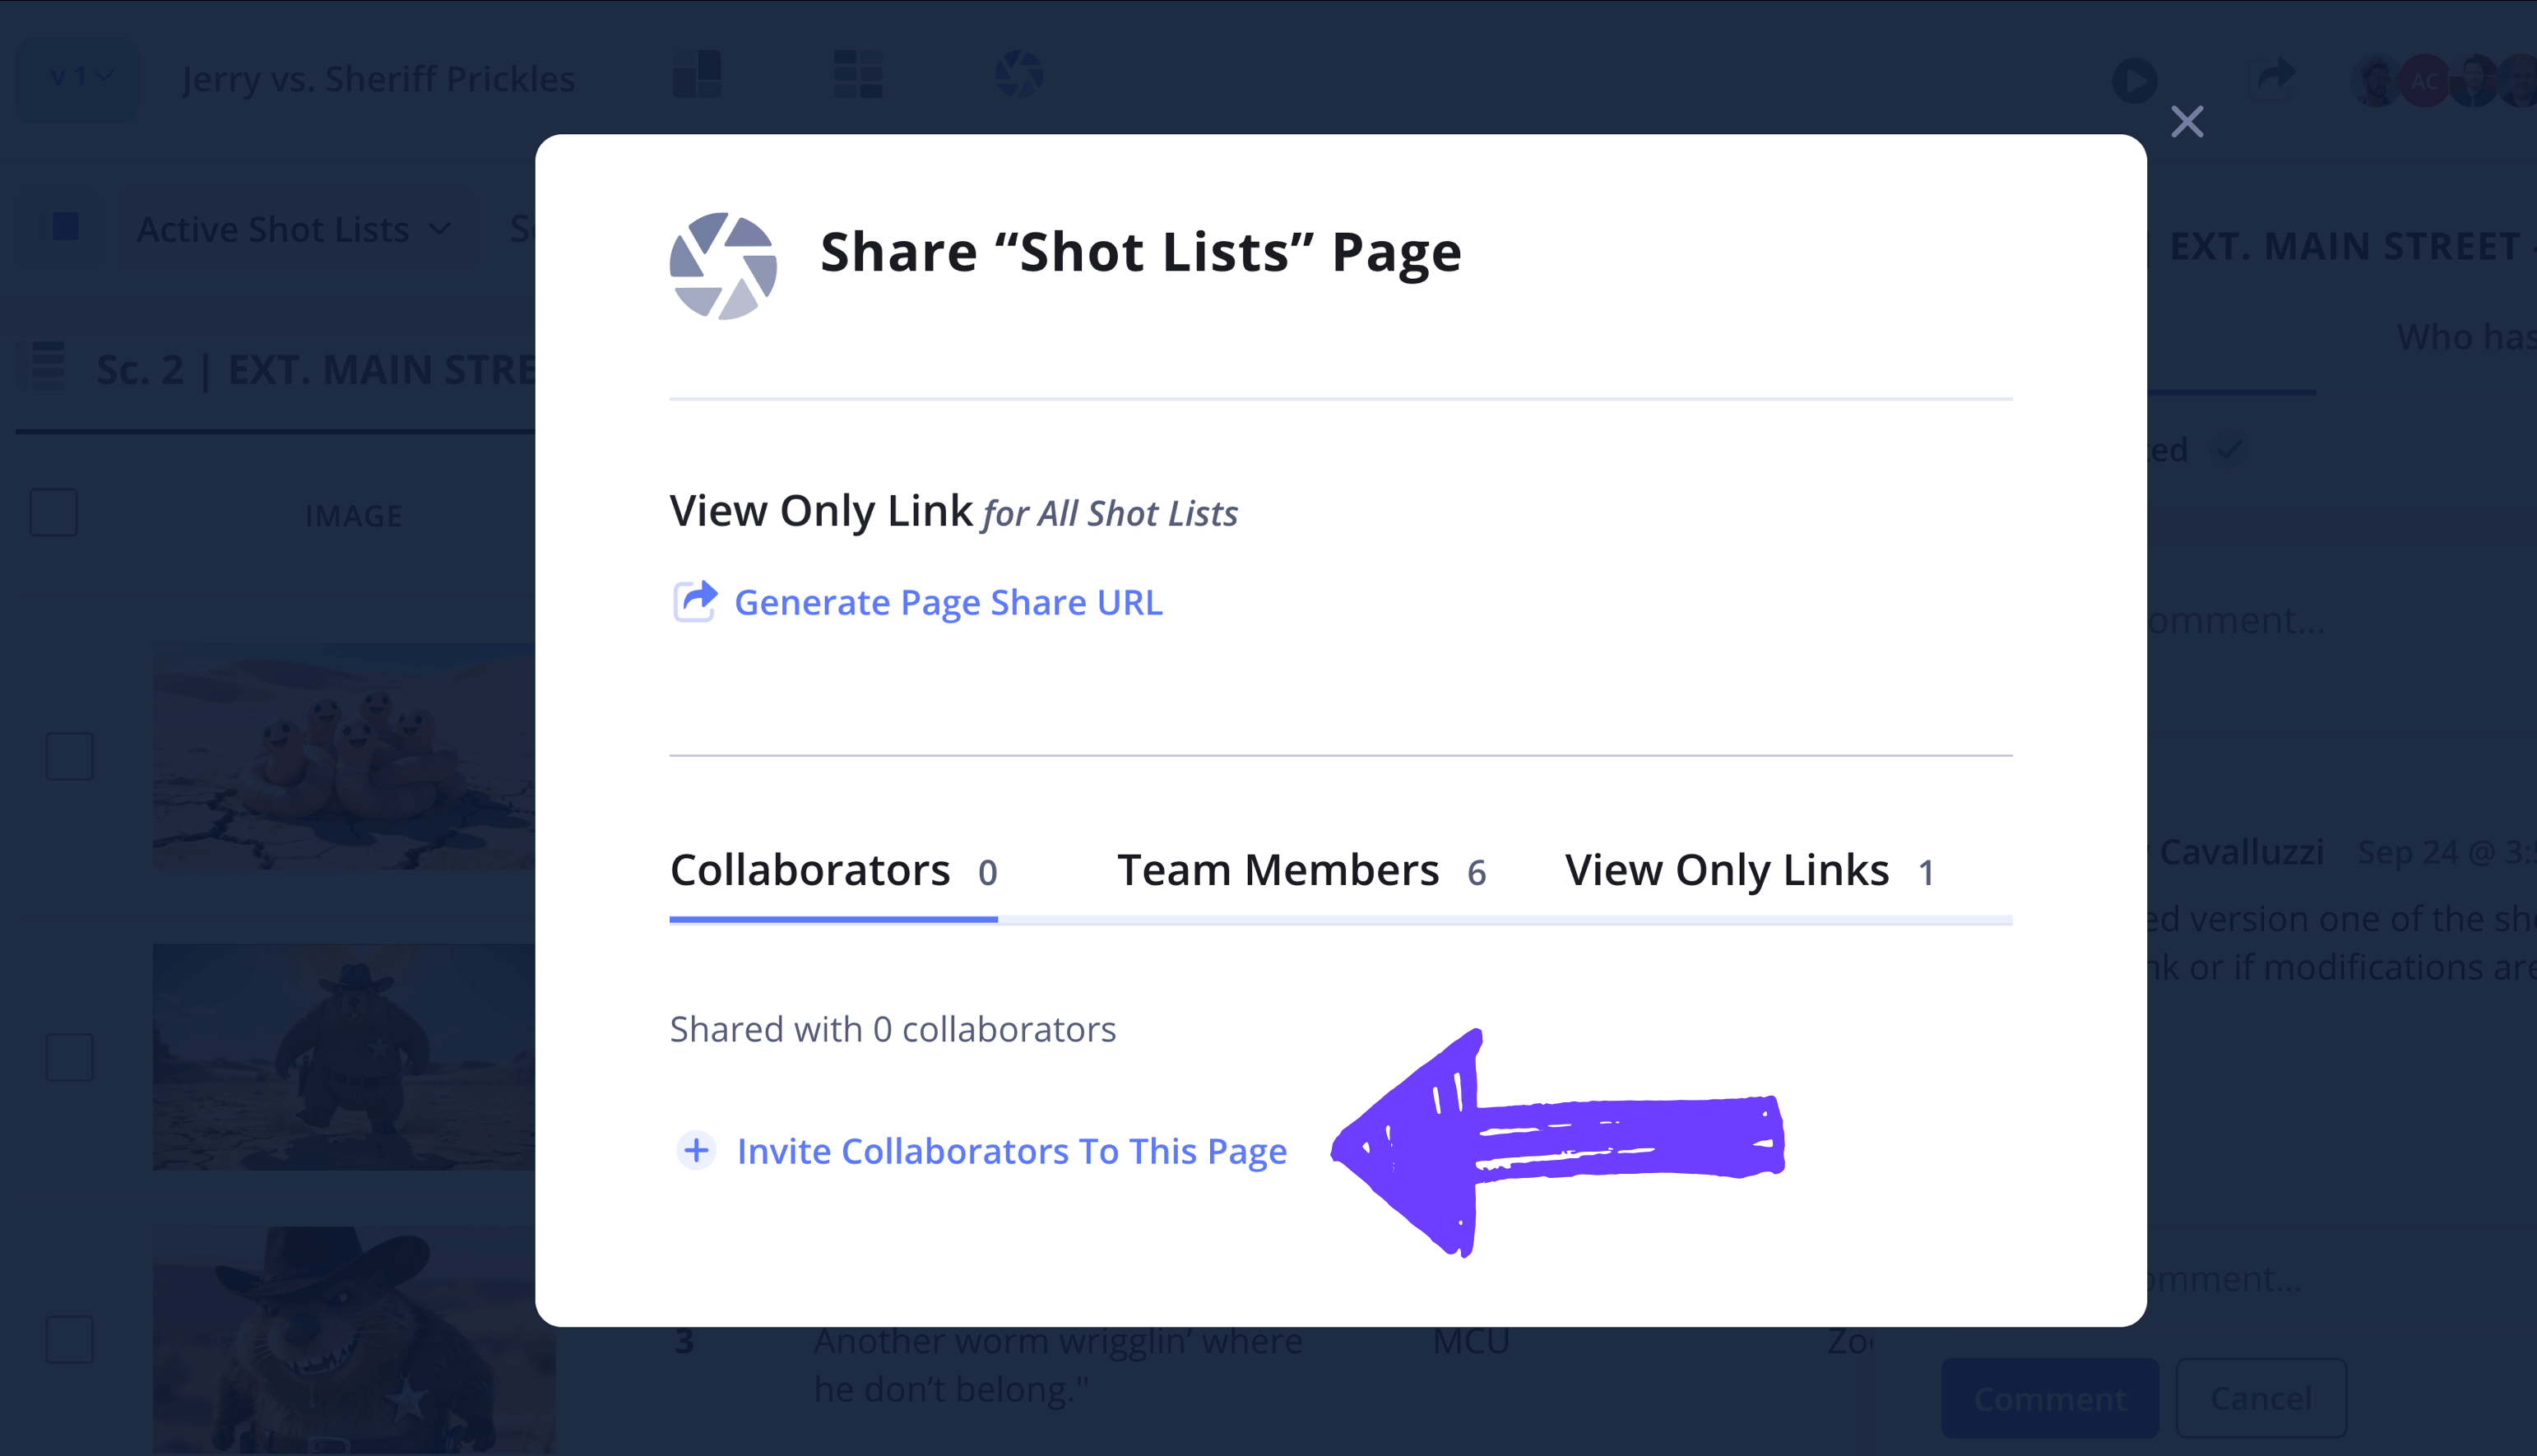
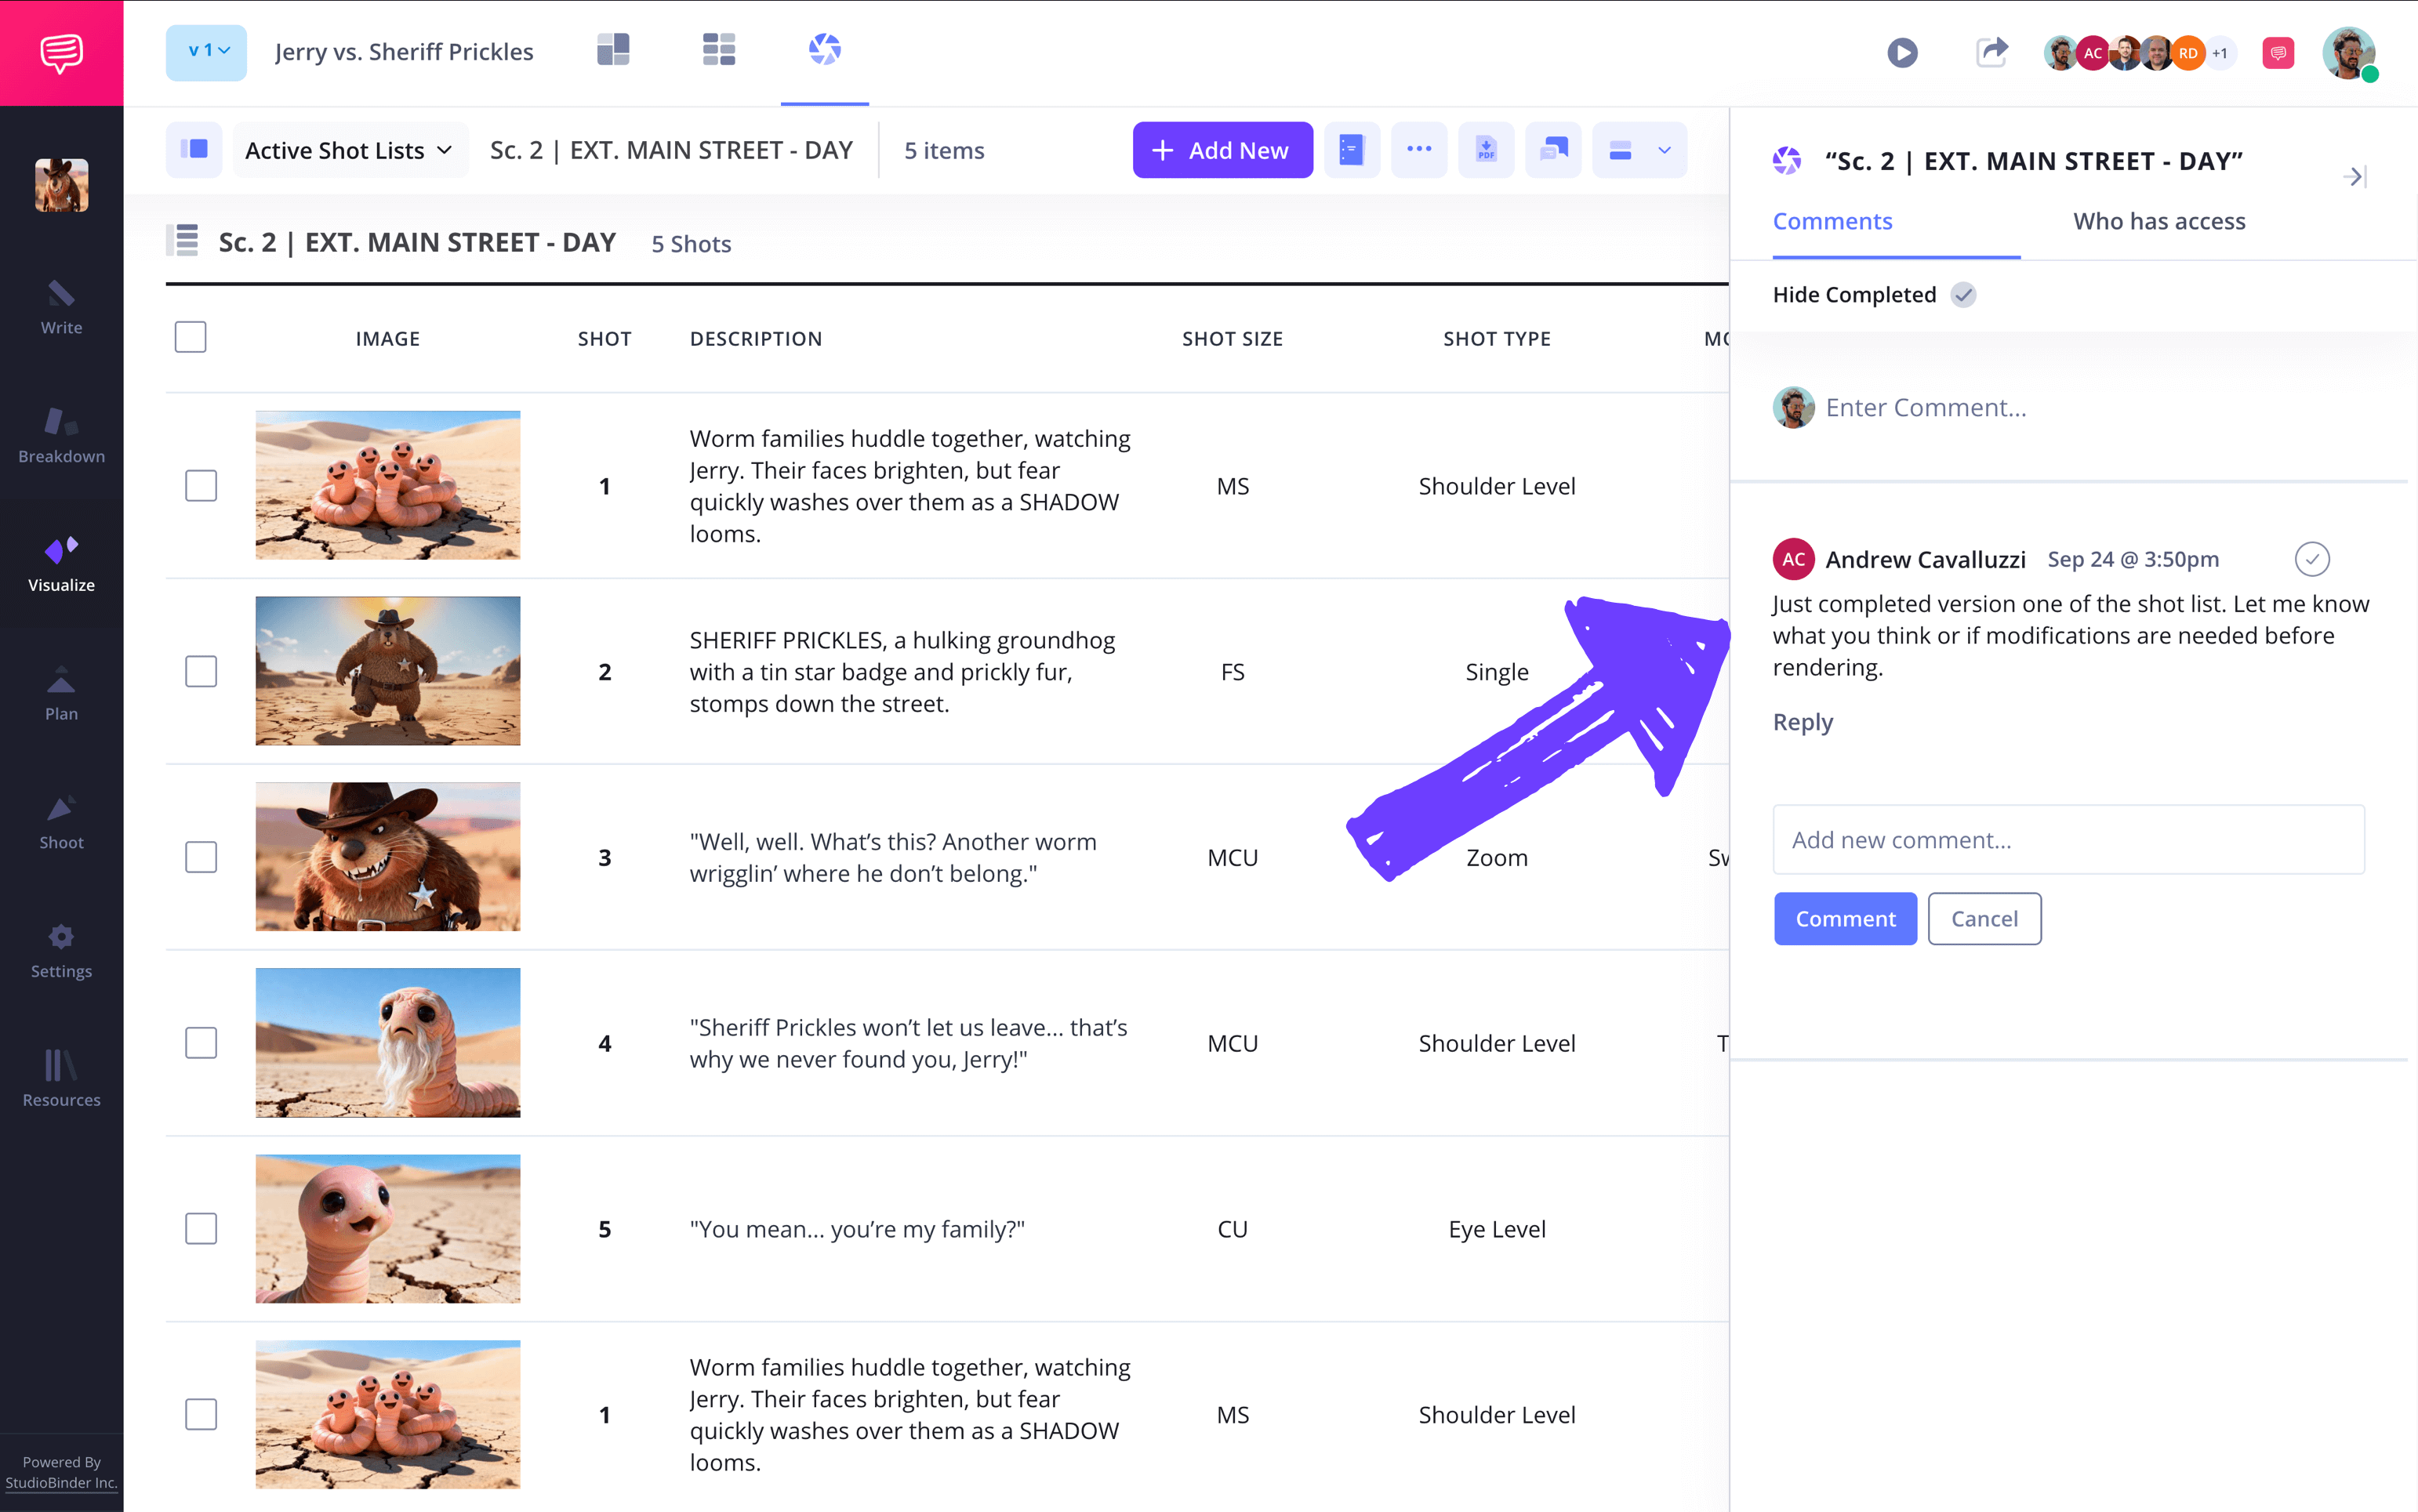
Once you have your team assembled, the comments tab located at the top right of your animation shot list template allows for constant dialogue and feedback between departments to ensure everyone is on the same page.
Conclusion
All finished!
With a solid grasp on how to take advantage of StudioBinder’s shot list template for animation, you’re now free to meet your team’s challenges with a knowledgeable understanding of the court you’re all playing in. It’s no secret that storyboards and animatics are the blueprints for what allows any great animation story to come to life, and now you have a functional hub to gather, plan, and execute from penned illustration to fully animated visualization.
Animation shot list FAQs
Animation shot list basics
When it comes to animation, a shot list is used to detail the images, camera angles, and shot length of an animated short or feature. Since this particular shot list must cater to animation needs, these tend to be even more detailed and precise than animation storyboards.
Creating an animation shot list starts with converting an entire scene into individual shots, and then listing the precise production details required for each shot. While shot lists typically detail the required gear for a shoot, an animated short or feature is created by hand or digital means, so camera setups, for example, are constructed entirely through sketches and digital space.
Though shot lists are similar to storyboards, they’re still highly useful, especially in animation, because they establish the subtle nuances and details that can’t quite be conveyed through storyboarding. Think of shot listing as a sort of evolution after the storyboarding process. And when it comes to shot listing for animation, details are key for a well-oiled production.
