Photography Mood Board Template
Define the look of your photoshoot
As a professional photographer, every successful shoot begins with a clear vision. A photography mood board template is an essential tool that helps you visually communicate the desired style, concept, and mood for your project. By using a moodboard template, you can organize inspirations, color palettes, and composition ideas to create a cohesive visual direction.
In this guide, we’ll show you how to create a photography mood board template using StudioBinder’s intuitive drag-and-drop interface. These techniques apply to any type of photography, from editorial shoots to commercial campaigns.
Steps in this guide:
Step 1
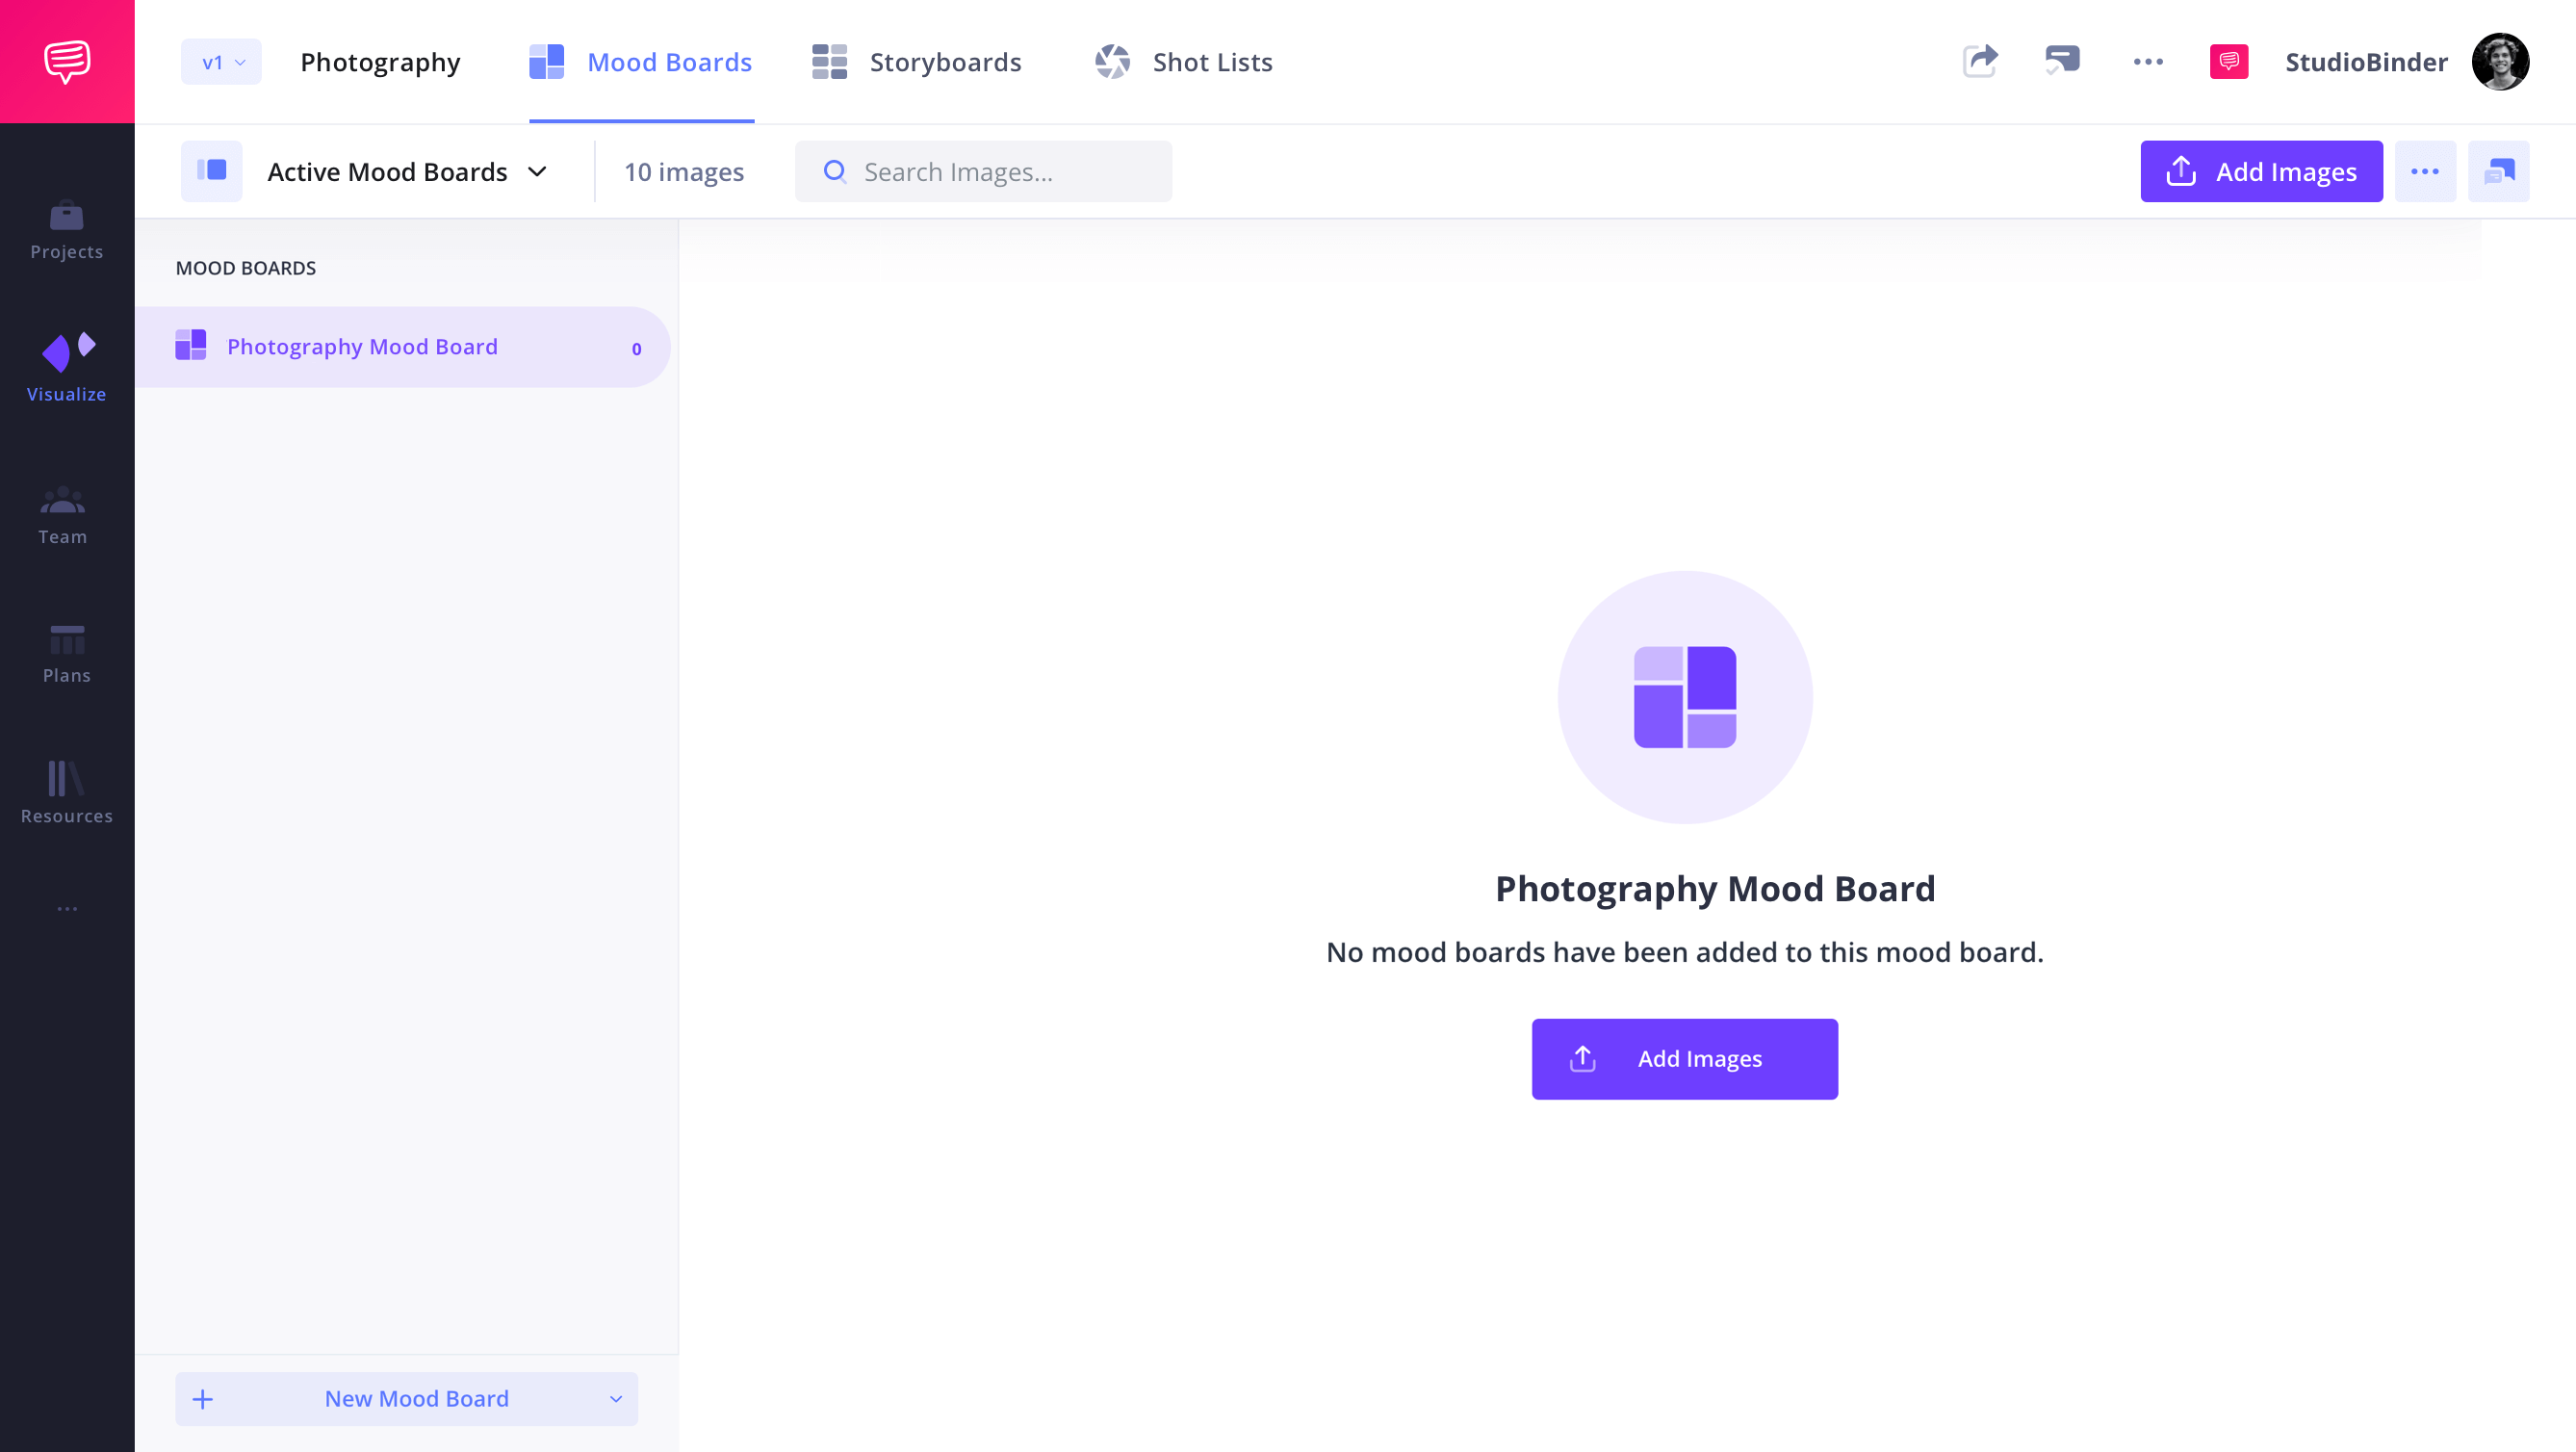
1. Create a blank mood board
A board template provides a structured way to merge concept, aesthetic, wardrobe, lighting style, and location into a single, cohesive presentation. Creating a photography mood board template ensures that all the essential components of your shoot align seamlessly.
By creating a mood board for photoshoots, you can effectively communicate and bring together all the essential components of your shoot, ensuring a seamless and harmonious outcome.

How to do this in StudioBinder
- From the project page, select Mood Board.
- Create a separate mood board for every key category.
Step 2
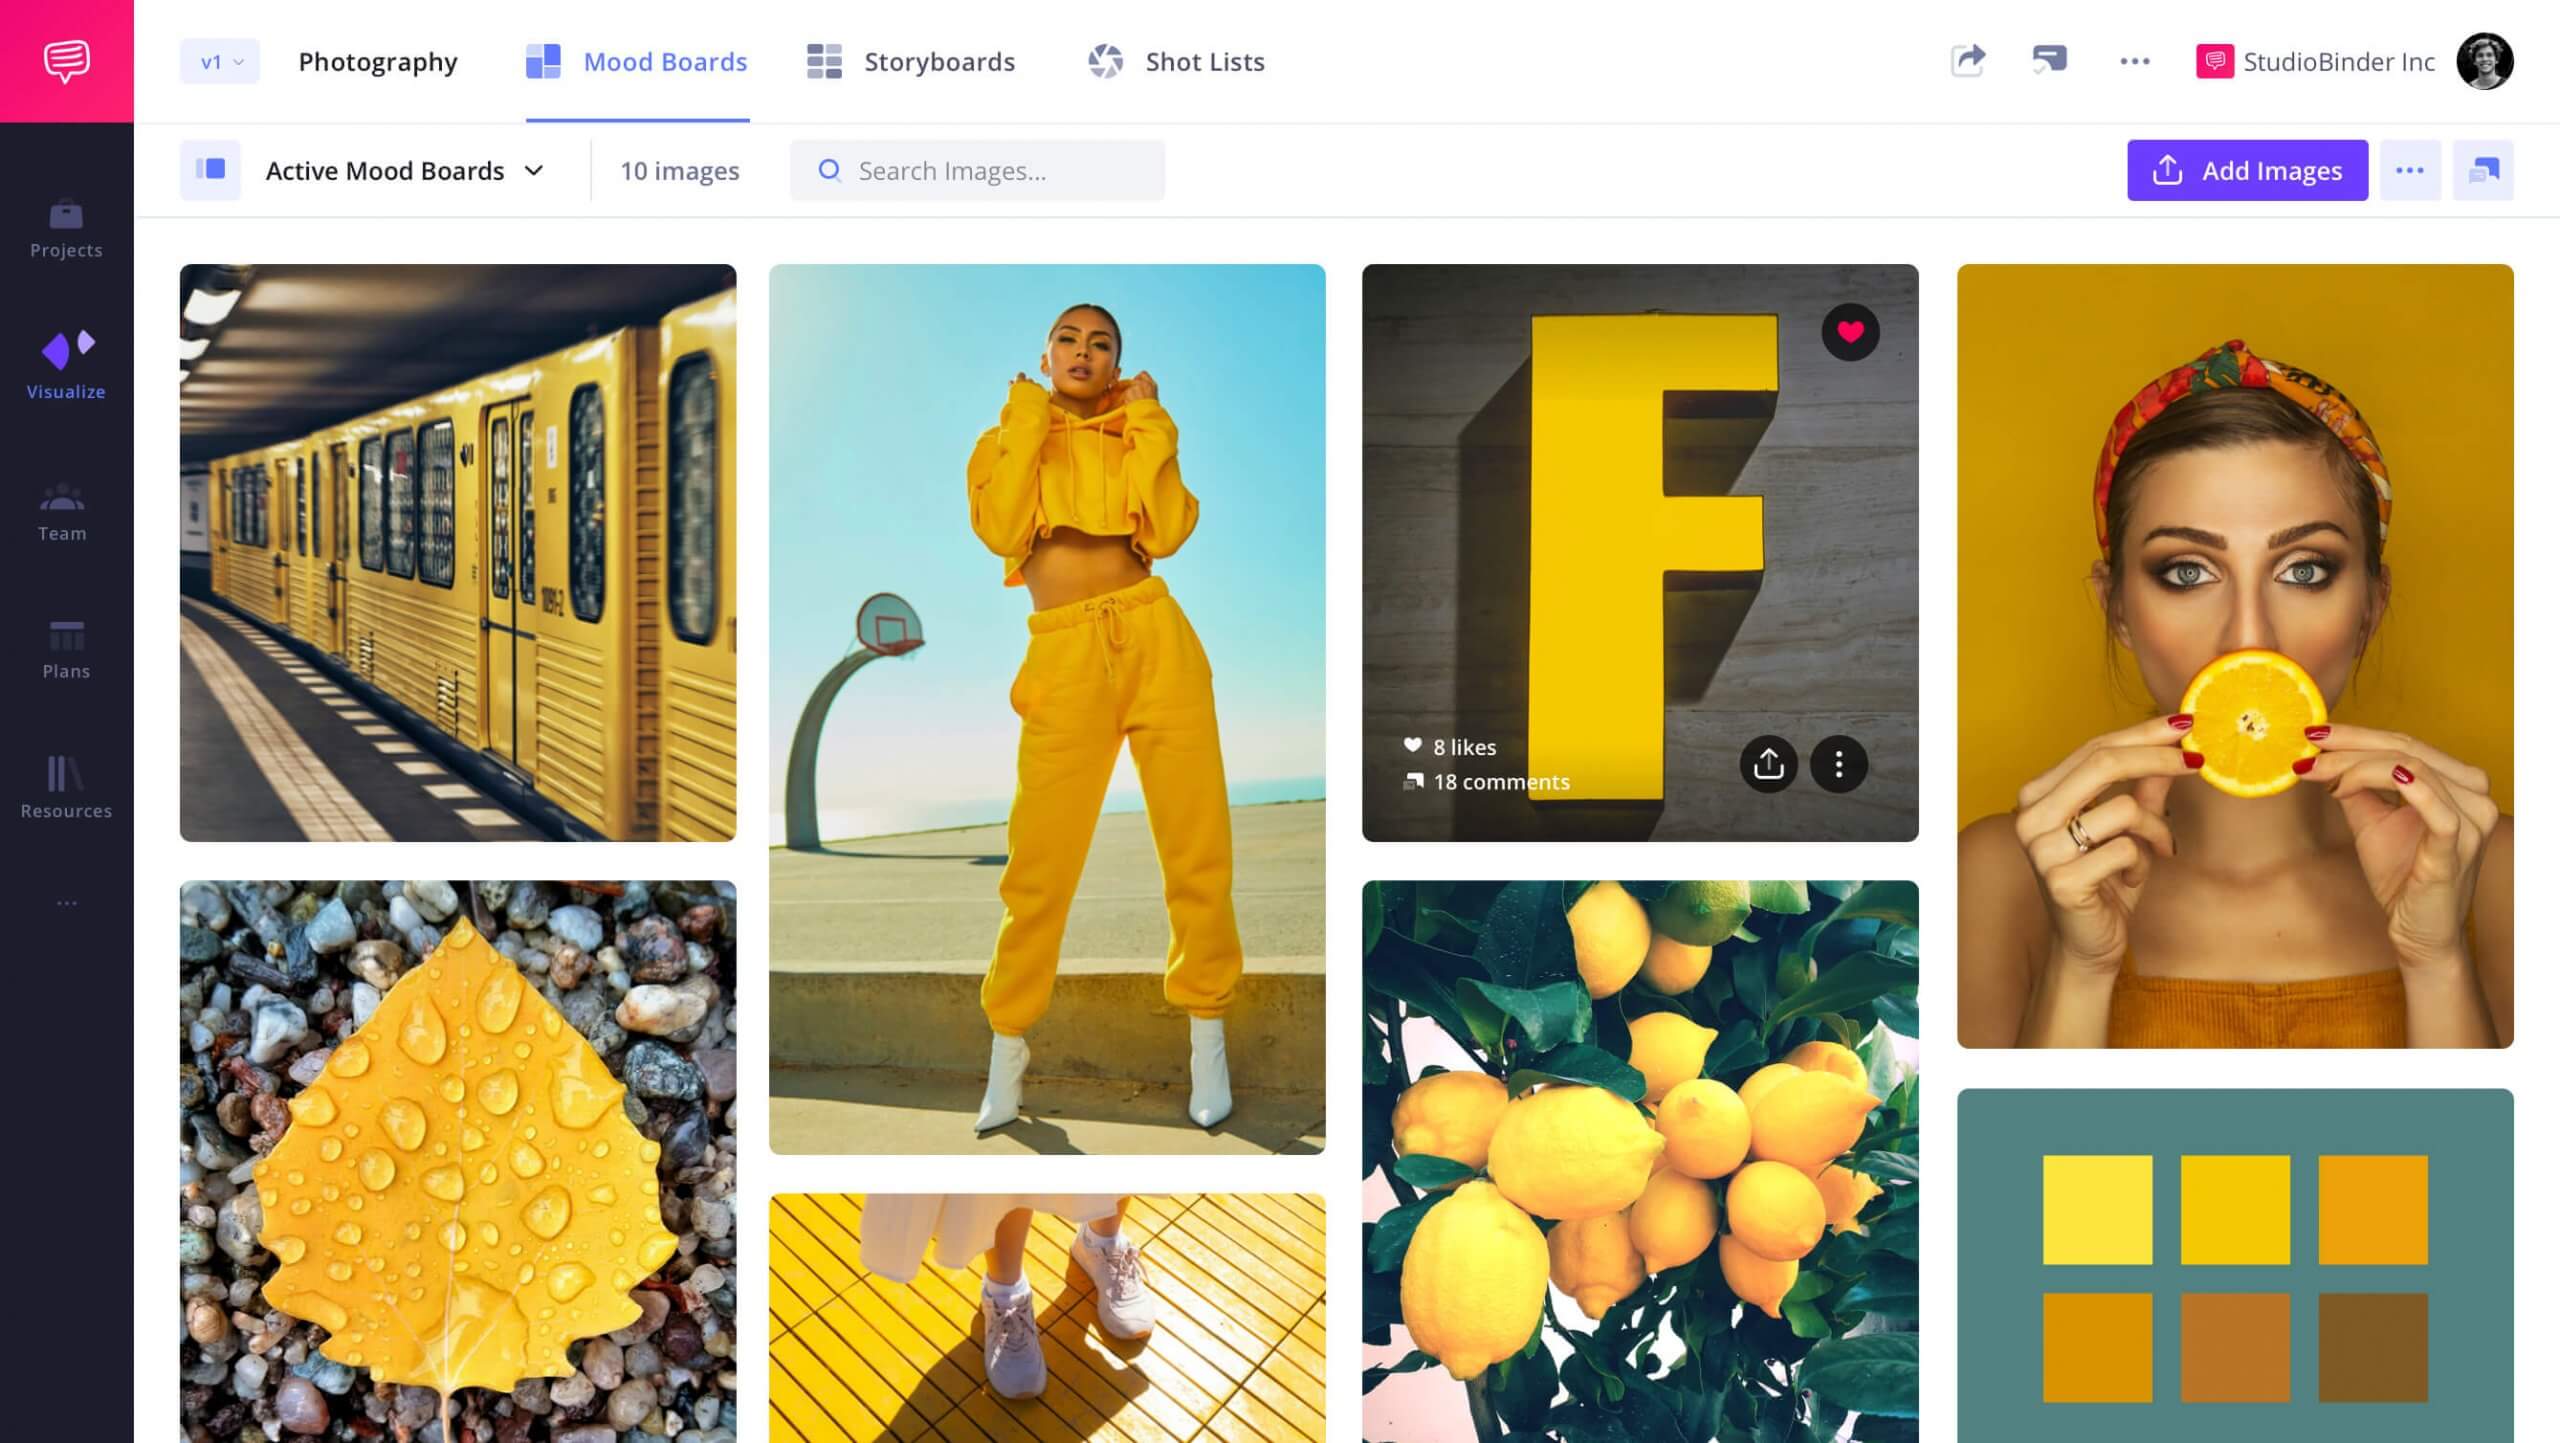
Gather your images
The next step is collecting images, color palettes, patterns, and other visual elements that align with your desired photography style. A well-curated photography mood board template should present a unified aesthetic.
Remember to start big and narrow down your choices later. Once you've collated your research, it's as simple as integrating these elements directly into your project.


How to do this in StudioBinder
- Search the web and save images to your computer.
- Import or drag-and-drop images into your moodboard template.
Step 3
Fine-tune your images
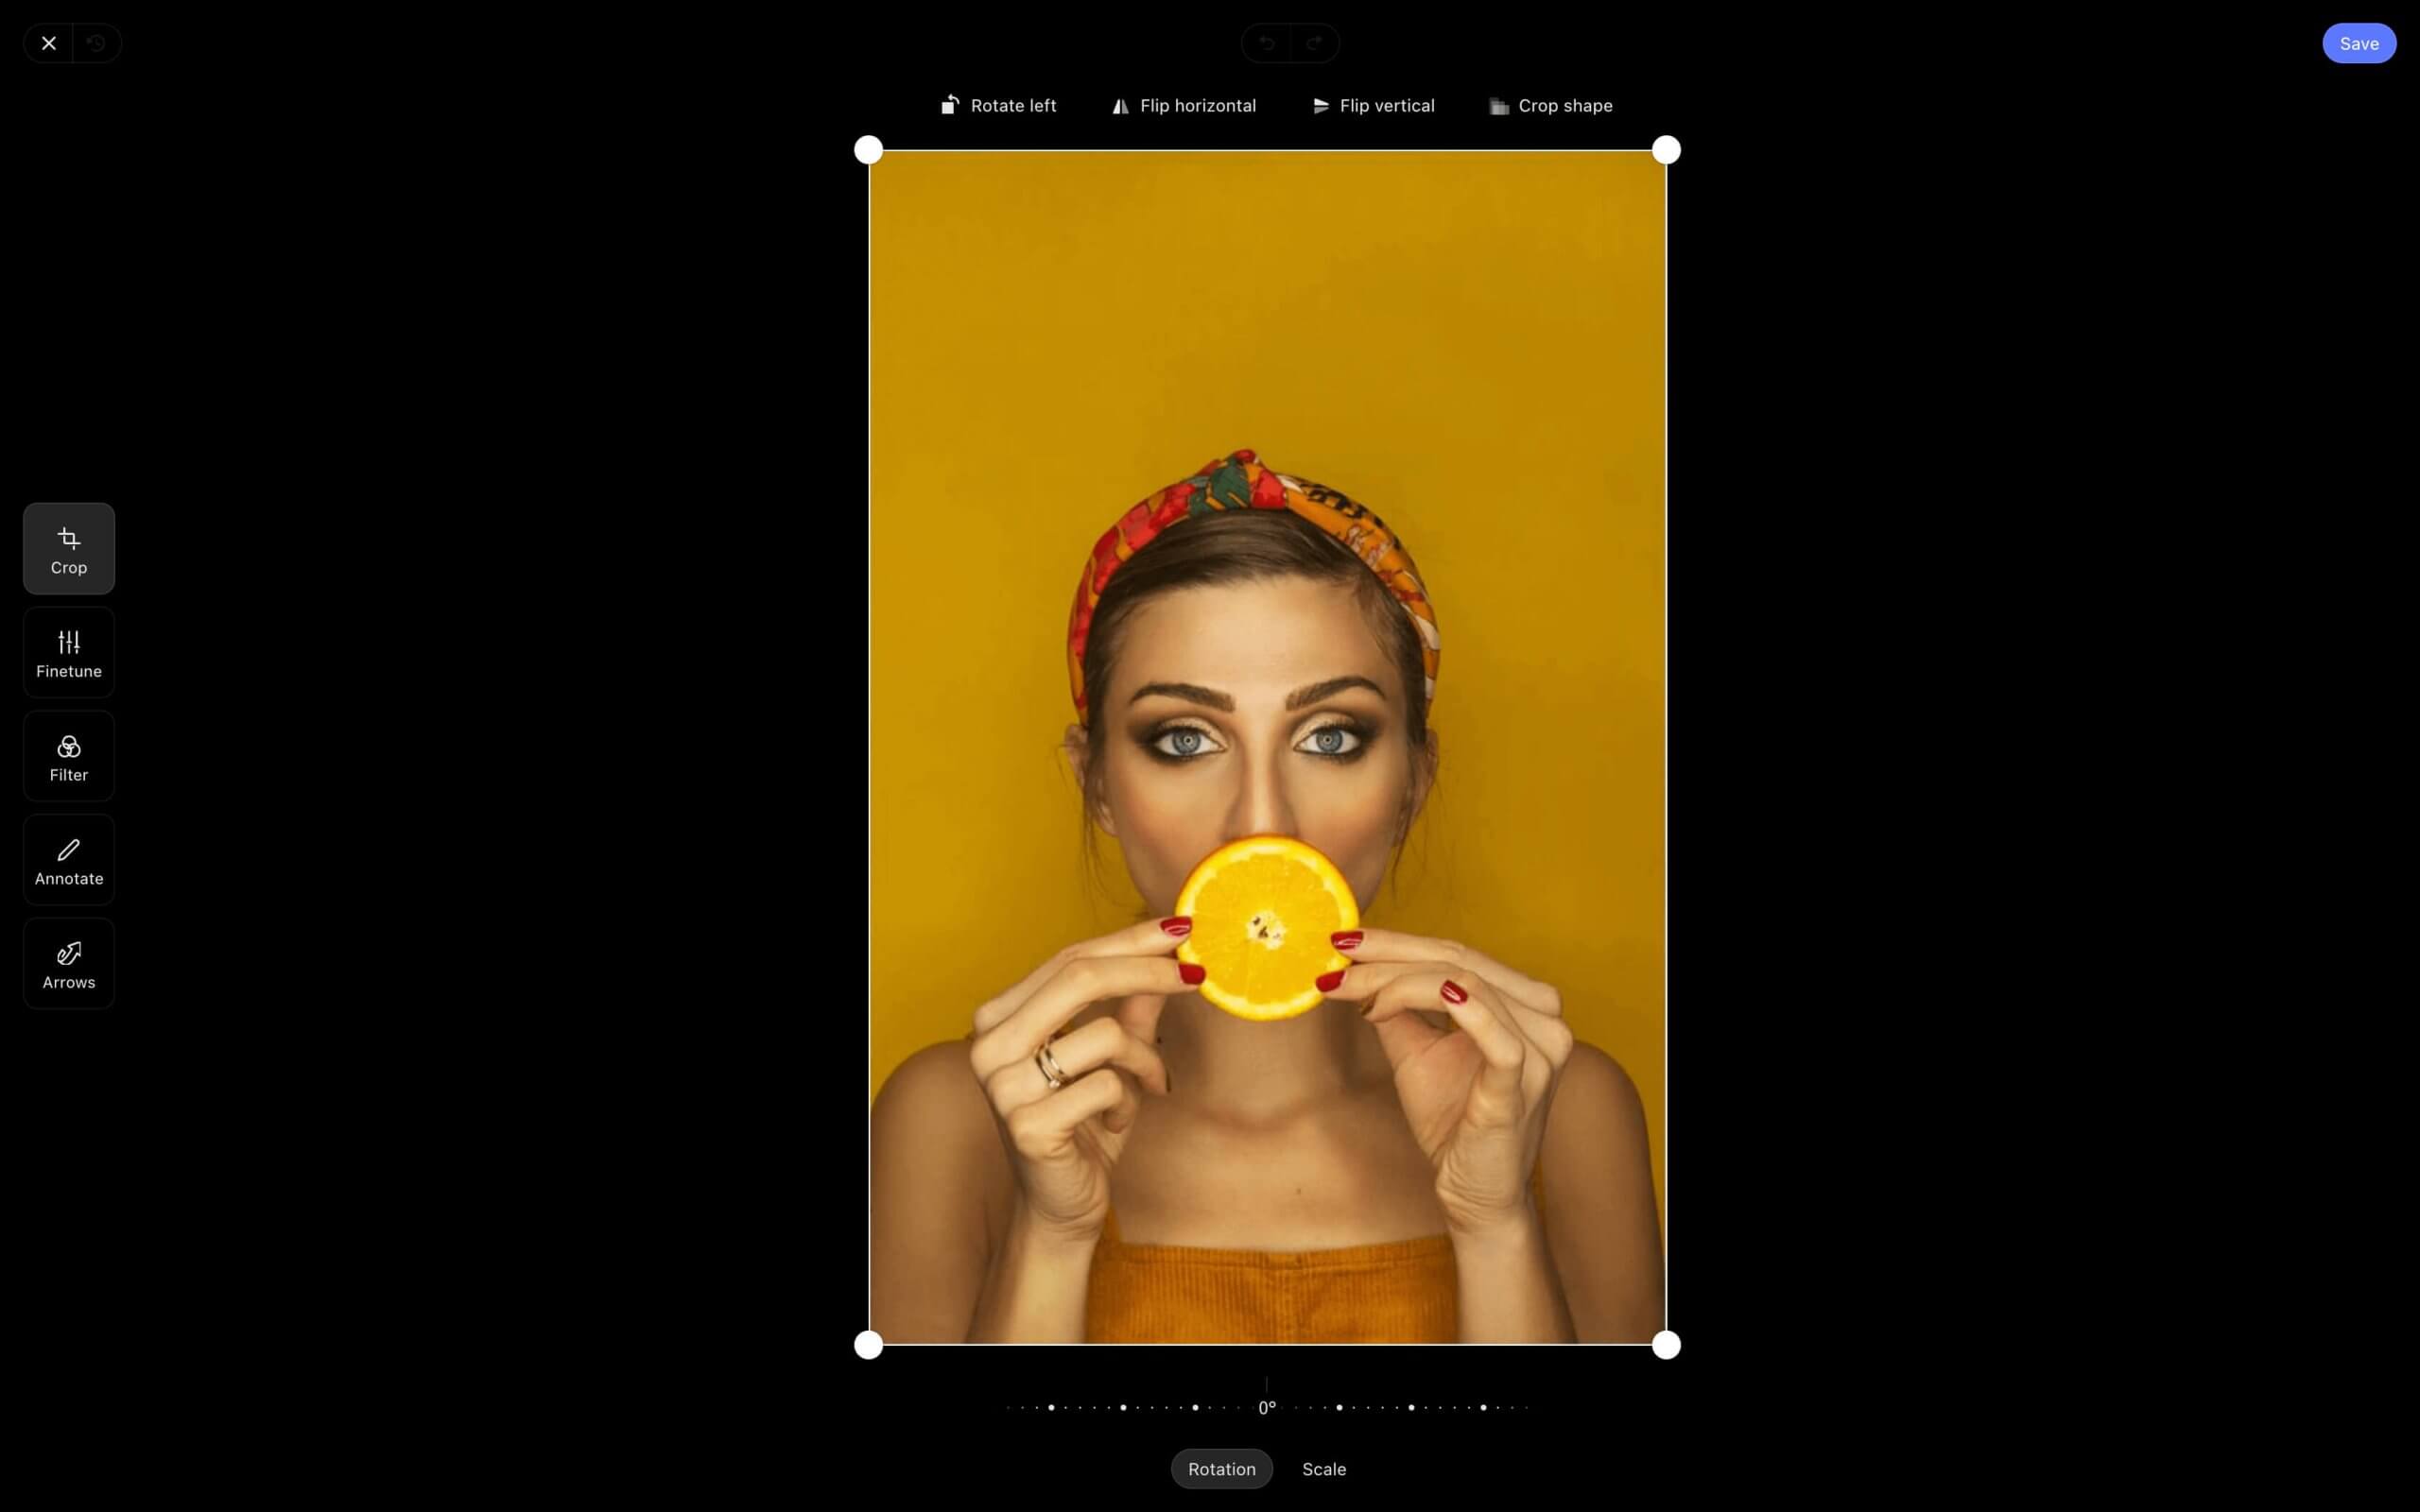
Once you’ve collected your images, fine-tuning is crucial. Adjust brightness, contrast, saturation, exposure, and other settings to ensure each image aligns with your creative vision. Annotations can also help communicate specific ideas to your team. This will ensure that your photography mood board is dialed in for the eventual shoot.


How to do this in StudioBinder
- Open the image from the mood board templates.
- Select Edit.
- Crop, annotate, fine-tune, or adjust the image settings.
Step 4
Arrange the images to tell a story
Now, it’s time to arrange your images into a compelling composition. A well-structured mood board template helps convey your vision clearly. Organize images based on color schemes, patterns, props, models, or set aesthetics to create a visually engaging story.
Create "zones" by grouping images in proximity by composition, color schemes, patterns, props, set dressing, models, or general aesthetics.


How to do this in StudioBinder
- Consider "zones" to group images in proximity.
- Drag-and-drop images to rearrange them into a layout that tells a story.
Step 5
Share your mood board for feedback
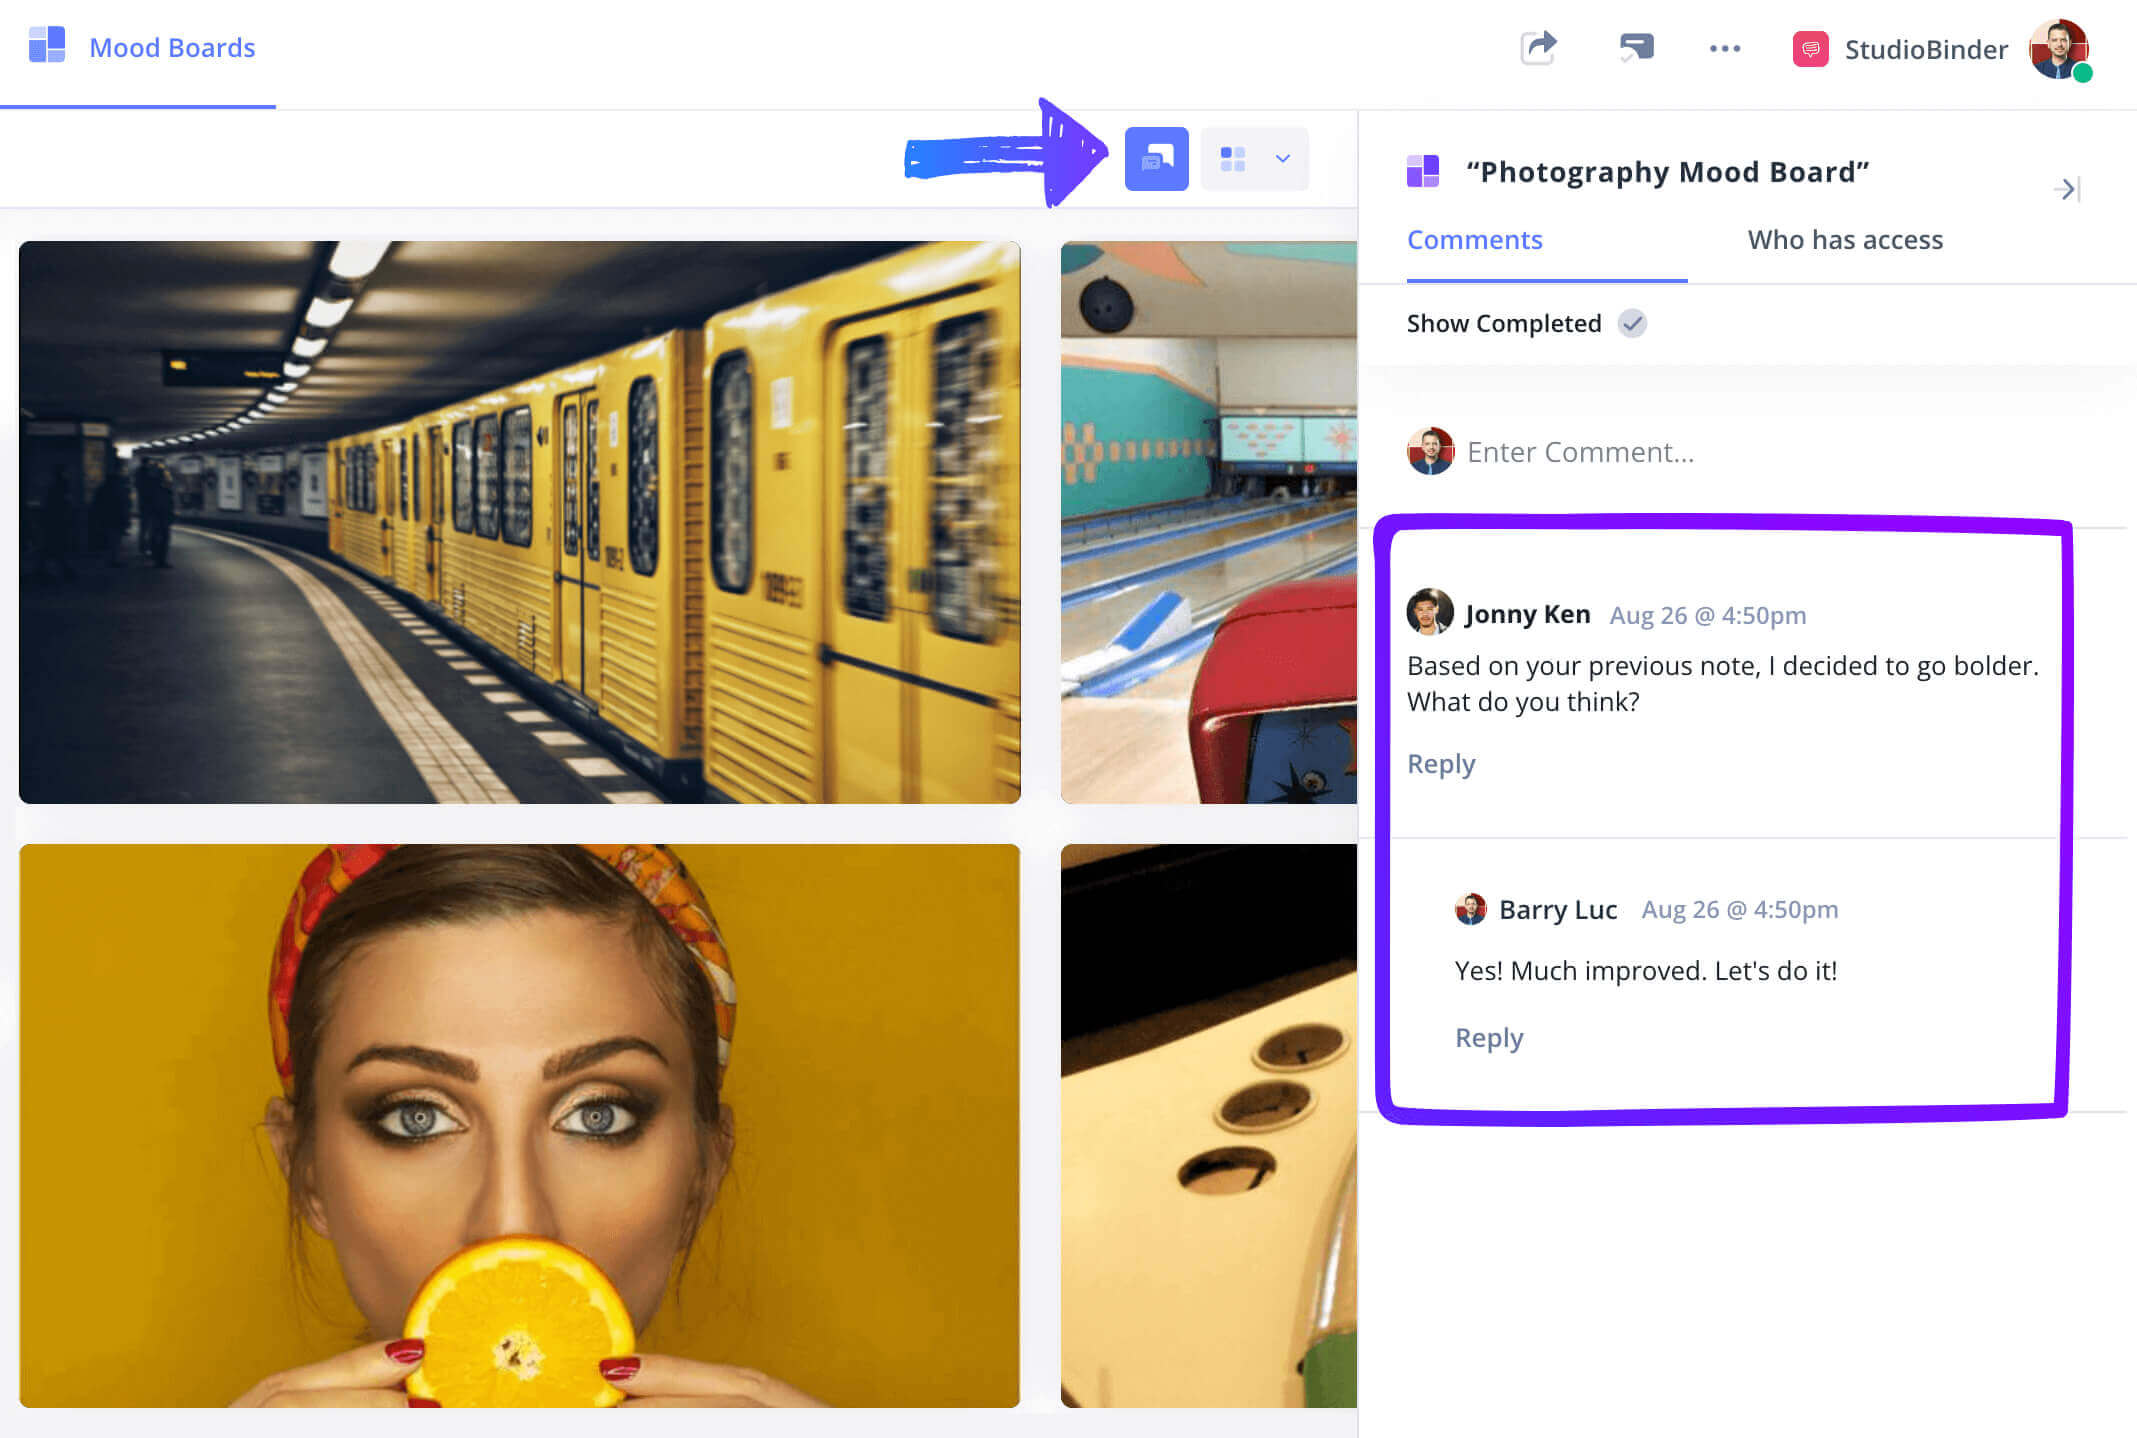
Collaboration is key in photography. Share your photography mood board template with clients, team members, or collaborators to ensure alignment before the shoot.
This collaboration allows for adjustments and refinements based on the input received, ensuring everyone is aligned with your vision.


How to do this in StudioBinder
- Generate a View Only Link or Invite Collaborators to edit.
- Use the comments sidebar for real-time feedback.
Conclusion
Your Photography Mood Board is Ready!
Your photography mood board template is now complete! Use it as a reference throughout your shoot to maintain consistency in styling, lighting, and overall visual direction.
Browse our other Mood Board Templates to enhance your creative process and streamline future photography projects.