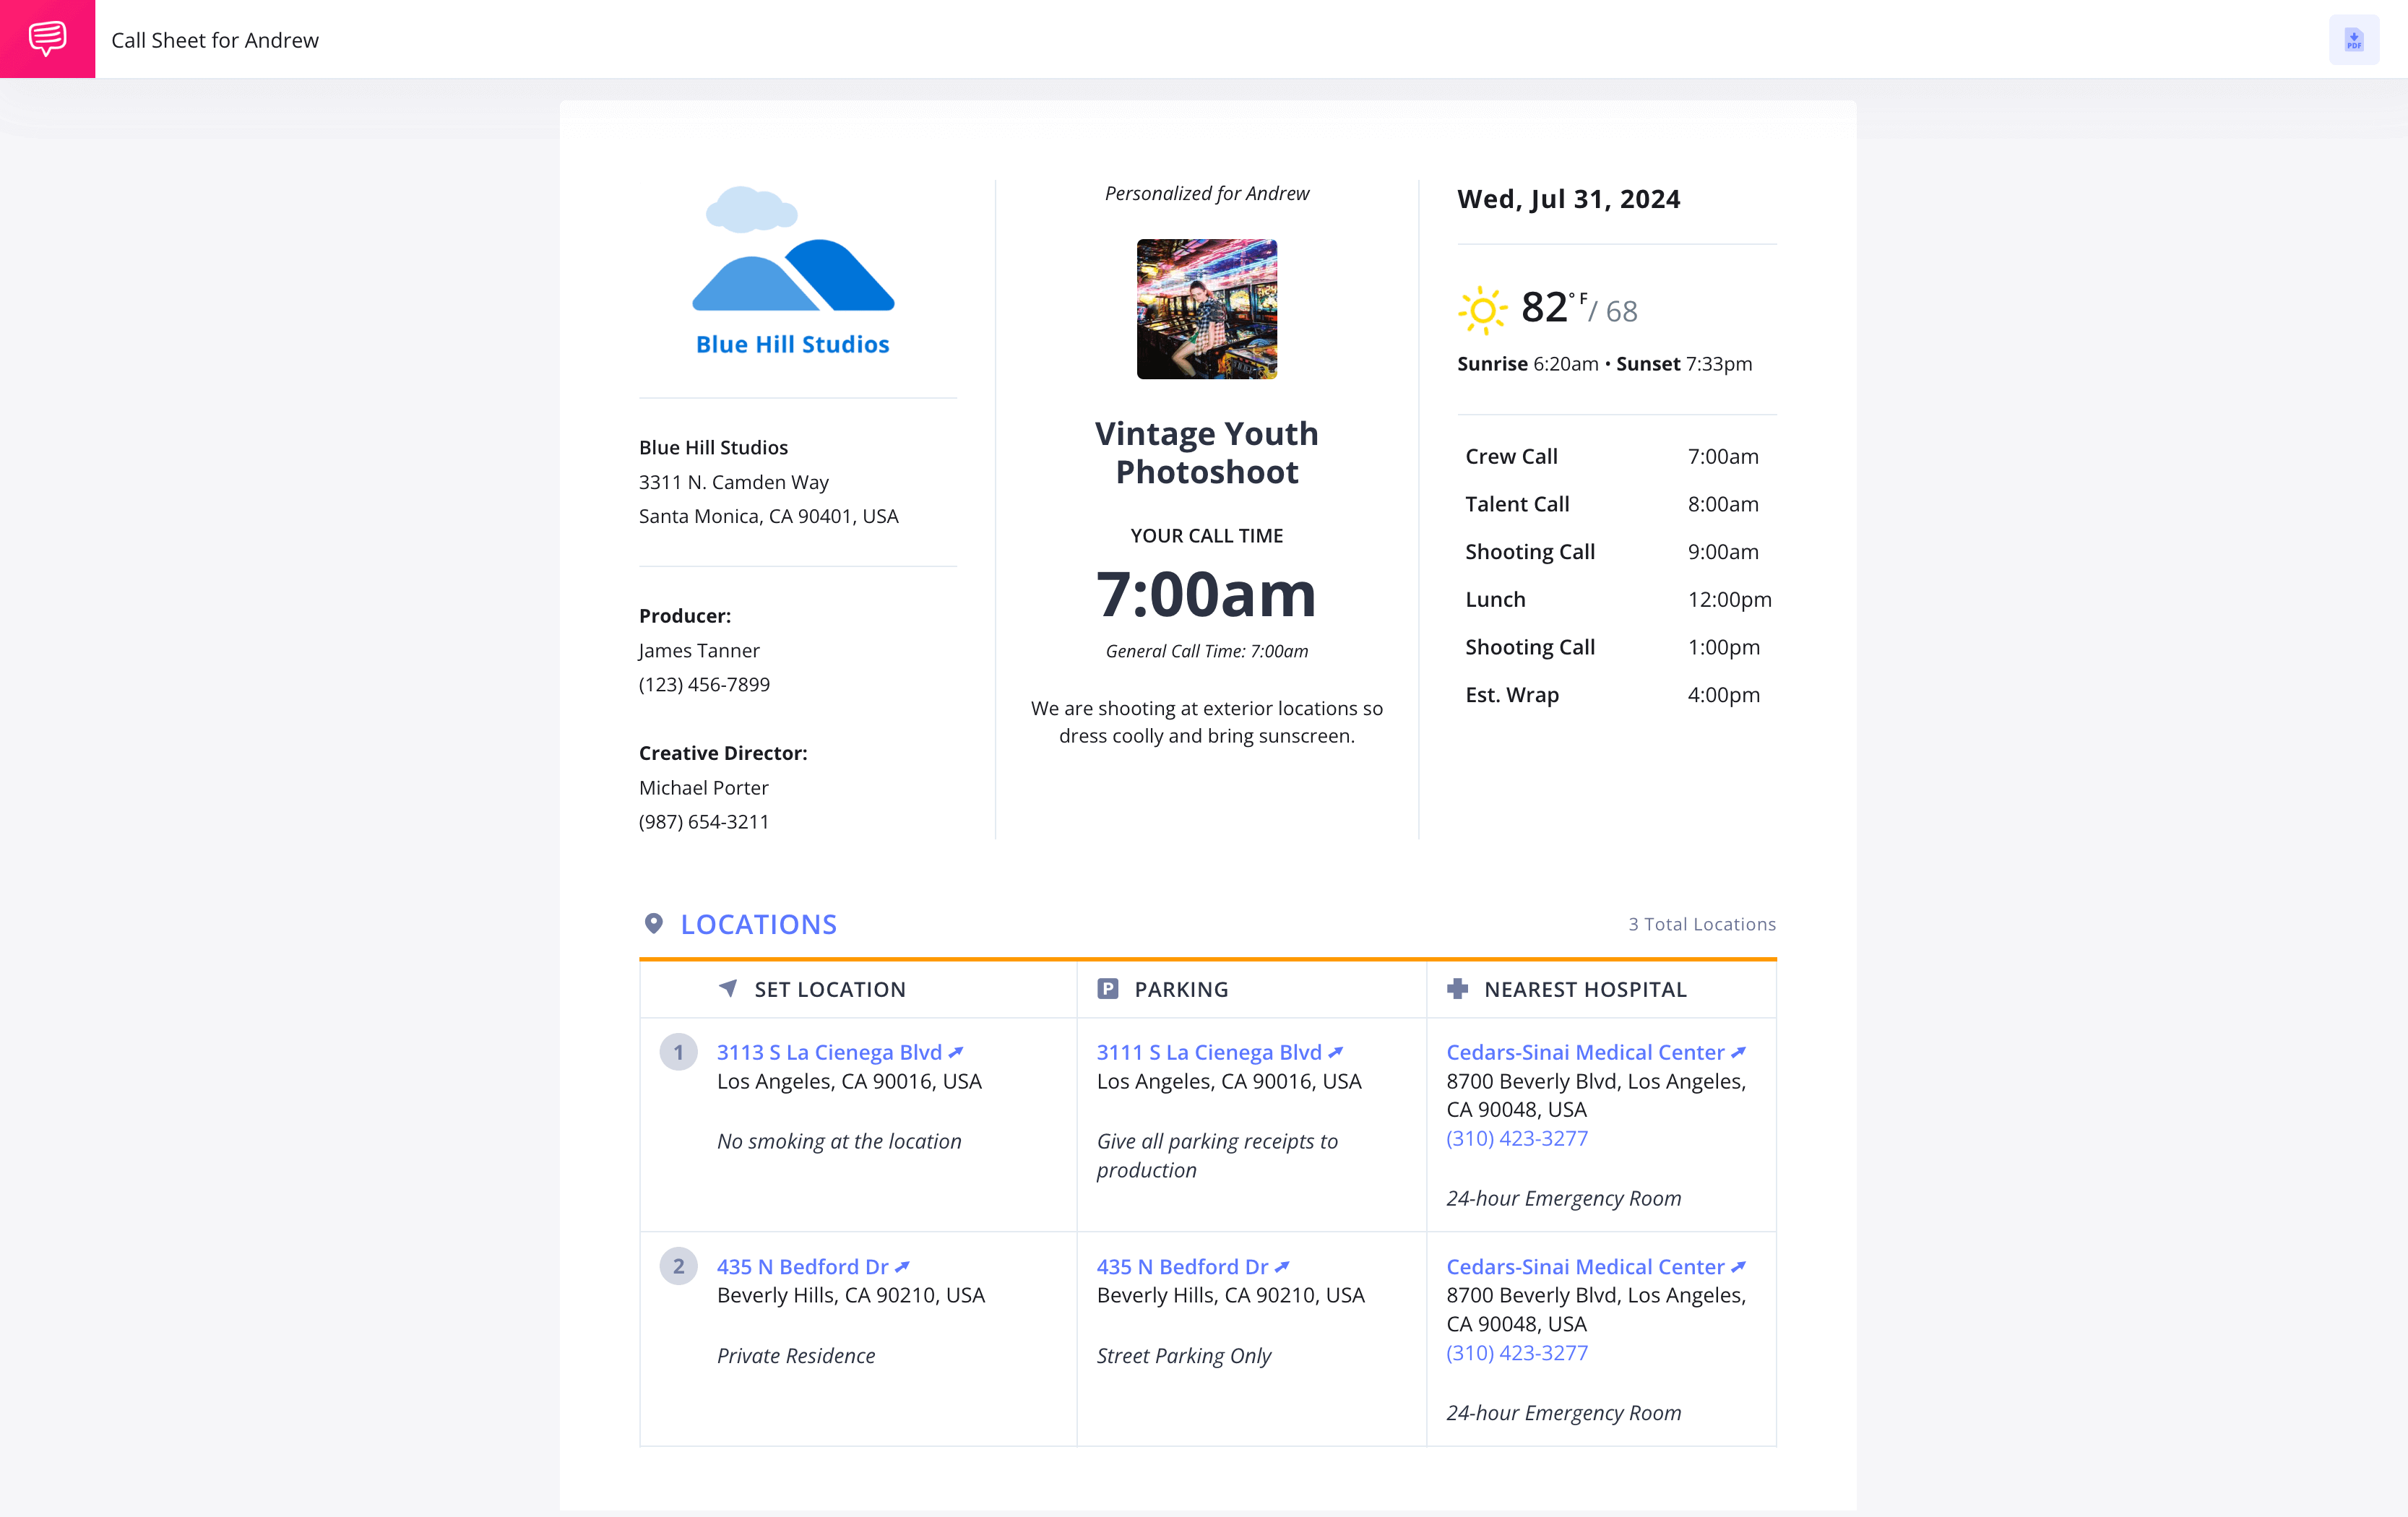
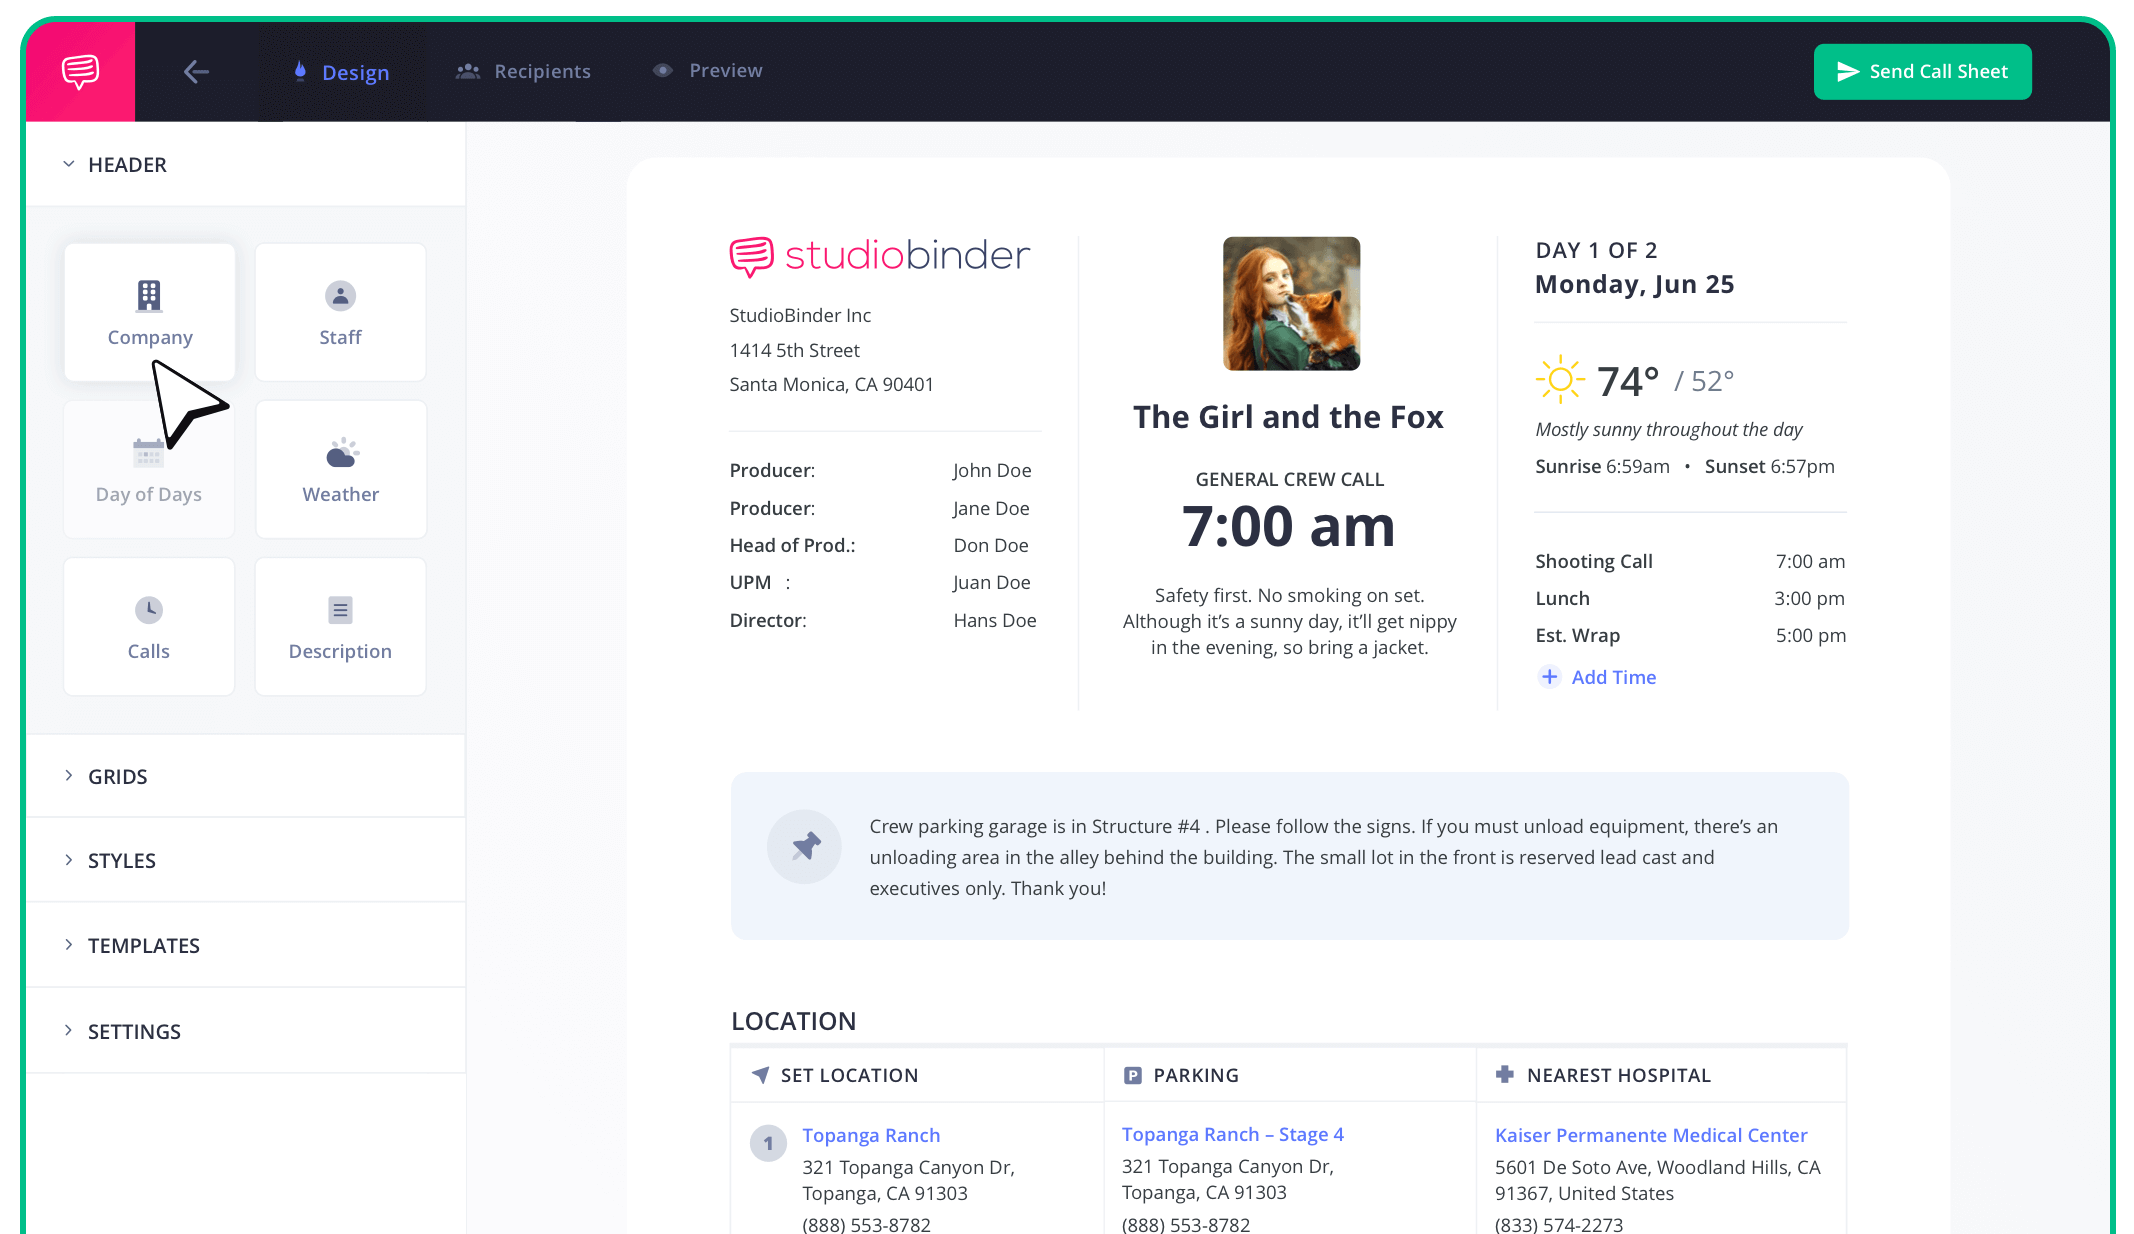
Photoshoot Call Sheet Template
Value of a Photography Call Sheet
Organizing all of the collaborators on a photoshoot to be at the right location at the right times with the right schedule in hand can be a large task. This is why creating a call sheet can be just as valuable as a photography storyboard or shot list when preparing for a photoshoot.
To guide you through the process step-by-step, we'll be demonstrating with StudioBinder’s call sheet software. That being said, the principles outlined here are applicable universally—whether you opt for software or prefer the traditional method of using pen and paper.
Steps in this guide
Step 1
1. Add your shoot day info
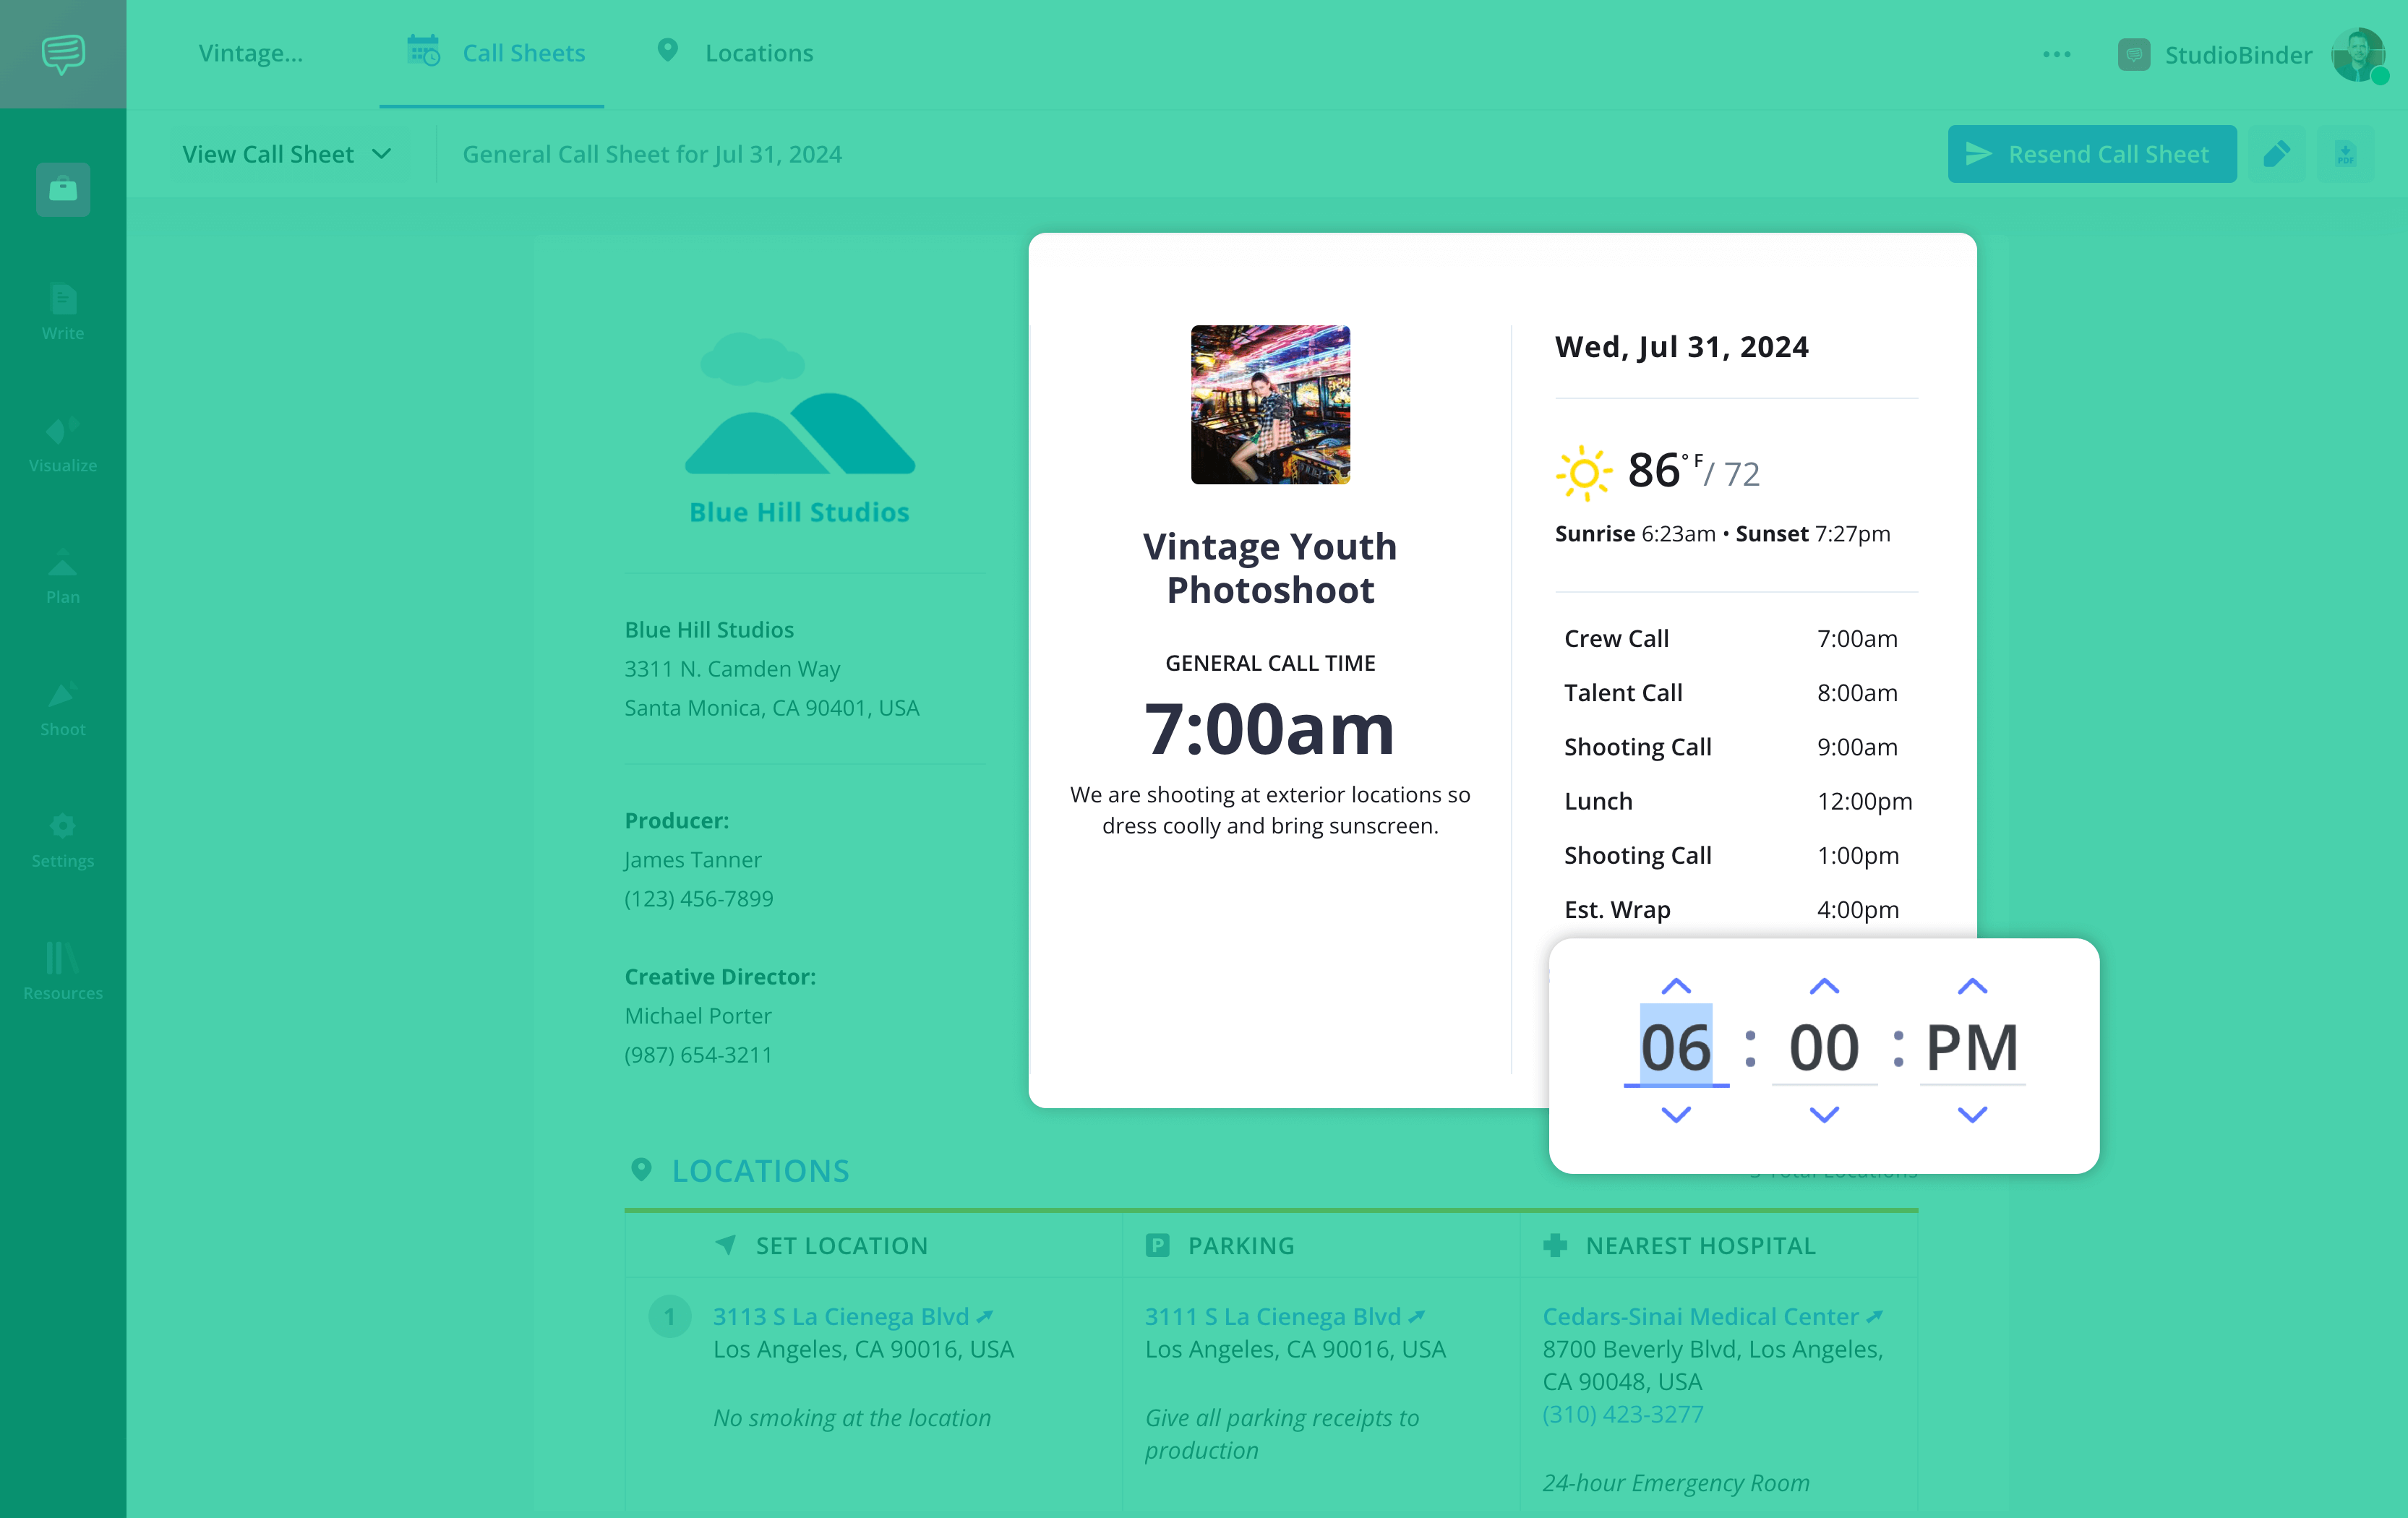
The top portion of a call sheet should feature essential production details, such as the title of the photoshoot or campaign, the studio and/or photographer’s name, and contact information for key personnel like assistant photographers, production assistants, models, or make up artists.
Next, the middle of your call sheet or side column will need to include details specific to the photoshoot day. Photoshoot day details in a call sheet should cover:
- Shoot Date
- Crew Call Time
- Weather Forecast
- Basic Schedule and Times for the Day (e.g., crew call, model call, shooting start, breaks, lunch, estimated wrap time)
How to do this in StudioBinder
- Insert the logo of the studio on any project.
- Weather details update automatically based on location and date.
- Schedule agenda items and timing as needed.
Step 2
2. Enter location details
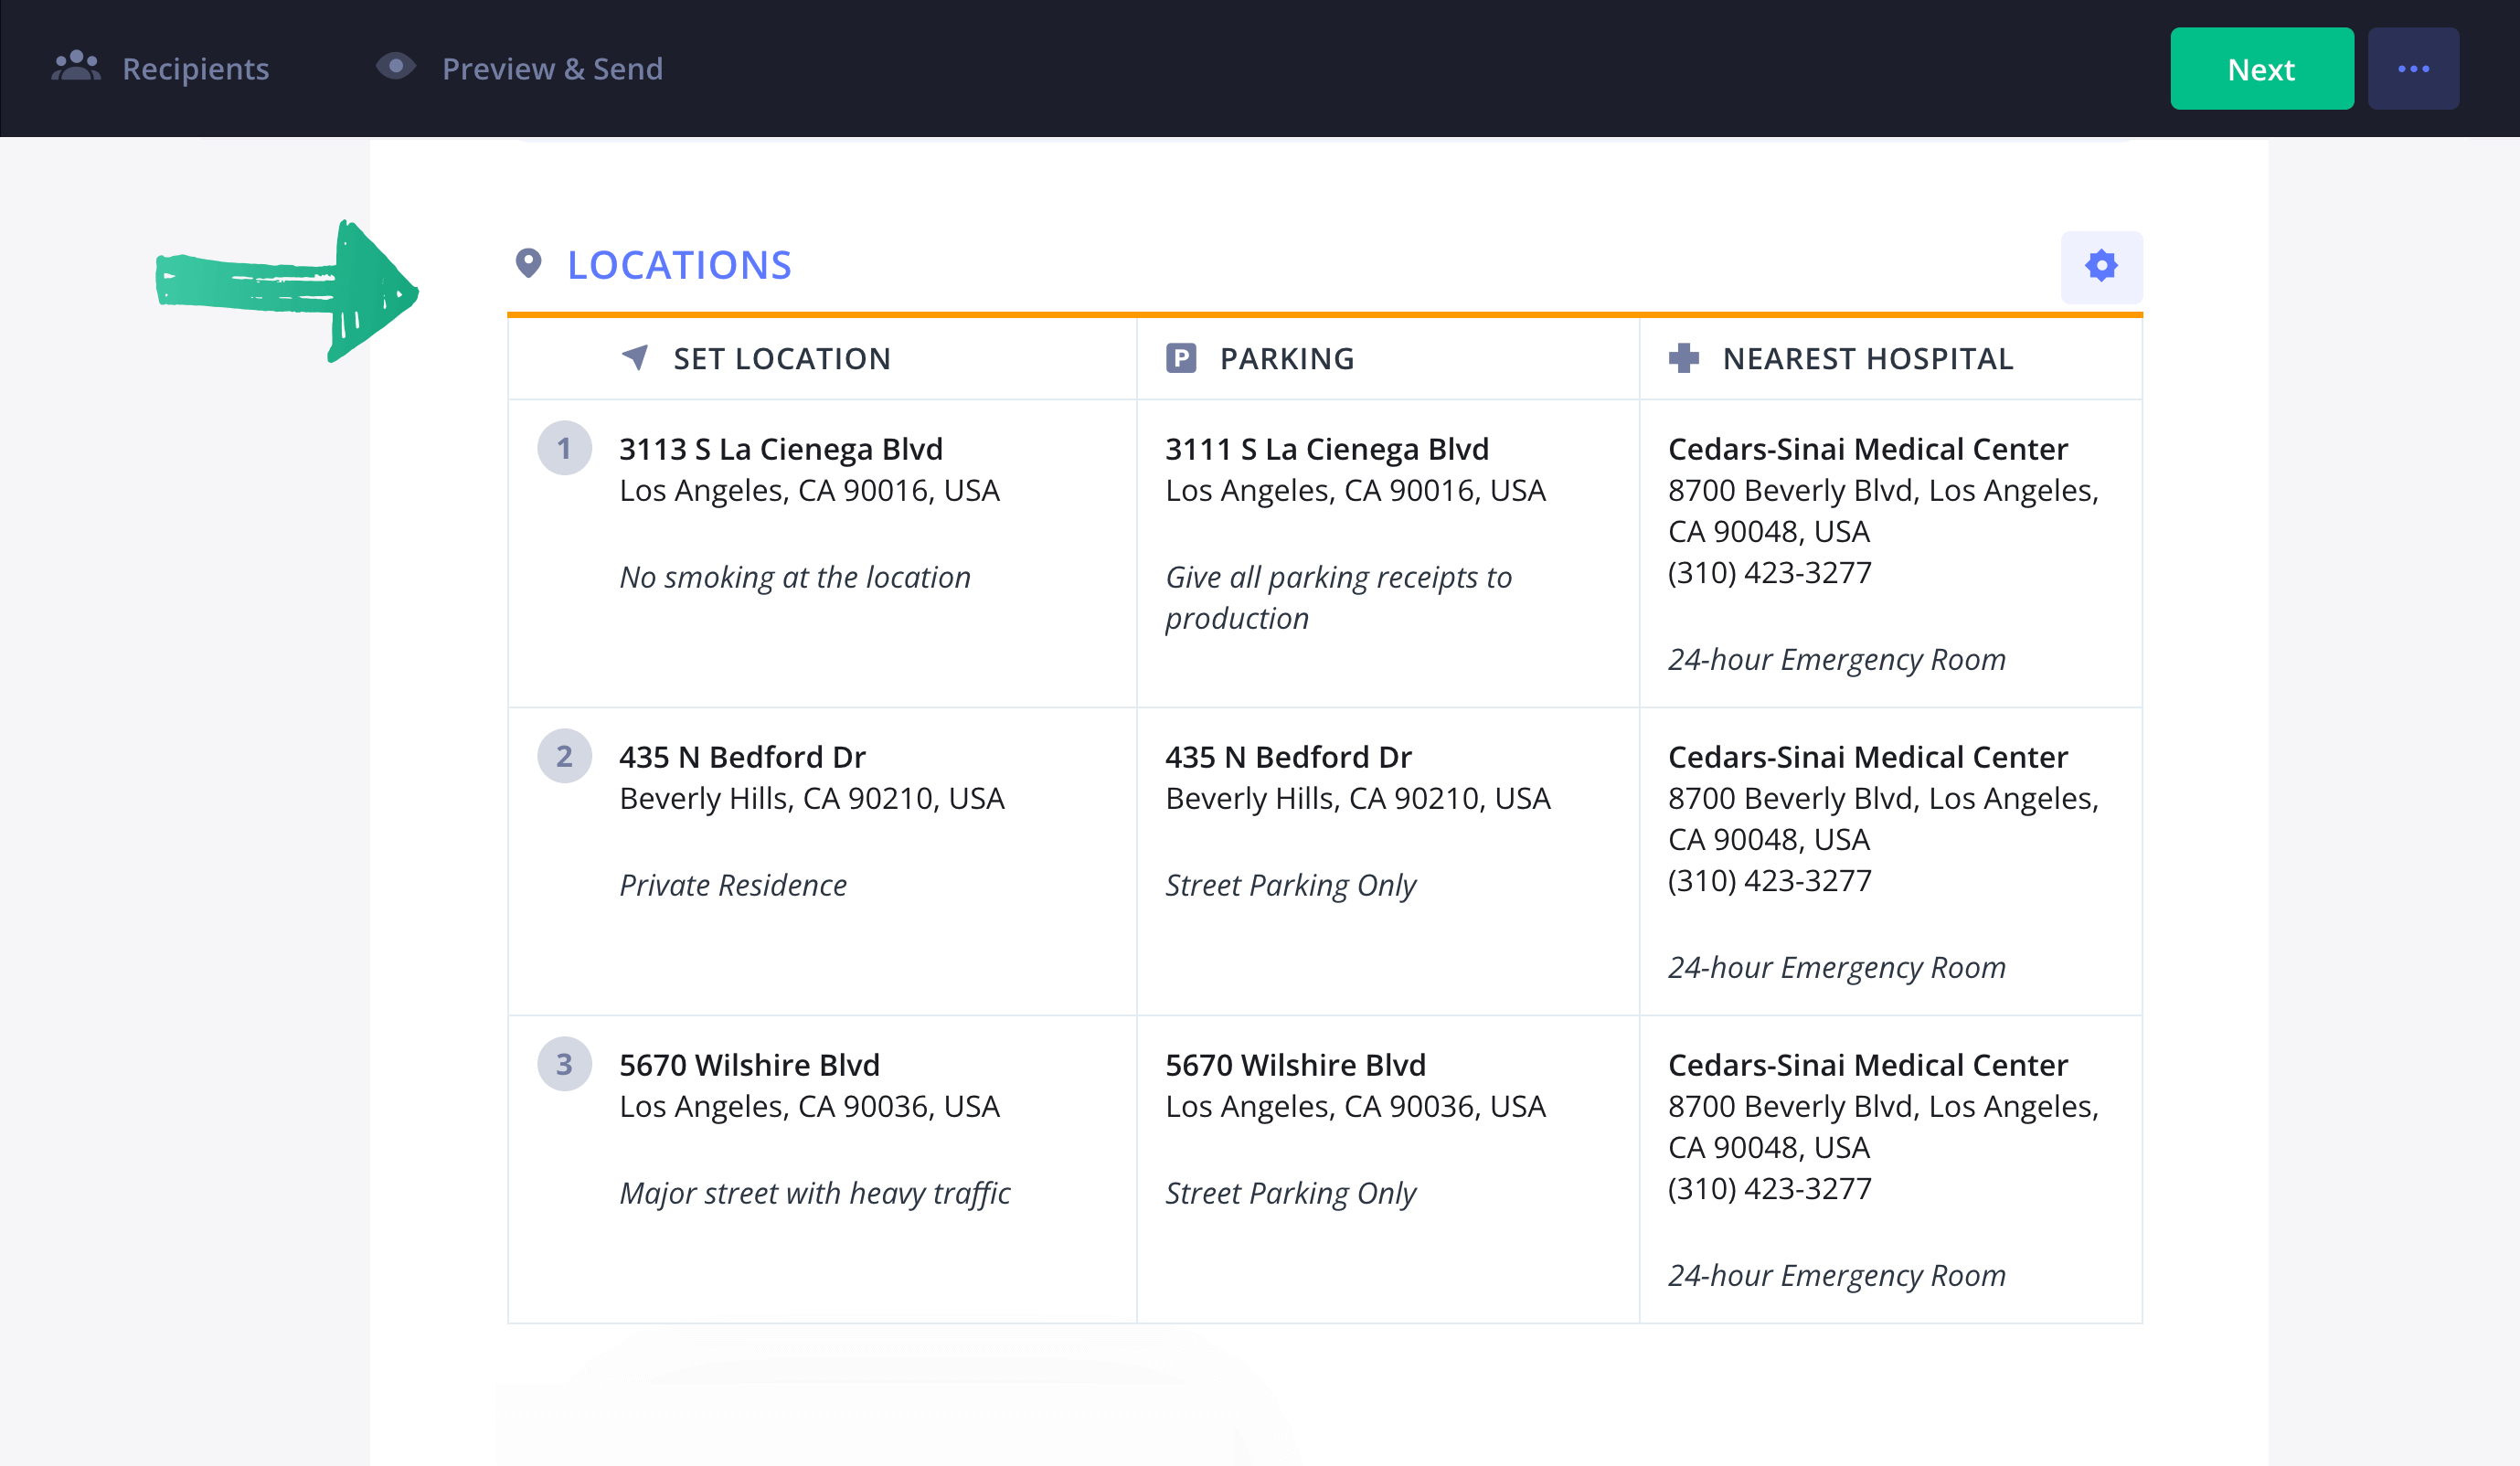
For a photoshoot, the shoot location is crucial info for crew and talent. In this section, location details include:
Location Name
Location Address
Parking Details (especially if parking is different from the shoot location)
Location Notes (include a contact person if necessary)
Nearest Hospital (ensure it has a 24-hour emergency room)

How to do this in StudioBinder
- Add locations manually or choose from previously used locations.
- Add detailed info for each location.
Step 3
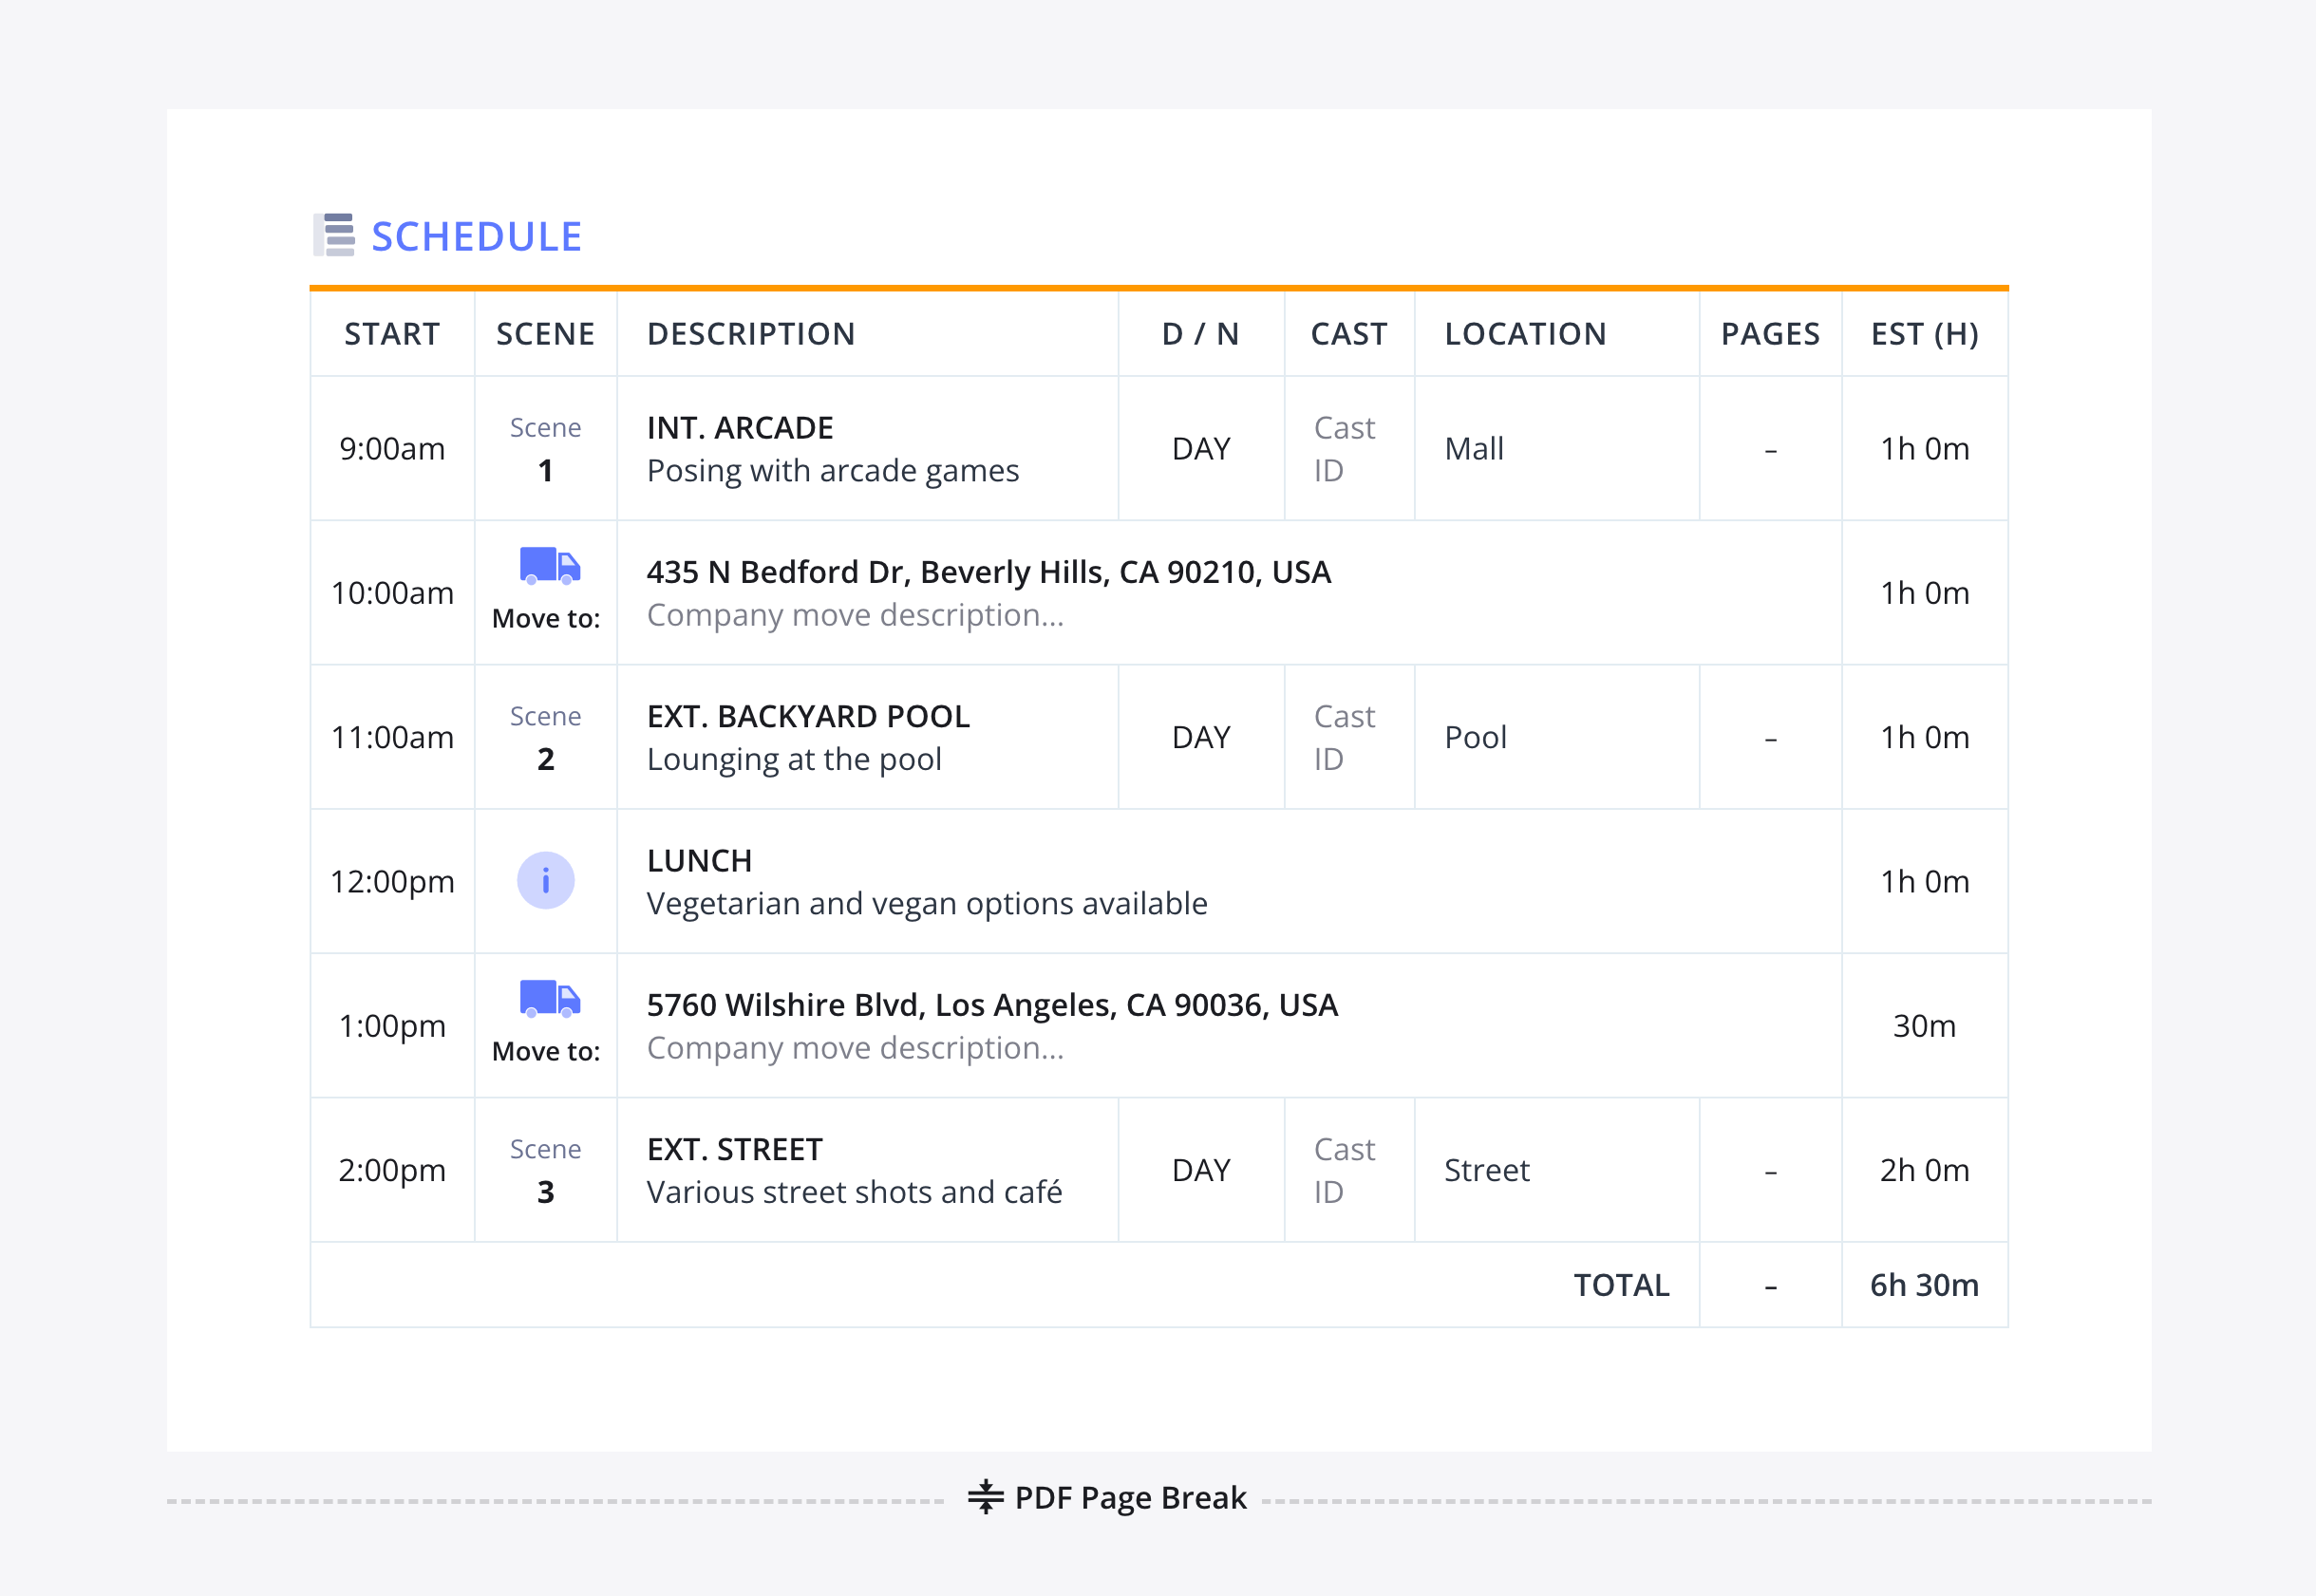
3. Set the shooting schedule
Next comes the photoshoot schedule for that particular day. This includes:
- Shot numbers
- Shot descriptions
- Talent
- Location
- Number of shots
- Indoor or Outdoor
- Estimated start times
- How long each shot is expected to take
While optional, providing an additional schedule for the following day—containing the same details—gives the talent and crew a helpful heads-up and is always appreciated, especially on bigger photoshoots.

How to do this in StudioBinder
- Arrange set ups as needed using the drag and drop feature.
- Add an advance schedule for the next day's shoot.
Step 4
4. Add your talent and crew
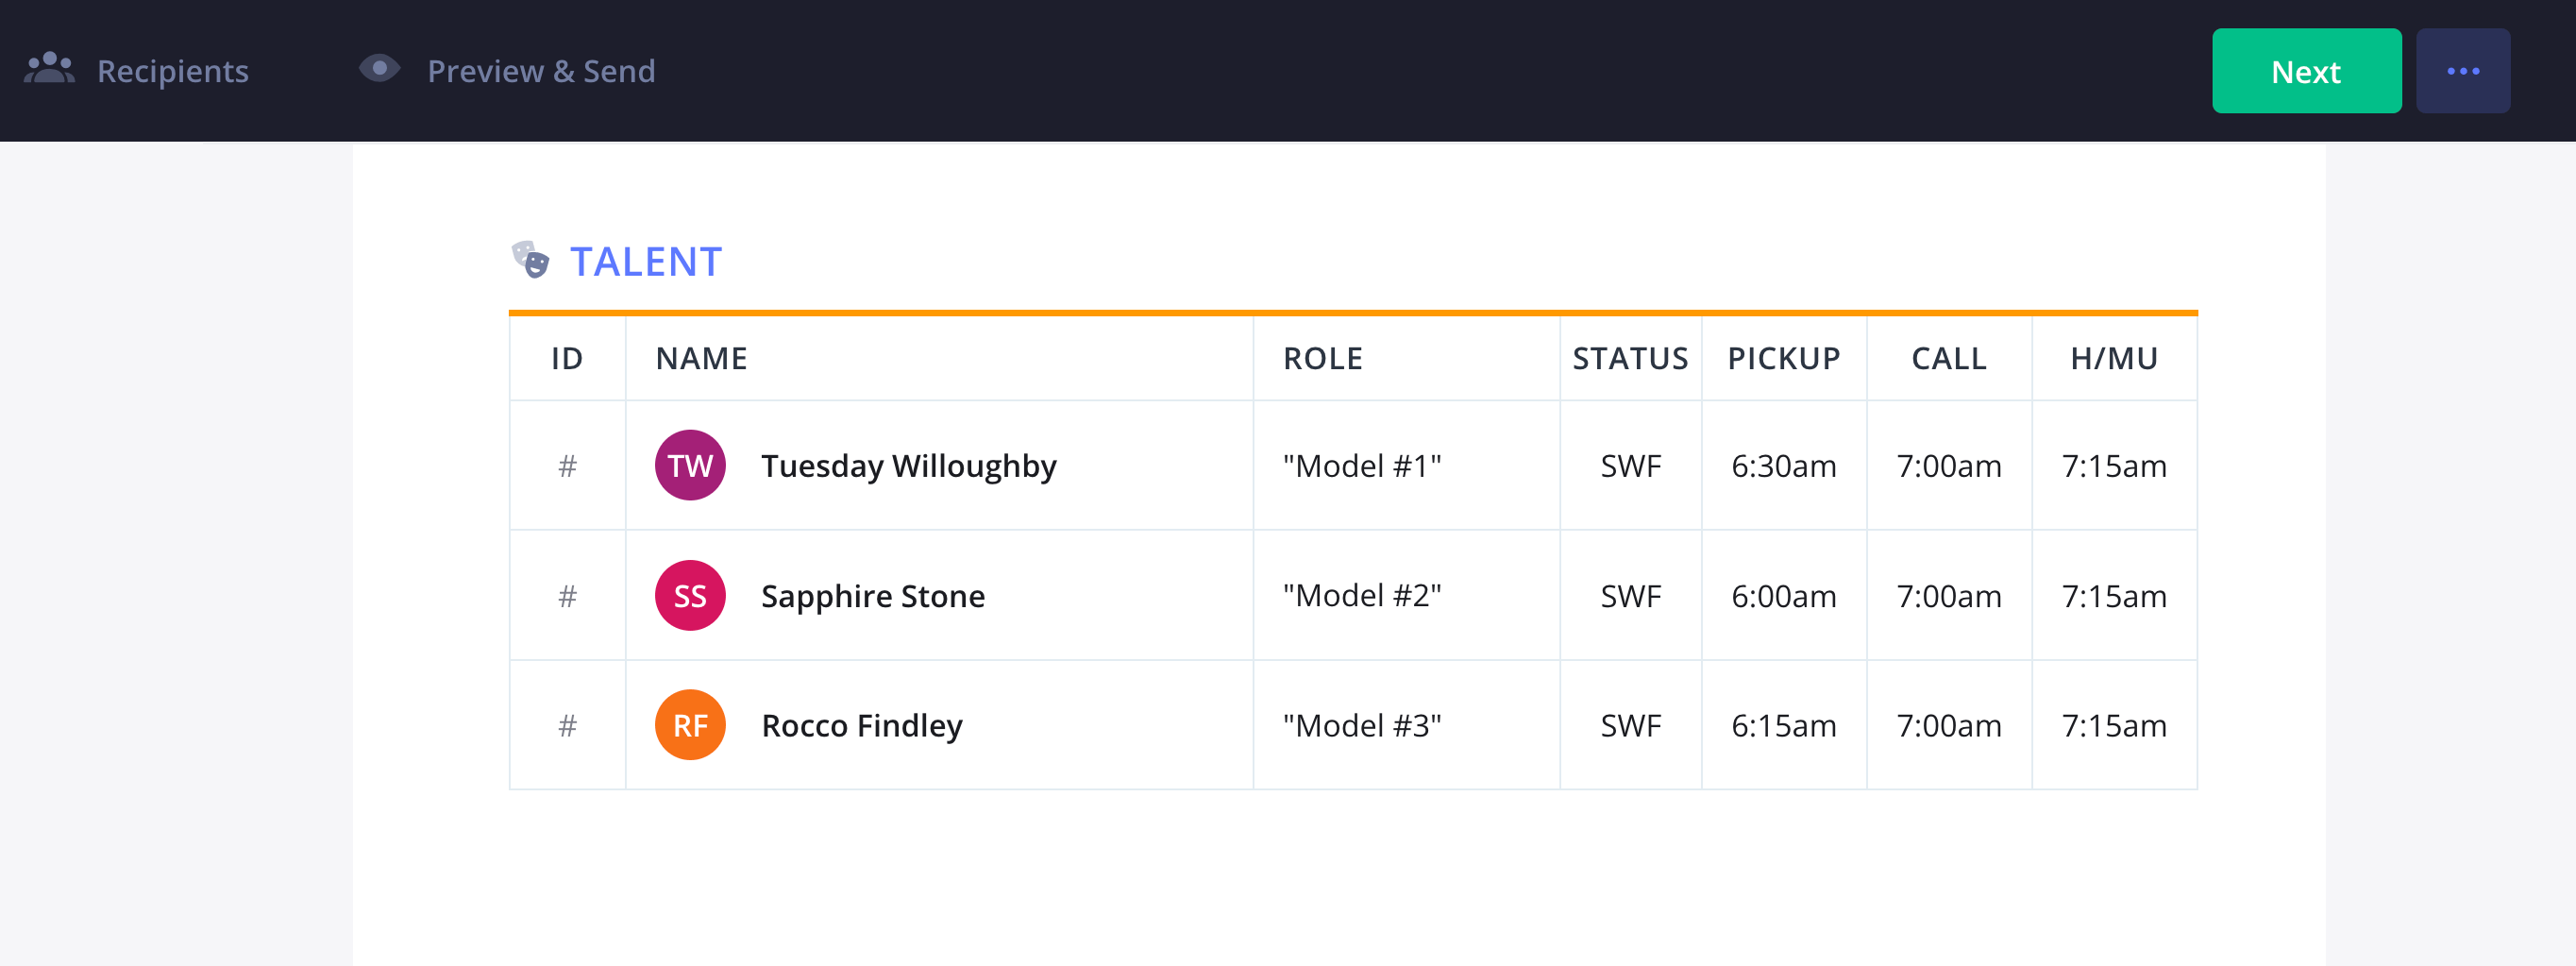
This section is for listing your models' names, roles or poses, model ID numbers, status (SWHF), pick-up times if special transportation is needed, separate call times for hair & makeup, and call times to be on set.
Talent Statuses on a call sheet are labeled as such:
- SW — starts work (first day)
- W — continuing work
- WF — finishing work (last day)
- SWF — starting and finishing work (only one day)
- H — holding for work, available but not working that day

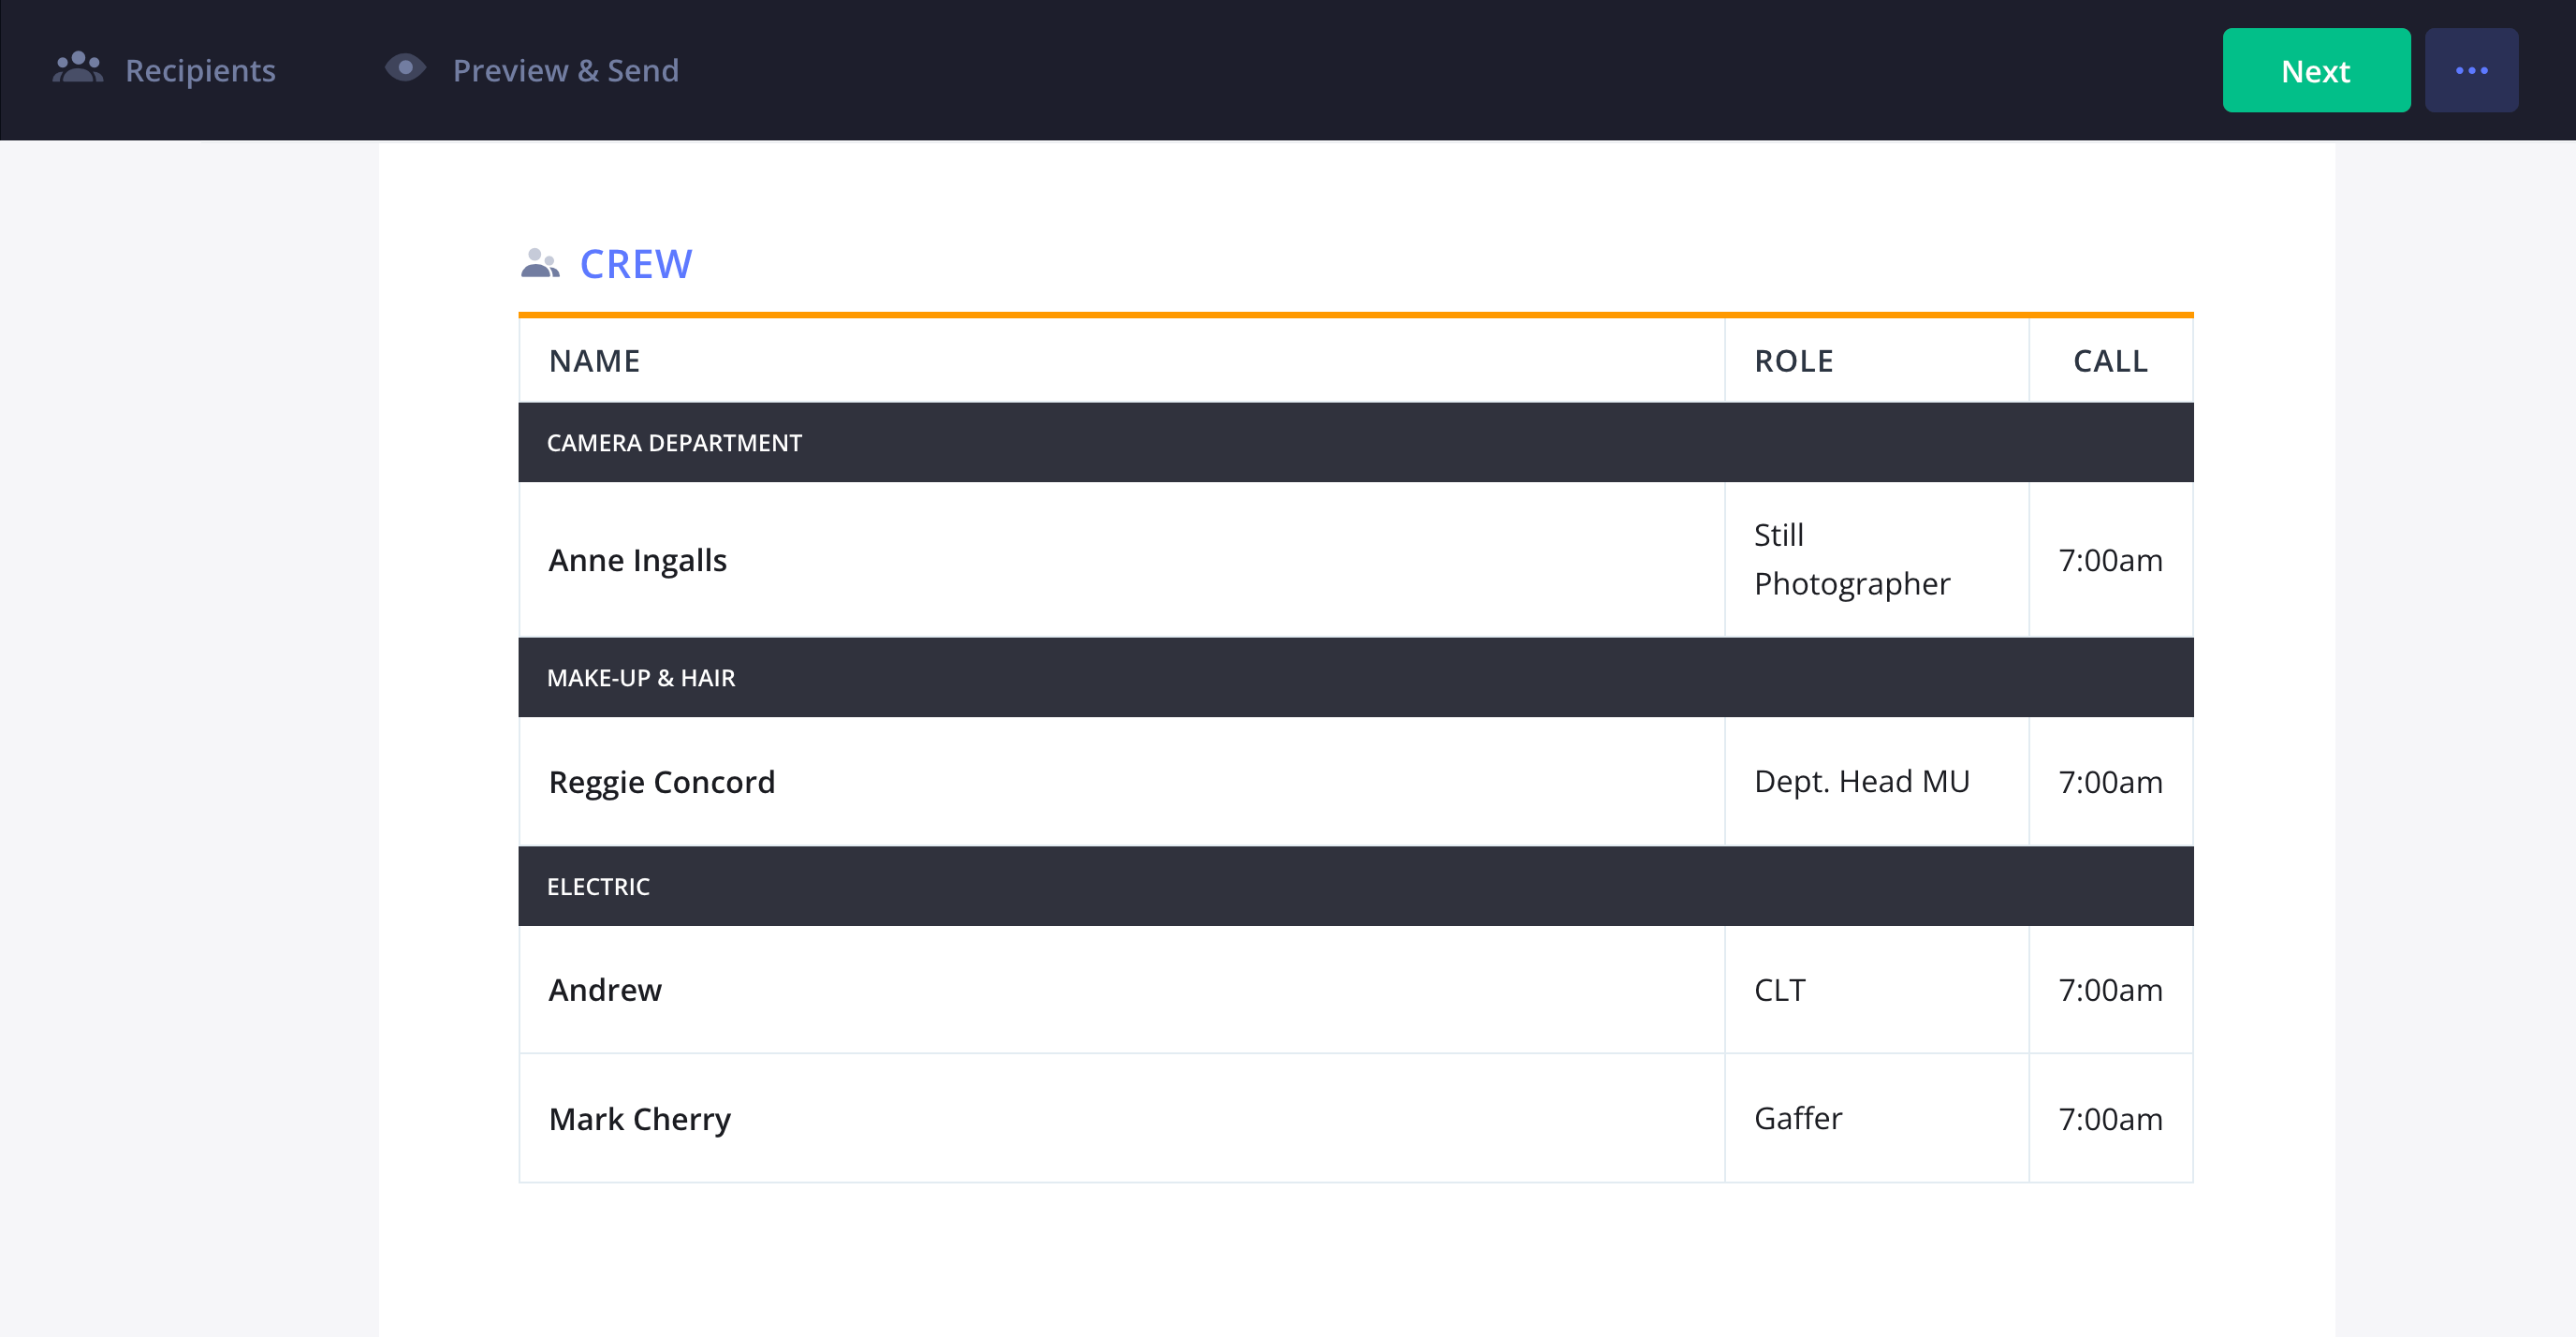
Crew information is listed in a separate section, including names, roles or departments, and their specific call times. The crew grid is usually organized by departments which is convenient for larger photoshoots that involve different teams for camera, wardrobe, and make-up.

How to do this in StudioBinder
- Auto-populate the cast from the shooting schedule and manually make adjustments if needed.
- Auto-populate your crew details from Project Contacts.
- Adjust crew info such as status and call times directly on the call sheet.
Step 5
5. Add department notes
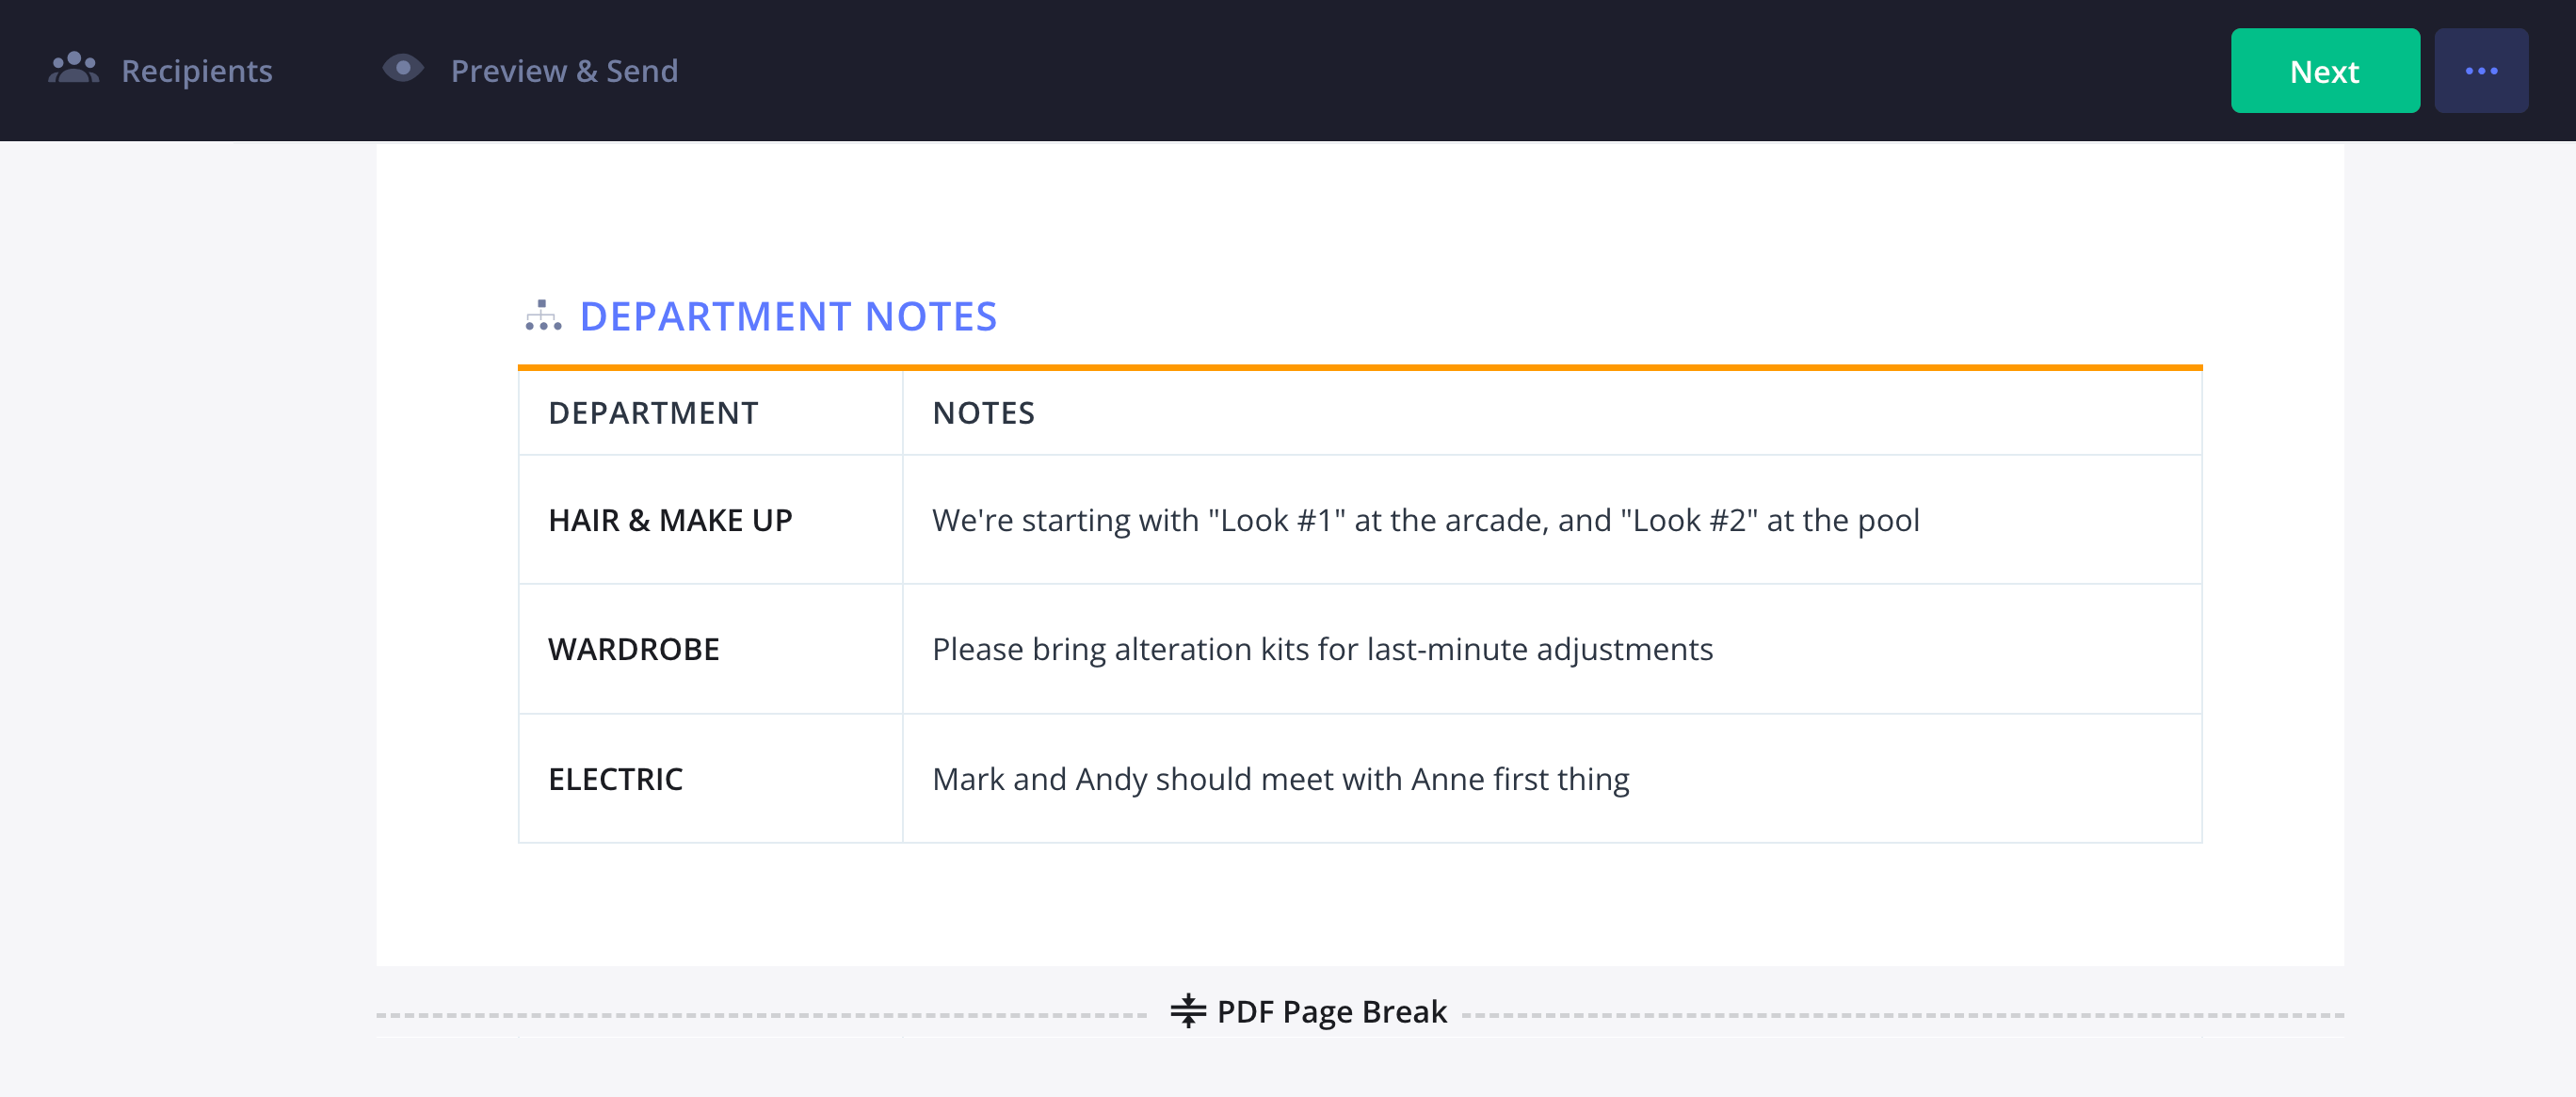
This section is for adding department-specific notes, including props, set design, wardrobe, makeup, special effects, camera gear, and more. Different types of photography will entail unique requirements for different departments, so these notes help keep everything organized.

How to do this in StudioBinder
- Manually add notes on the call sheet or automatically from tagged elements in a photoshoot treatment.
Step 7
6. Distribute and track the call sheet
Once the call sheet is finalized, it's time to get it into the hands of your collaborators and stakeholders. In commercial photography or editorial photography, clients may want to be on set as well. This is where a simple PDF call sheet is great to send to everyone that needs to be on set.
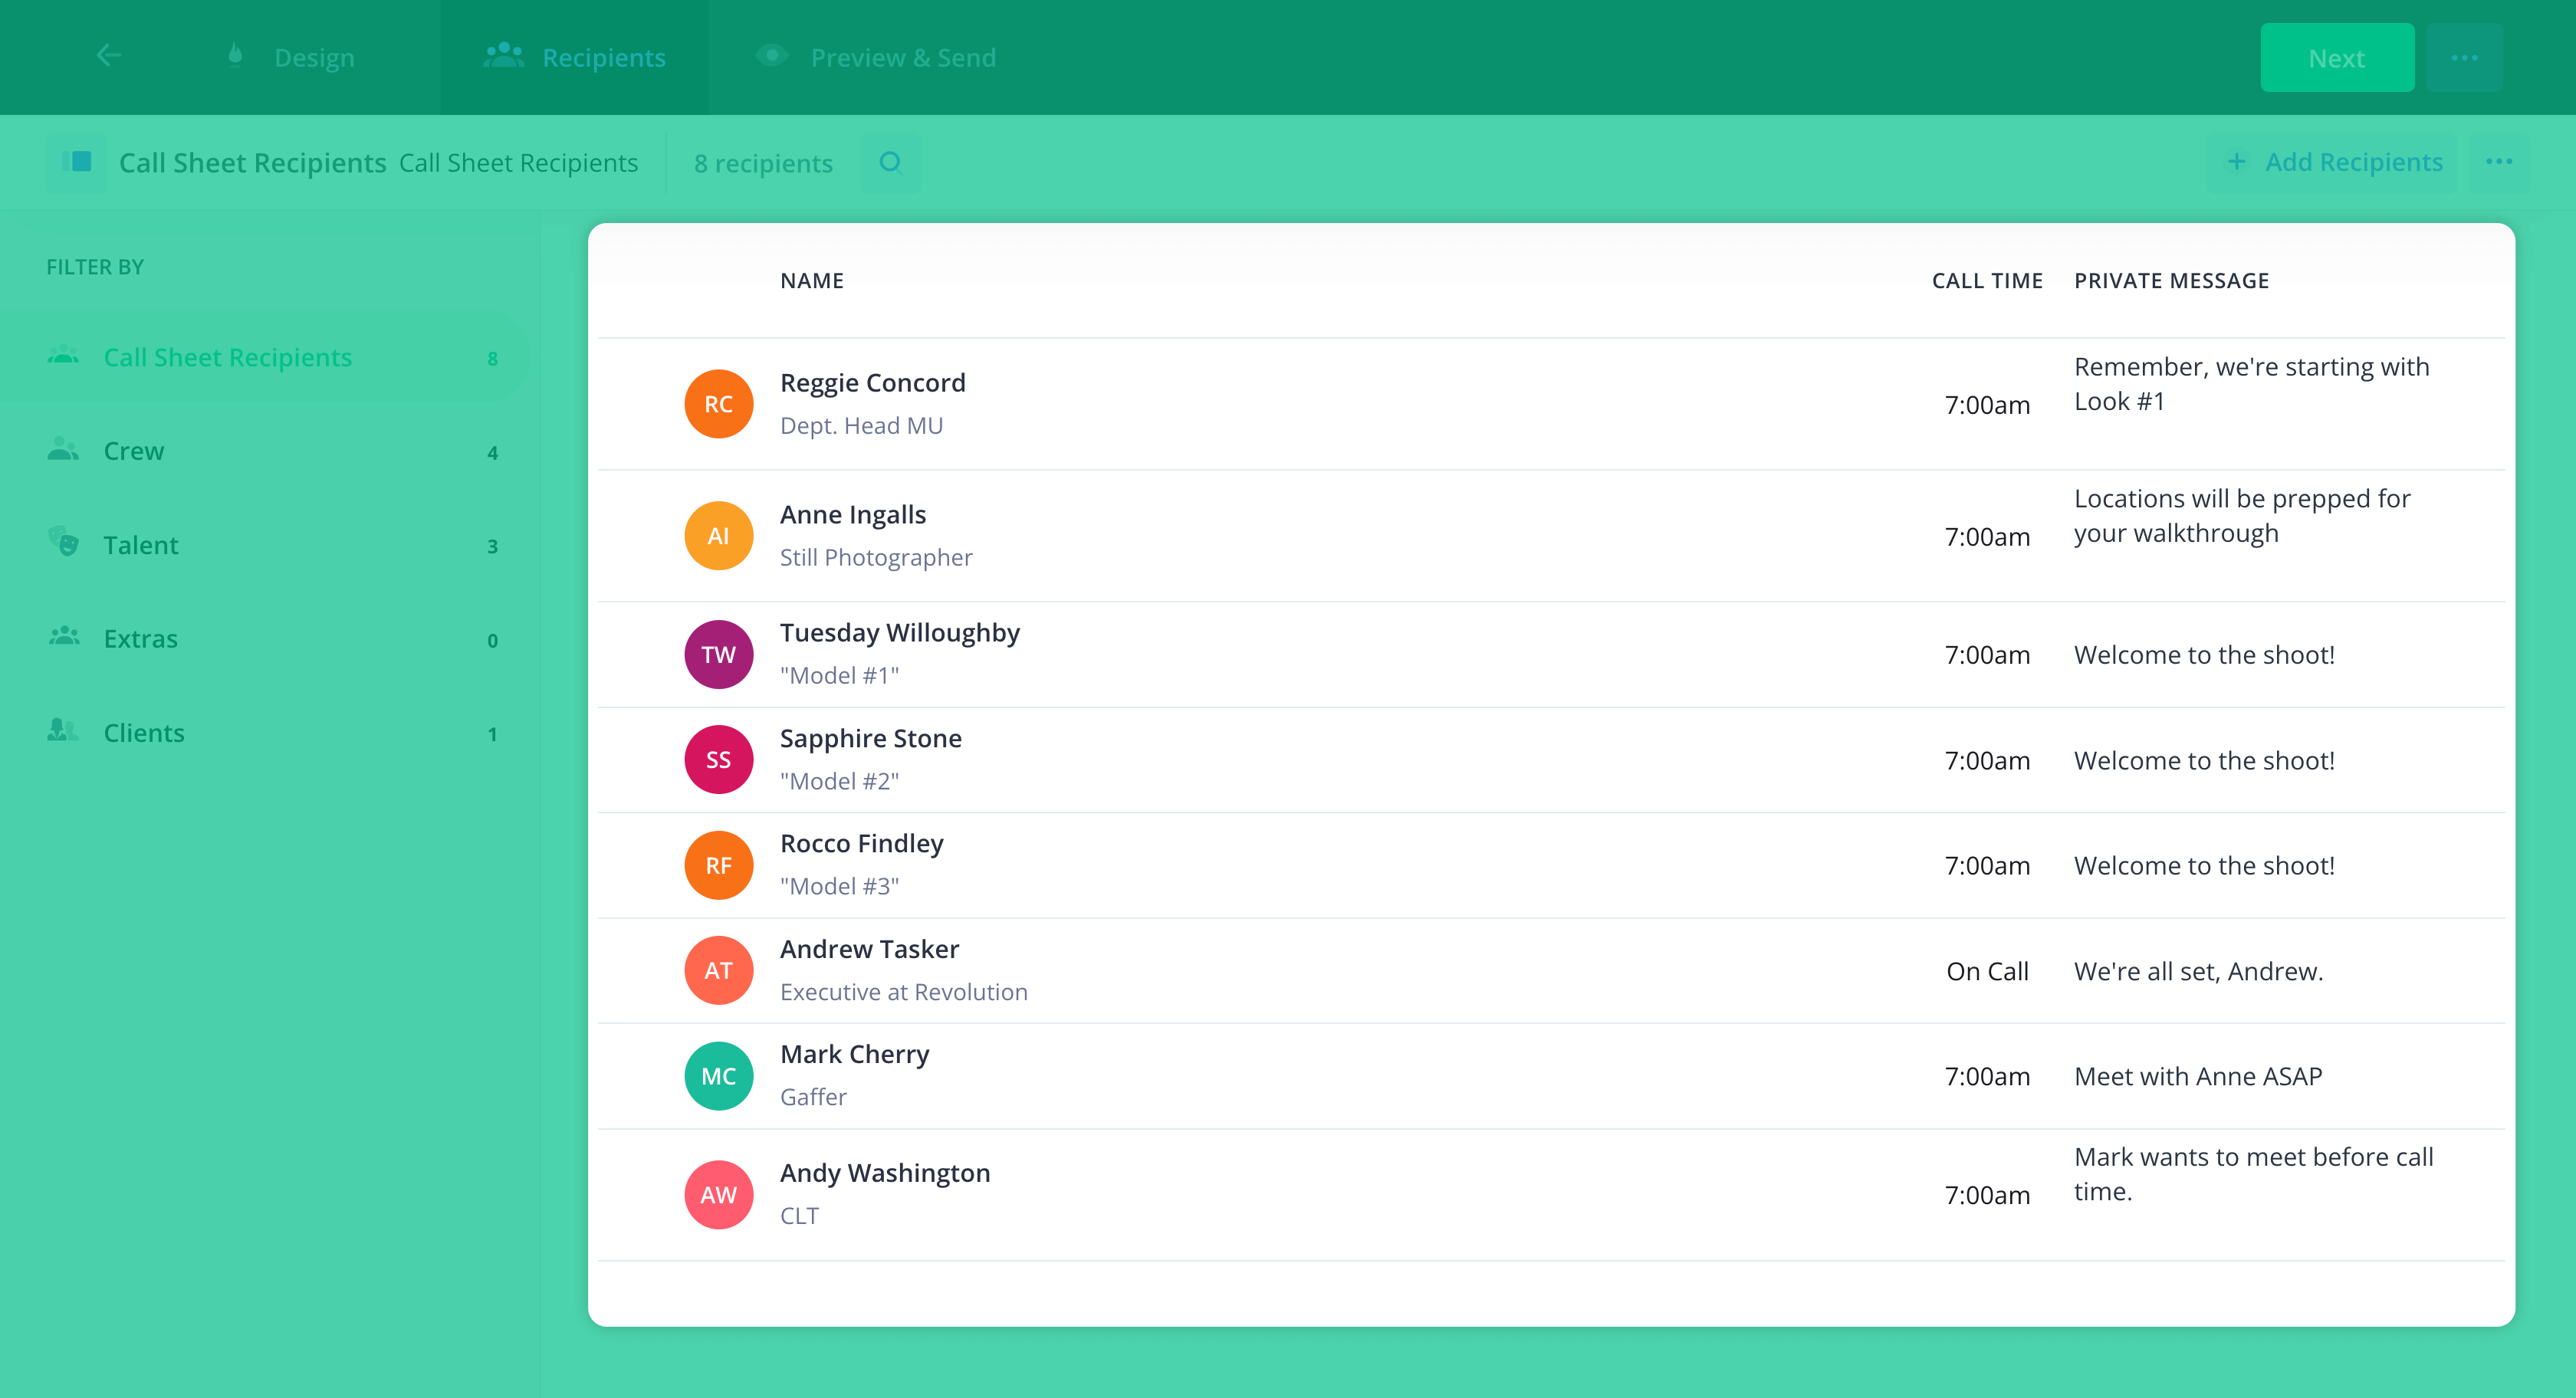

Ideally, all recipients should confirm they have received the call sheet for the photoshoot. Ask them to reply to the call sheet email or text/call the lead photographer or producer of the shoot to confirm.
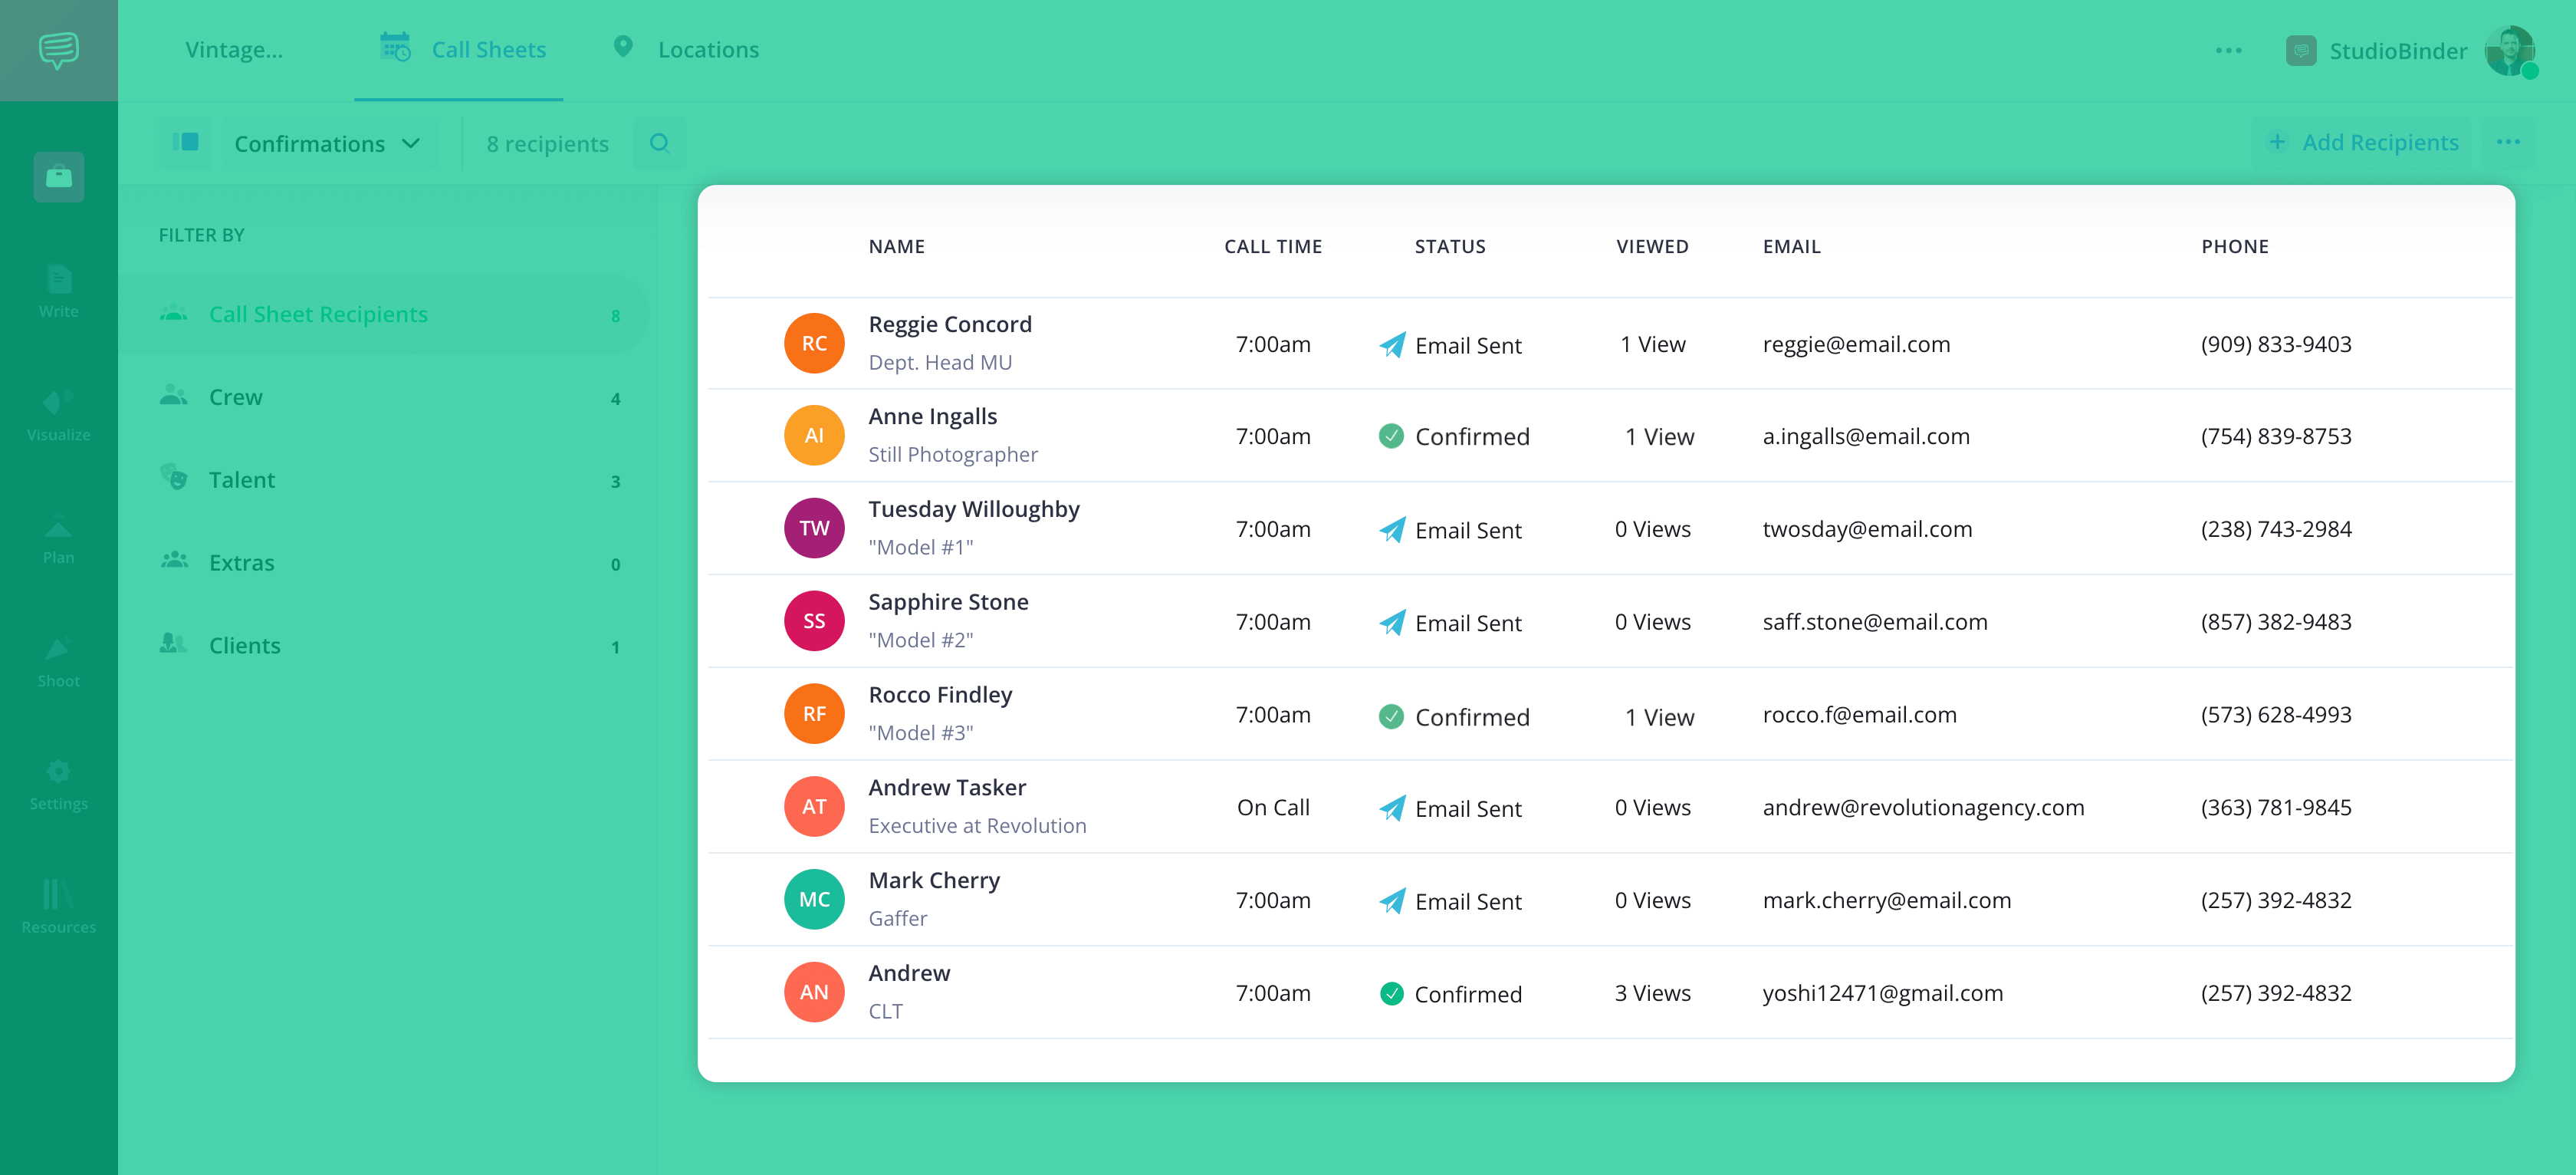

How to do this in StudioBinder
- Send call sheets via email or text message.
- Message all recipients of a specific call sheet simultaneously.
- Track call sheet status for each recipient.
- Identify and fix bounced emails.
Conclusion
Call sheets are sent
Congratulations, your call sheet is now sent! Want to dive deeper into photoshoot preparation? Don't miss our articles on how to storyboard photography, photography genres, and more. Prepare yourself for your next photoshoot!
