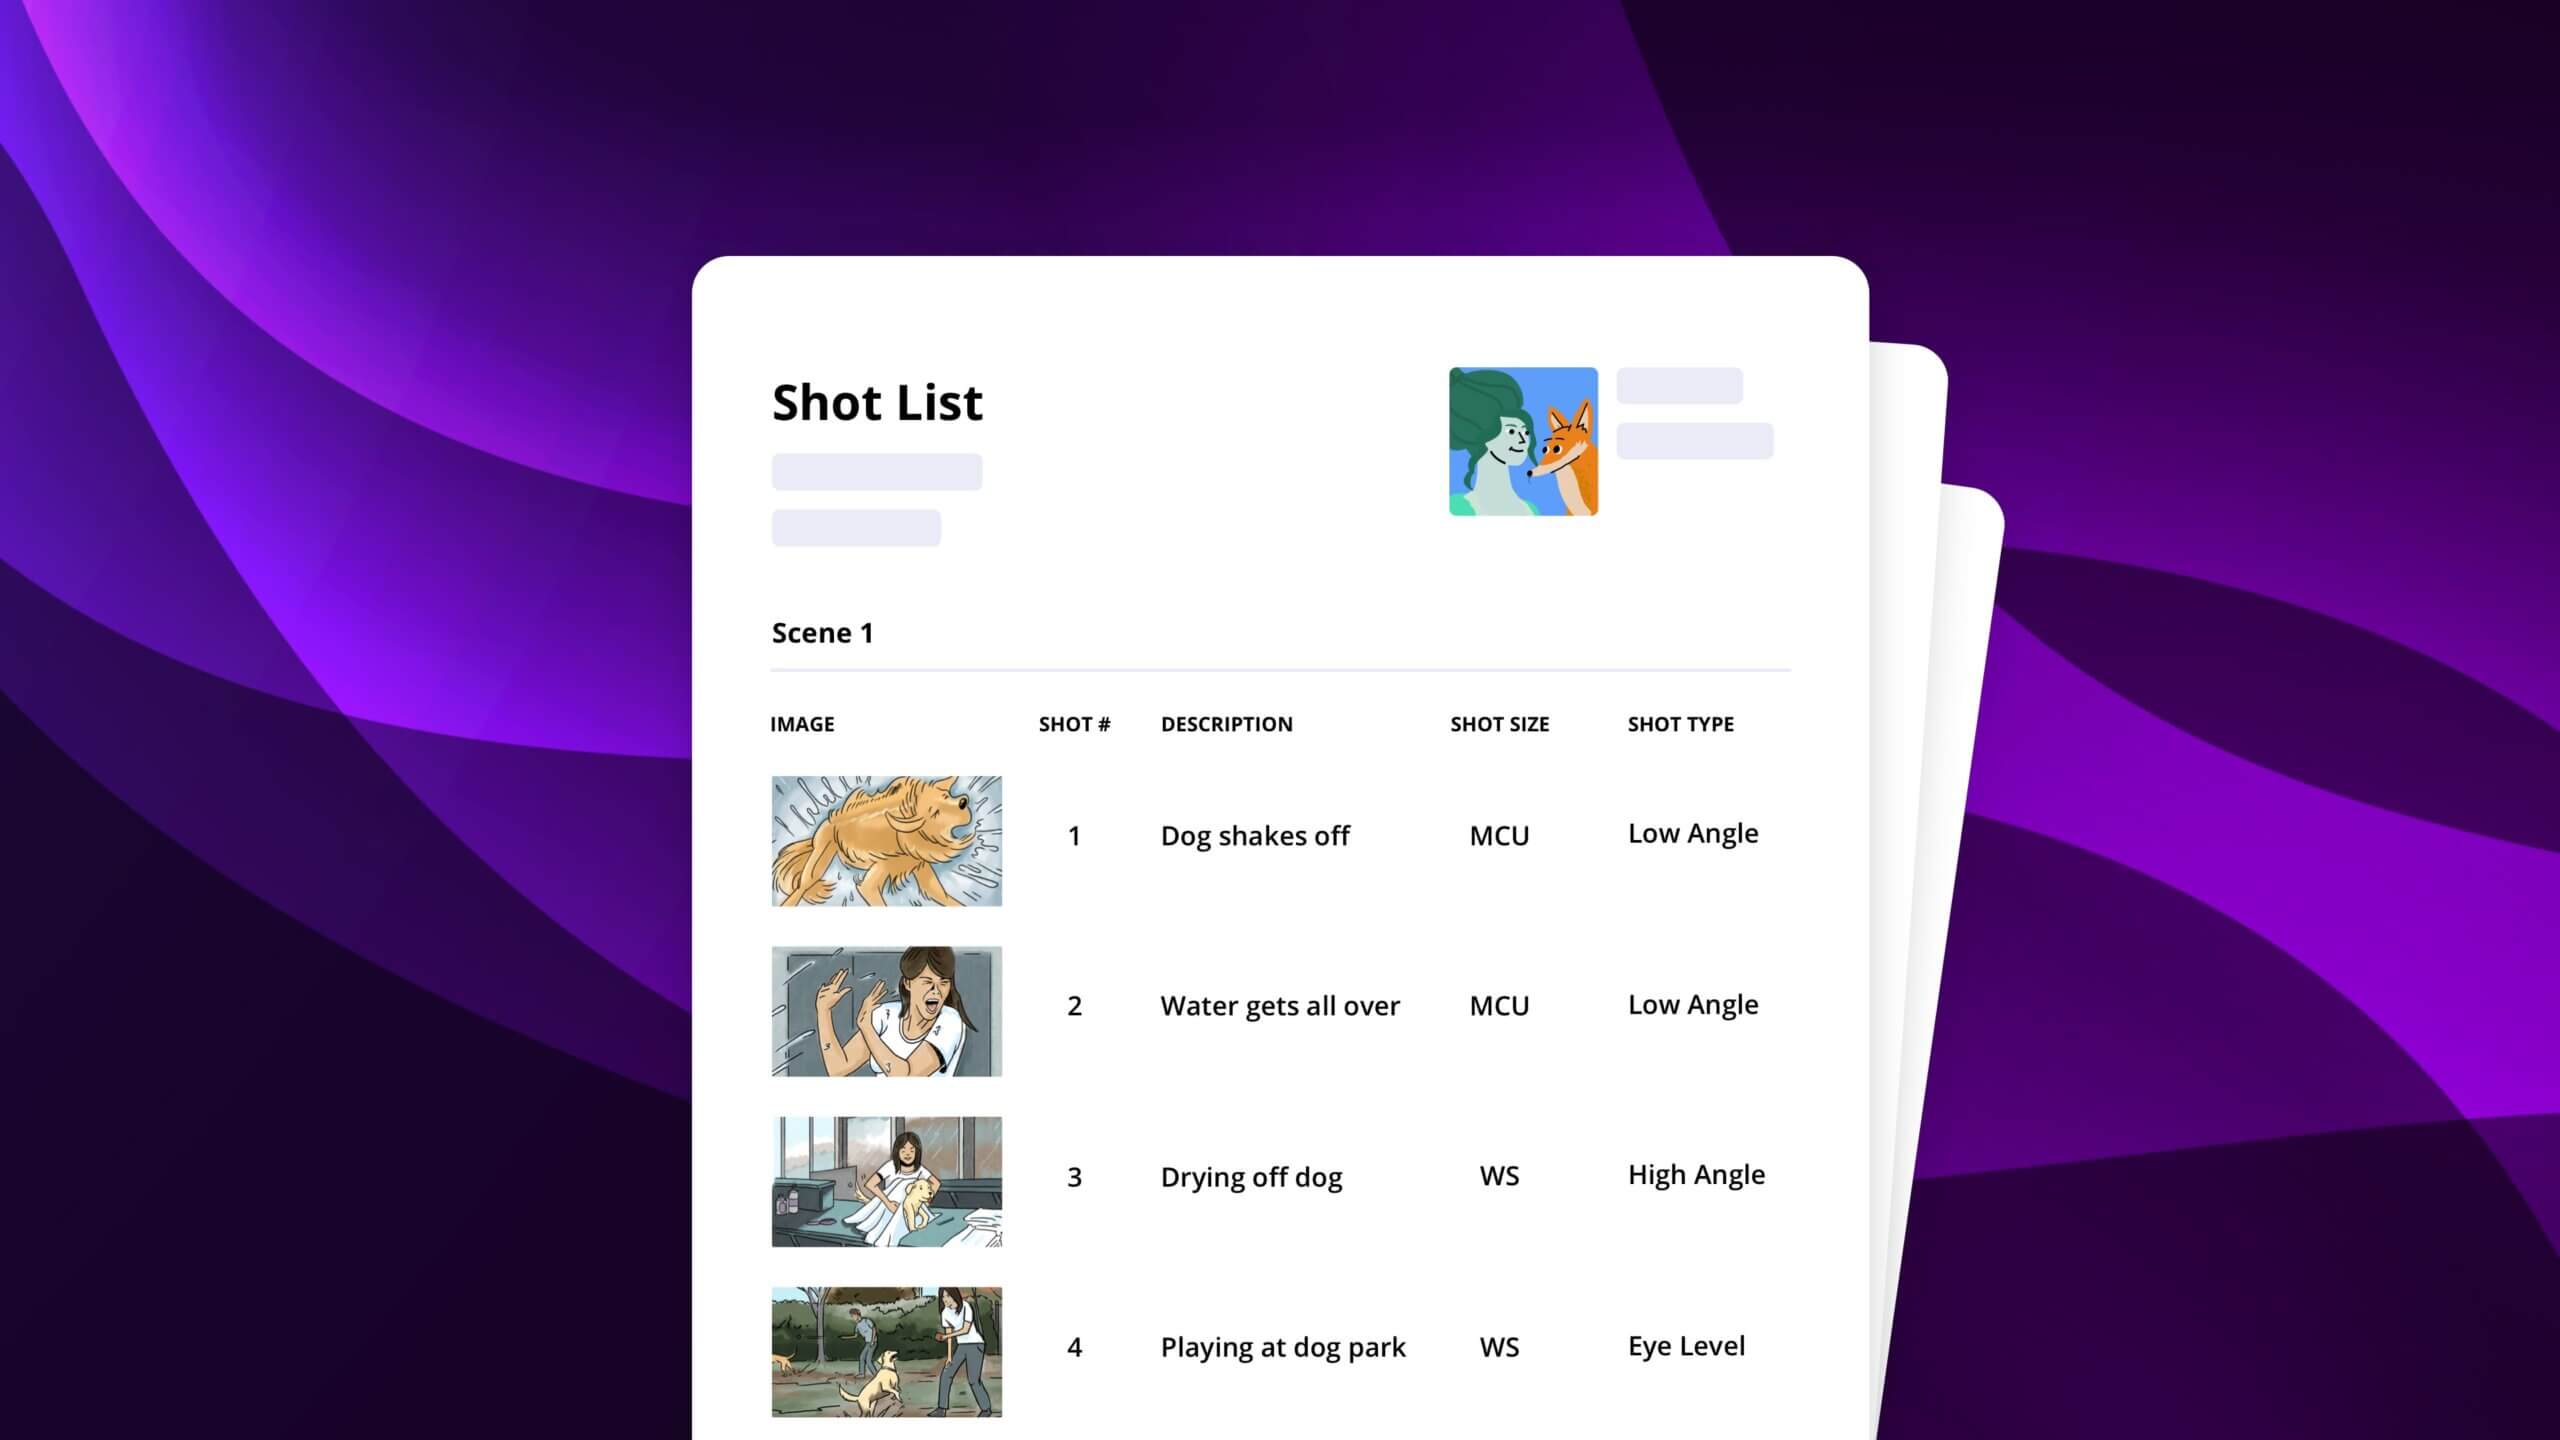
You’ve thoroughly read and re-read the script, and you can perfectly visualize what your finished movie is going to look like. But how can you make sure that what audiences will see on the screen will be the same as what’s in your mind’s eye? Easy peasy! You just need a Shot List.
Shot lists aren’t complicated, but they do have quite a few parts to them that you need to consider. Even if you’re familiar with what a shot list is, you may never have put one together yourself. That’s okay because, with StudioBinder’s help (and some great examples), we’re about to show you how it’s done.
But before we get to that, let’s start with a refresher on your basic visual vocabulary.
Cinematography Basics
1. Elements of a shot
First of all, when we talk about a “shot” in film we are referring to the entire camera setup and configuration we want to use. There are several components to consider as we execute our shots. Depending on what the narrative demands, what we wish to convey, will affect the decisions we make behind the camera.
Camera Distance
Fairly straight-forward – this one refers to how far away the camera is from your subject. For example, a close-up usually brings the camera right up to the subject, while a long shot means the camera is farther away.
Camera Position
Camera positioning refers to where the camera itself is positioned in relation to the subject. Think of how an over-the-shoulder shot (OTS) means the camera is behind the subject.
A profile shot would place the camera to the side of her.
Camera Angle
This is part of camera position, but refers specifically to the height of the lens. Camera angle helps establish the mood for what’s happening in the scene, or what’s going on emotionally with a particular character. For example, raising the lens up can create a sense of the character’s vulnerability. Lowering the lens can make him seem more powerful, particularly if he is in a position of authority.
Camera Frame
The camera frame refers to how much of the subject and/or the action taking place is visible. It’s the part of the shot that you probably think of first. The frame serves the same storytelling function - but visually - as an author’s descriptions of characters and action in a novel. It lets the audience see what’s happening, but can it also be used to focus the audience’s attention to specific details about the setting or about characters.
The frame serves a practical function as well. It dictates things like how close to the actors the boom can get without being in the shot.
In an especially difficult shooting space (like an airplane bathroom), you may not have the option of moving an object out of the frame that you don’t want to see. If so, your camera crew might be able to “frame out” (meaning reset the frame to eliminate) what you don’t like.
Depth of Field (DoF)
While the frame describes what is visible, depth of field refers to what is in focus. More specifically, DoF refers to what is in focus in relation to the subject.
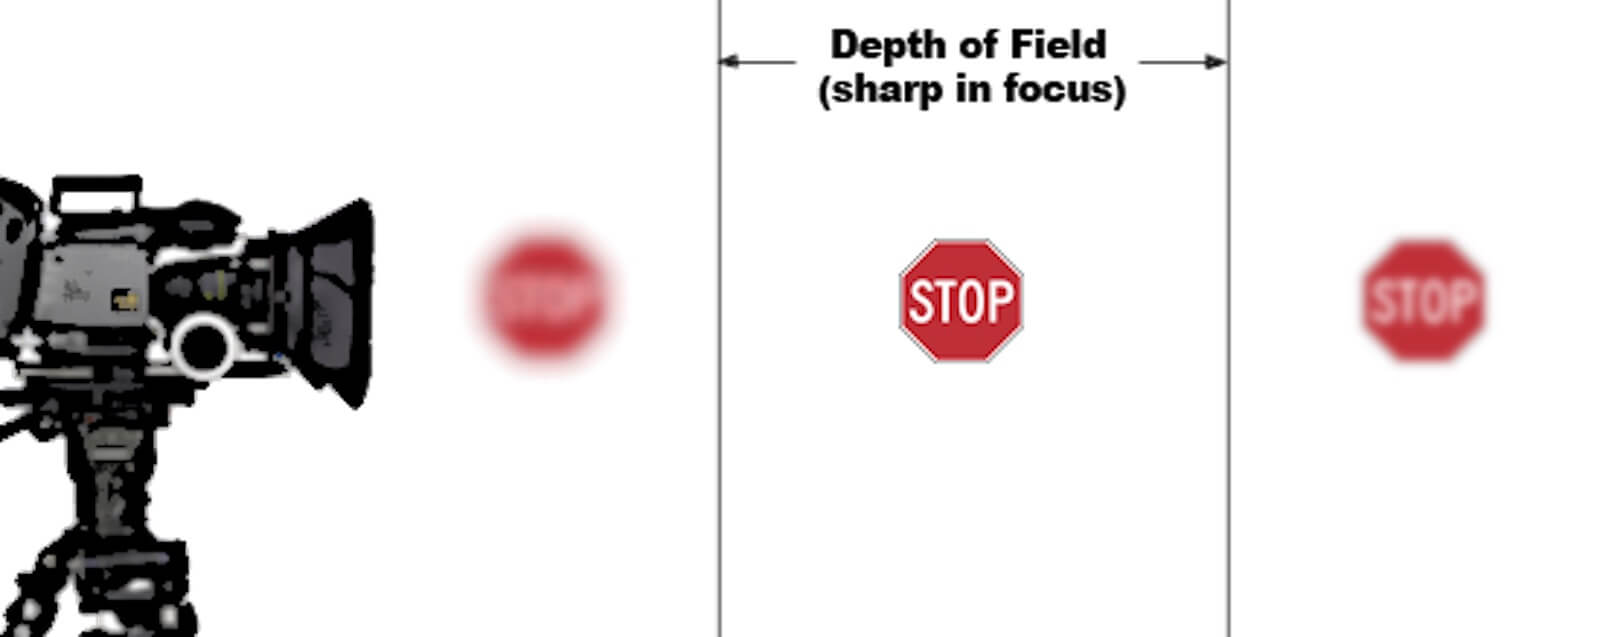
DoF means what is in focus within the frame
A shallow depth of field (or “shallow focus”) means that the subject is in focus, but the foreground and/or background isn’t, as in this shot from Bright Star:
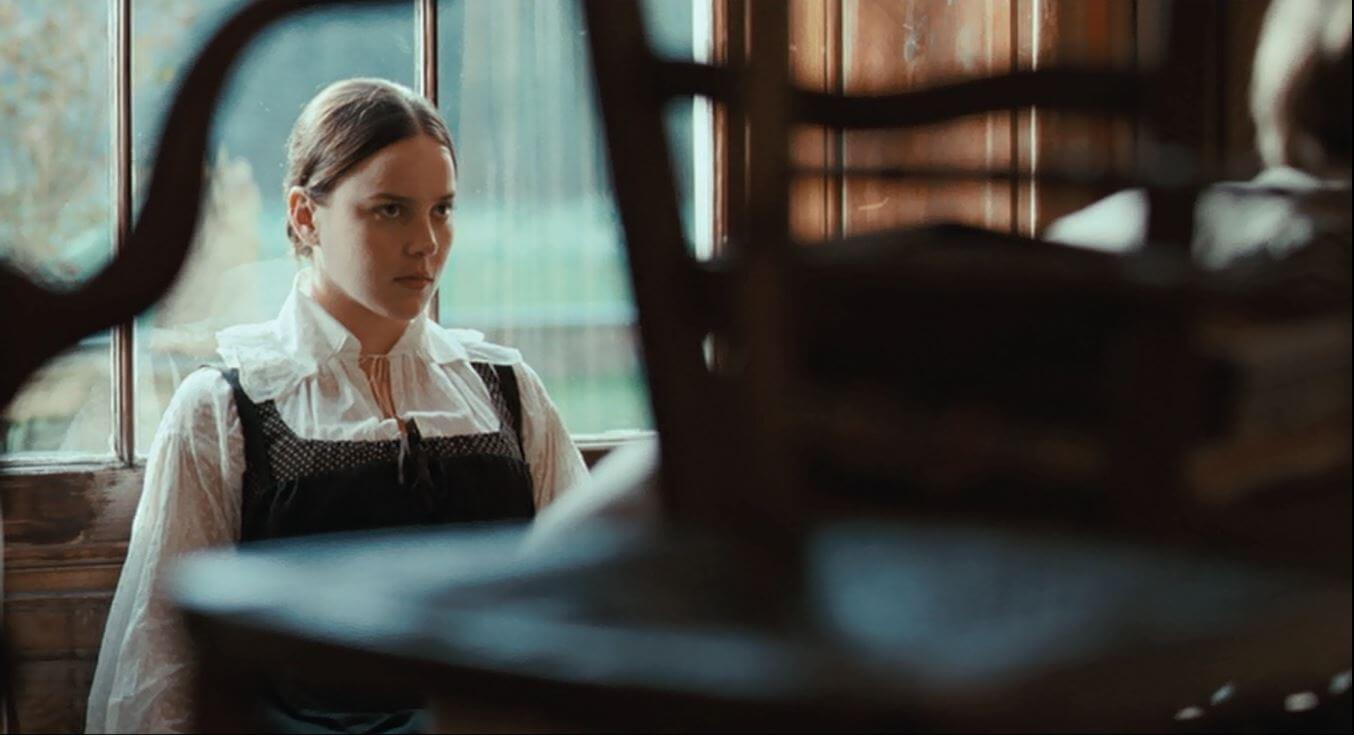
Shallow focus used in Bright Star
You can also shift between deep and shallow focus in the same shot. This is called a “rack focus” or sometimes “selective focus."
Learn more about this extensive subject in our essential guide to depth of field.
But just knowing the difference between deep and shallow focus will go a long way toward helping you communicate effectively about your vision.
Camera Movement
You can have the camera follow the action, or remain static. There are a number of ways to move the camera that we will detail later in this post. But we do have an entirely free masterclass on filmmaking techniques, along with one specific episode on how to direct the camera.
Let’s prioritize and talk a bit more about framing and identifying shot types.
Related Posts
cinematography techniques
2. Basic framing & identifying shots
Our filmmaking ancestors gave us four basic types of framing: the wide shot (WS), the medium (MS), the close-up (CU), and the over-the-shoulder (OTS).
We still use all of these every day, as well as countless variations of each that you can incorporate into your style. These variations sometimes seem endless, which is why we curated a complete guide to camera shots. In the mean time, let's learn about how framing helps us identify the shot type.
The Wide Shot
The wide shot allows the most information about your world into the frame while at the same time showing the least amount of detail.

Master the wide shot
We use wide shots for things like exposition of the story’s setting, or associating a specific location with a character (called “establishing shots”). Think of that shot of Jerry’s apartment building in any episode of Seinfeld.
Wide shots are effective for establishing mood as well. For example, Wes Anderson often uses wide shots to create nostalgia, as if we are looking at the pictures in an old photo album.
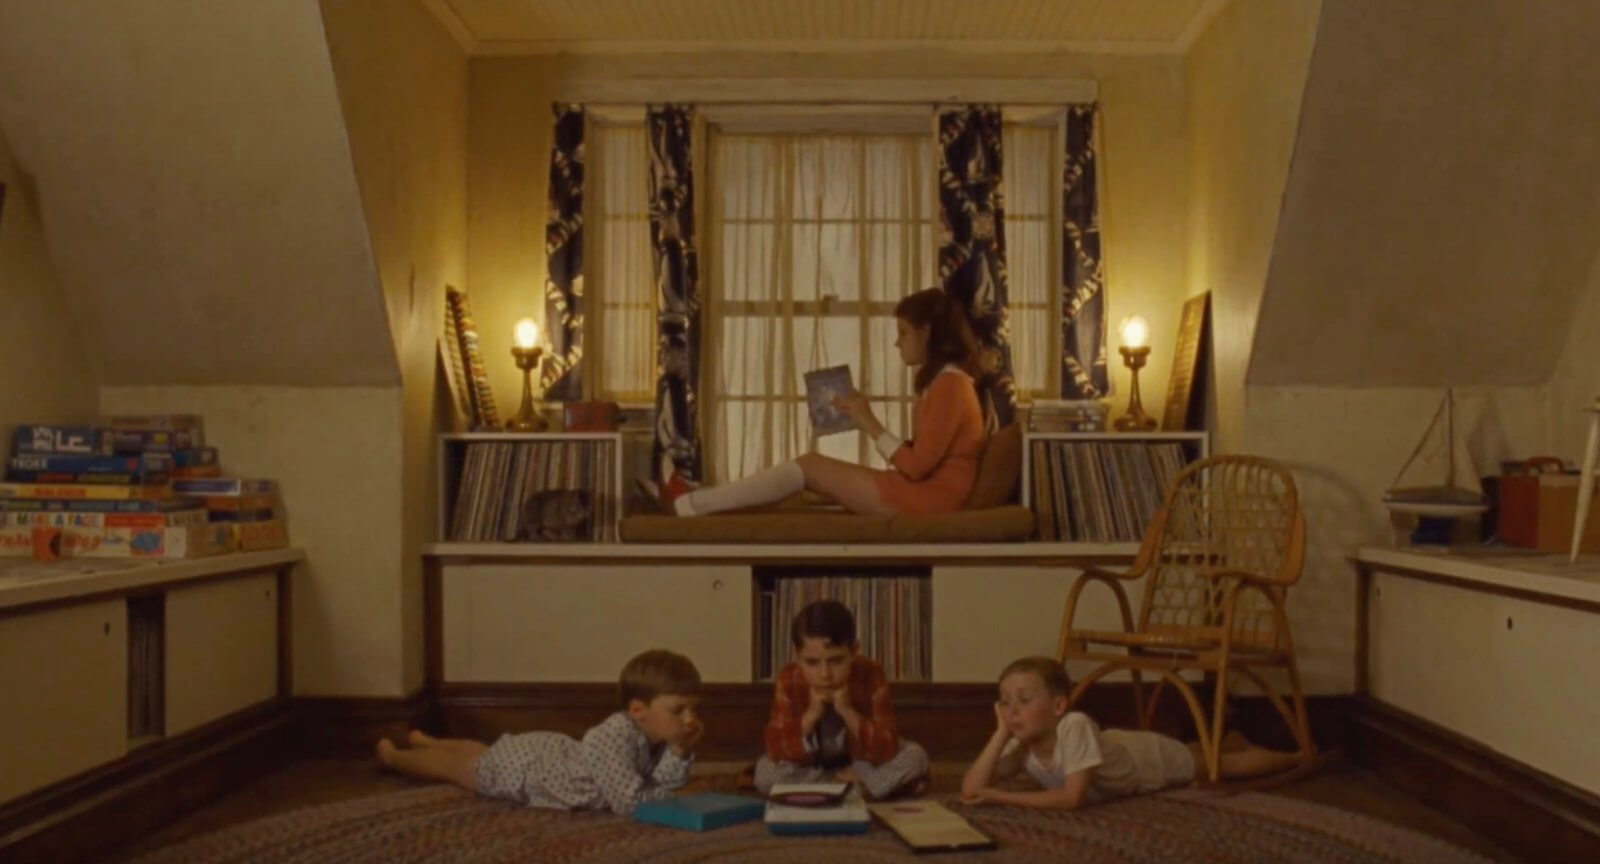
Moonrise Kingdom
We also use the wide shot for physical comedy or stunts. Physical comedy like slapstick usually gets the best response from an audience when they can see the entire, disastrous (but hilarious) situation in real time.
The same is true with stunt gags, which can be difficult to perform or complicated to set up. Often you’ll only get one chance to capture what is needed (i.e. explosions). And the lack of character detail in the wide shot makes it less obvious if you’re using a stunt performer.
But wide shots can also be used to depict intimate character traits. For example, using a wide shot can show a character’s feelings of abandonment or isolation.
When putting characters on each side of the frame, a wide shot can illustrate the characters’ emotional distance from each other.
Finally, wide shots are - but not always - what we use as the master shot of a scene. The master establishes geography, that is where everything and everyone is in relation to each other. This helps orient the audience to the environment so they can better follow any action or movement.
In addition, editors use the master as a reference for any other angle on the scene. Shooting the master first is a good idea, not just for editors, but for the purposes of reference and continuity on the day as well.
The Medium Shot
The frame of the medium shot is roughly from a person’s waist to just above her head. It’s arguably the most frequently used of all frames.
That’s because the medium frame most closely represents conversational distance. In other words, it’s the frame our eyes would see naturally if we were talking to the character in person.
You can see examples of the shot below:

Check out more on the medium shot
The medium shot puts us close enough to see a character’s facial expressions while also allowing enough room for her to gesture and move around. It’s essentially the “default” frame for characters to inhabit.
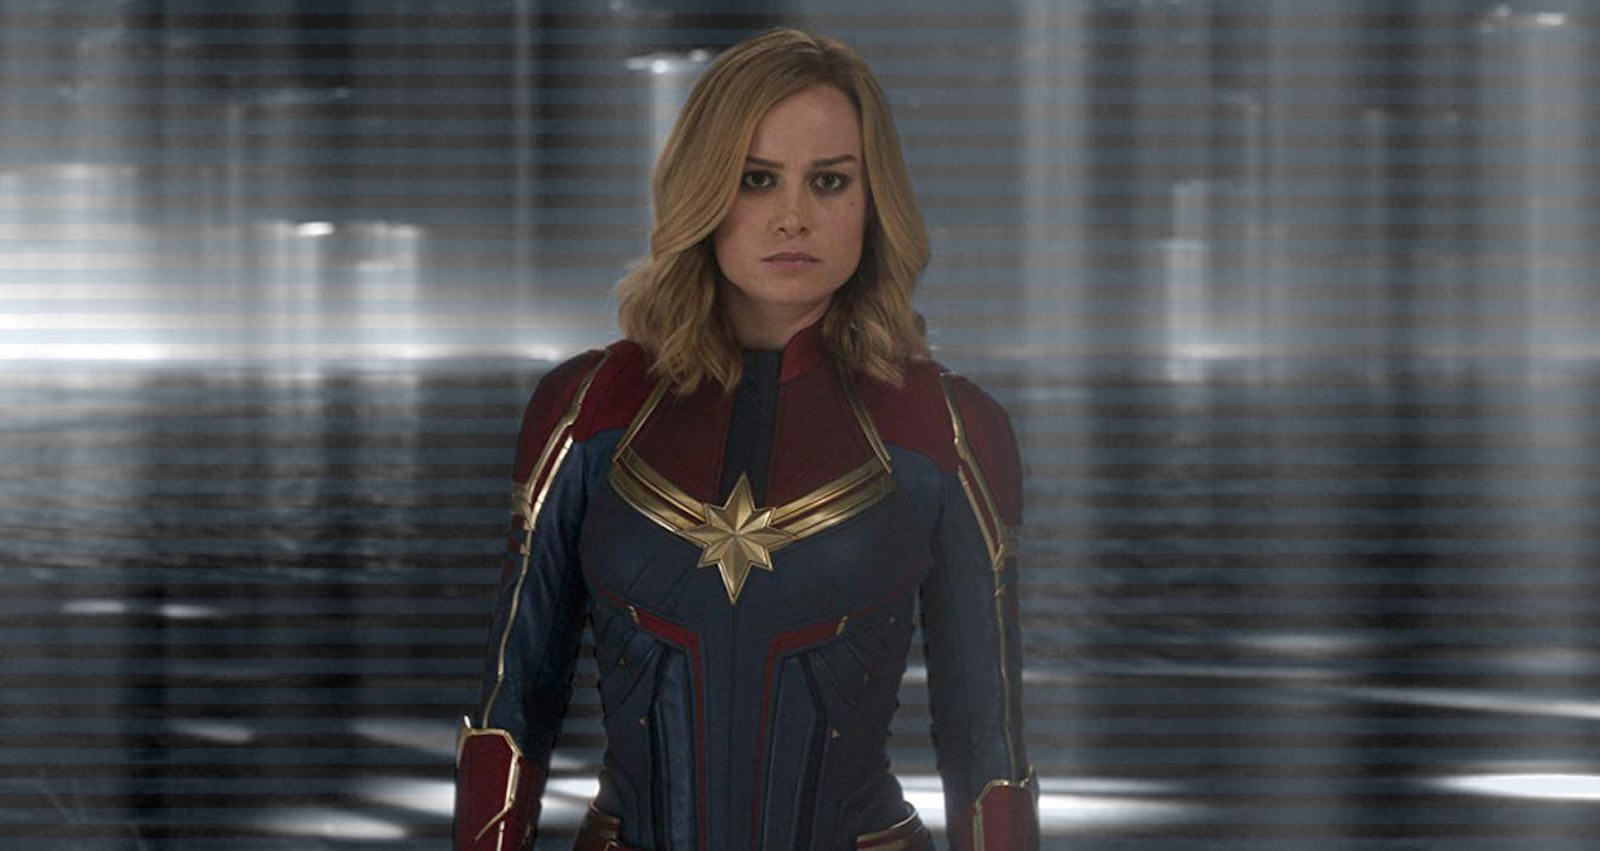
Captain Marvel medium shot
Another version of the medium shot is the cowboy. The cowboy is just more loosely framed, from about mid-thigh to above the top of the character’s head.
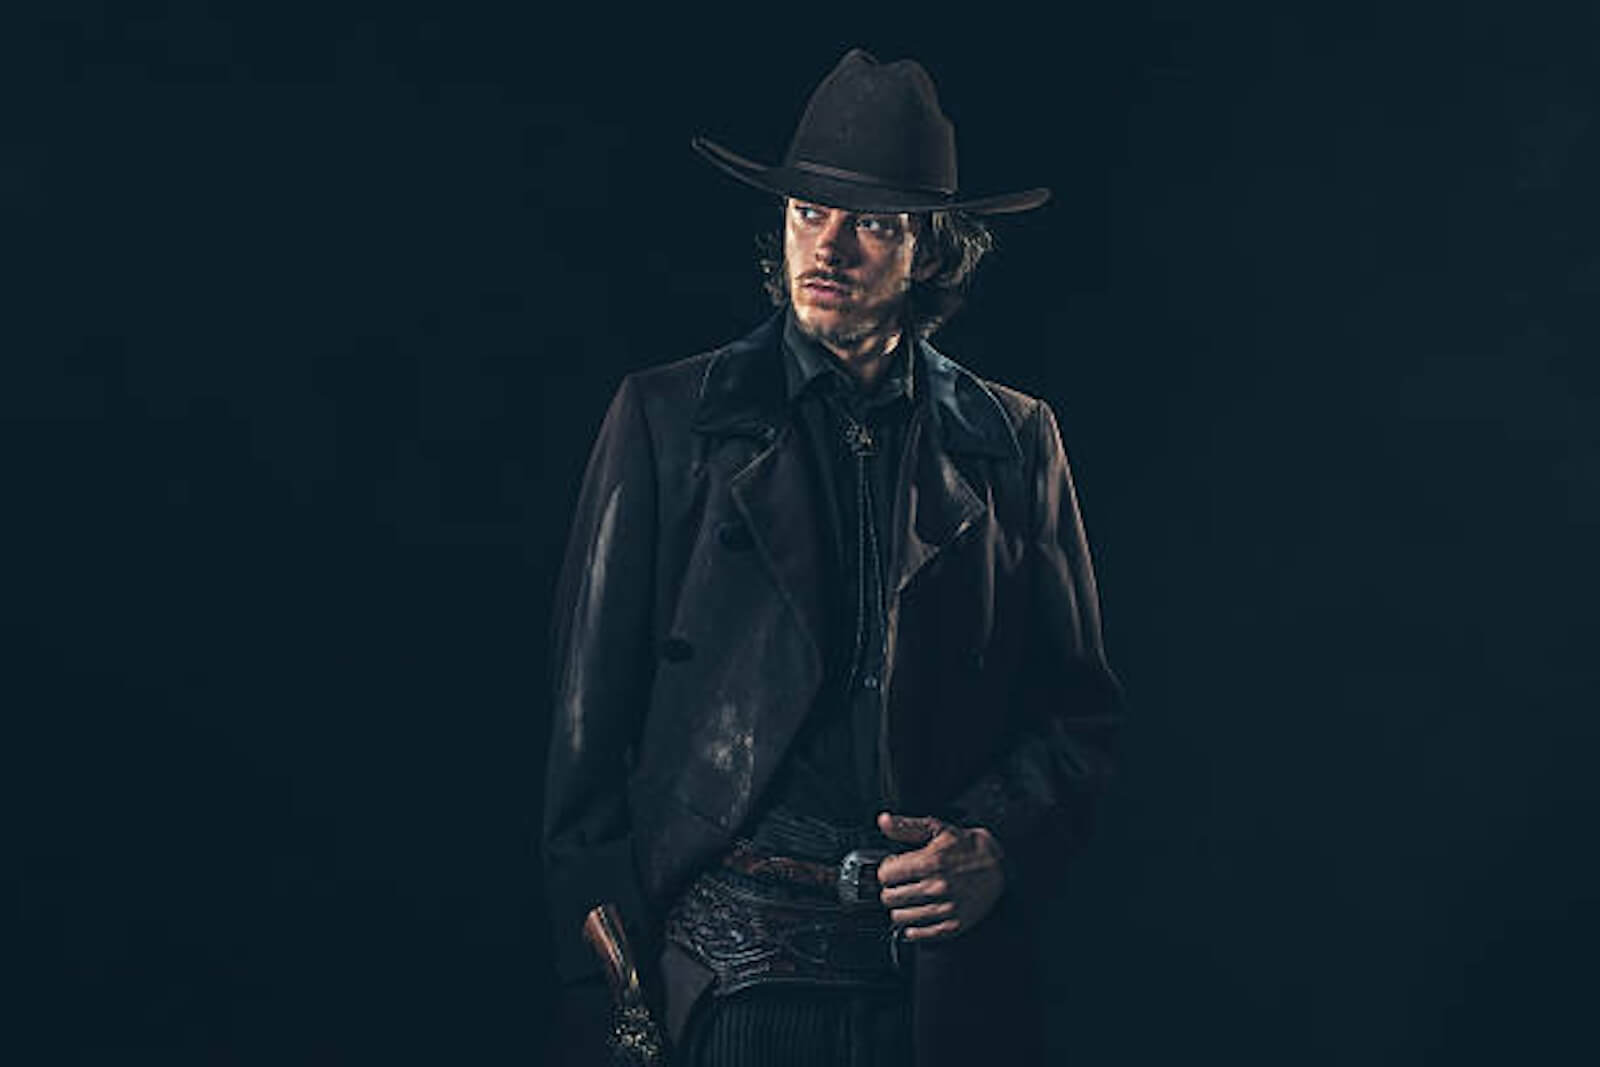
The cowboy frame
The name comes from how, in old westerns, characters were usually framed to show from their holsters to the top of their hats.
The Medium Two Shot
The one puts two characters in the frame together.
They may be facing each other, or the camera, depending on their relationship or the emotions between them.
If the characters are in some way adversaries (say a baseball manager and an umpire arguing over a call), a profile two-shot, with each character facing the other, is a good way to show it.
If they’re newlyweds watching a sunset, we could probably tell just by having the two characters right next to each other in the frame.
The Medium Wide Shot
When more than two characters share the frame, you’ll need to move to the medium wide shot (MW). The medium wide is a good way to illustrate camaraderie between characters by having them all facing the camera.
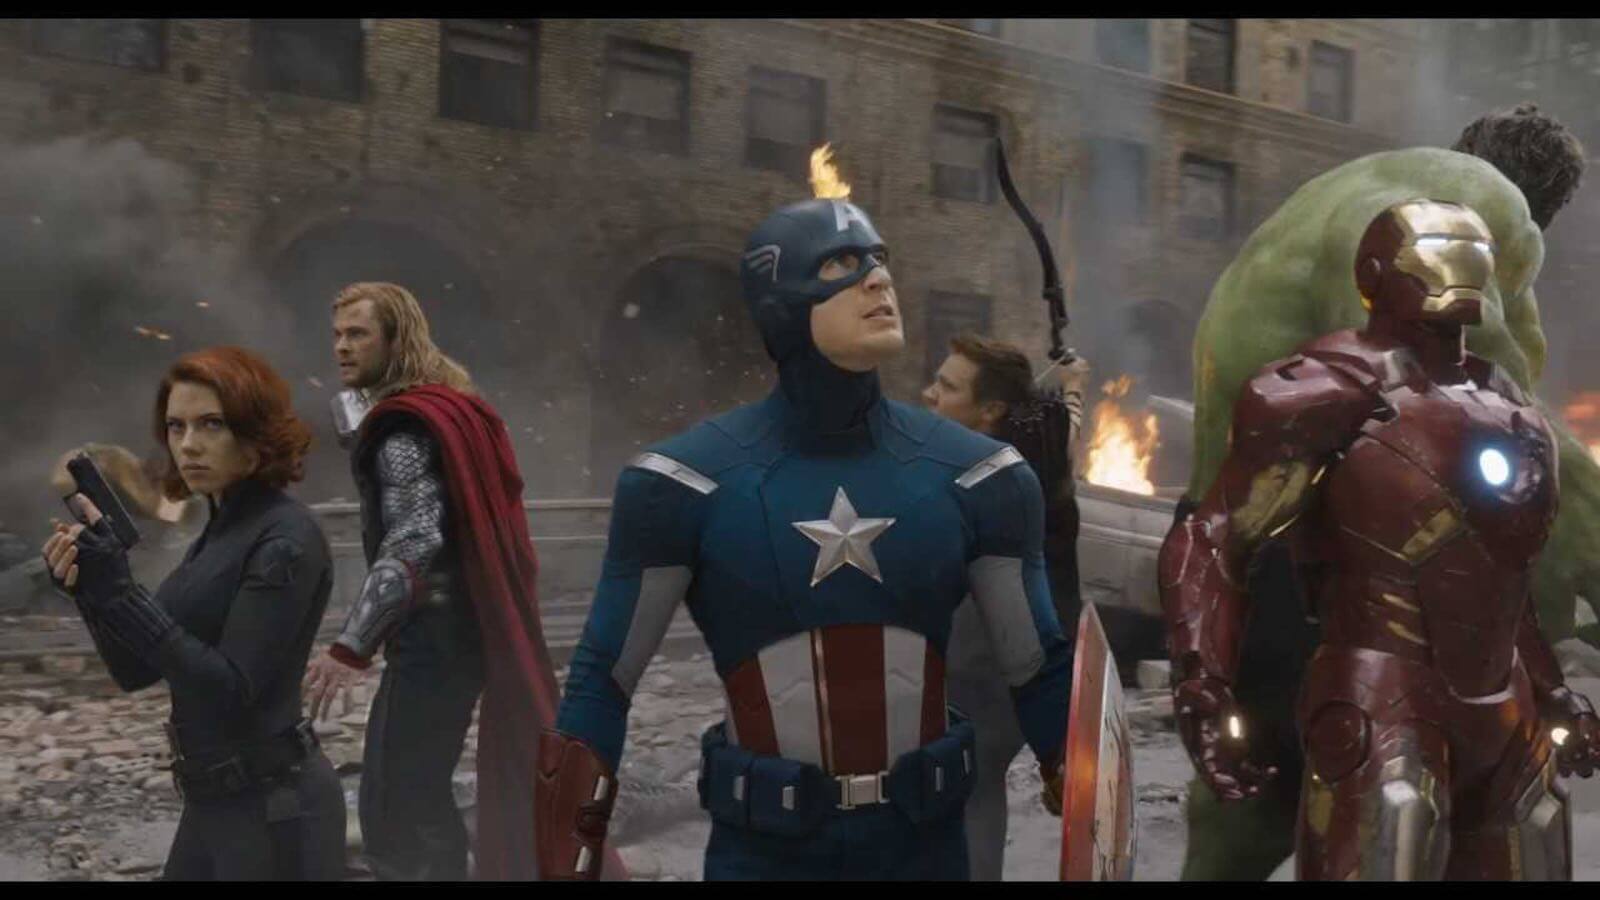
Avengers assemble
Remember that no matter how many characters you put into the frame, a medium shot stays above the knees.
The way we frame our subjects matters. Why not learn every possible way to do it? Add to your tool belt and become the best filmmaker you can. Check out more shots below:
Camera Shot Sizes
Guide to Shot Sizes
Master every shot size, and learn how to combine them with angles and movements to take your storytelling to the next level.
The OTS Shot
The over-the-shoulder - sometimes just called “over”- is exactly what it sounds like. The camera is literally behind the actor and shooting over his shoulder at some other subject. The OTS may be the only shot specifically devised to psychologically engage the audience. Check out some examples below:
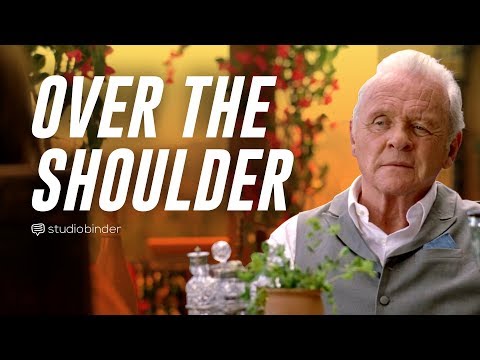
Over the shoulder in Westworld
Think of how the OTS usually comes at a point in a conversation when it’s starting to get important. The OTS is the shot that places the audience right at the table, so to speak, listening in.
But the OTS is also used to signal relationship dynamics. When combined with camera angle, the OTS can create a powerful sense of what one character is feeling about another.
For example, in this frame from The Empire Strikes Back, Vader appears to be a giant compared to Lando.
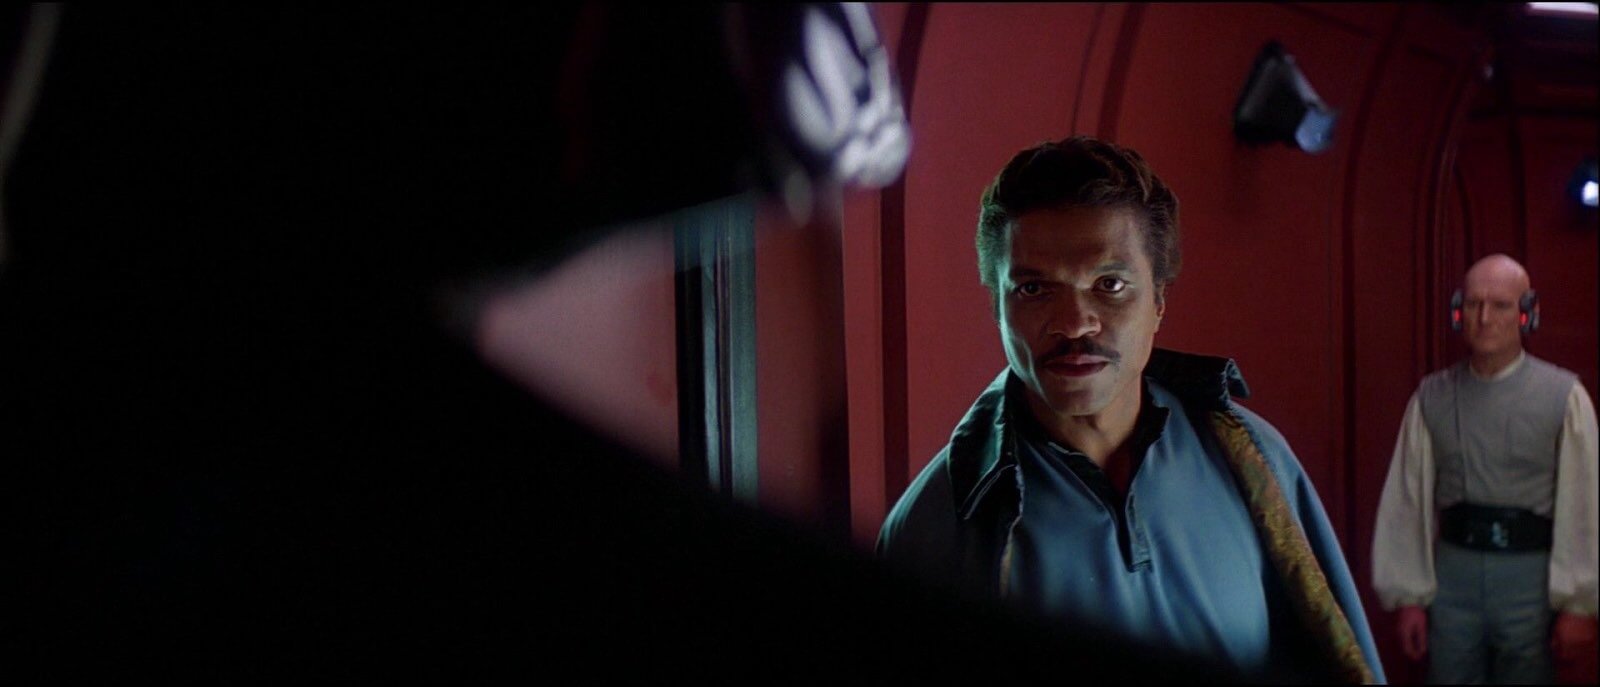
OTS shot
It’s a clear representation of what is happening in the story at this point: the uber-powerful Darth Vader has taken over control of Lando’s Cloud City, one of the last Empire-free systems.
The Close-Up
Close-up framing starts from about the middle of a character’s chest to just above the top of his head. And if used sparingly, can tell the audience what's most critical in the scene. We go into a deep dive of the close-up shot here, but you can also check out the video below.

Close in on the close-up shot
There are any number of variations on this frame, including the medium close-up (MCU), which is framed from between the waist and chest on up; and the extreme close-up (XCU), which is just the face or even just the eyes.
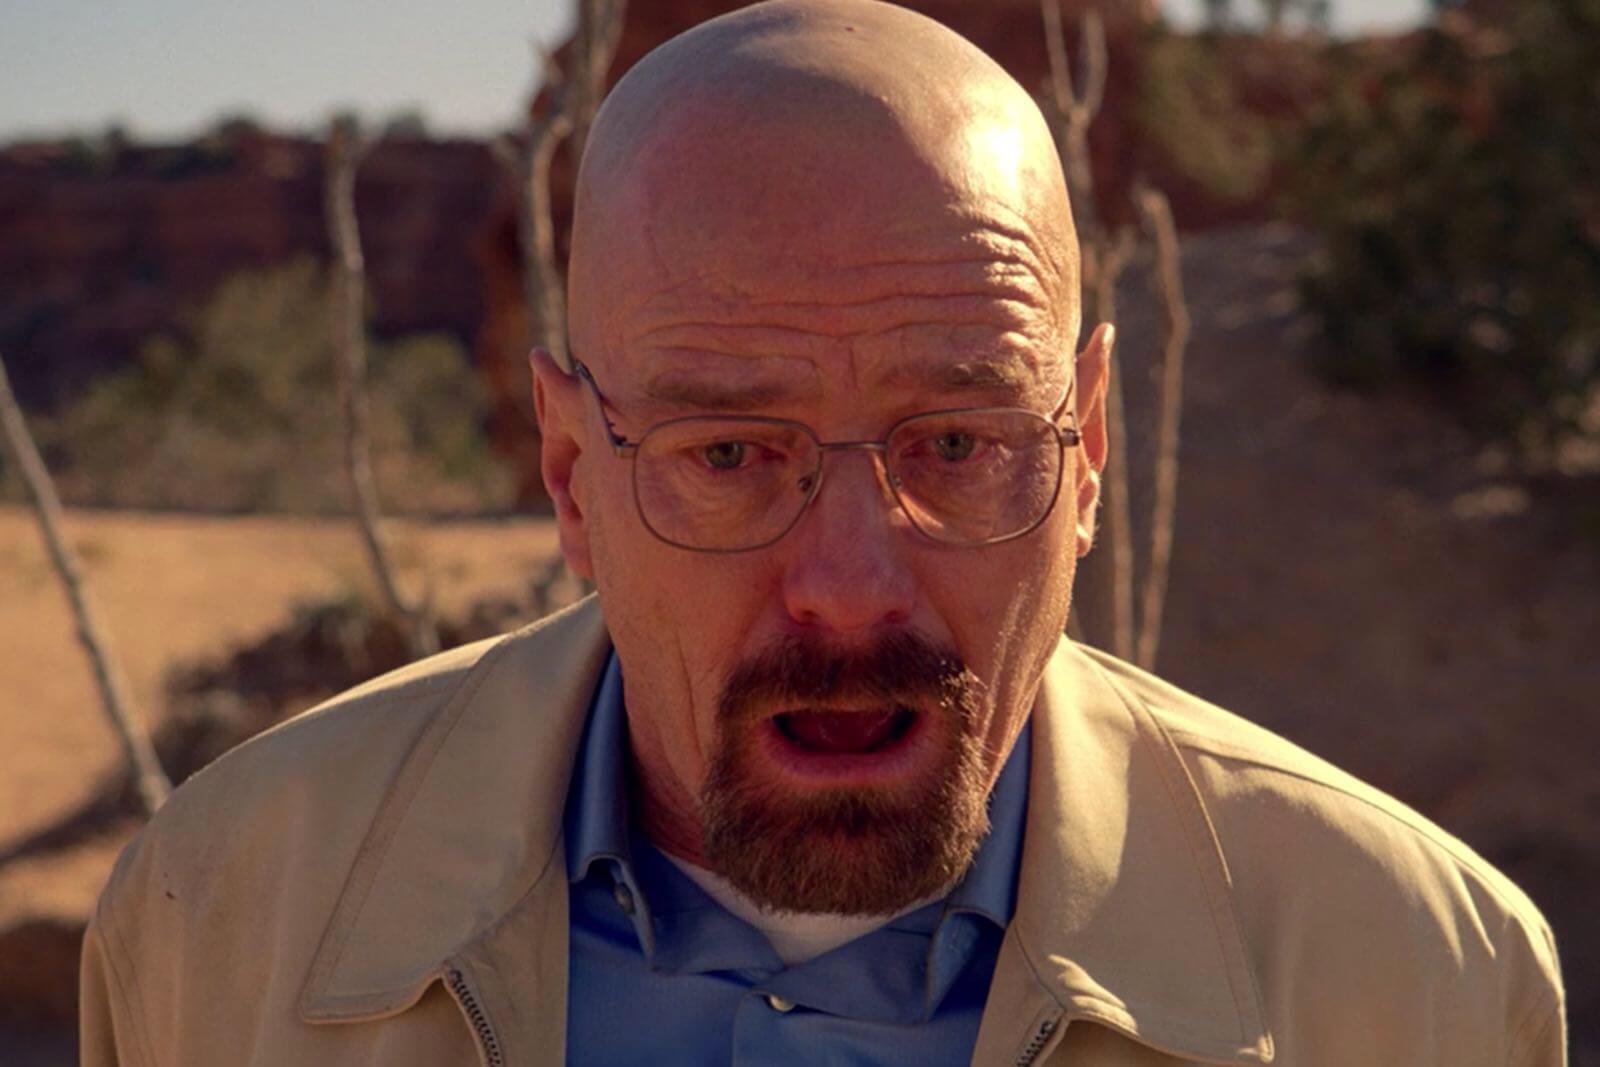
Close-up on Walter, in Breaking Bad
Close-ups aren’t just for being able to see facial expressions clearly. They are nearly always used to get the audience to identify with the character’s emotional state, or show intimacy between characters.
pro tip
Actors tend to save their best performance for the close-up.
So remember that, no matter how tight you want to get with your closeup, it should always be motivated by the character’s perspective on what is happening in the story.
The Dutch Angle
One last frame you might want to use is known as the Dutch angle. This is when the lens is tilted horizontally to one side, creating a diagonal effect.
![How to Use The Dutch Angle Shot [Cinematic Techniques in Film] #dutchangle](https://i.ytimg.com/vi/R9FUEScjB1U/hqdefault.jpg)
The Dutch Angle
The Dutch angle (also called “canted angle”) is used to illustrate a sense of disorientation. Technically, this should be called the Deutsch (German) angle, because it comes from the German Expressionists of the 1930s.
Now let’s talk more about camera movement.
Related Posts
camera techniques
3. Camera movement and equipment
Unless you otherwise indicate it on the shot list, your crew will assume that a shot is static, using a tripod (“sticks”). But there are several ways to incorporate the camera into the action.
Panning is swiveling the camera lens to the right or left to follow an action. Tilting is pointing the lens up or down to follow an action. There’s no such thing as “panning up/down”. That’s a tilt. Always.
You can also move the whole camera to follow the action, either using a dolly or a steadicam. A dolly is essentially a specially made cart that supports the camera and operator.
did you know?
Dollies have specialized wheels that keep camera motion smooth and even. They are often used with a special set of tracks, especially when shooting exteriors.
Dolly and Tracking Shots
Traditionally, a dolly shot moves the camera forward or backward to follow the action (“dolly in/out”), while a tracking shot moves the camera left or right with the action.
These days “tracking” can refer to a steadicam shot, which can literally go anywhere the characters go and “track” their movements in any direction.
![How to Shoot Better Tracking Shots [Examples of #Trackingshots]](https://i.ytimg.com/vi/mkVYpzyJvG8/hqdefault.jpg)
Tracking shots
An excellent, more budget-friendly substitute for the steadicam is the gimbal.
A gimbal essentially turns any camera into a steadicam. It counterbalances the camera’s weight so that motion is smooth and even, and allows for shooting in just about any direction as the action is happening. Luckily some of the better camera stabilizers are getting more affordable.
Similarly, if your budget can’t afford a dolly, a slider usually works just as well. A slider is basically a tiny, tabletop dolly that just the camera sits on. Sliders were developed for small budget shoots and are also good for shooting miniatures.
Crane Shot
A crane shot moves the camera to a higher or lower angle as the action is happening. A jib (a small, portable crane) or even a drone can also be used for the same effect, often less expensively.

Crane shot
A handheld shot can put the camera - and therefore the audience - right in the middle of the action. Steven Spielberg used handheld camera to great effect in this scene of Saving Private Ryan.

Handheld shots
Now that we know how to call the shots (sorry, couldn’t resist), let’s start putting our shot list together. We'll go over how to use StudioBinder to do it, and also some best practices on estimating setup times for each shot.
Related Posts
Pre-Production hacks
4. Build your shot list to estimate time
Now that we're a bit more informed on shot classification, let's start building our shot list. In StudioBinder shot listing software, curating a shot list has never been easier. We'll go through how to build your shot list, with an interest on estimating setup time.
We'll see how StudioBinder simplifies the process. If you want more information on shot listing in StudioBinder without considering time just yet, go to our article on how to shot list. It's a great guide and can help understand the fundamentals of shot listing.
You can also take a look at this video on shot listing and storyboarding to help get you started.

StudioBinder Online Shot List Software
Now, once our script is imported in StudioBinder, and we navigate to the shot list page, you will see a column on the lefthand side. This column holds all of your scene headers from your script.
Practice Scene
Click on the scene you want to build the shot list for. (In the below example, you'll see just one scene, but ideally, for a larger script, this list will be much longer).
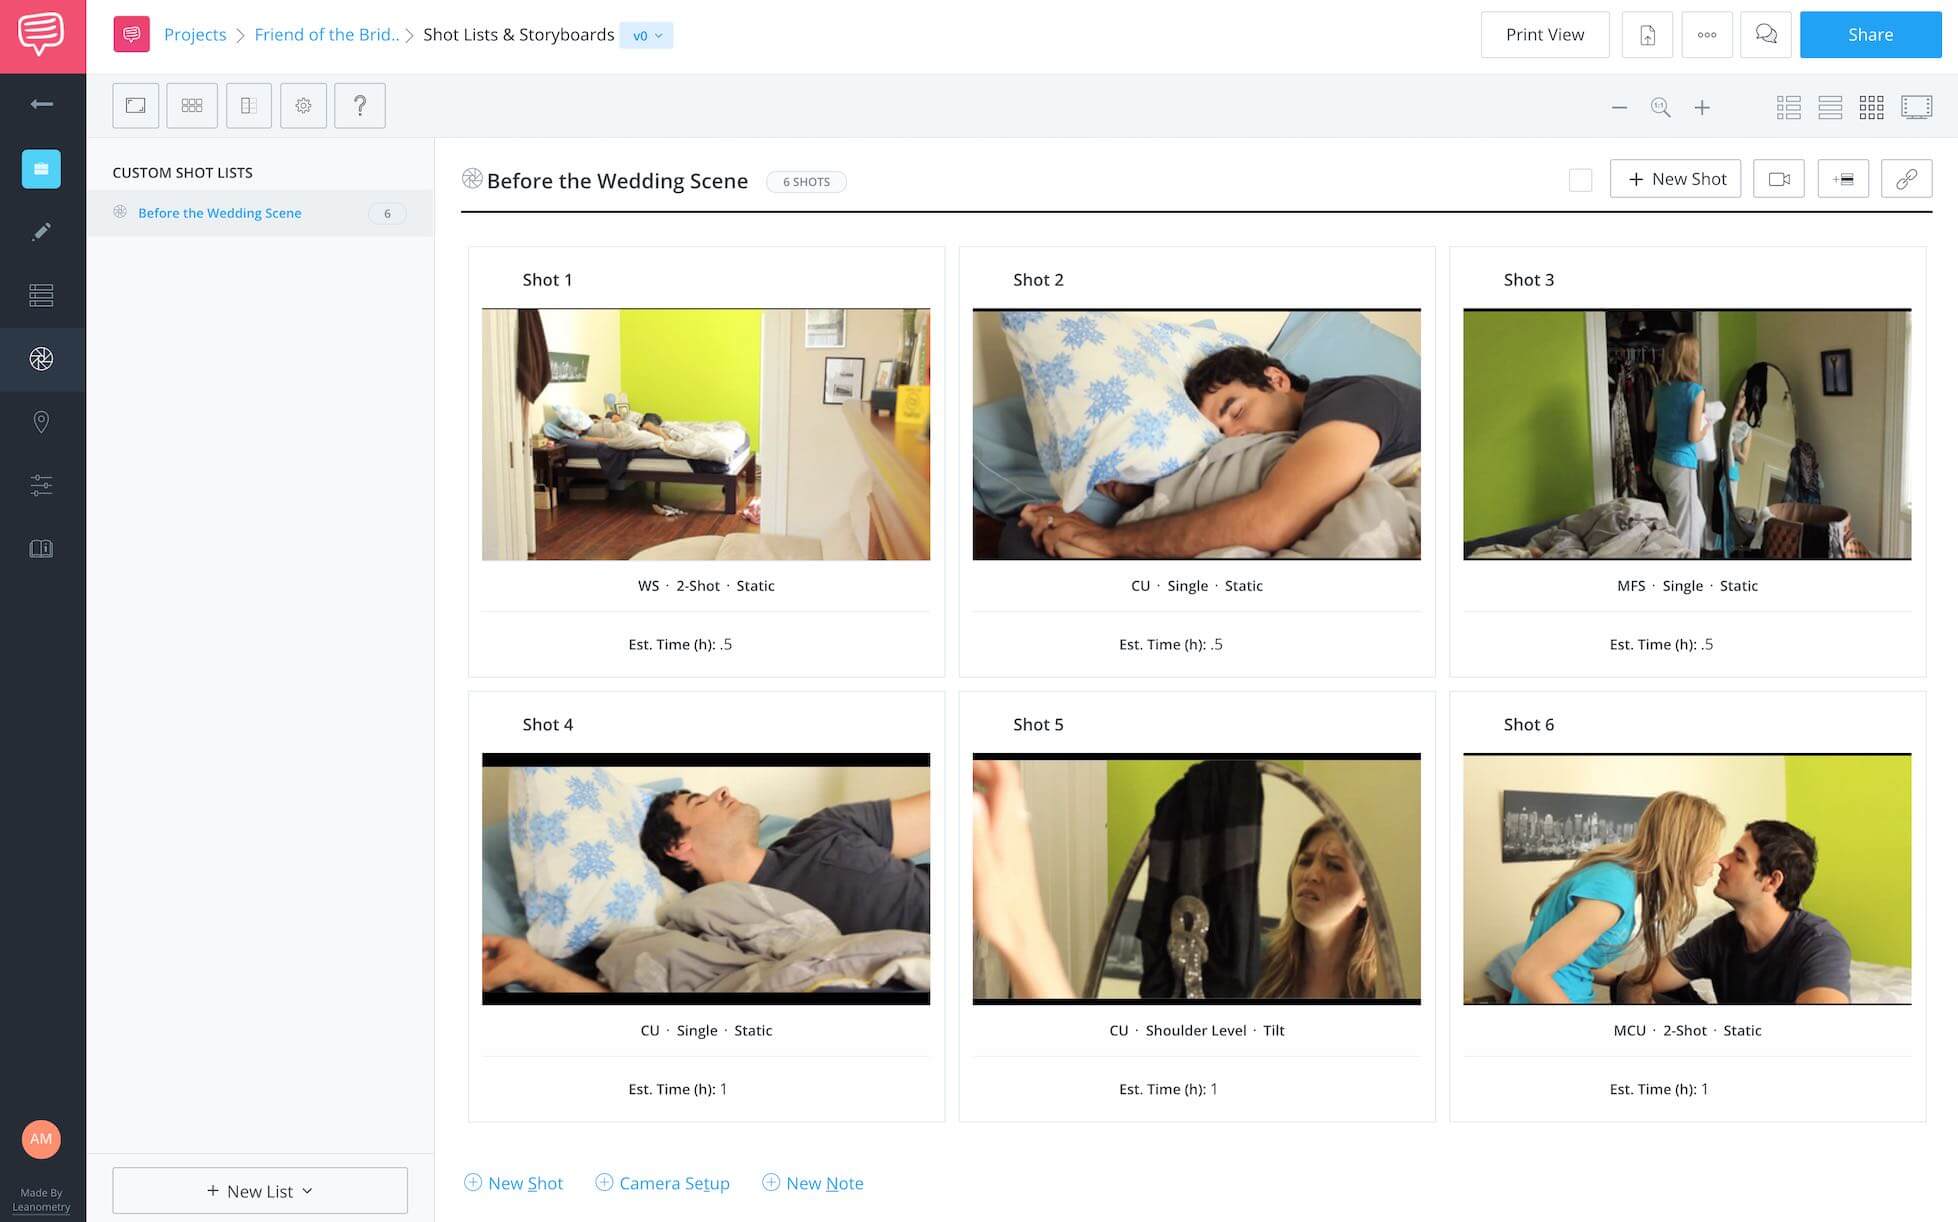
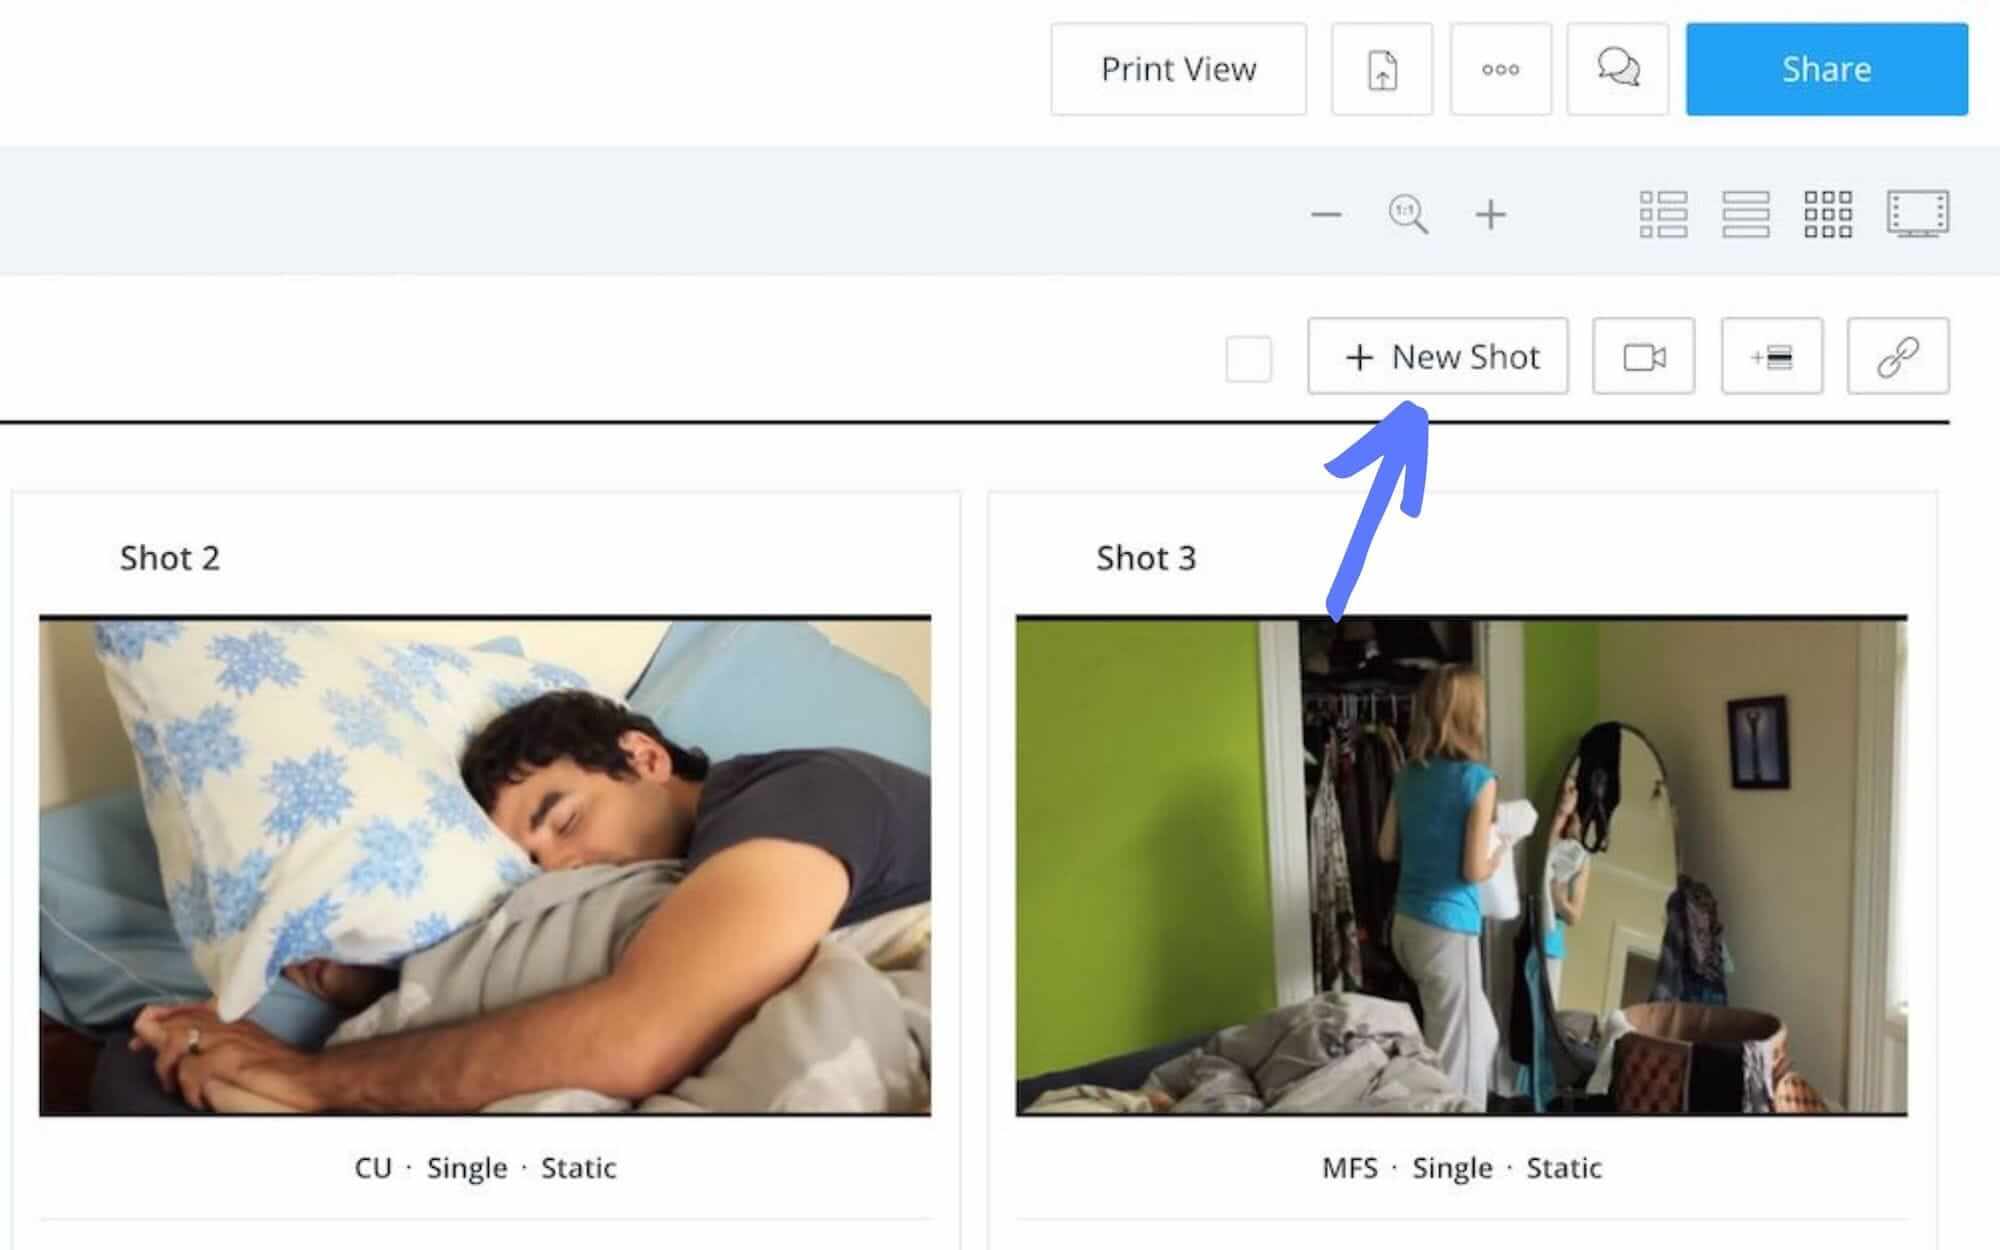
So now let's dive into our practice scene. We can see the shot list below, notice the "new shot" button the righthand side.
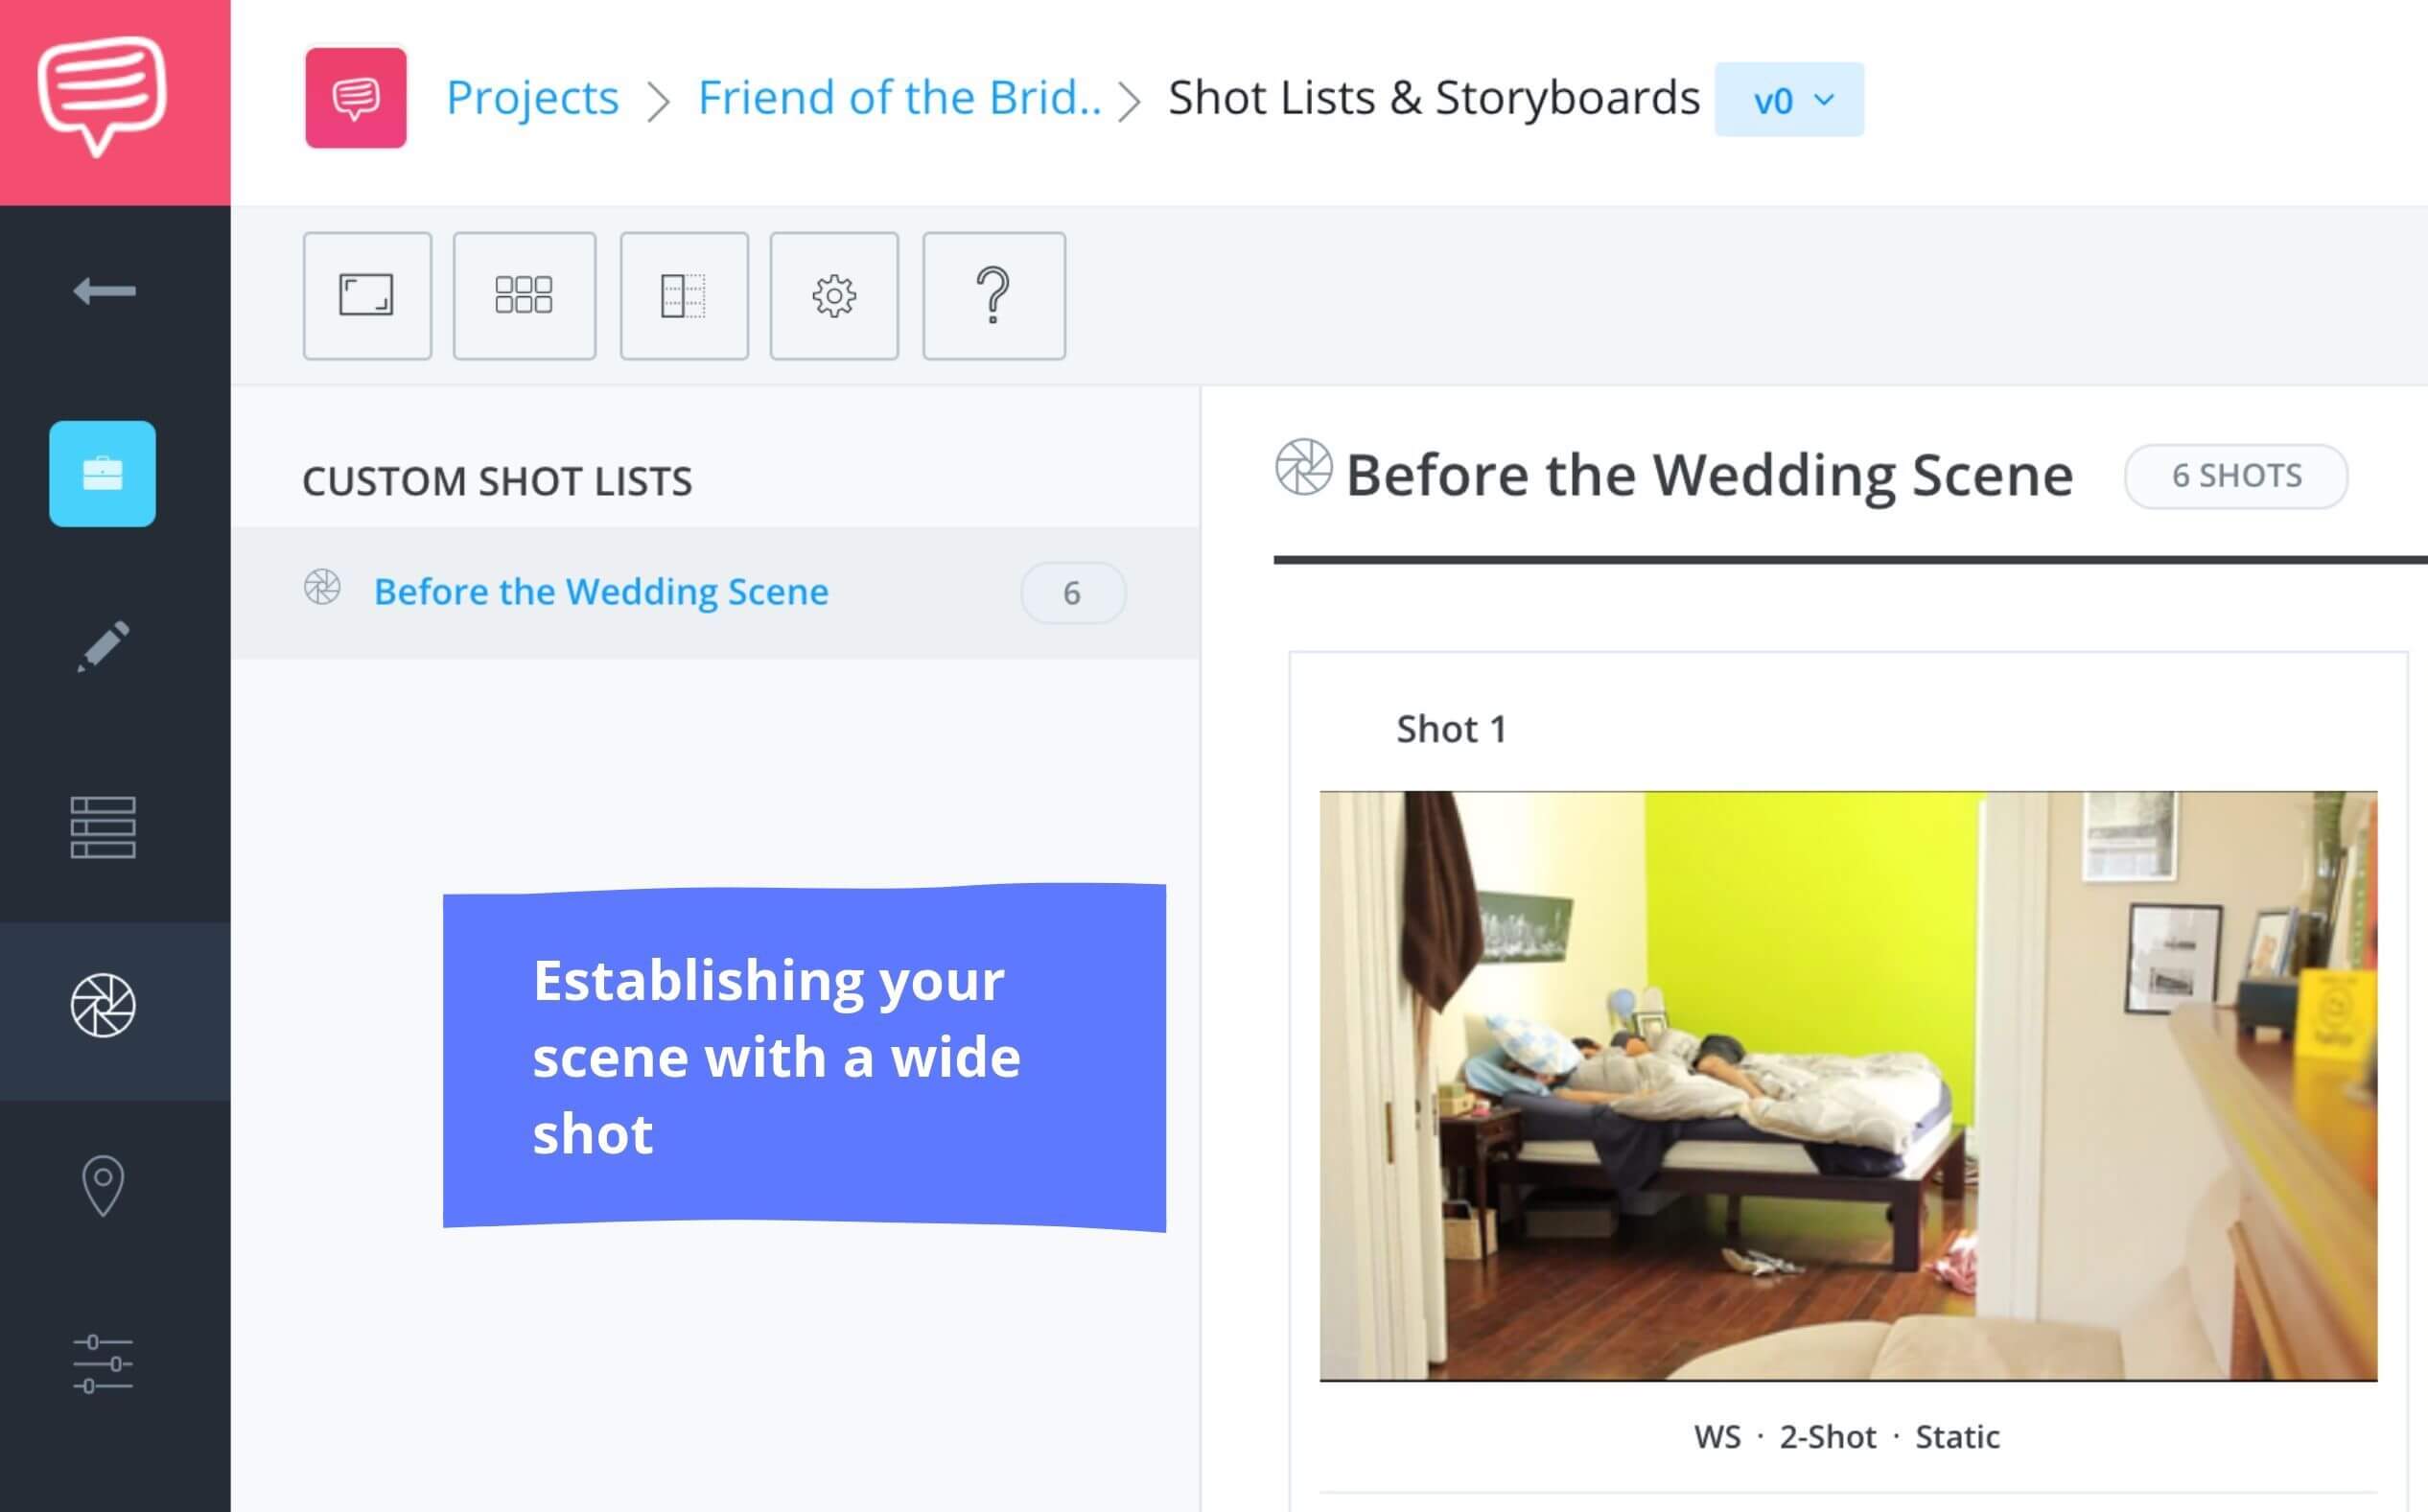
Luc and Juliet are waking up after a night out at respective bachelor and bachelorette parties. Juliet wants to stay snuggled in bed for a while since they have a long day of wedding-ing ahead.
But when Luc passes wind, she leaps out of bed.
Now that we know what’s happening in the scene, let’s choose our shots.
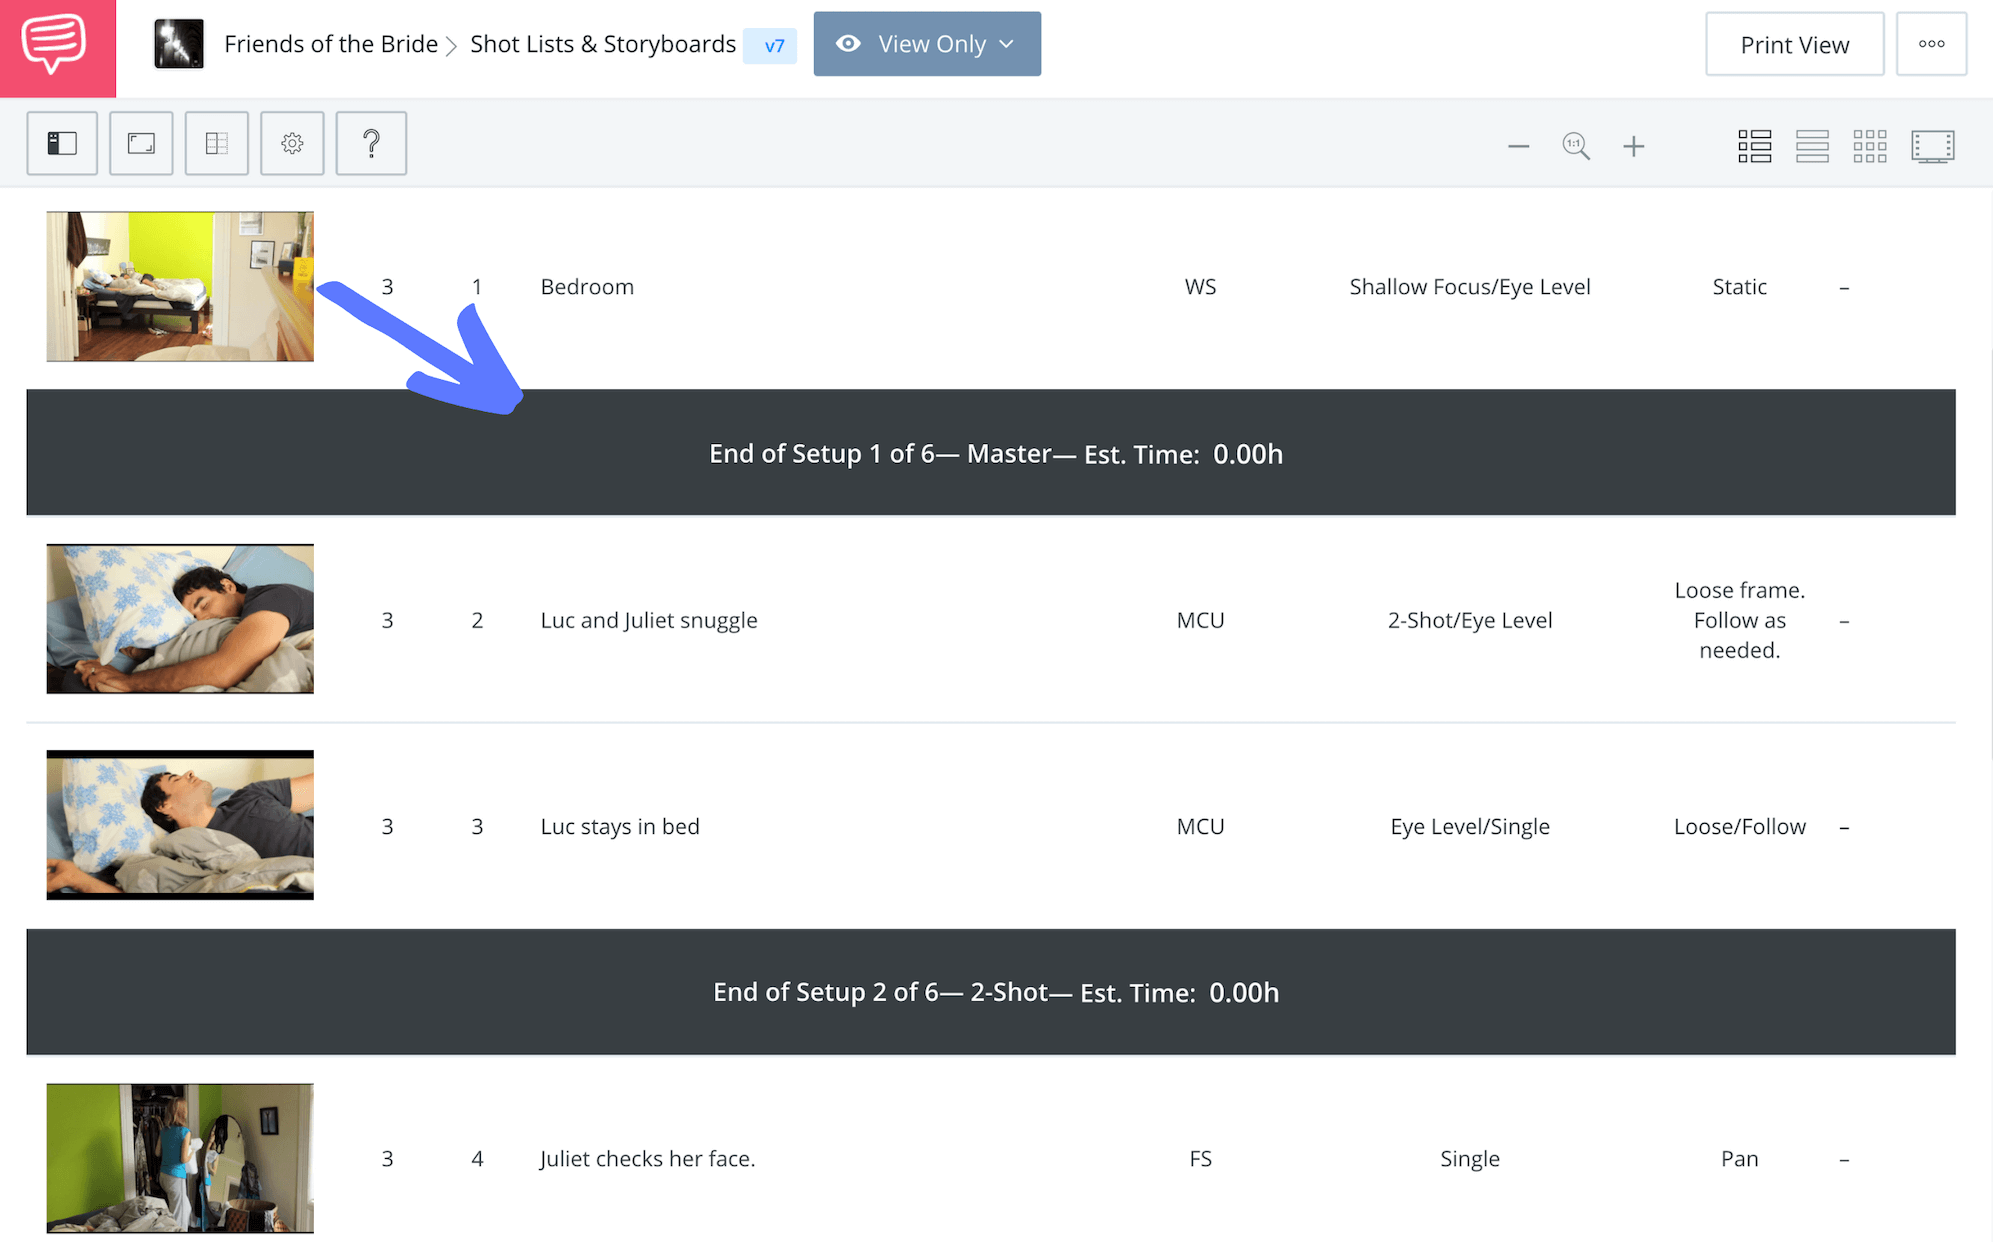
First let’s hit “T” on the keyboard to add a new setup. Setup means where we are going to position the camera and all the gear for lighting the scene.
We want to try to get as many shots as we can in each setup to make the best use of our shooting schedule. Setups are displayed as these banners:
I always like to start shooting the scene with the master shot. Again, the master is the shot that establishes reference, both for the audience and for other angles on the same scene.
Another benefit to shooting the master first is that it gives the actors a chance the run the whole scene through without interruption. Actors LOVE this because it helps them get into the right emotional space.
Shooting the master first also helps the camera team become familiar with what the actors will be doing. So let’s put “master” as the description of this setup.
Now let’s add a shot. Click on “new shot” or hit “S” on your keyboard..
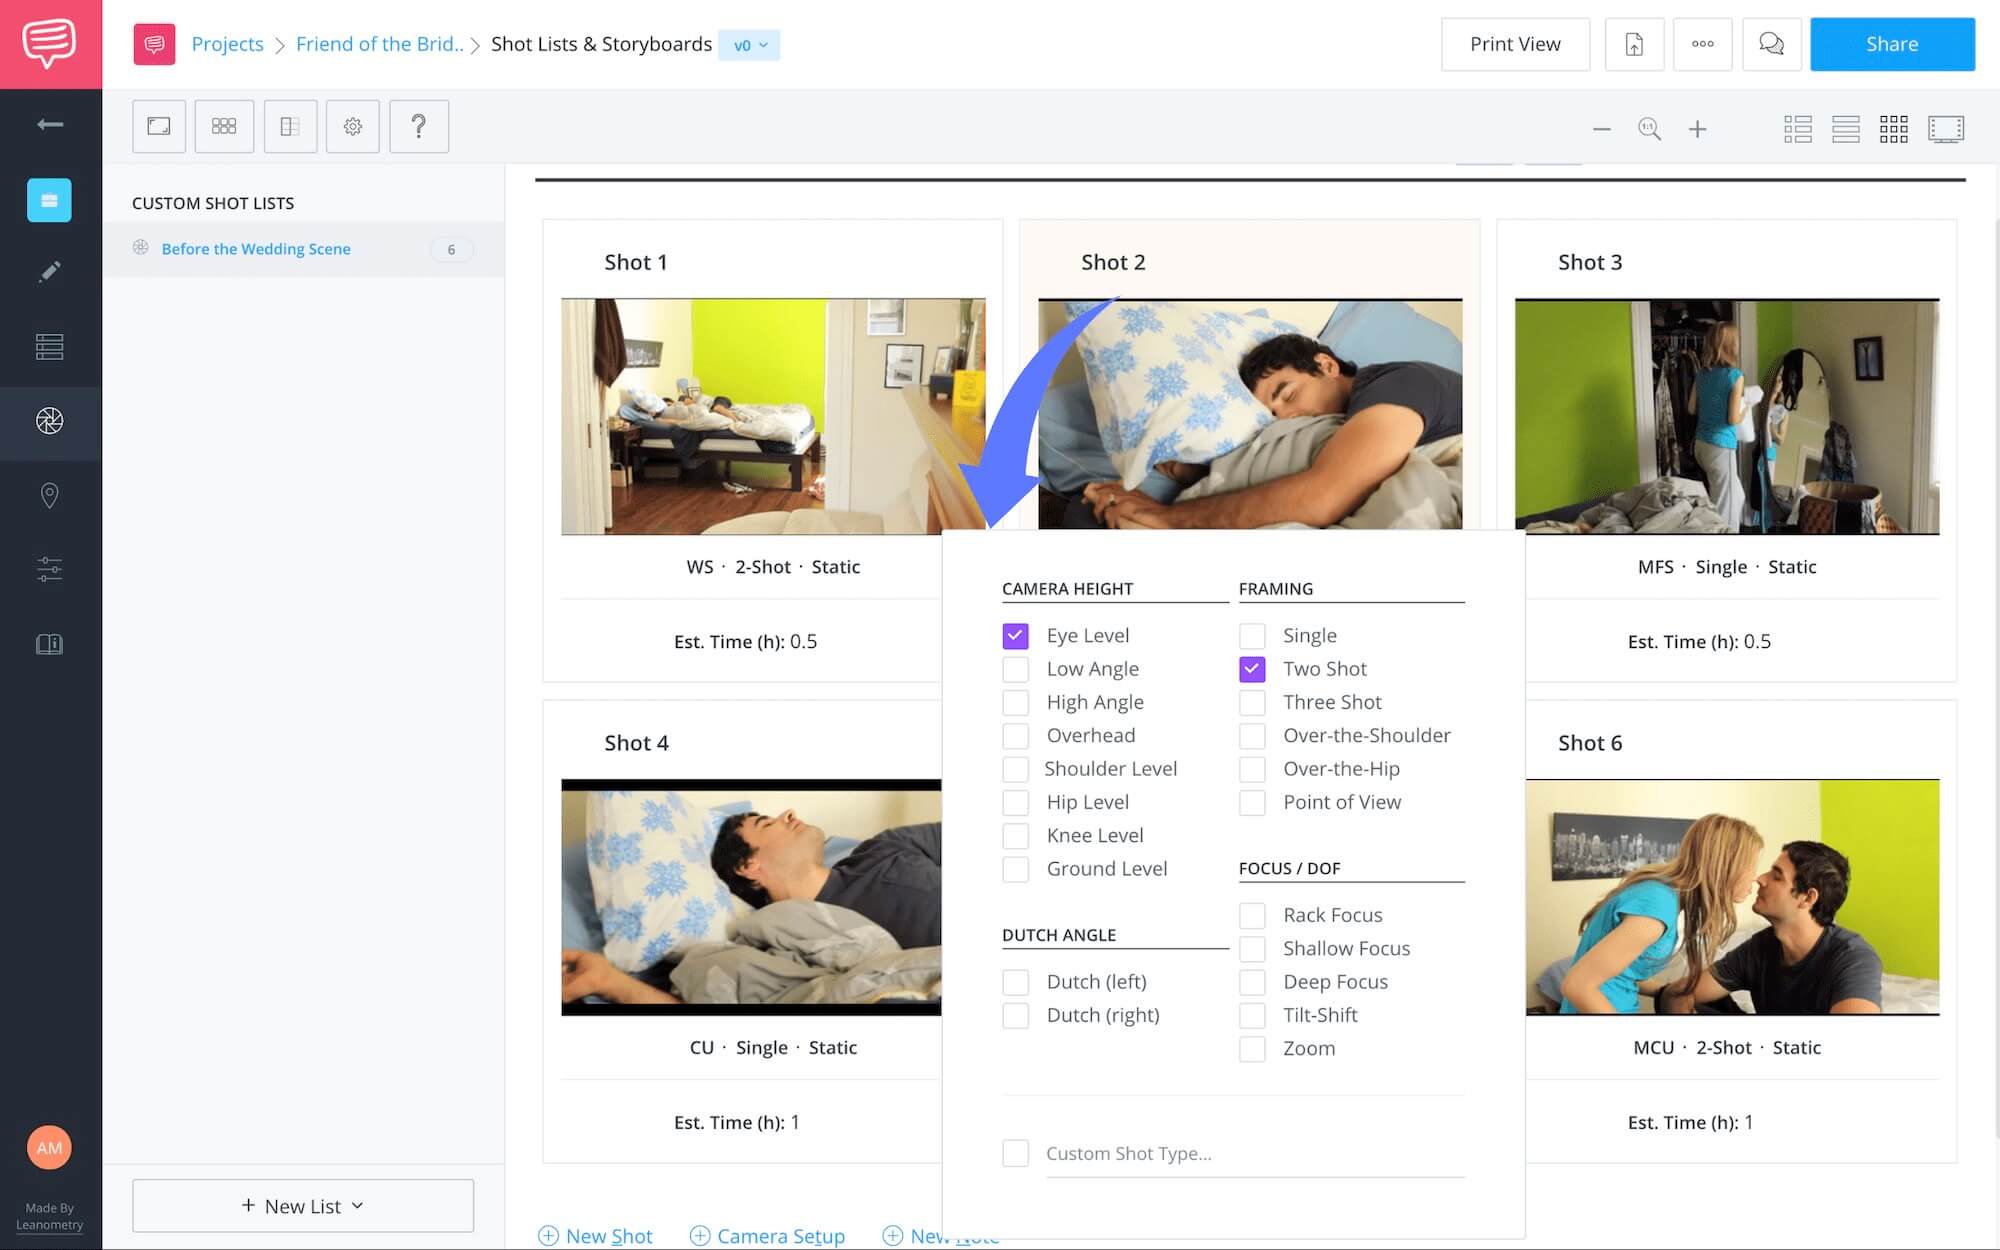
It will bring up a form for us to fill in that includes a menu of all the shot elements we talked about earlier.
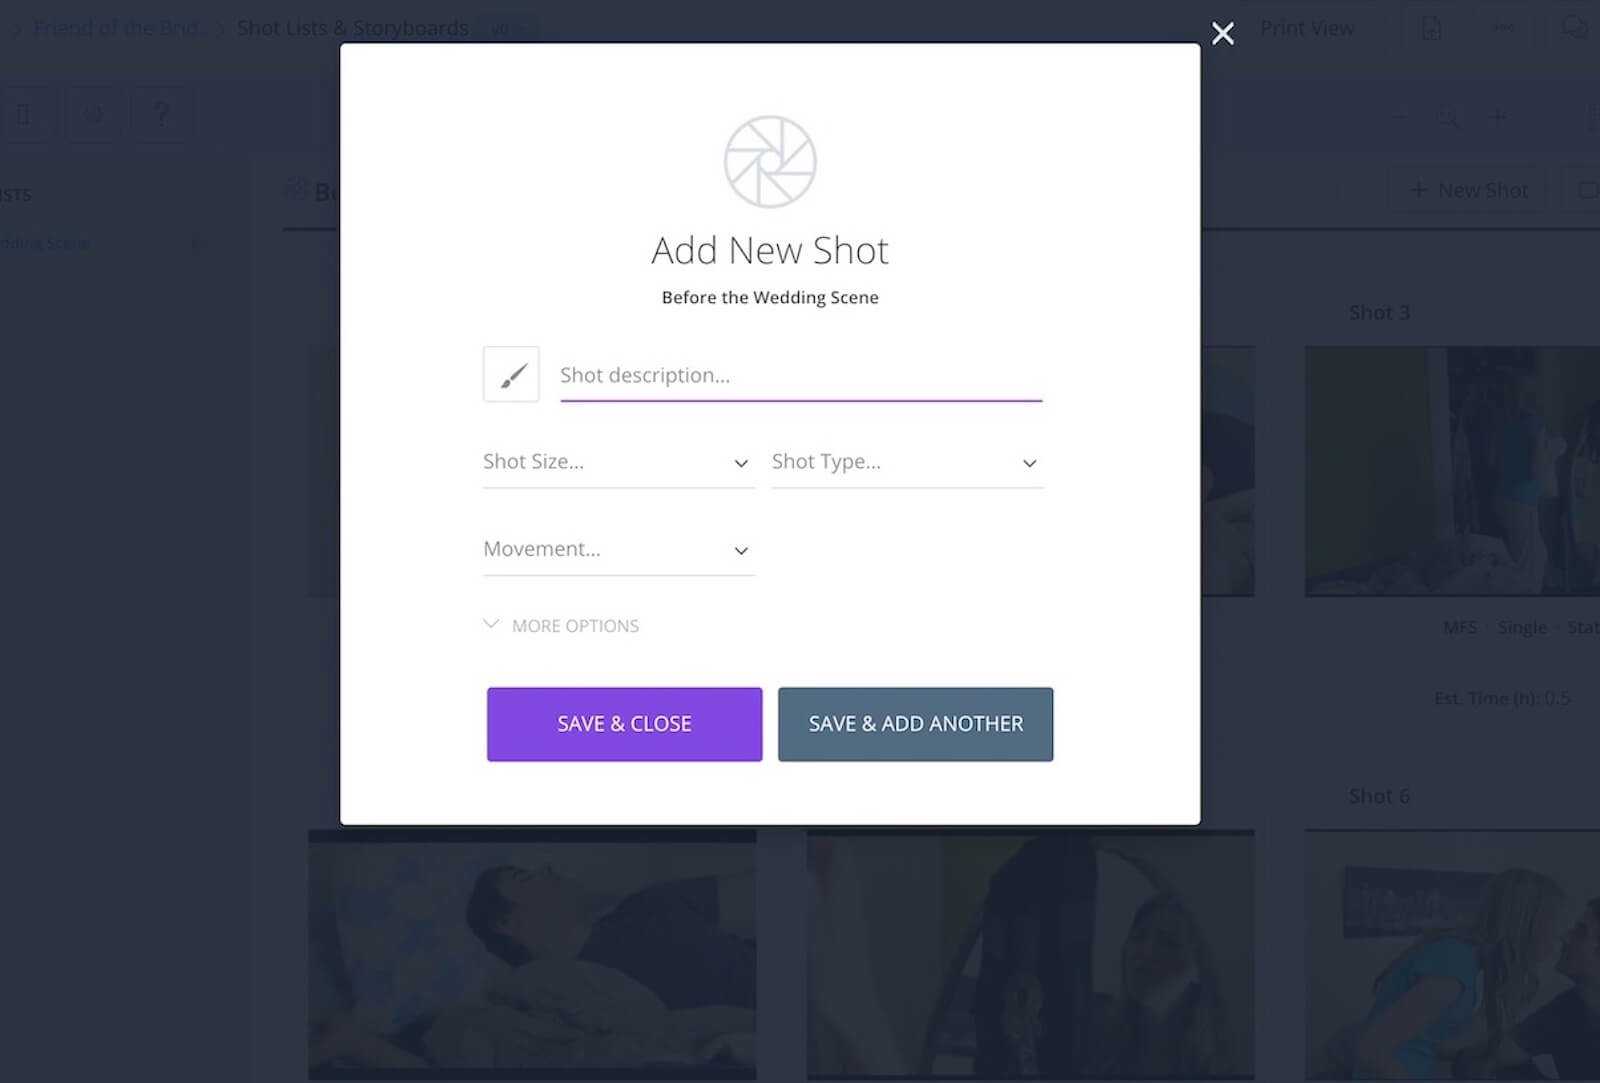
Add New Shot Menu
If you want more than a basic description of the shot, click on “more options”. But for the master, we’re going to keep it simple.
In the story, this is the first time we are inside this couple’s home. We can get a sense of who they are just by being able to see pieces of how they live.
In addition, Juliet moves back and forth from the bedroom to the bathroom quite a bit, while Luc stays lying in bed. This is a nice contrast of action that symbolizes their personalities.
So, let’s set this very first introduction as a wide shot.
I don’t want camera movement in this one, so we’ll check the “static” box under Shot Size; and for Shot Type, we’ll check the box that says “two shot,” or you could even check "eye level."
We’ll talk about what those other choices mean shortly.
Hit the big purple “save and close” button and you’ve just listed your first shot of the scene.
Now that we have a sense of their environment, we need to see who these characters are, so let’s move in closer. Let’s add a new setup, then a new shot.
This time, let’s also get more specific about our shot. Click on “more options”.
First, the Shot Size is going to be a medium close-up. For Shot Type, we have two people snuggled together, so we’ll check the “two-shot” box. Although, it is hard to see her face hidden under the pillow.
We’ll also check “eye level” because even though the characters are laying down, we don’t want the camera to be looking down at them. We want the audience to identify with these characters, not judge them.
For Movement, I’m going to check the Custom box and write in “loose frame, follow as needed." What I mean by this is, because the actors are laying down and we are on a fairly tight frame, their movements could easily have them leaving the frame.
I want to make sure the camera keeps the same frame on the actors by keeping the head of the tripod loose, and panning or tilting to follow any action.
While we’re here, let’s talk about the other options on the shot list menu. First there is a Visual Effects (VFX) option. If you are shooting a scene that you know will have effects added in post-production, you have to leave space for them in your framing and camera movement.
If you have more than one camera (say, to cover an explosion or a stunt), you can select which camera will be covering this shot under the Camera section. If you only have one camera, you don’t need to check anything.
The more boxes and information you can provide from the shot list menu, the clearer your vision will be to the rest of the crew. Add however many shots you can get while the camera is in this same spot.
Keep going with your list until you think you’ve covered the scene the way you envision it.
You can re-order each strip or setup if necessary, to accord with the day’s shooting schedule.
Click on Image Shot List or Storyboard to add in your references. Once you’ve added all your setups and your shots, you’ll have a nice, easy to follow document that looks like this:
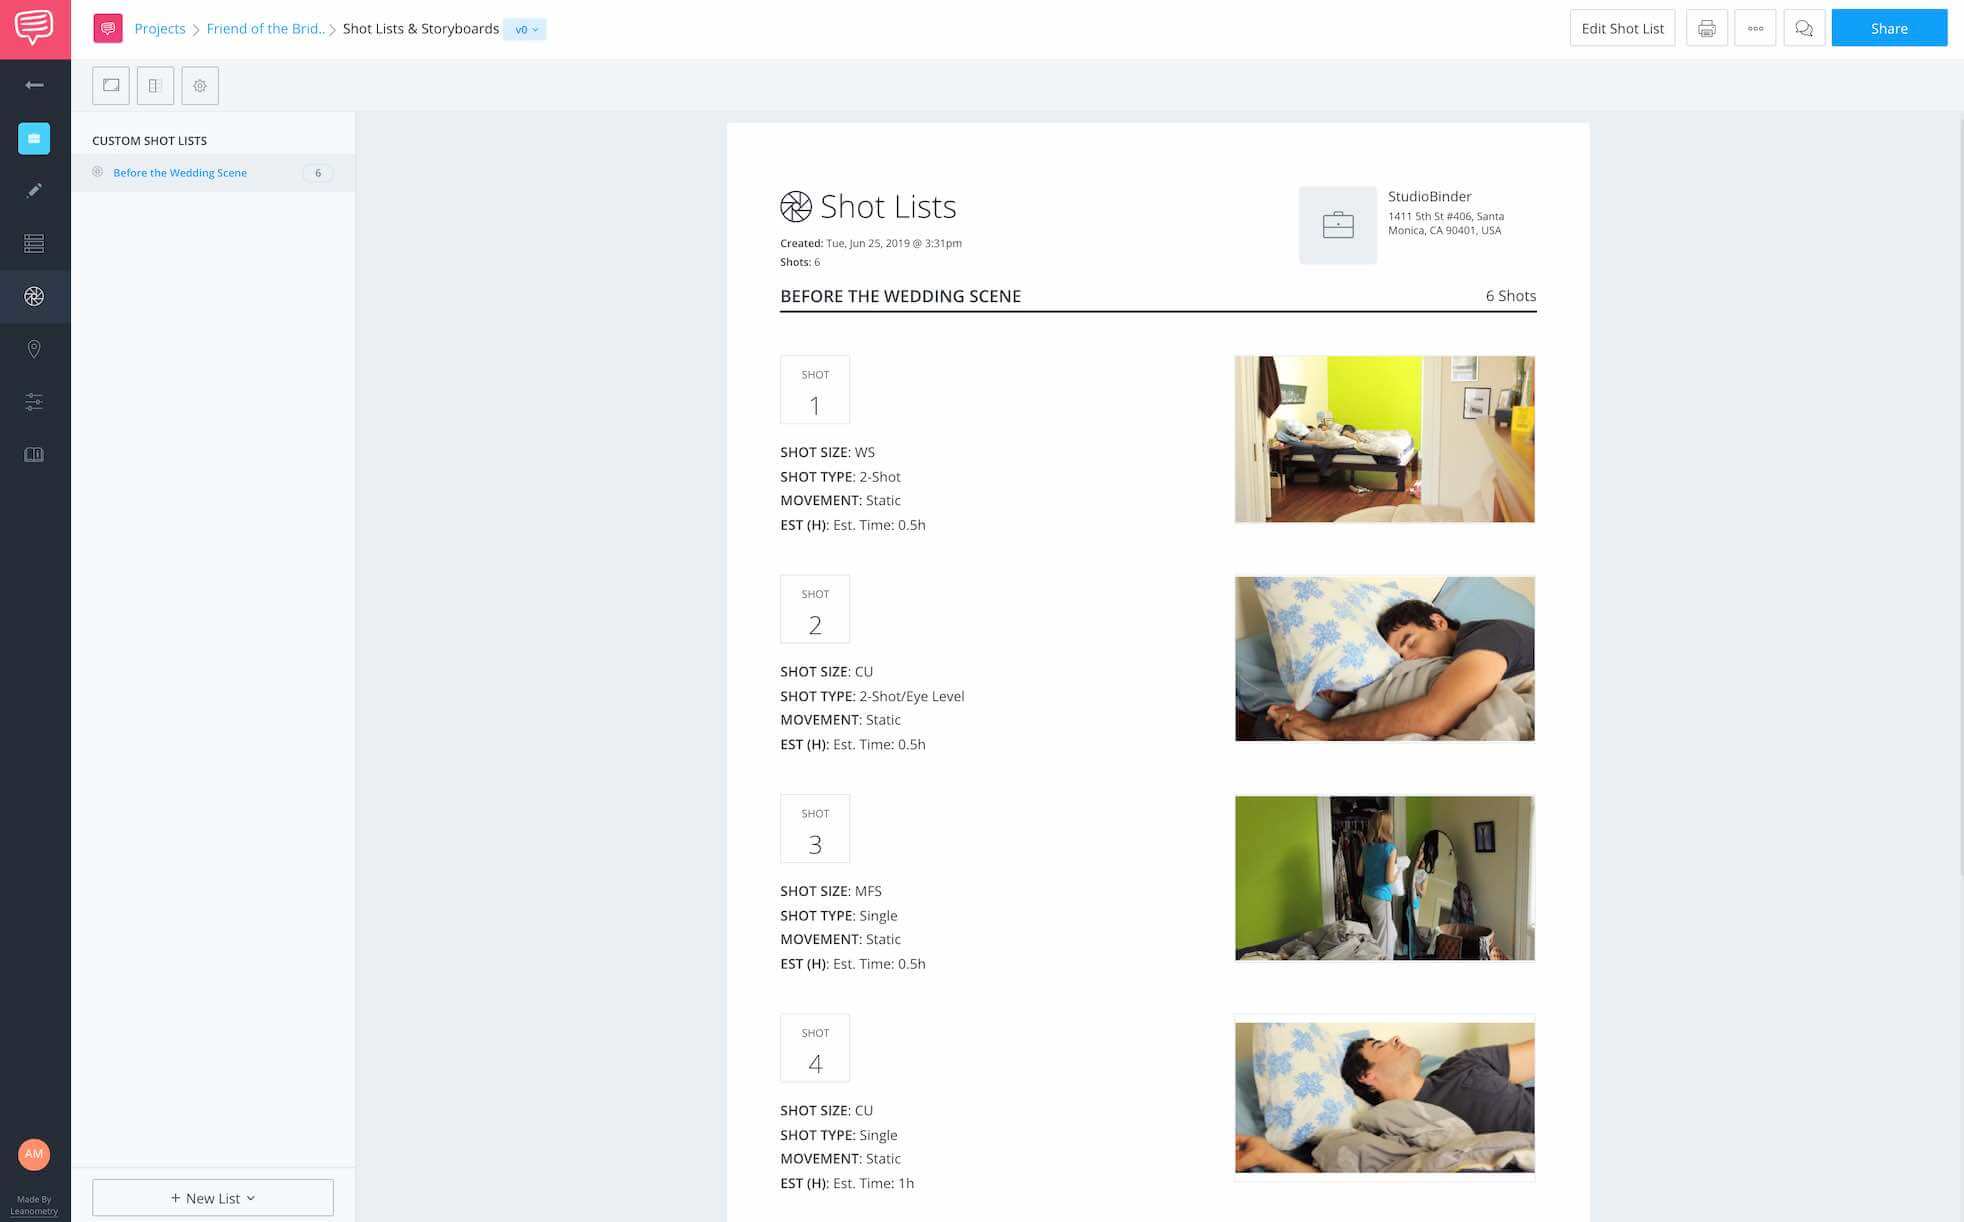
Digestible list for crew
You can share or print this document for the rest of your crew. Or you can just keep the pdf on your favorite device so it’s always there when you need it on set.
Related Posts
Wrapping Up
Final thoughts
Remember that camera shots are what bring the audience into the story. So, whatever shots you choose, they should always be motivated by something a character is seeing or feeling.
Or they should communicate to the audience directly, like when a particular character is not to be trusted but the protagonist hasn’t yet figured that out.
Be flexible. You might have a limited budget that won’t accommodate a crane or a dolly, but you can still make your shots dynamic and meaningful in other ways.
Be thoughtful. Your shooting style should match the story you’re telling. A character driven narrative like Ladybird isn’t going to look like Avengers: Infinity War.
Be patient. Things that might be complicated or frustrating at first will quickly become routine after just a few hours on set. Take it all in and learn from your experience.
Up Next
Start Shot Listing Like a Pro
At this point, you probably have a better grasp on shot composition, maybe you're even inspired to start shot listing your vision. But knowing the theory behind camera work is only half the battle.
The next post provides a practical on how and when to shot list. It even discusses those times when shot listing is unnecessary. Plan for your project in the most efficient way possible. Become a professional.
Up Next: Shot List Like a Professional →
Share your vision with elegant shot lists and storyboards.
Create robust and customizable shot lists. Upload images to make storyboards and slideshows.
