Have you ever seen an insanely detailed photograph where every portion of the photos is completely in focus? If you’re like most people you might wonder “How did they capture this?” Odds are that they created the remarkably sharp image using focus stacking. Focus stacking is used to shoot a diversity of subjects from landscapes, to products, to macro photography. What is focus stacking and how can you do it to create incredibly sharp photos? Learn the answers to both these questions and more in this article.
What is Focus Stacking in Photography?
Focus stacking explained
The idea of focus stacking may sound complicated, but once you understand what it is and how to do it, it actually becomes much more simple.
Before we dive into the “how” let’s take a look at the “what” by defining the term focus stacking.
FOCUS STACKING MEANING
What is focus stacking?
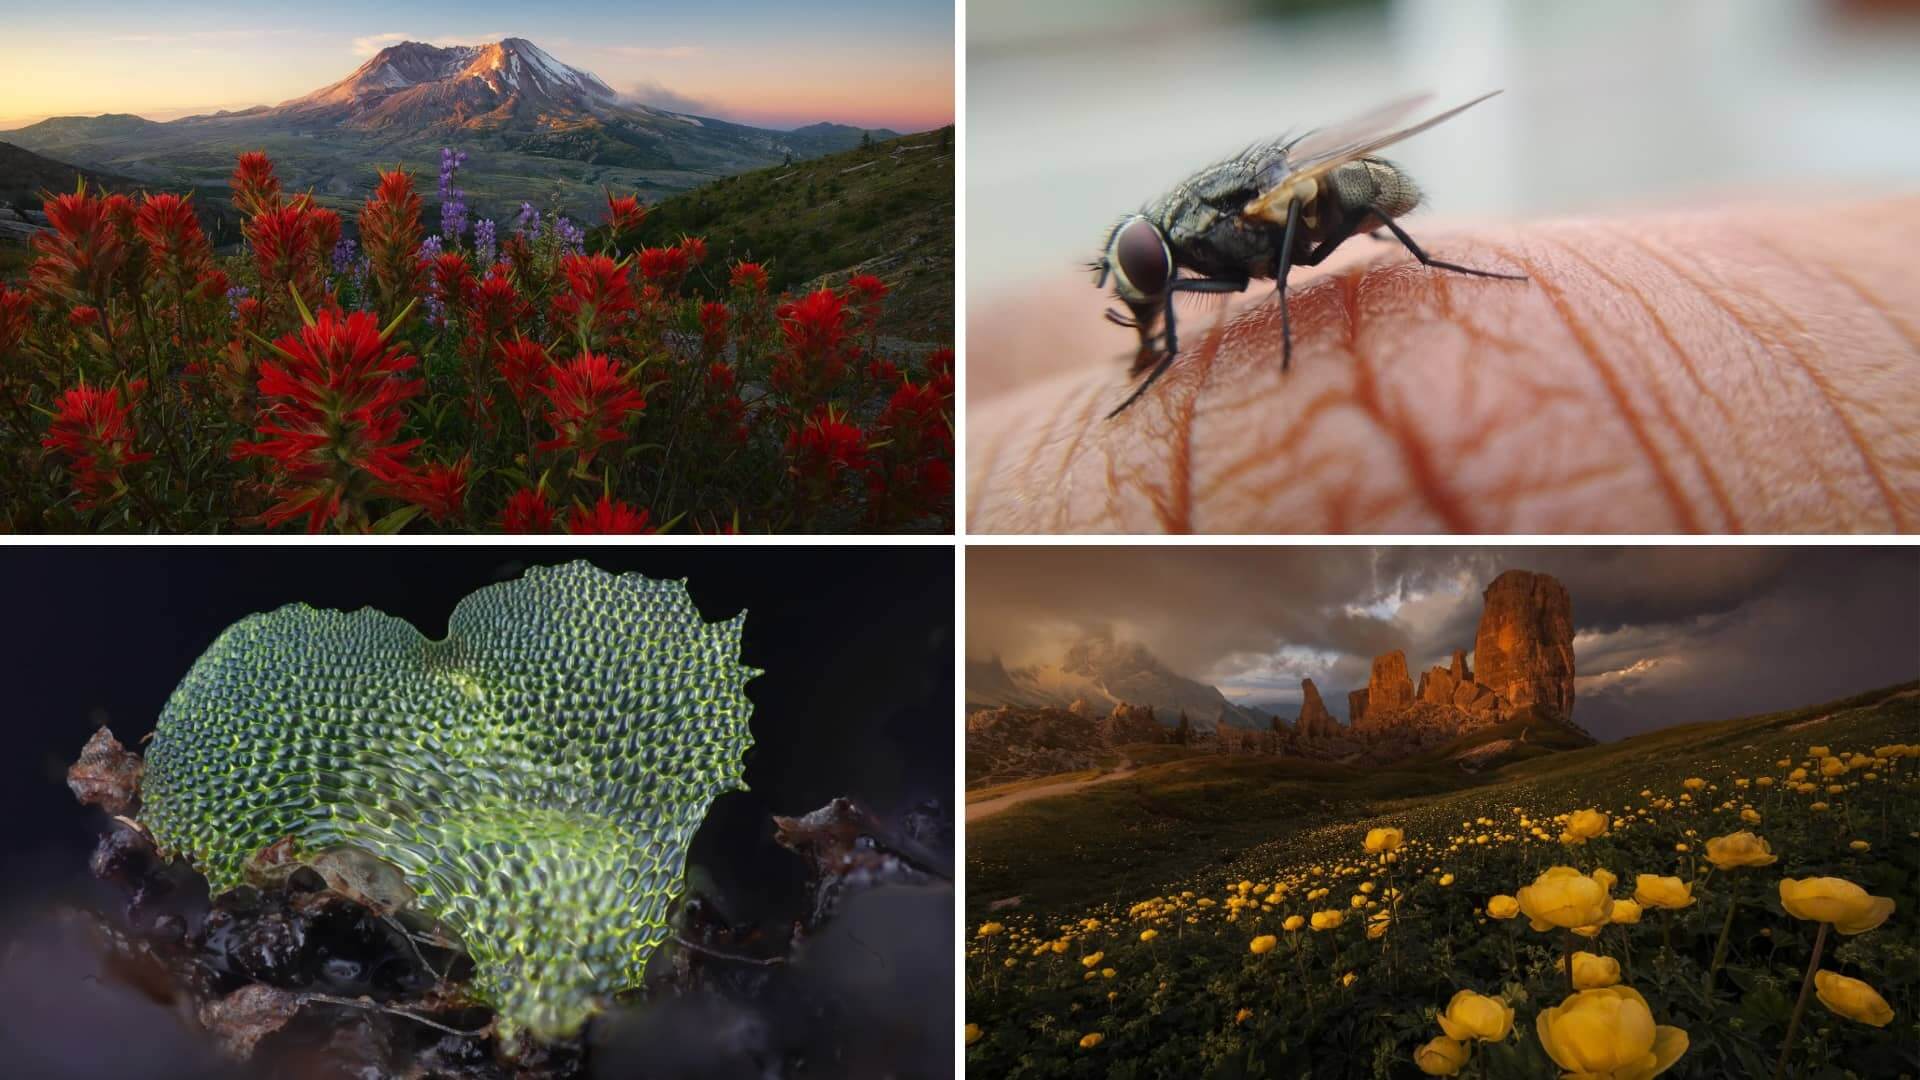
Focus stacking is a technique that allows photographers to create a single image where objects on various focal planes are all in focus. Focus stacking, also called photo stacking or focus layering, can create the effect of a deeper depth of field without any loss of clarity or sharpness. The technique involves shooting the same composition multiple times with various focal points. These images are then composited in Photoshop or other editing software to create a single image in which everything in the photo is in focus. Focus stacking is often used in landscape photography, product photography, and macro photography where various elements at variable focal planes need to be in focus.
Focus stacking equipment needed:
- Tripod
- Camera that can shoot in manual mode
- Photoshop or other focus stacking software
What is Focus Stacking Good For?
When to use focus stacking
Focus stacking may seem like a tedious technique for one image. However, it can create insanely sharp images that are impossible to achieve otherwise. That being said, focus layering is not always necessary. So what is focus stacking good for and when is it necessary?
The simple answer is when you are capturing an image and want multiple elements at varying distances to be completely in focus. This is often the case when shooting landscapes, products, or even when using a macro lens.
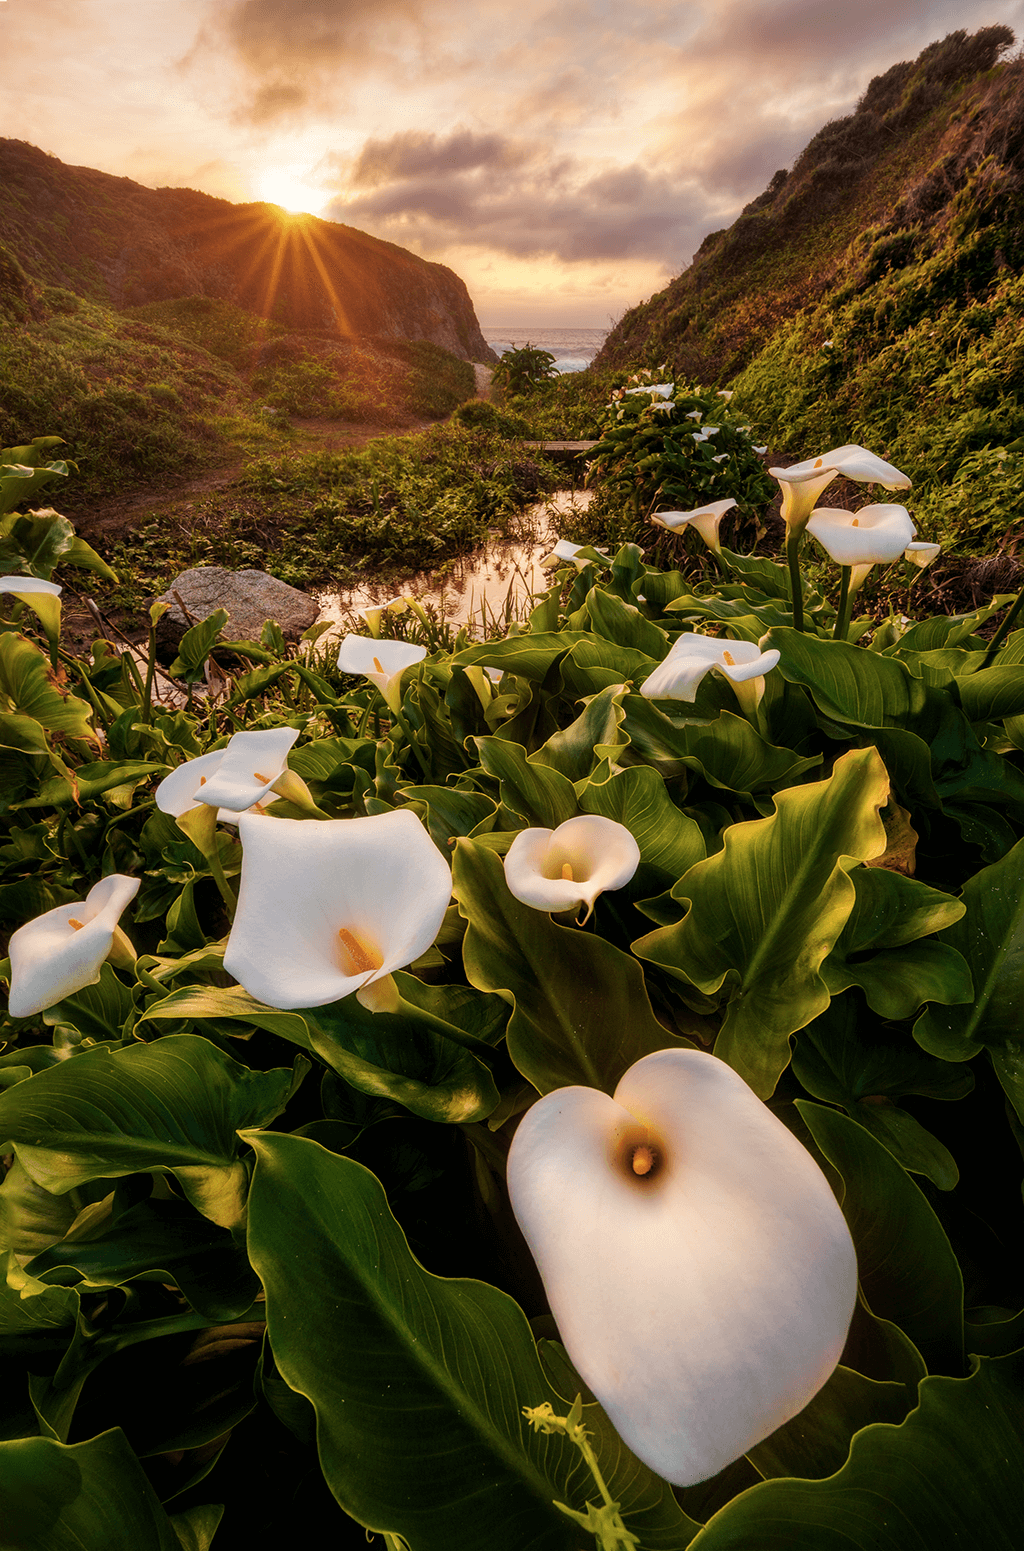
Take for example the image below. The only way to capture a single image in which the flowers in the foreground and sunset in the background are all sharp and in focus is to use focus layering.

Image by Tom Bricker
You might be wondering, “If you want a deeper depth of field with more in focus, why don’t you just close down the aperture?” While a smaller aperture like f/22 will create a deeper depth of field, it also reduces the amount of light let into the camera and reduces the clarity of the image.
Check out this video below by Saurav Sinha to learn more about the benefits of photo stacking and the situations that they are best used in.
How to focus stack in Photoshop
Now that we’ve talked about when and why to use focus stacking, let’s take a look at how to do it. All you will need is a tripod, a DSLR camera or mirrorless camera that can shoot in manual mode, and Photoshop. There are two parts to creating a focus stacked image: shooting and editing.
First, let’s take a look at how to shoot the images.
Related Posts
How to Stack Photos
Shooting the image
When focus stacking, using a tripod or some sort of fixed stabilizer for your camera is crucial. Since focus stacking involves merging multiple photos together, all the photos must have the same exact composition. You will also need to set your camera to manual mode so that you will be able to vary your focal point for different shots.
1. Compose your shot
A crucial step to taking any photo is composing your shot. Start by framing the shot you want and composing the different elements within the frame. It is important to be sure about your composition since focus stacking involves merging multiple images. If your composition changes you will need to start the entire process over.
Also keep in mind that photo stacking may require you to slightly crop when merging the photos. So shoot just a bit wider than normal so you won’t have to crop out any important details. Once you’ve decided on your composition, set your tripod and lock it down.
2. Adjust your settings
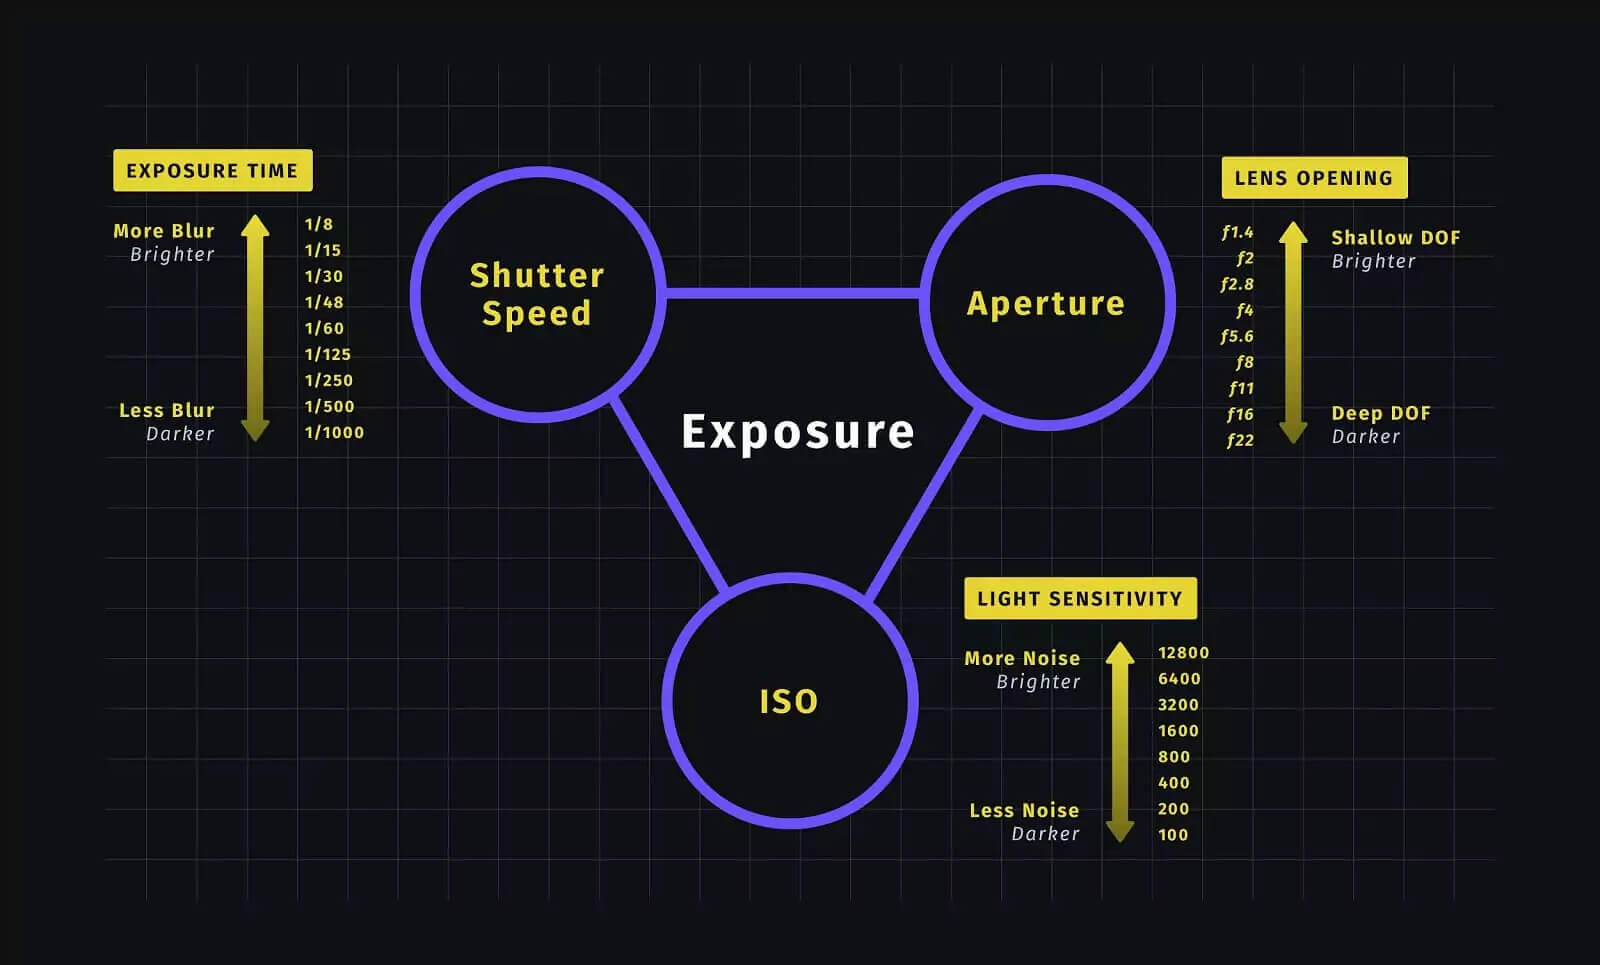
Next, properly expose your shot. Consistency in exposure from shot to shot is important to focus stacking one cohesive image. Shoot in manual mode so that you can have full control over the entire exposure triangle.
Photo stacking guide • Exposure Triangle Graphic
Try to keep your ISO low to avoid any image noise. Using a wider aperture will help you capture more detail, but it will also require you to take more shots. Make sure your shutter speed is fast enough to keep your images sharp.
3. Focus on the first area of the image
Now that your camera is ready to shoot, set your camera to single focus point mode so that you can adjust the specific focal point of the shot. If you’re experienced enough, shooting manual mode with a live view of the image will give you even more control over the focal point.
Begin by focusing on the area of the photo that is closest to the lens. Take the photo and check back to make sure that your exposure and focal point are correct before moving on. Here is a field example of focus stacking that will help you get a better idea of how to execute this step.
How to do focus stacking
4. Take multiple shots with varying focus points
Next, change the focal point of the camera to the next section of the image. Take the image and repeat this process while slowly moving the focal point backward until you’ve taken photos of every section in focus.
Once you’ve captured all the images you need to, it’s time to bring them into Photoshop to composite them together.
Related Posts
Focus Stacking Photoshop Tutorial
Editing the image
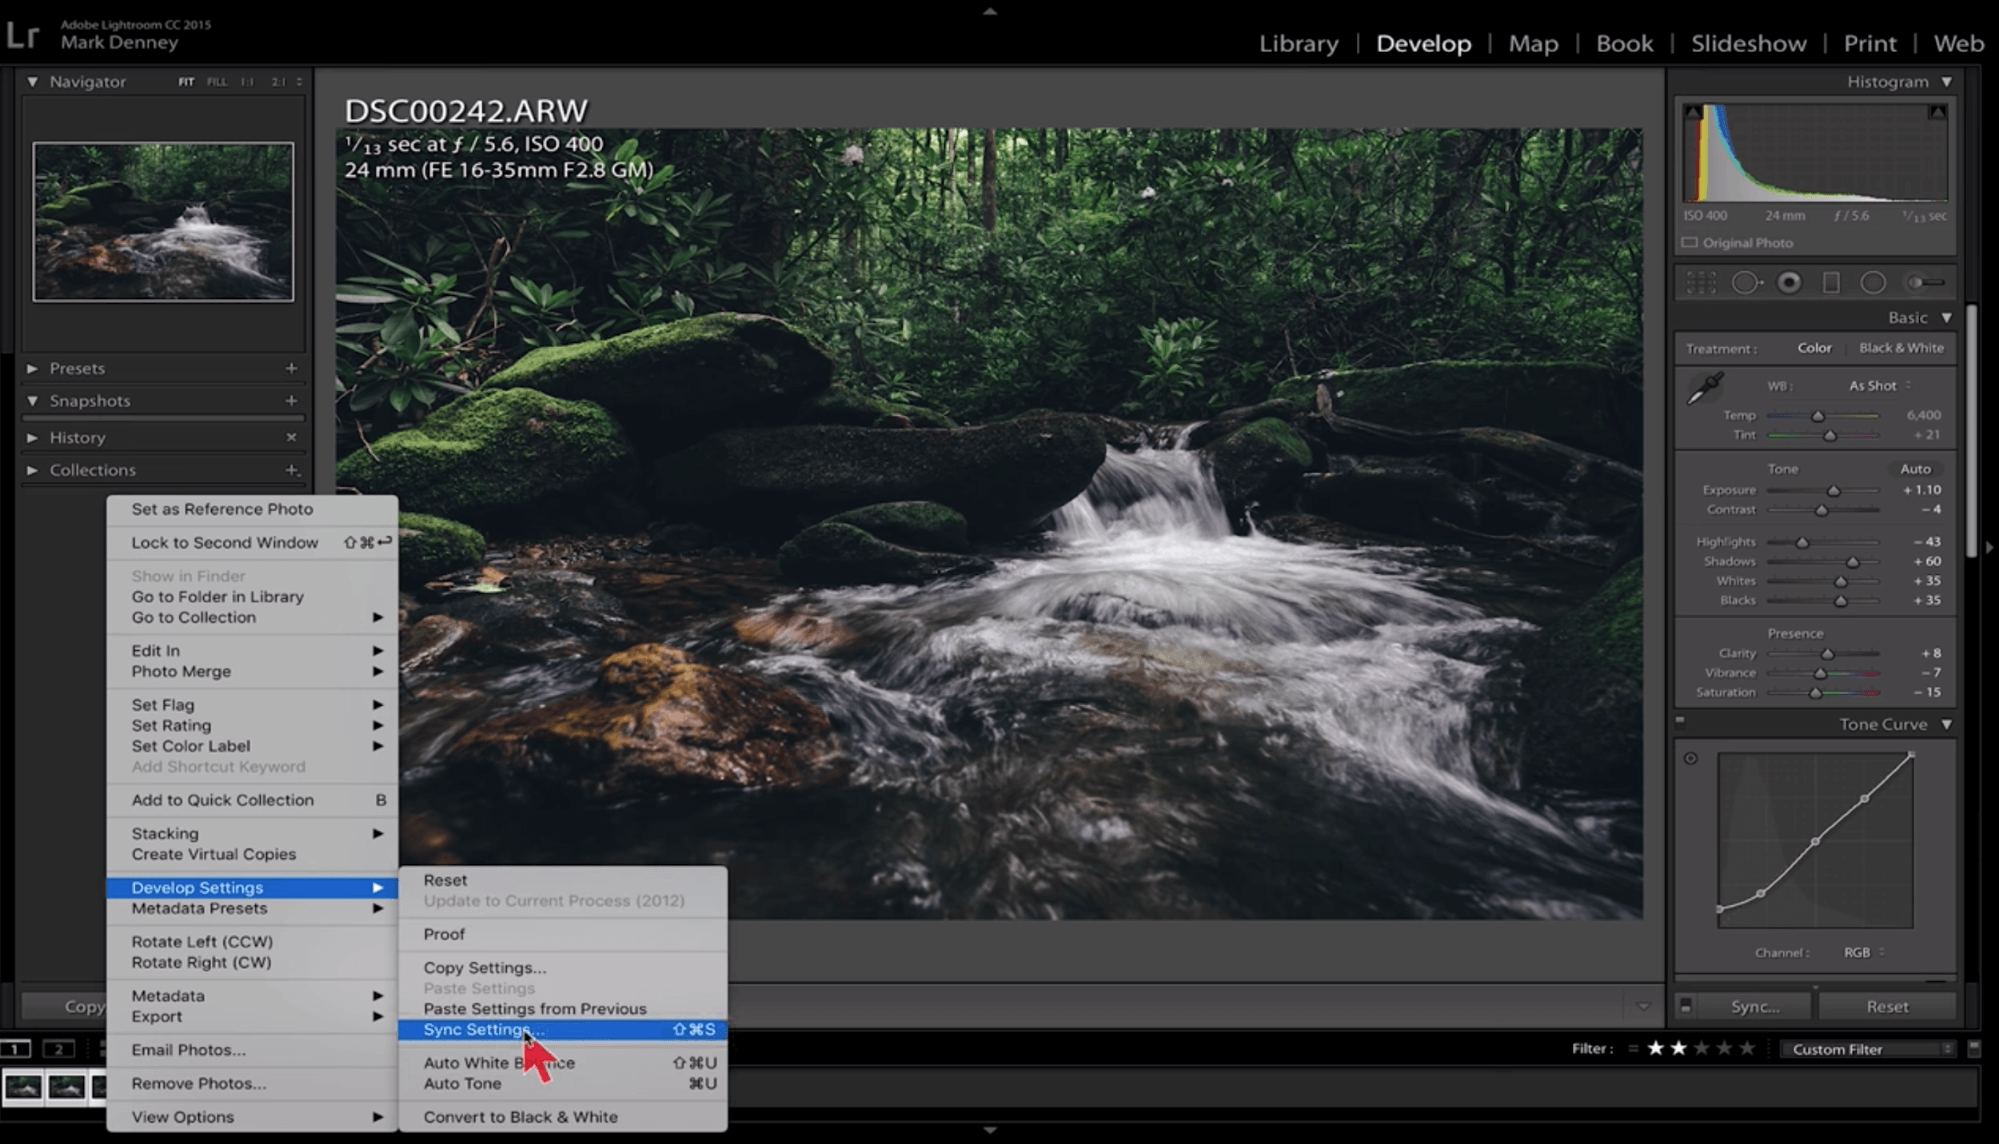
The real magic of photo stacking happens in the edit. To focus stack images effectively, you’ll want to use Adobe Lightroom and Photoshop. Let’s take a look at the fastest way to focus stack using Adobe Photoshop. We’ll be following the same steps in this tutorial by Mark Denney. Give his video tutorial a watch for a more visual demonstration on stack photography
How to focus stack in photoshop
1. Select your photos
First, upload the files from your shoot into Lightroom. In the Library, click the grid view and select the photos you wish to focus on.
2. Apply edits
Apply any edits you wish to see in the final photo to the first photo in the stack. Once you’ve adjusted your contrast, highlights, colors, etc. you will need to synchronize these edits to the rest of the photos in the stack to make sure they are all visually consistent.
Do this by holding down shift and selecting all the photos in the stack. Right click on the image you have edited and click the following sequence: Develop Settings > Sync Settings.

Synchronizing edits • Focus stacking examples
This will show you all the edits you have made that you want to apply to all the photos. Finally, click “Synchronize.”
2. Open in Photoshop
To open these images in photoshop click the following sequence: Choose Photo > Edit in > Open as Layers in Photoshop. This will open Photoshop with your selected photos as layers in the project.
3. Alight the photo layers
To alight the photo layers in photoshop, make sure you have all photos selected. Then click the following sequence: Choose Edit > Auto-Align Layers. Click “Auto selected” before finally clicking OK. Photoshop will then alight the photo layers.
4. Blend the layers
Finally, you’ll want to blend the layers to create a single, focus-stacked image. Do this by selecting all the photos. Then click the following sequence: Choose Edit > Auto-Blend Layers.
Make sure you select “Stack Images” in the dialog before clicking OK. This should result in a focus stacked photograph which will appear as a layer mask.
Focus stacking is an incredibly useful tool that can open the door to capturing truly unique photos. While it may not be a technique you use for every photo, focus stacking will make you a more versatile photographer.
The process of focus stacking may seem a bit tedious, but with practice it can actually be incredibly fast and painless.
Related Posts
UP NEXT
What is Overexposure in Photography
Focus stacking is a rather advanced photography technique that can help you create unique images. However, if you are just starting out in photography you will need to learn the fundamentals. One of which is understanding overexposure and how to avoid it in your images. Learn more about overexposure in photography and the techniques used to properly expose a photo in our next article.
Up Next: Overexposure Explained →
Showcase your vision with elegant shot lists and storyboards.
Create robust and customizable shot lists. Upload images to make storyboards and slideshows.

I am so pleased to find this site and hear /see focus stacking so well explained. Thank you heaps. I'm sure I'll benefit from your other topics too.