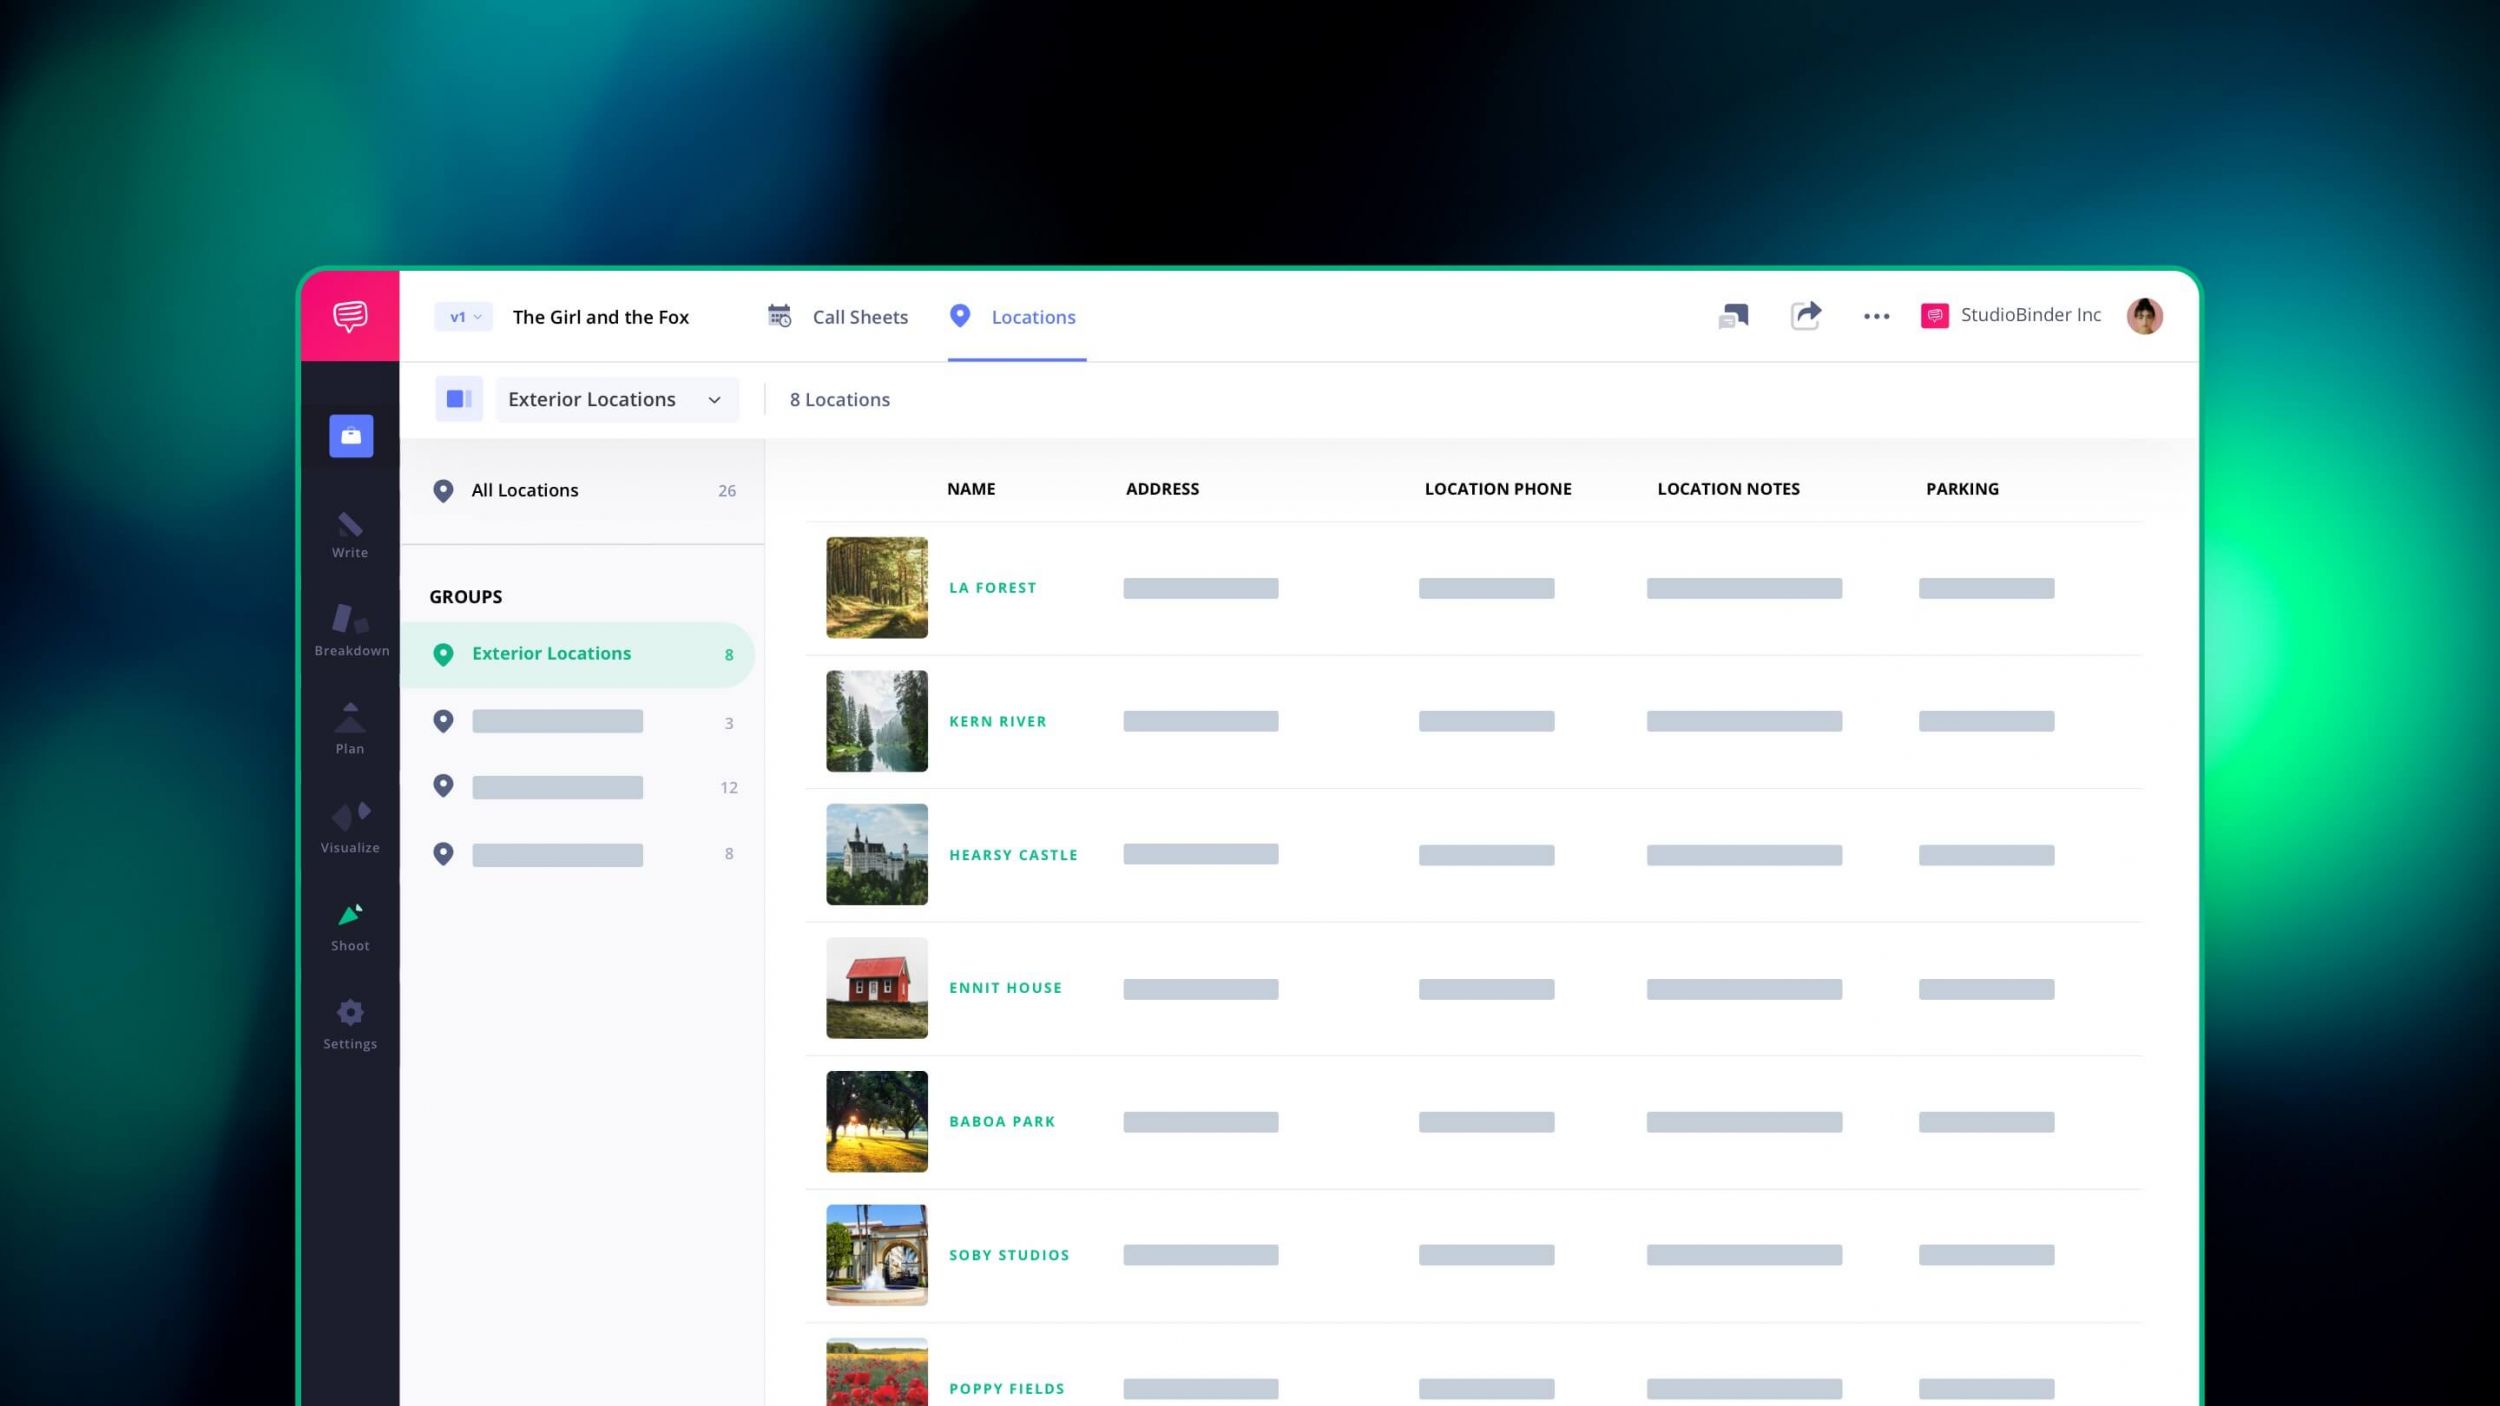
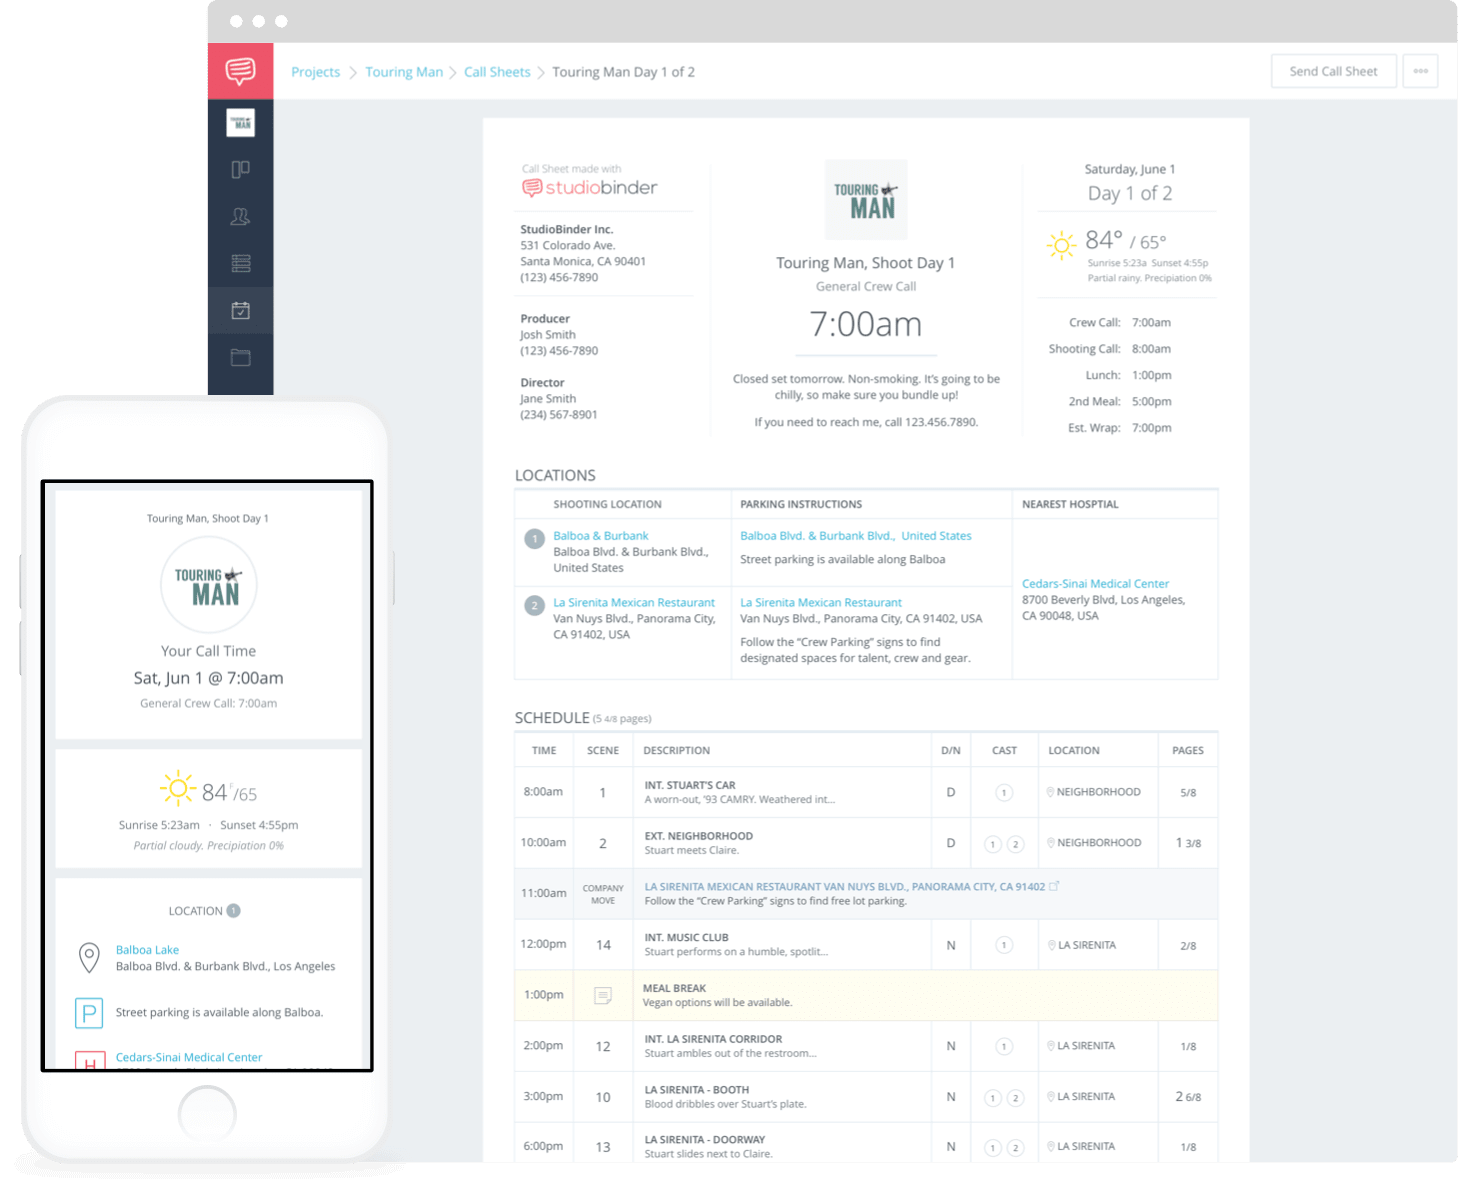
INT. BATHROOM, EXT. SANTA MONICA PIER, EXT. NEW YORK STREET. What do all of these have in common? Well, first of all, they’re all scene headings, at least two-thirds of one. Secondly, they’re all different places or locations. There isn’t a set rule on how many locations to include in a script, but remember that each location comes with its own set of logistics. It used to be that you’d put the information into a spreadsheet, copy and paste as needed. That becomes redundant quickly. StudioBinder’s locations page makes this process easier by allowing you to input the information once. Follow along for a step-by-step guide to managing shooting locations and how your shooting schedule and call sheets will benefit.
Manage Shoot Locations
Why location management matters
With all its moving parts, myriad of departments and personnel, a film production is a logistics beast. There are countless variables to contend with once you arrive on set so eliminating unnecessary variables is the key to an efficient production.
One of these areas falls under the purview of the Location Manager. If you happen to be shooting everything at a single location, this may not be much of an issue. For the rest of us juggling multiple locations, sometimes in the same day, keeping organized is absolutely vital.
That's why we're going to walk you through the various ways to keep your locations organized within StudioBinder. Again, you'll have plenty of curveballs to deal with once you're at the shoot locations but getting everybody to the right spot on time shouldn't be one of them.
SHOOT LOCATIONS PAGE OVERVIEW
What is a shooting location?
Shooting locations are the physical locations where you’ll actually be filming your project. StudioBinder’s shoot locations page allows you to input all of your shooting location information that is then readily available when breaking down and scheduling your shoot. This removes all the tedious and redundant information input everytime you need to assign a location to a scene or bring in a location to a call sheet.
Locations page information fields:
- Location Name
- Set Address
- Parking Address
- Parking Instructions
- Nearest Hospital
- Location Contact
- Location Notes
If you’re more of a visual learner, take a look at this video that covers managing shooting locations in StudioBinder.
Location Details
Step 1: Add location information
Ok, first things first. We need to put the location details into our StudioBinder project. You’ll want to check and then double-check that you have all of the correct details for your shooting locations. You don’t want to find out that you’ve input the wrong address. Having one page to input the information makes it easy to make adjustments if something like that does happen.
So, from your Project Overview page, the first page you see when opening your project...
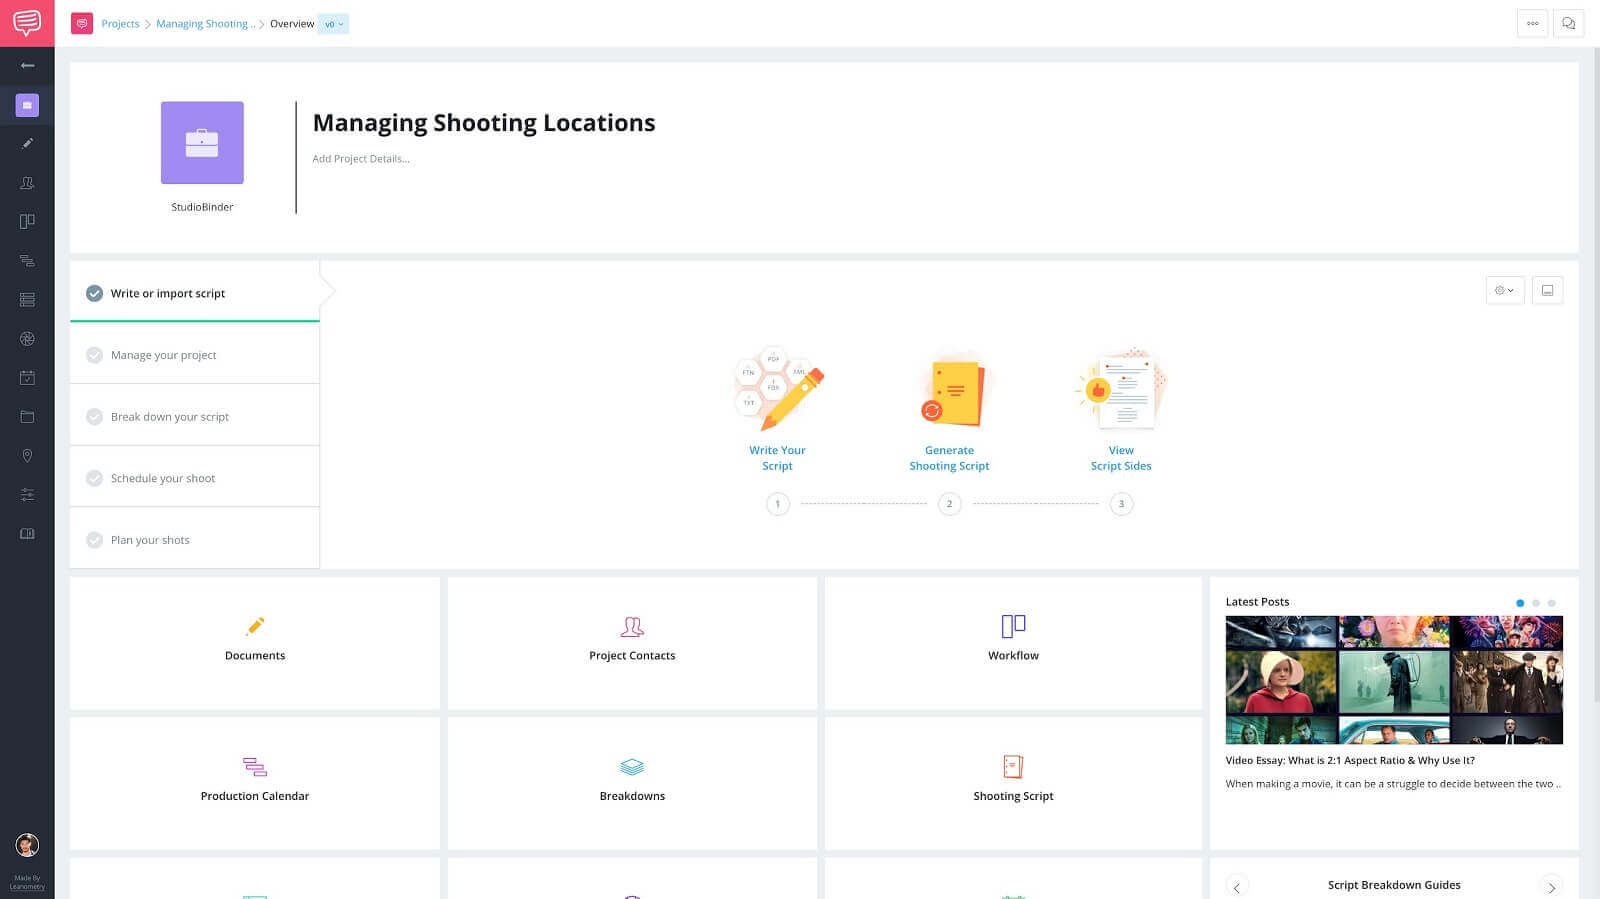
Project overview page
...on the left navigation sidebar, click the Shoot Locations button...
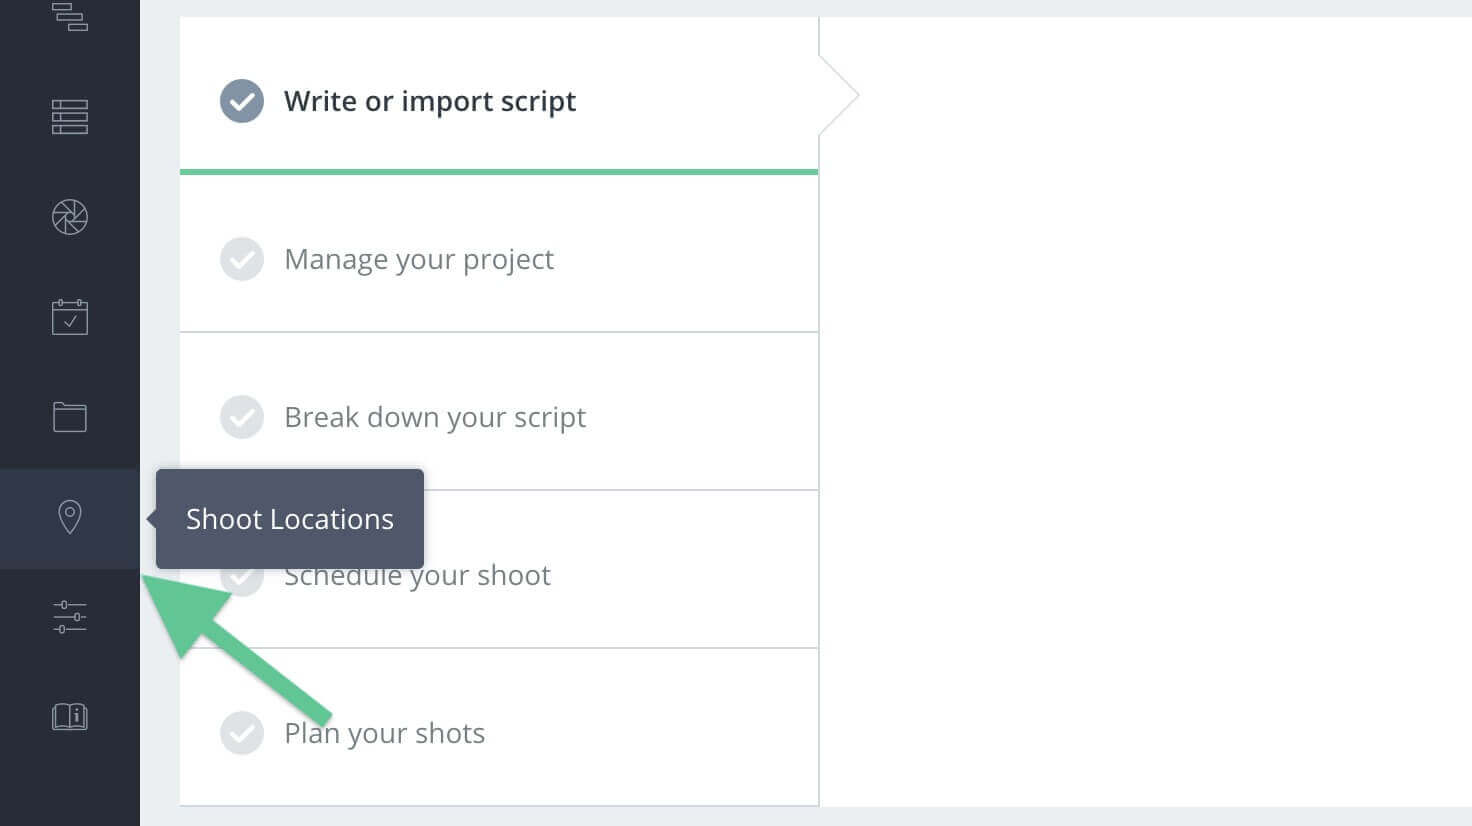
Left navigation sidebar • Click Shoot Locations
...this will take you to where we’ll be inputting the location information that we have, the Shooting Locations page.
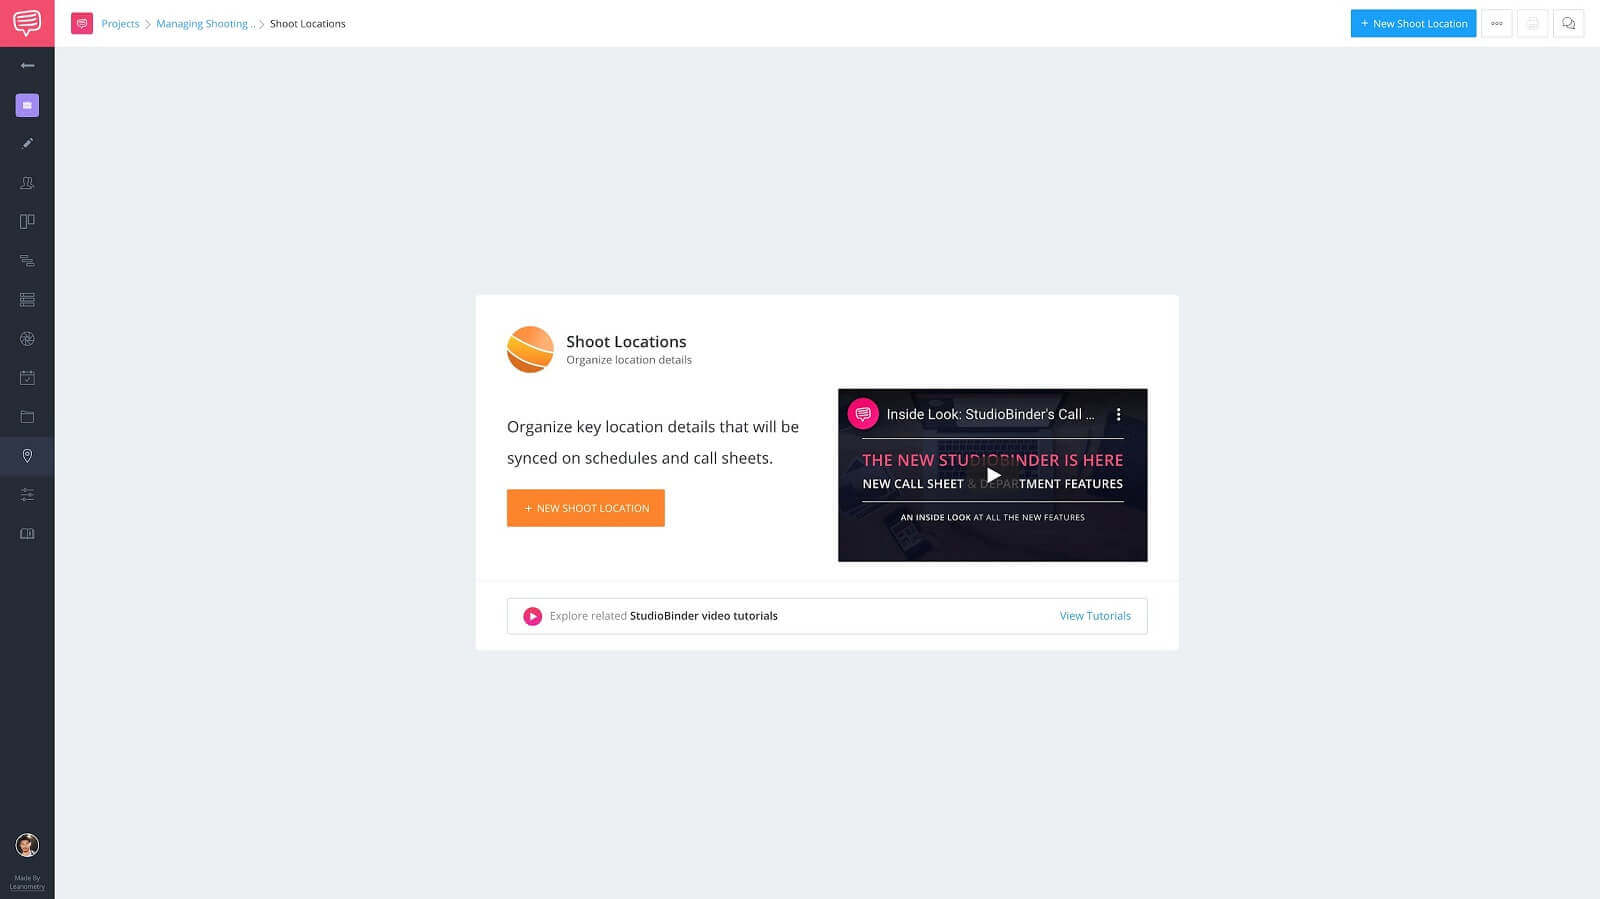
Shooting locations page
Now, click on +New Shoot Location, to start adding the details for your first location.
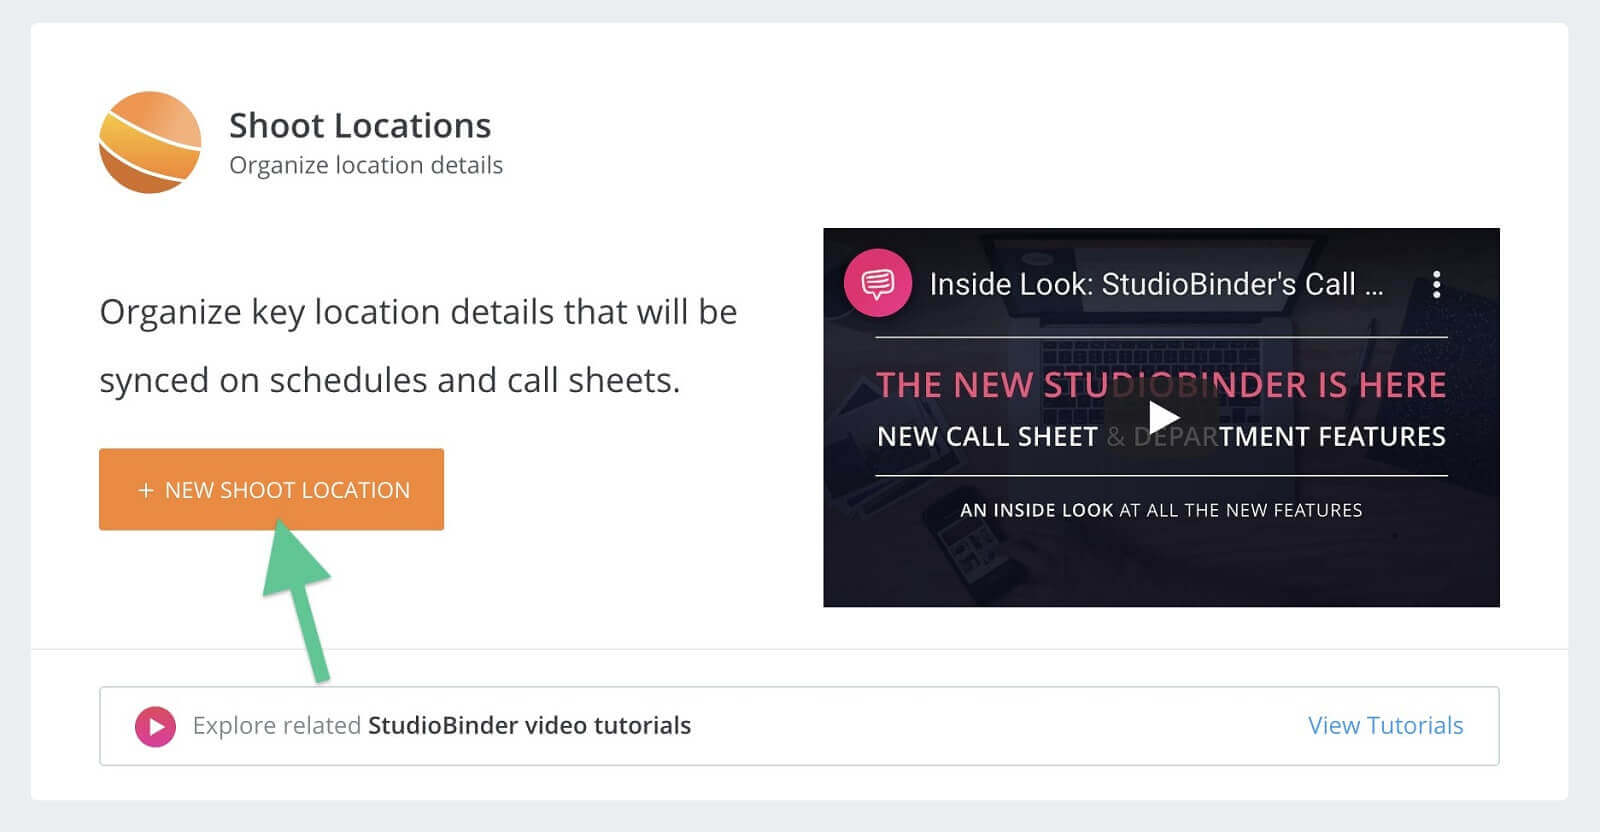
Shooting locations page • Click +New Shoot Location
...in the create new shoot locations dialog box, input all of the information you have available for that particular location. Be sure to include any essential information for parking.
For example, you might need to let everyone know that there will only be street parking available.
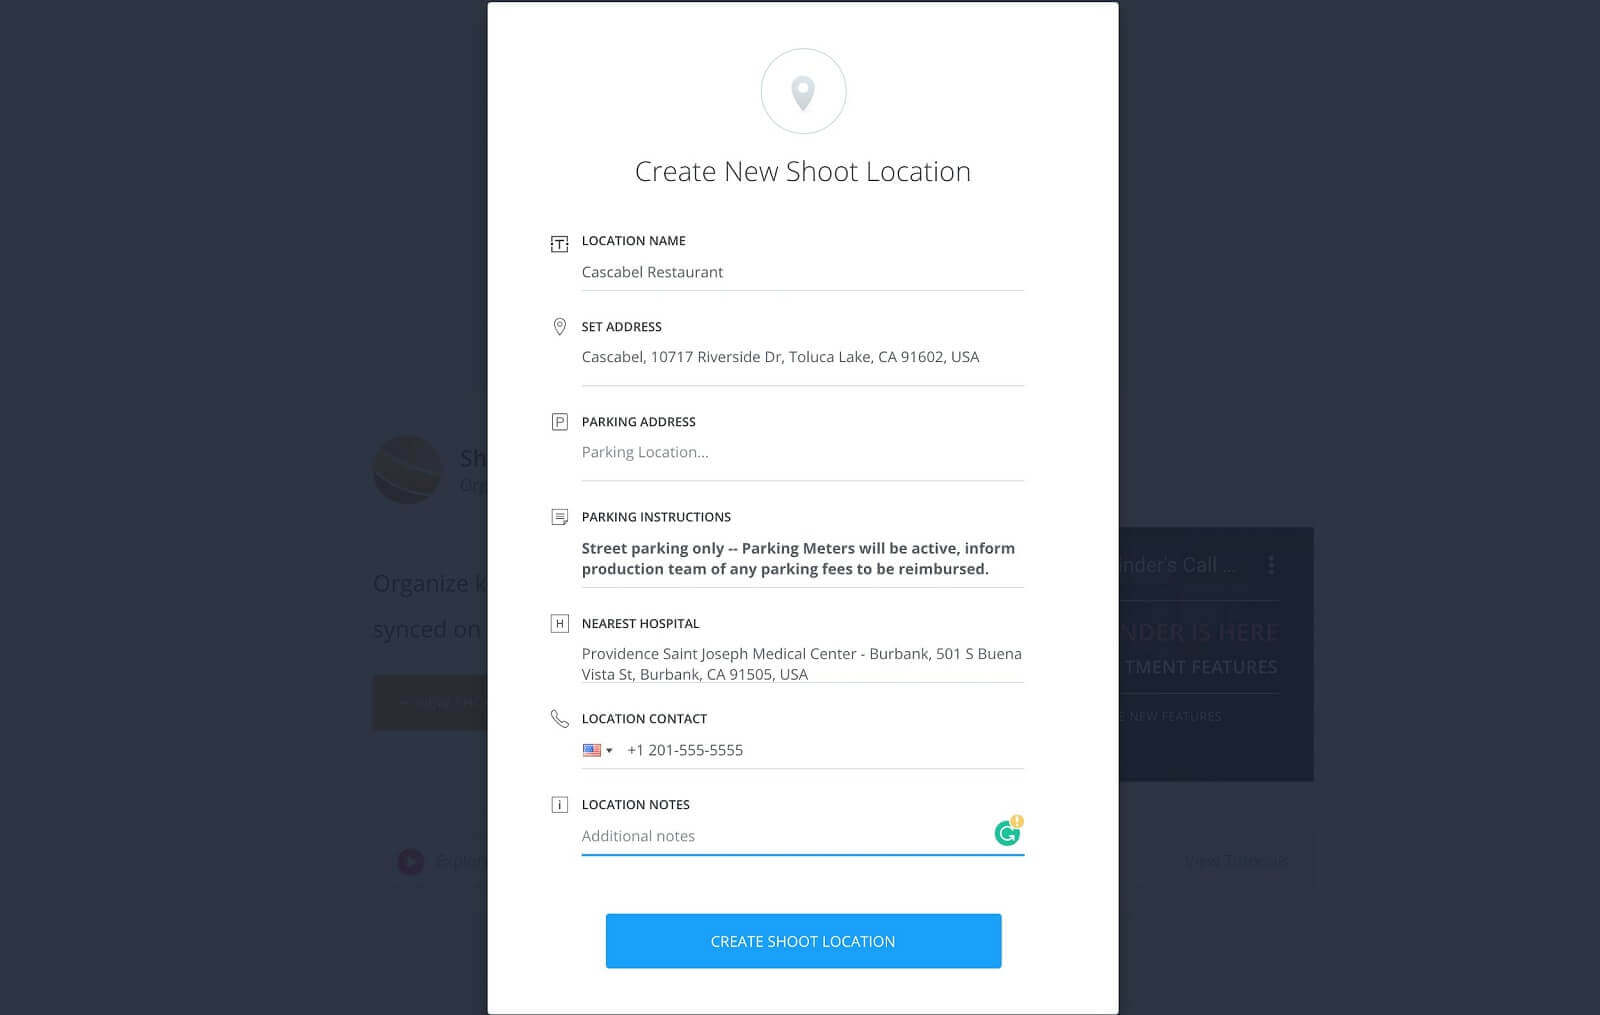
New location dialog box • Populated location details
Did You Know?
StudioBinder uses Google API to obtain address information. This allows the address to become clickable in call sheets, so you may pull up a map. If you know your location has an actual name you can search for it in the address field. If the name does not appear, you can suggest a name edit to Google by searching the address in Google and clicking suggest an edit.
You might ask, “Well, what if I’m shooting in a remote location that doesn’t have an address?” You can actually find the location via Google Maps and copy the coordinates and input those into the address line.
The following video will do a much better job of how to do this than I might be able to relay in writing.
How to input custom coordinates
Once you’ve finished inputting the information, click Create Shoot Location.
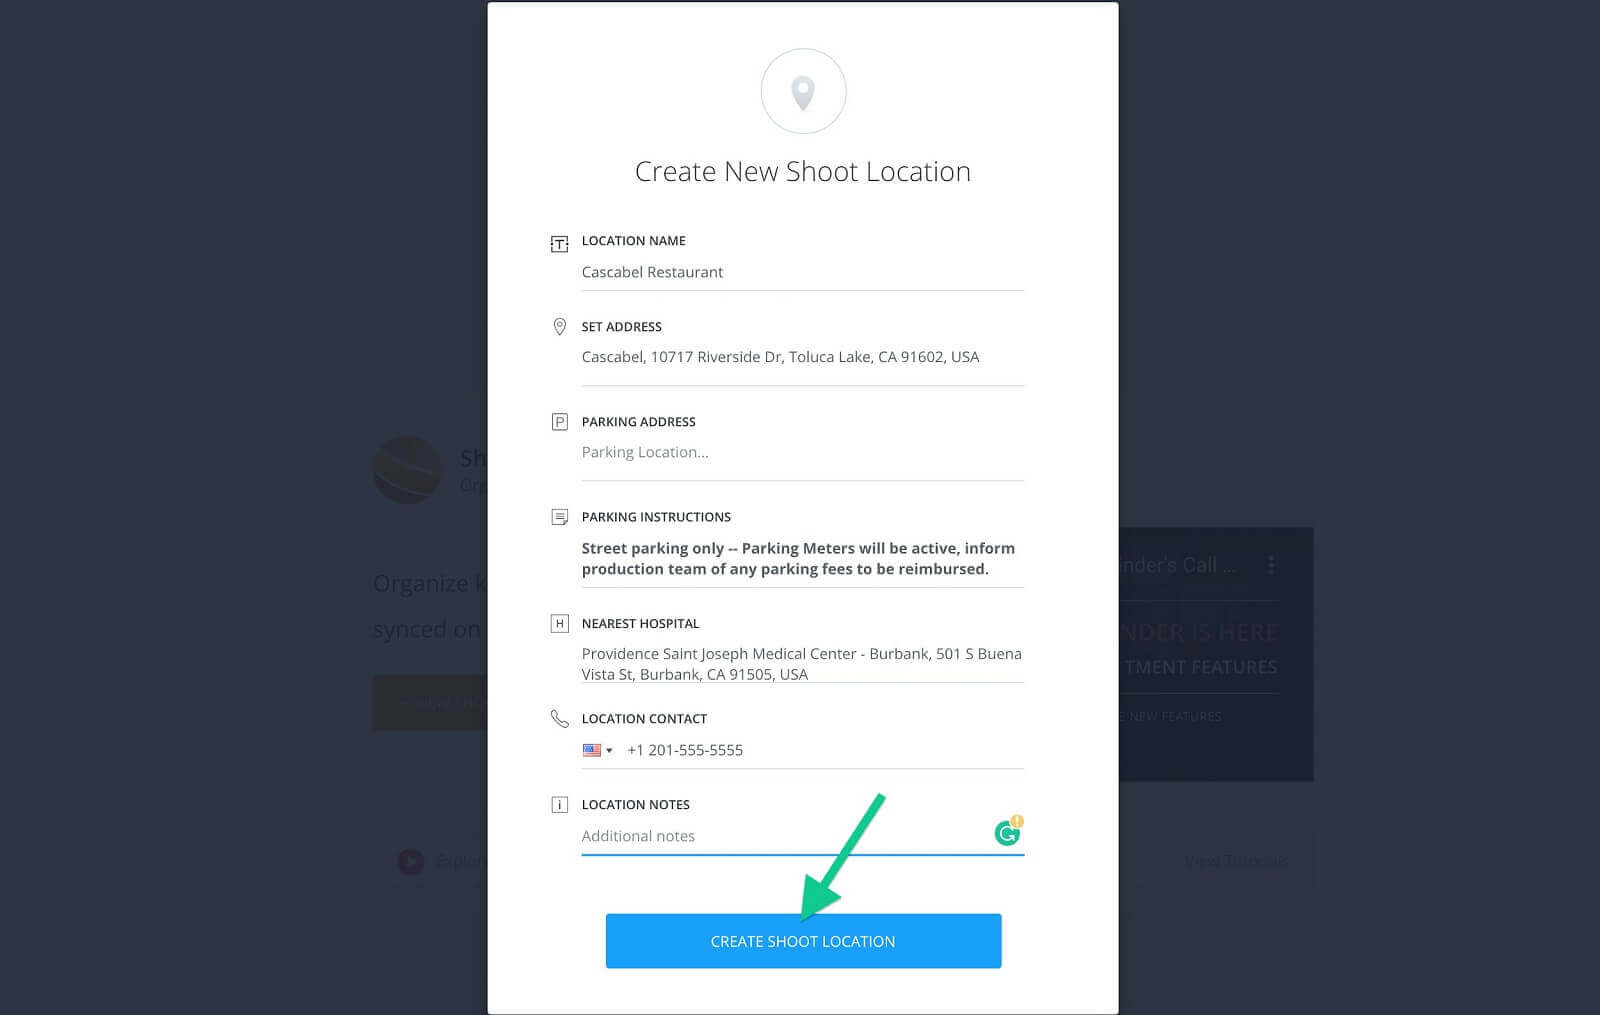
New location dialog box • Click create shoot location
Now, you’ll repeat that process for any other shooting locations that you may have. With the information now in the project that brings us to the second step. You can begin to start assigning the location(s) to the specific scenes that will be shot there.
Assign Shooting Locations
Step 2: Tag the location in the script
The main purpose of having all of the shooting information in your project is to eventually add it to a call sheet so everyone knows where they’re supposed to be. The great thing about StudioBinder’s location page is that you only have to input the information once and you can easily assign the locations without having to type a word.
Now, there are a few ways to do this. You have the ability to assign locations during the Script Breakdown process, when you are setting your Shooting Schedule, or if you build a call sheet from scratch you’ll also be able to assign a shooting location when creating a call sheet. Don’t worry, I’ll touch on each one. Just in case.
Breakdowns Page
Ok, the first option is during the breakdown process. To get to the Breakdowns page, starting from the locations page that we’ve been, use the navigation sidebar to select breakdowns.
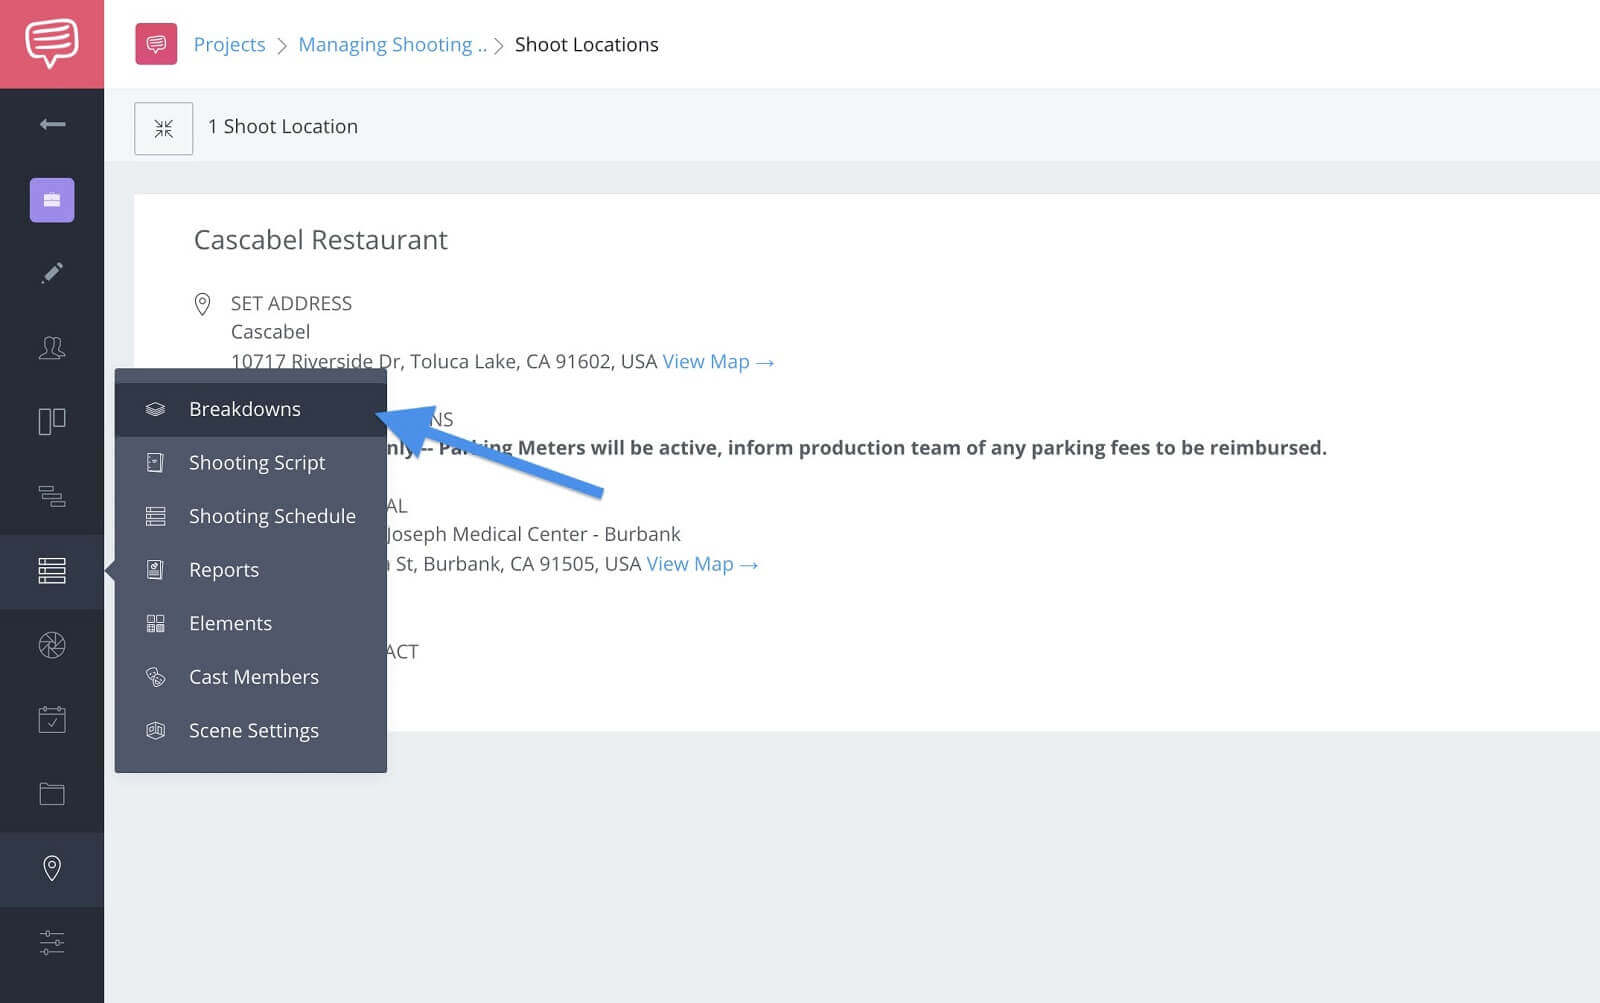
Navigation sidebar • Click breakdowns
Here on the breakdowns page you’ll notice the top strip above the script has all of your scene heading information.
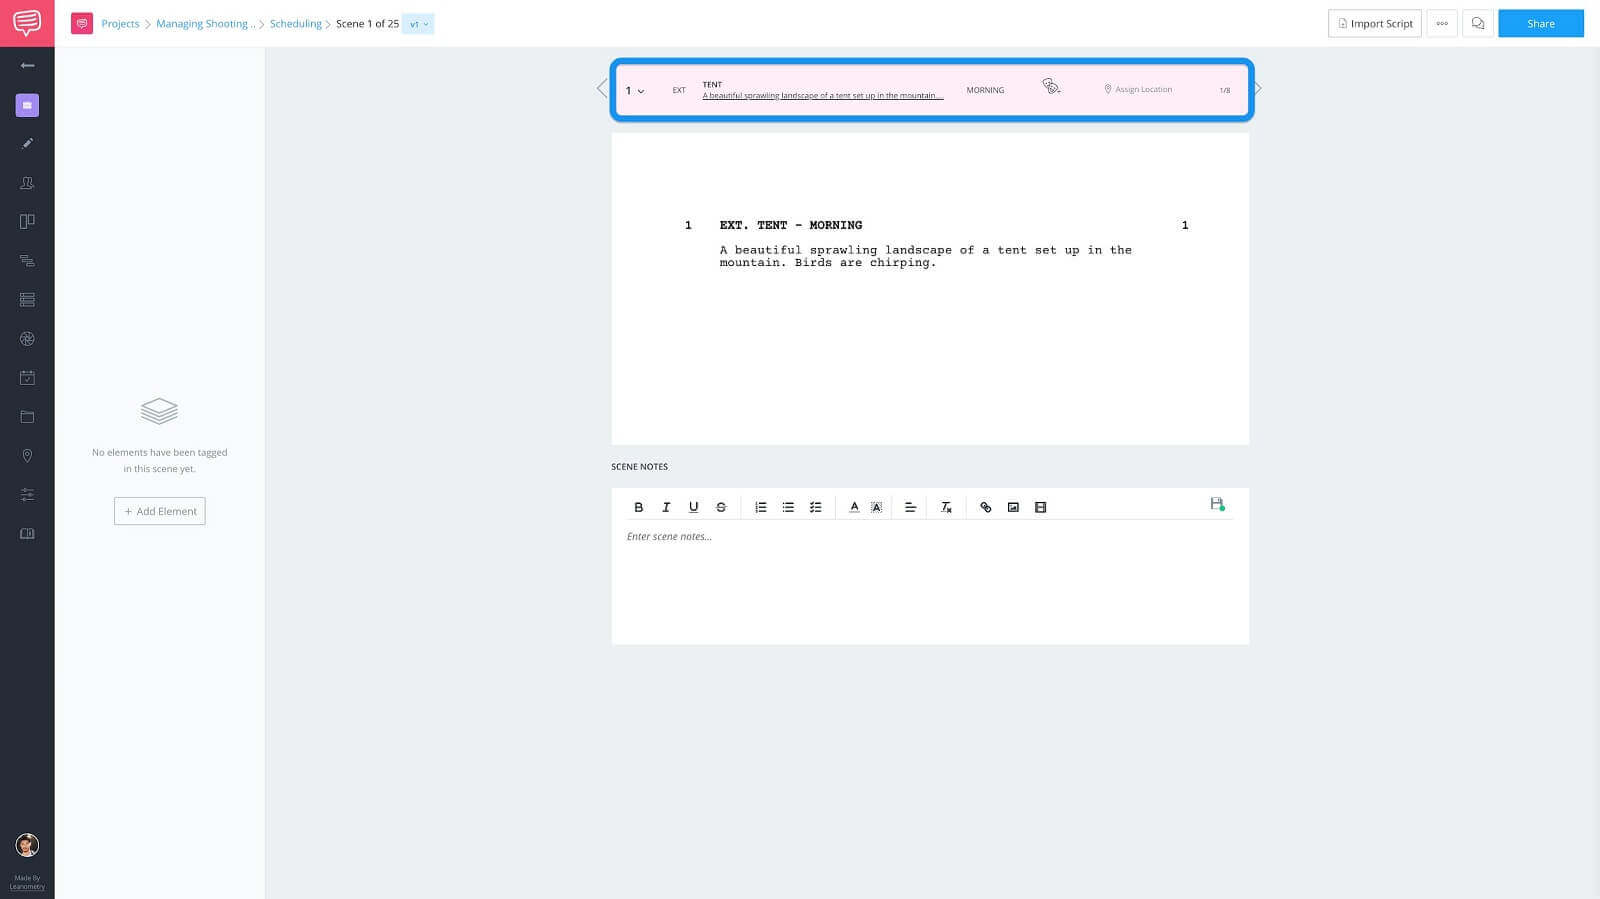
Breakdowns page • Scene heading strip
Click on Assign Location...
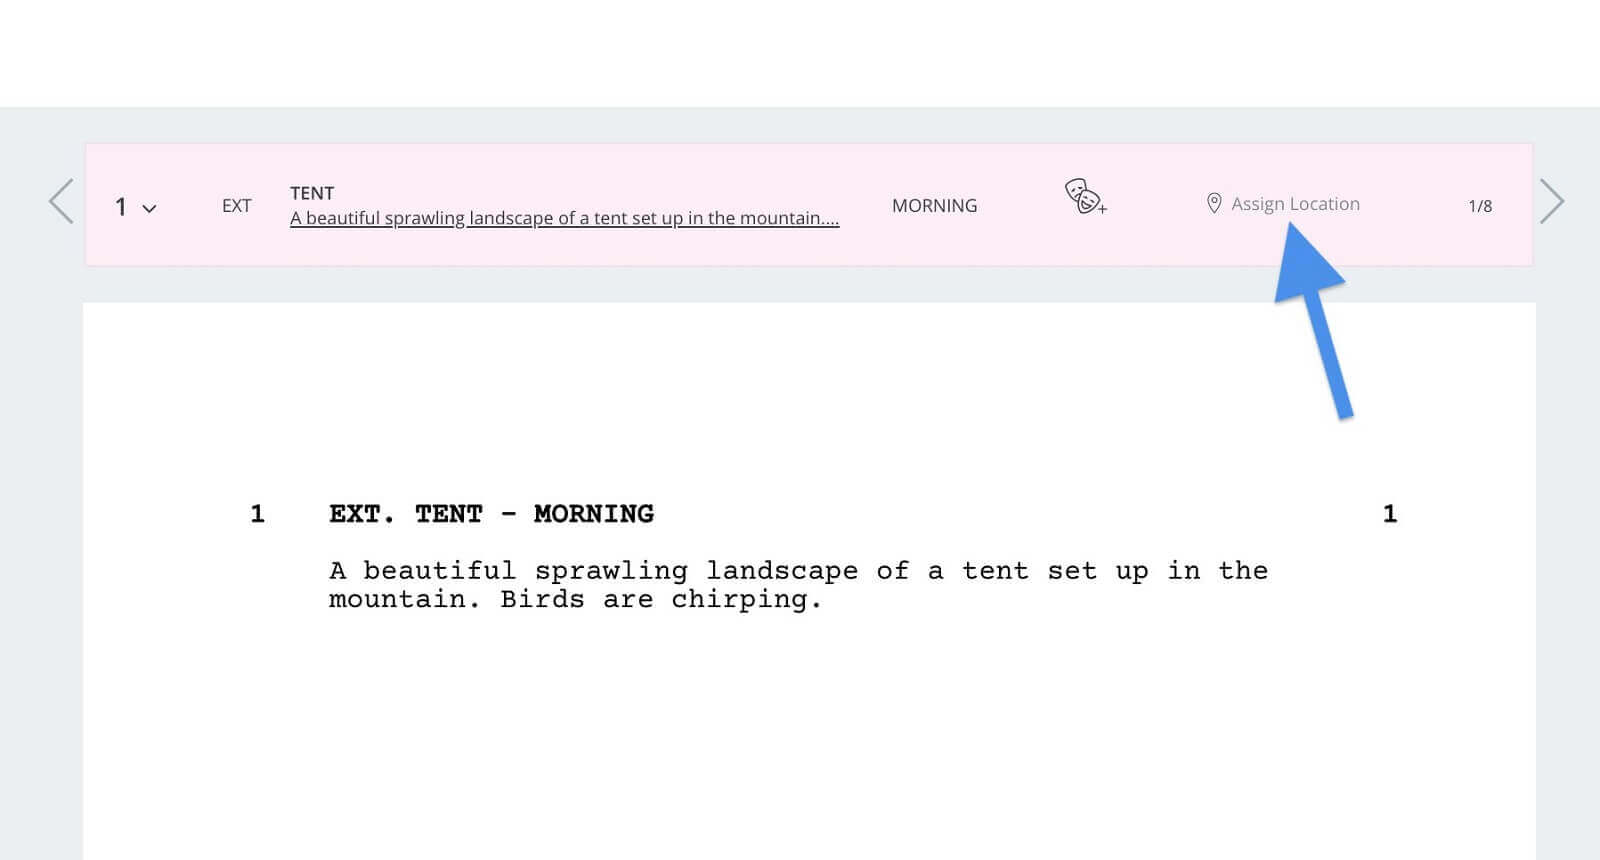
Scene heading strip • Select custom
This brings up the locations drop down menu where you will see listed all of the locations you input on the shoot locations page.
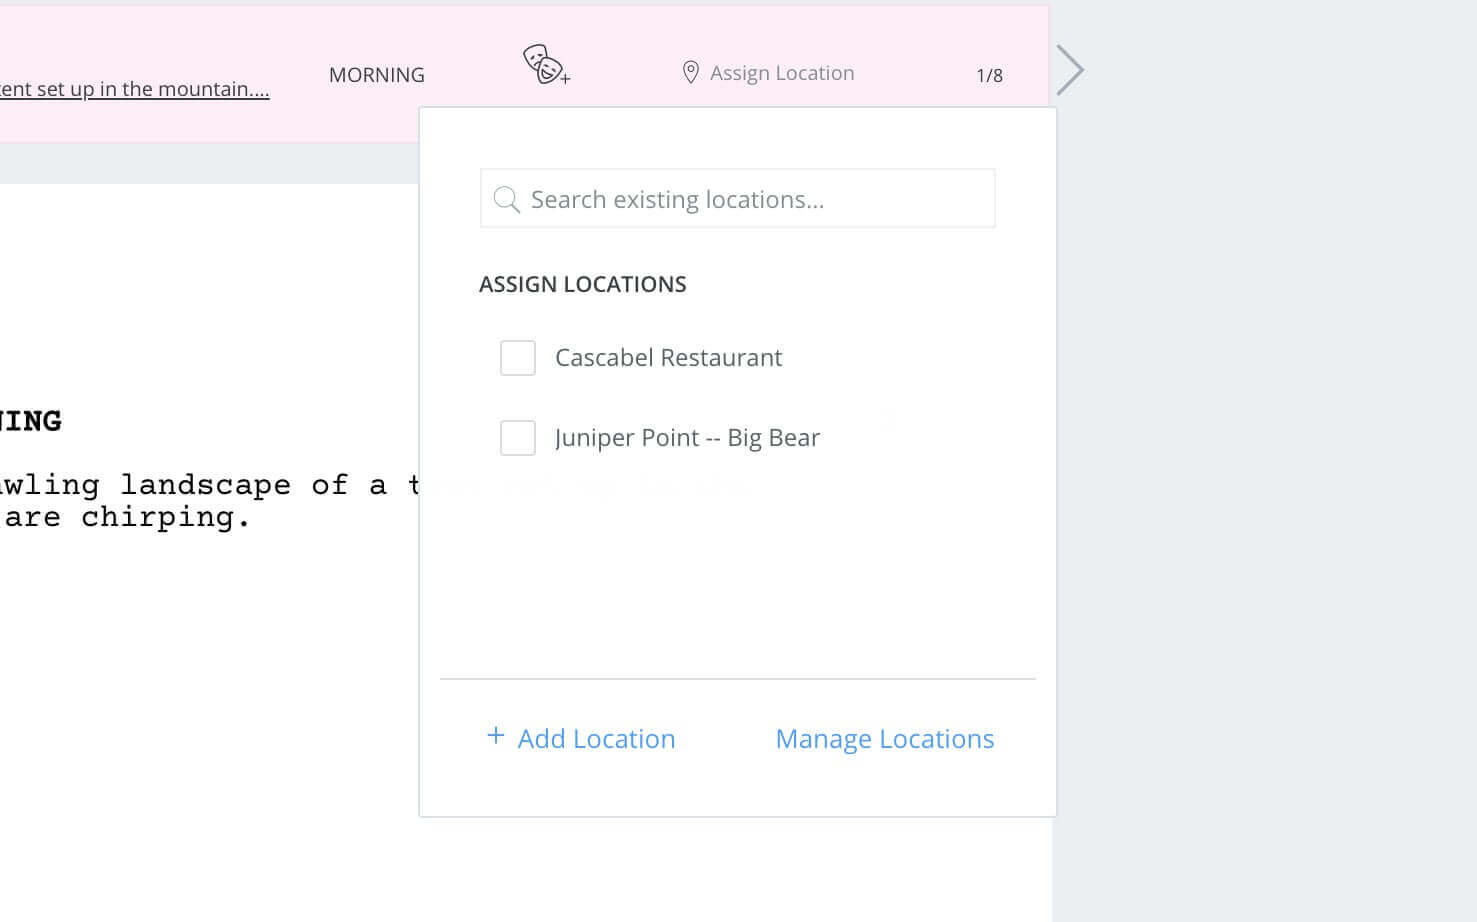
Locations drop down menu • Select location
Simply select the location that corresponds to the scene you are on. That’s it. One click. No having to type or copy and paste the address for every scene that will be shot there. Alright, now that we’ve covered how to assign locations on the breakdowns page, let’s hop over to the shooting schedule page.
Shooting Schedule Page
To get to the shooting schedule page, use the navigation sidebar to click Shooting Schedule.
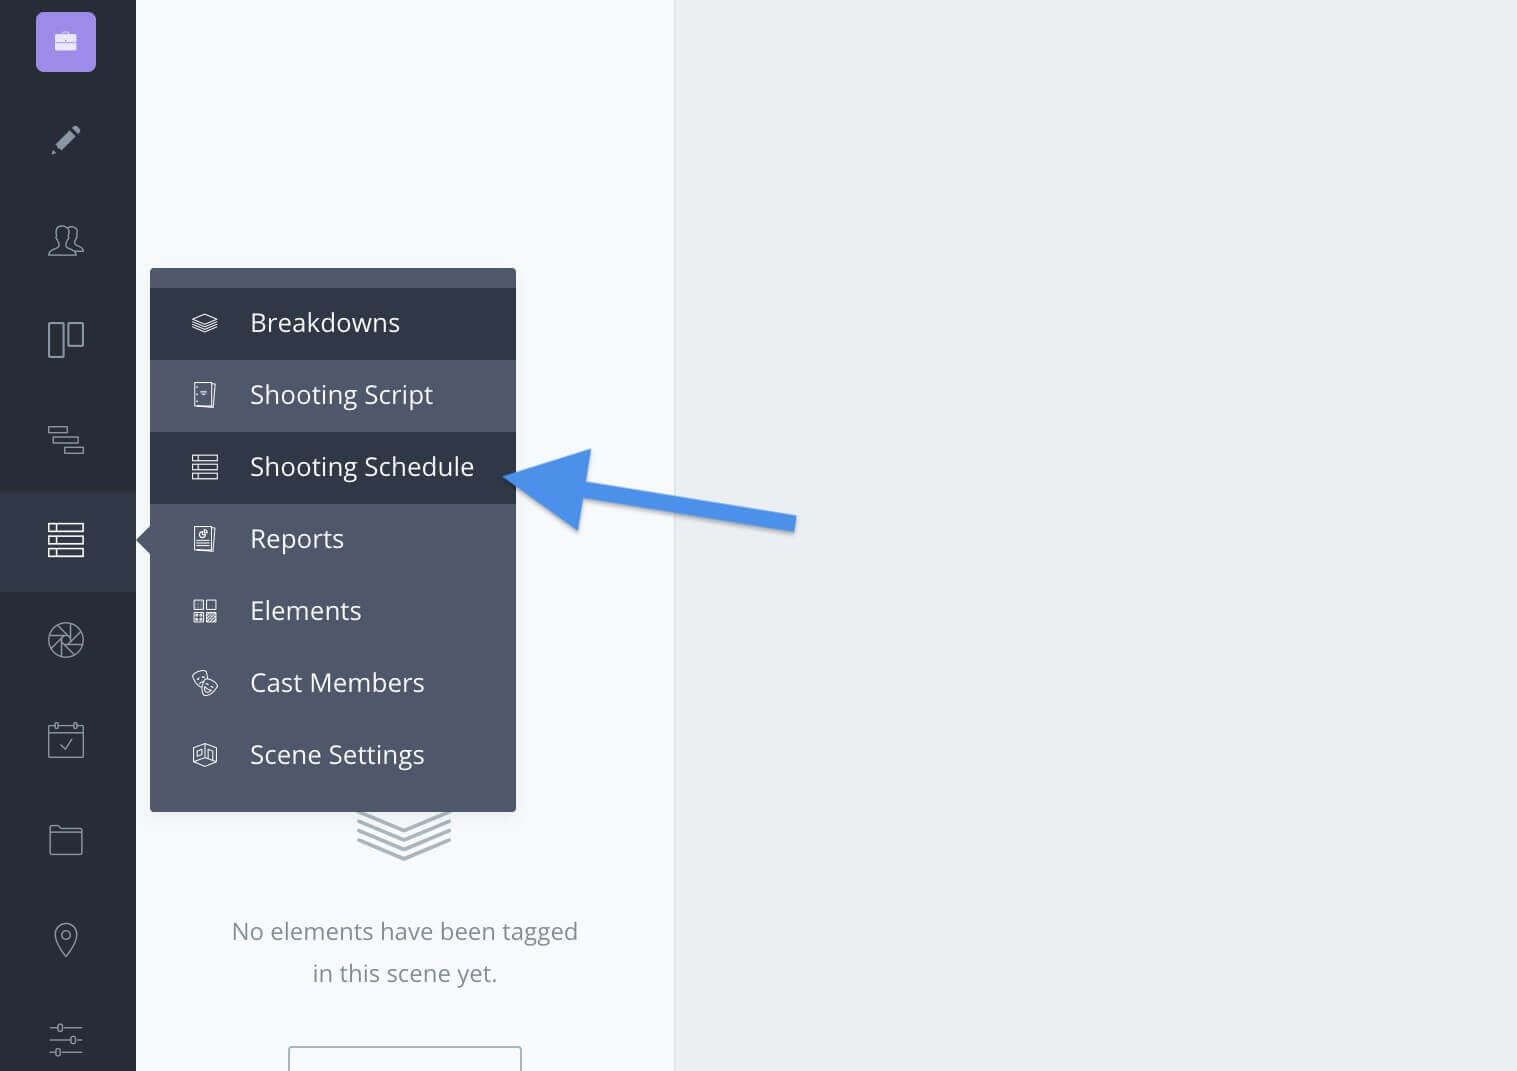
Navigation sidebar • Click shooting schedule
This brings us to the stripboard...
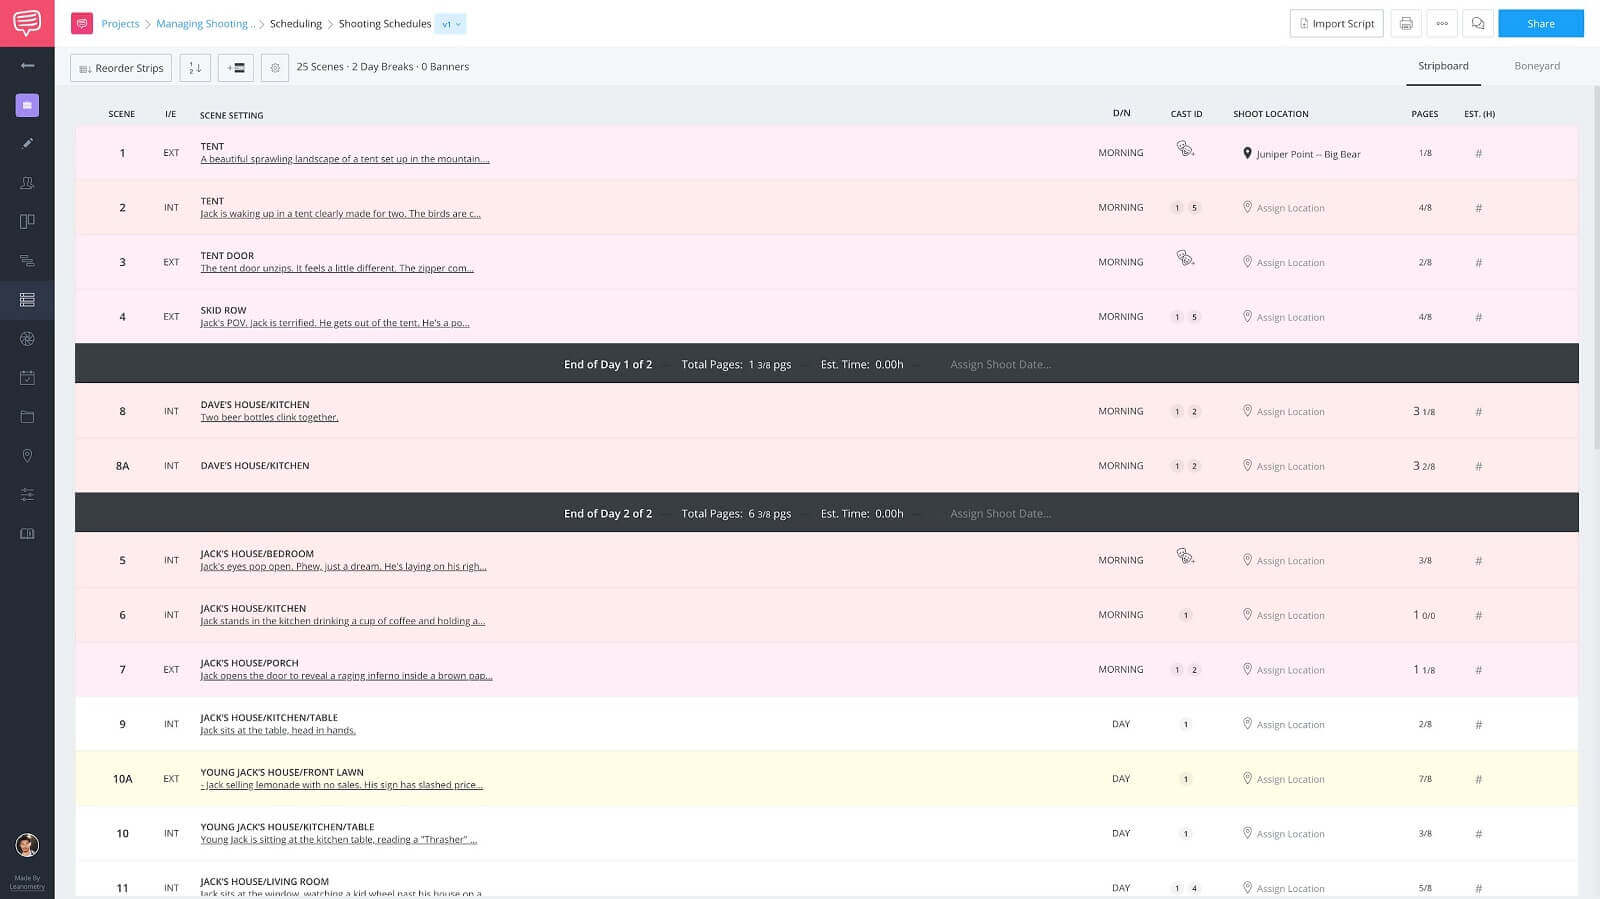
Shooting schedule • Stripboard
...by default the shoot location column should be visible, however, if you don’t happen to see that column you can enable it by clicking on the adjust columns button.
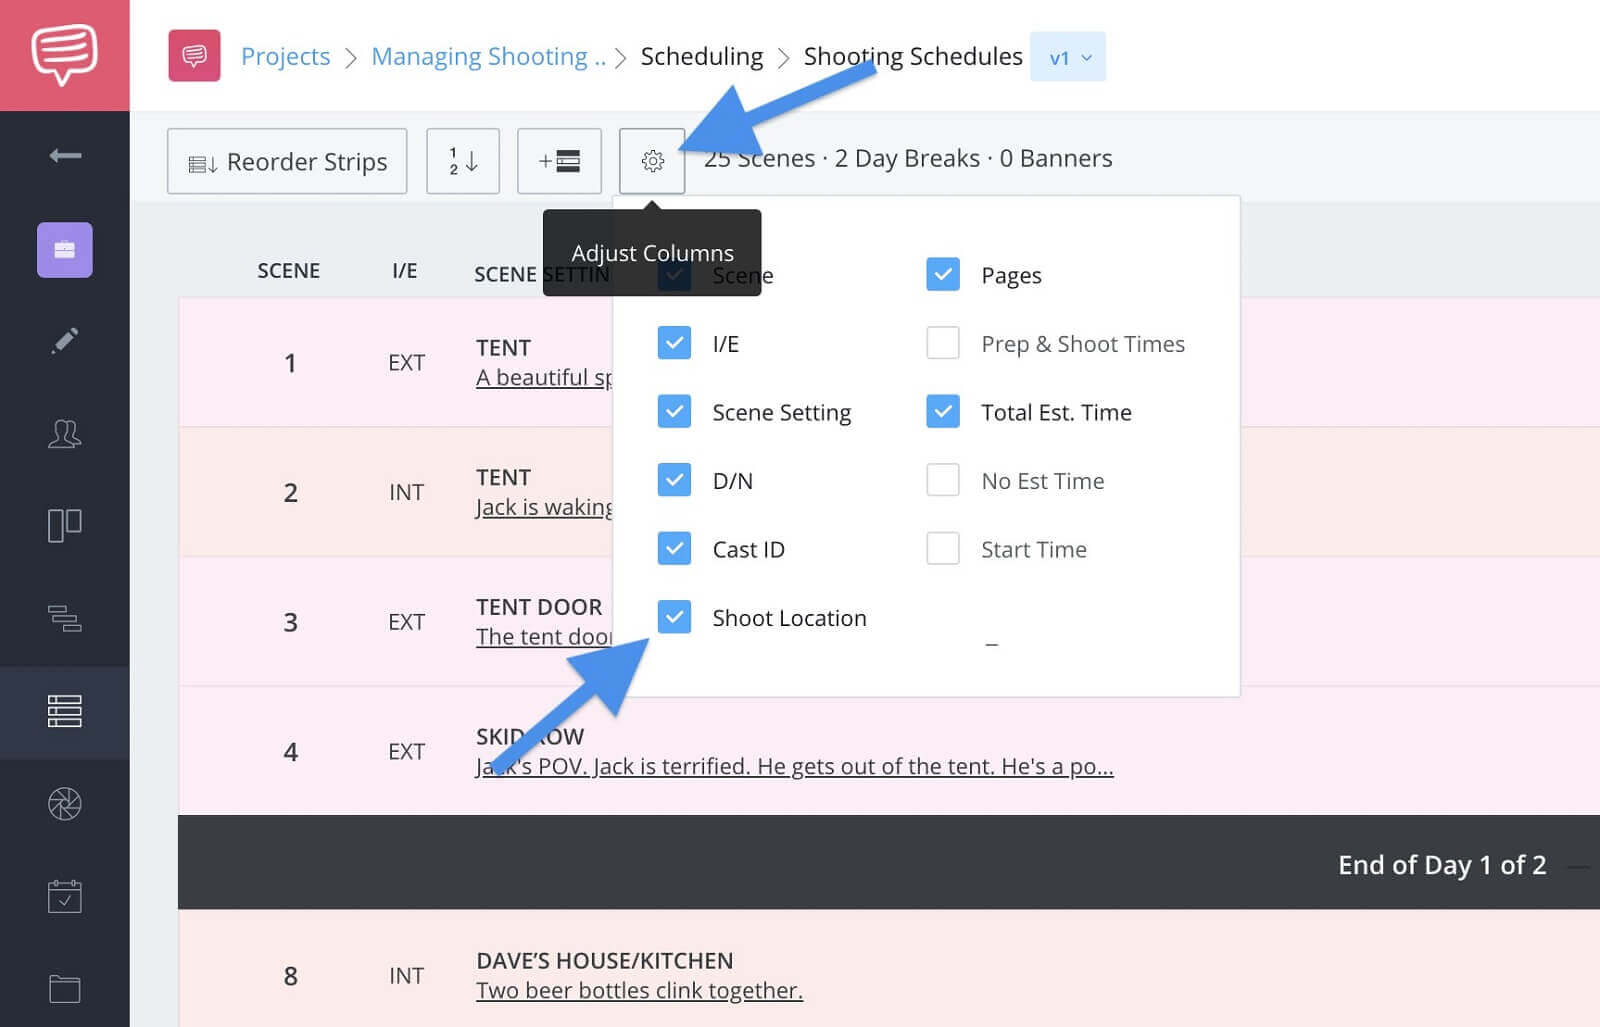
Adjust columns button • Enable shoot location
Now, to assign a location simply click the Assign Location button under the shoot location column.
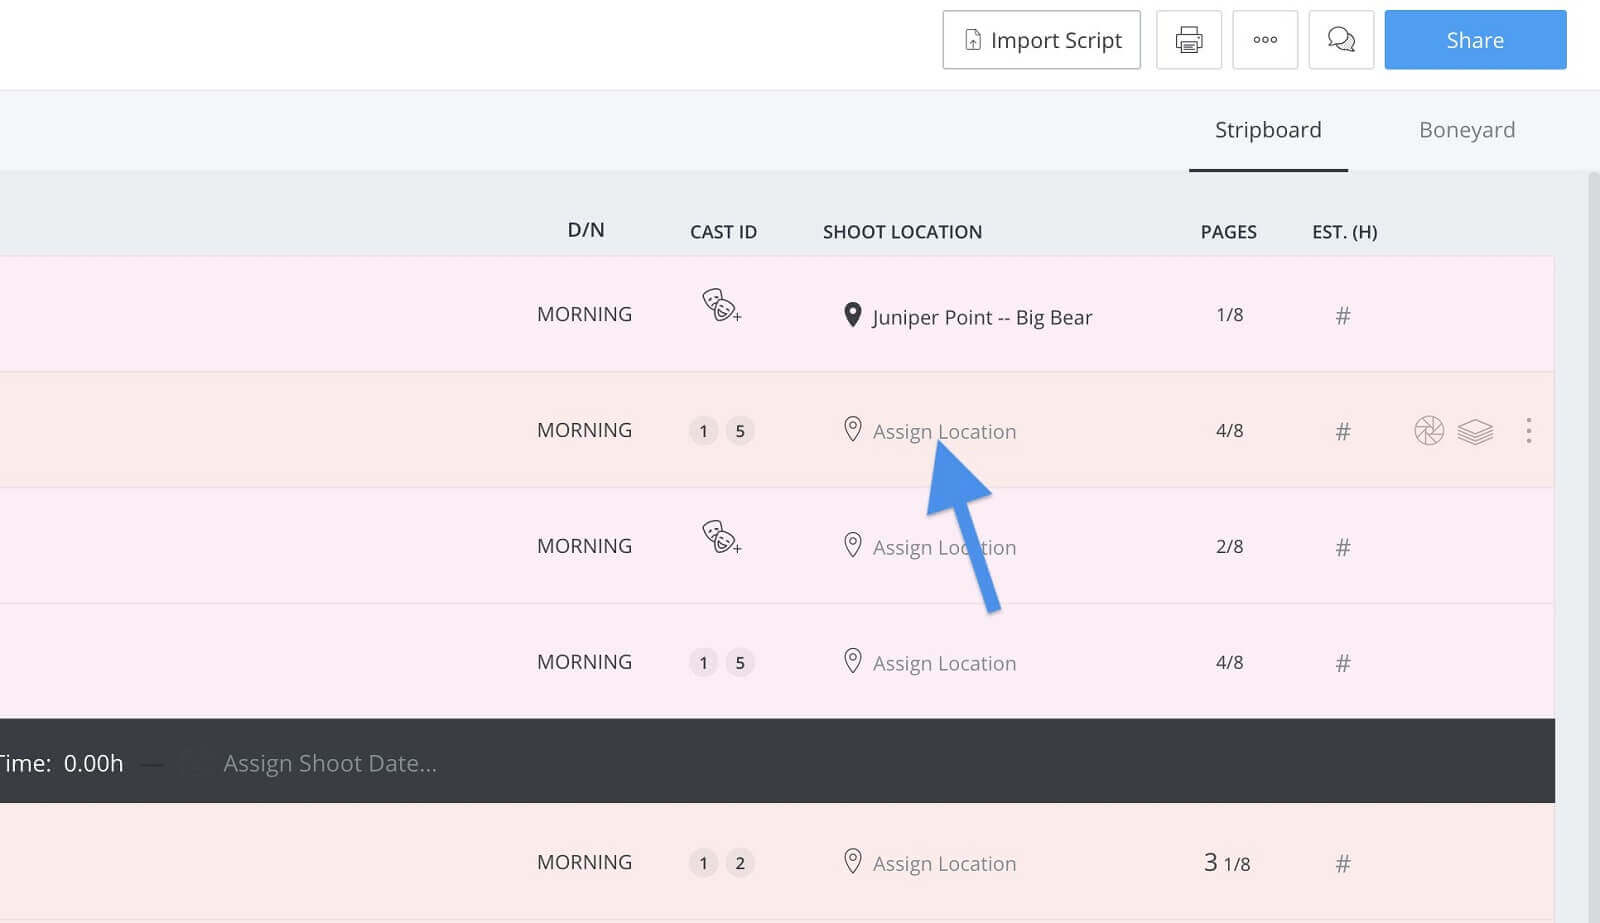
Shoot location column • Click assign location
Again, this will bring up the locations drop down menu. Simply select the corresponding location and you’re set!
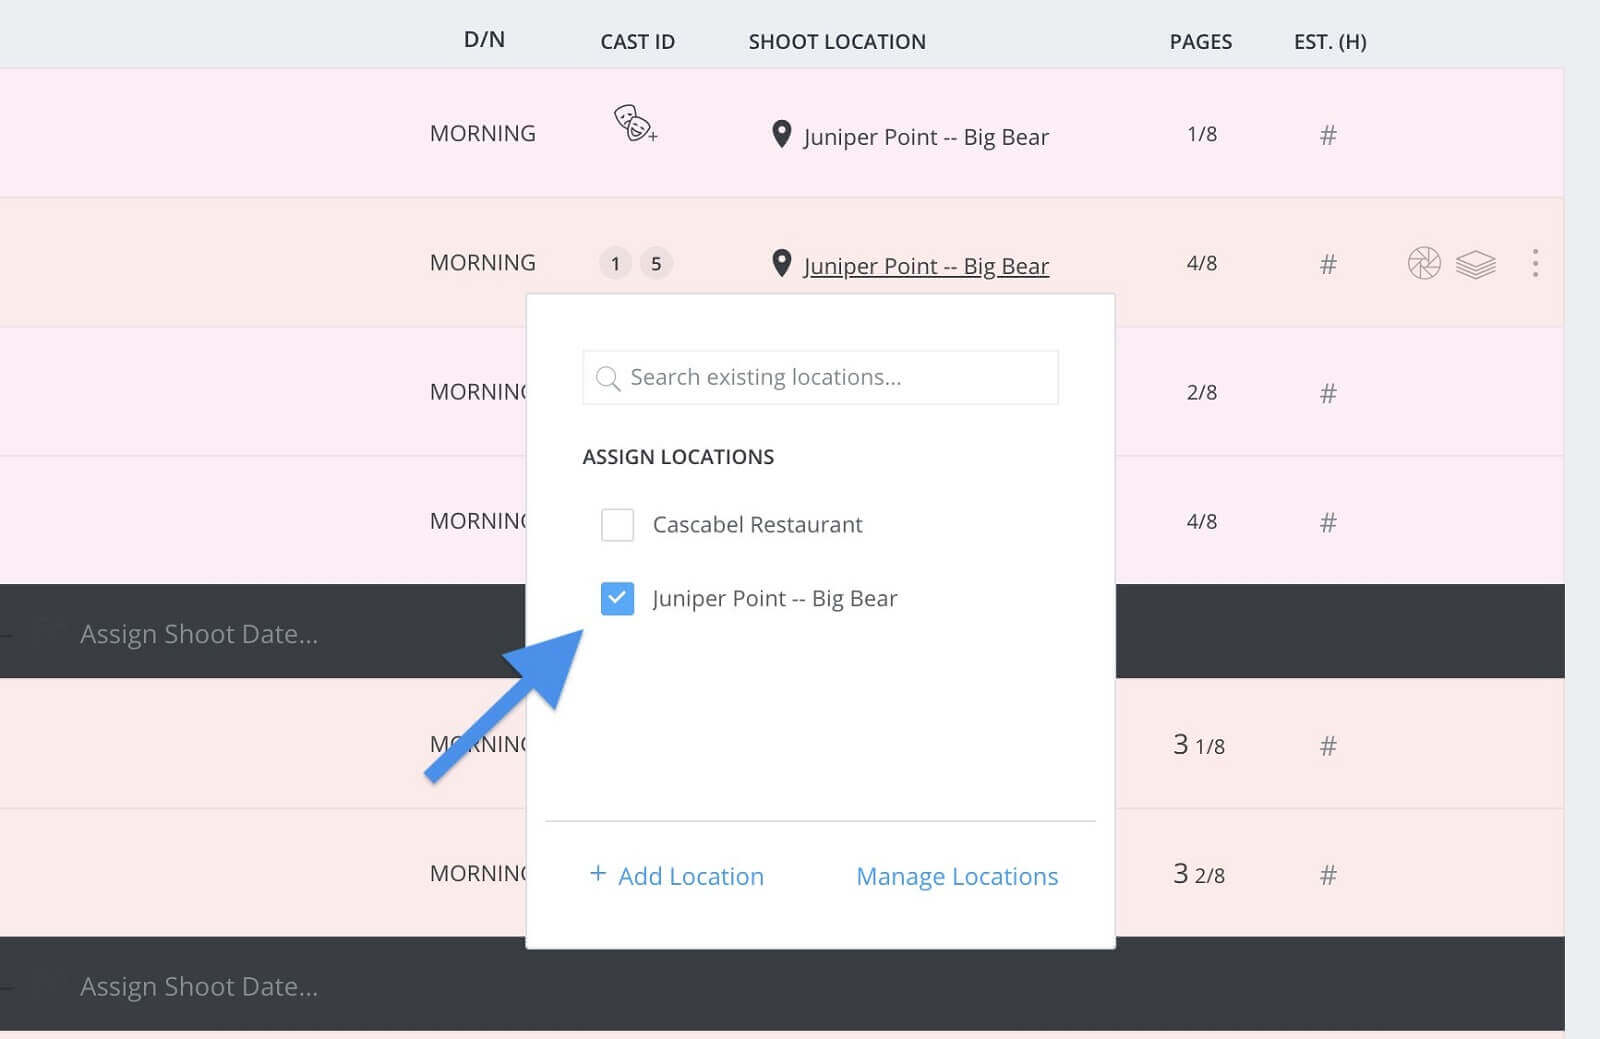
Locations drop down • Select location
Now, after you’ve assigned locations to an entire day on your shooting schedule you can easily spin-off a call sheet and all of the information will be imported into the script for you.
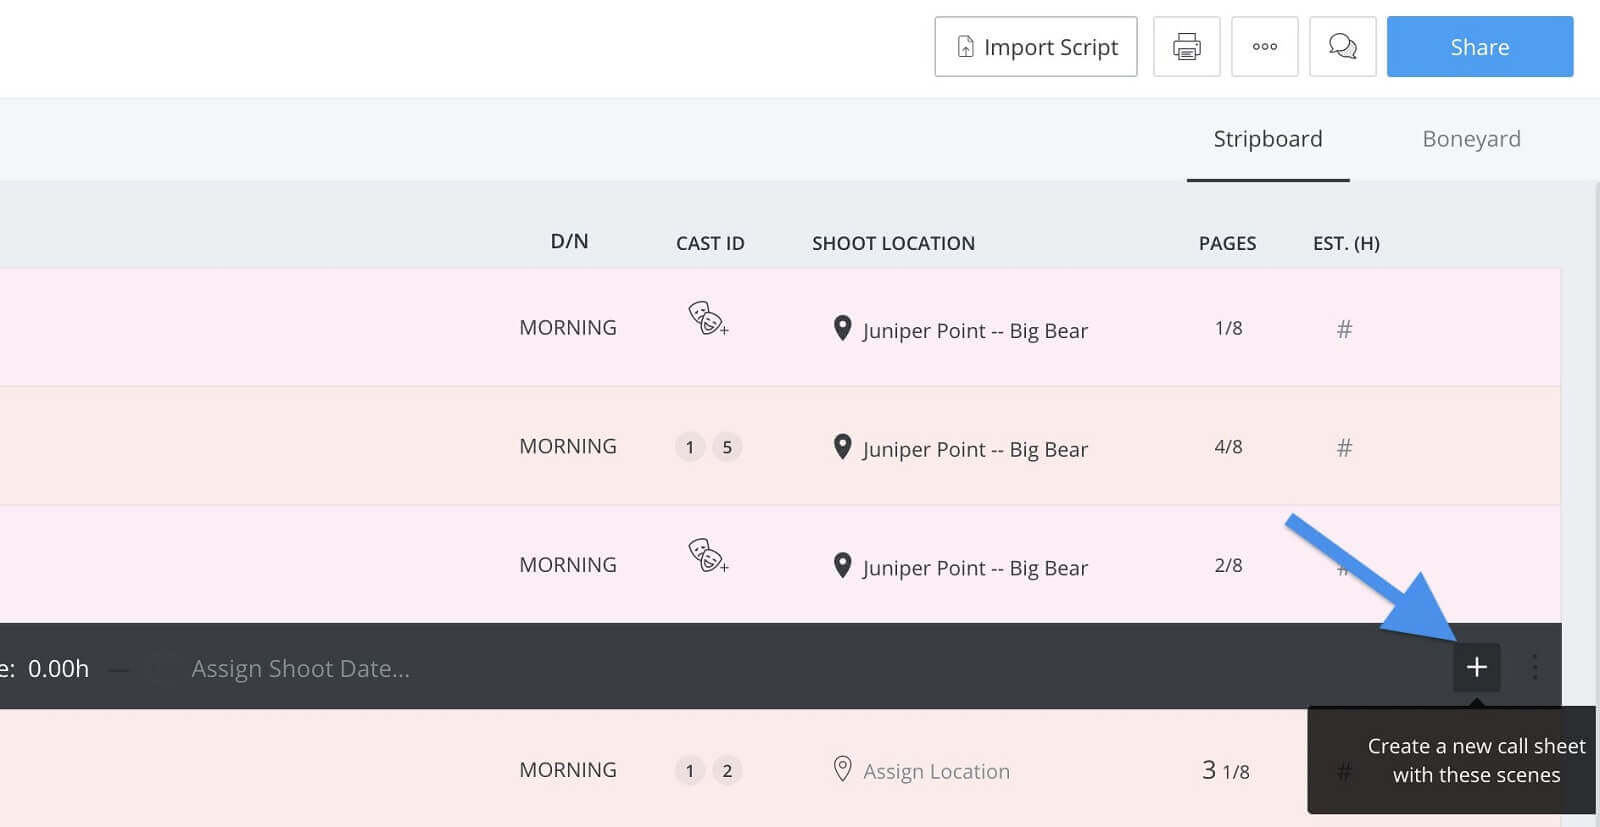
Day break strip • Spin-off call sheet button
Speaking of call sheets, let’s jump over to the call sheet builder to see how easy it is to assign locations when creating a call sheet from scratch.
Call Sheet Builder
From the shooting schedule, use the navigation sidebar to navigate to the call sheets page.
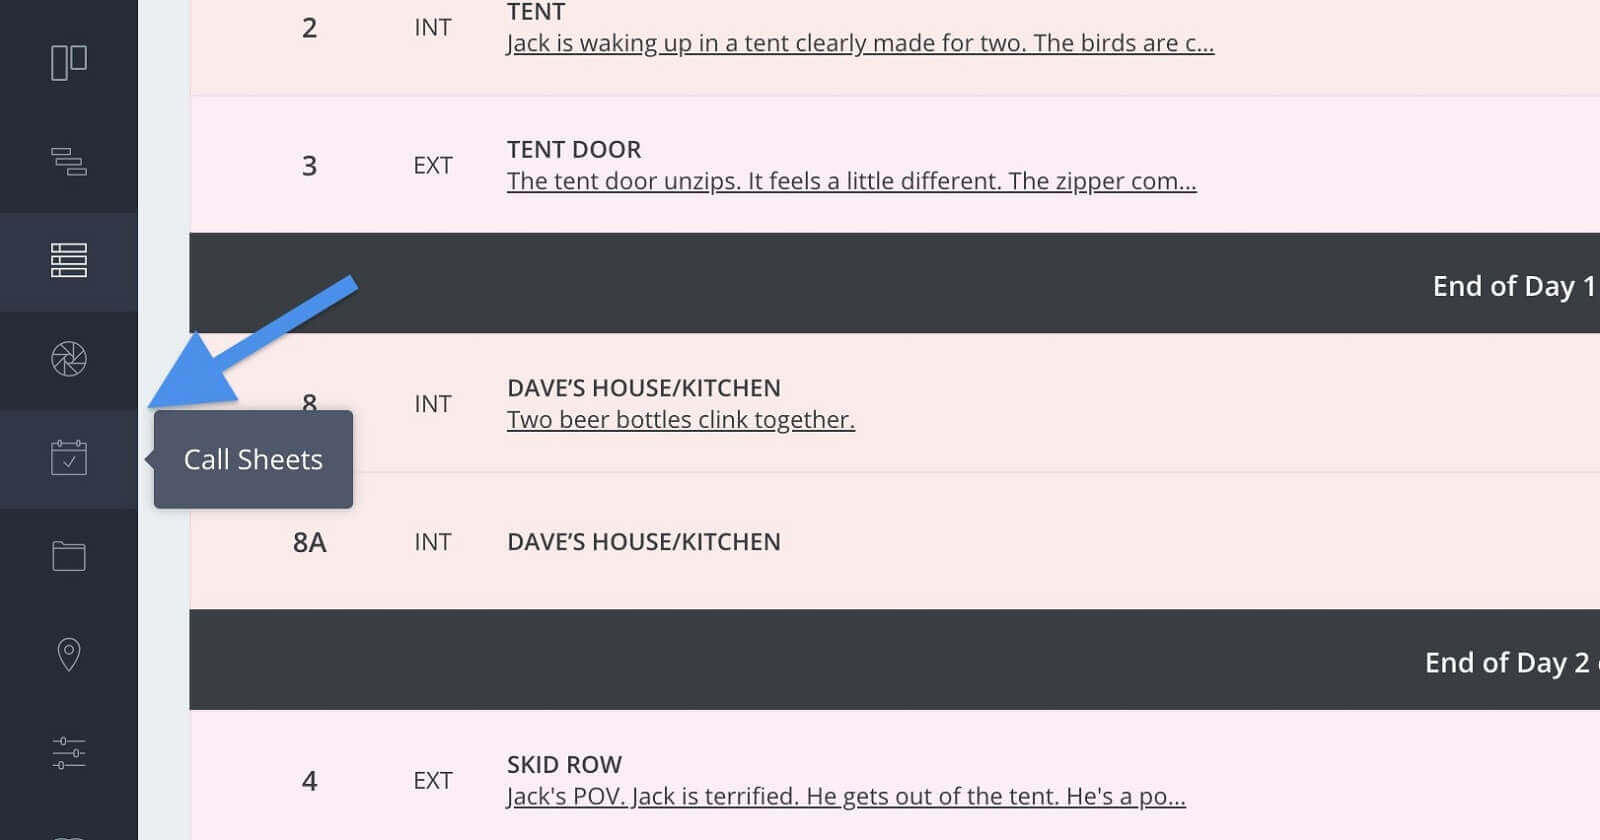
Navigation sidebar • Call sheets button
On the call sheets page, create a new call sheet if you don’t have one already by clicking on +New Call Sheet, give the call sheet a name and then click next.
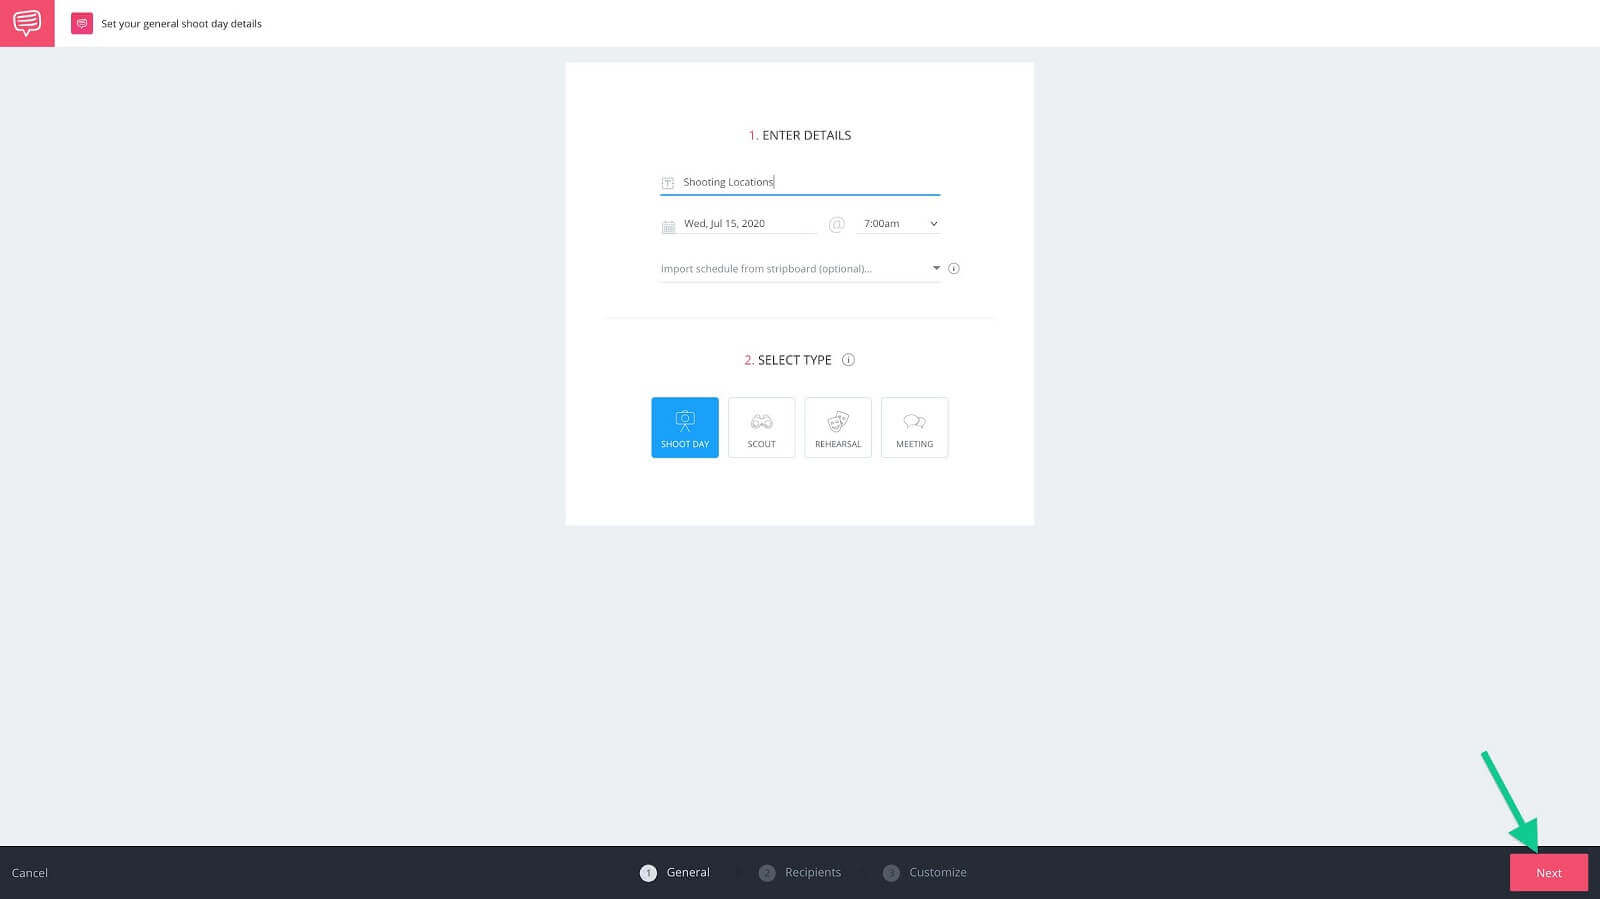
Call sheet details page • Click next
Now, for the sake of getting to the point we’re going to jump over to the customize step of the call sheet builder. To do this, click customize.
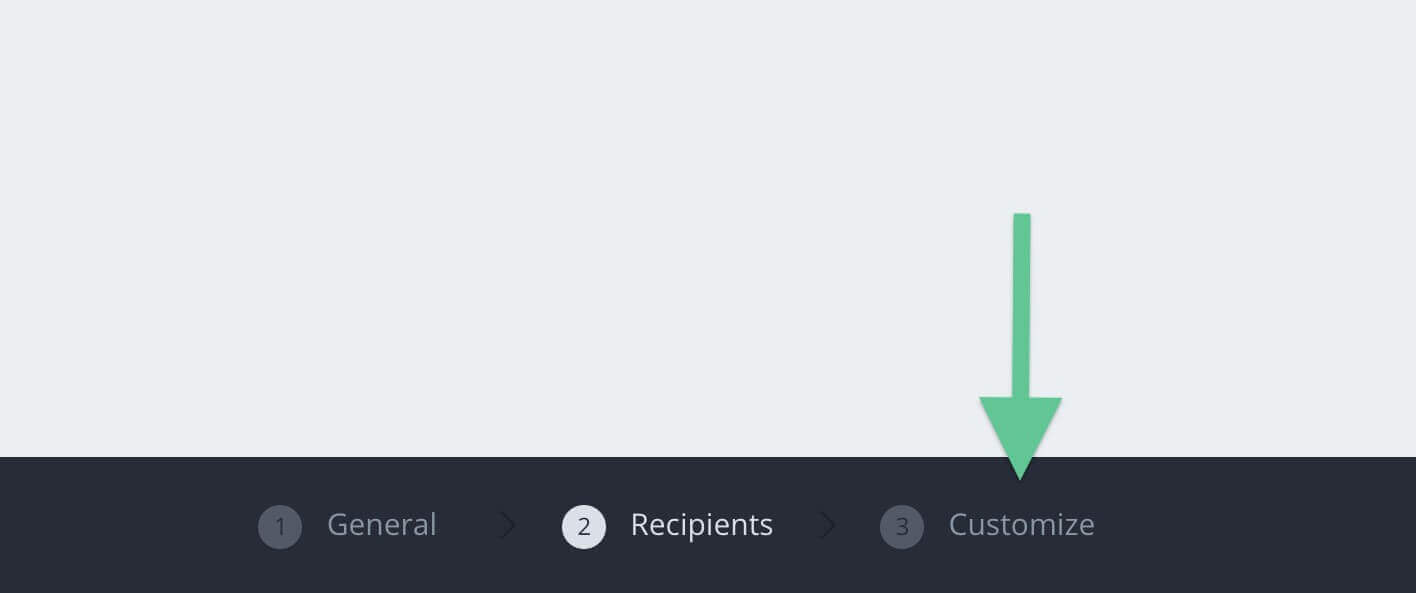
Call sheet builder • Click customize
Here on the customize page, you’ll see towards the top of the call sheet is the locations section.
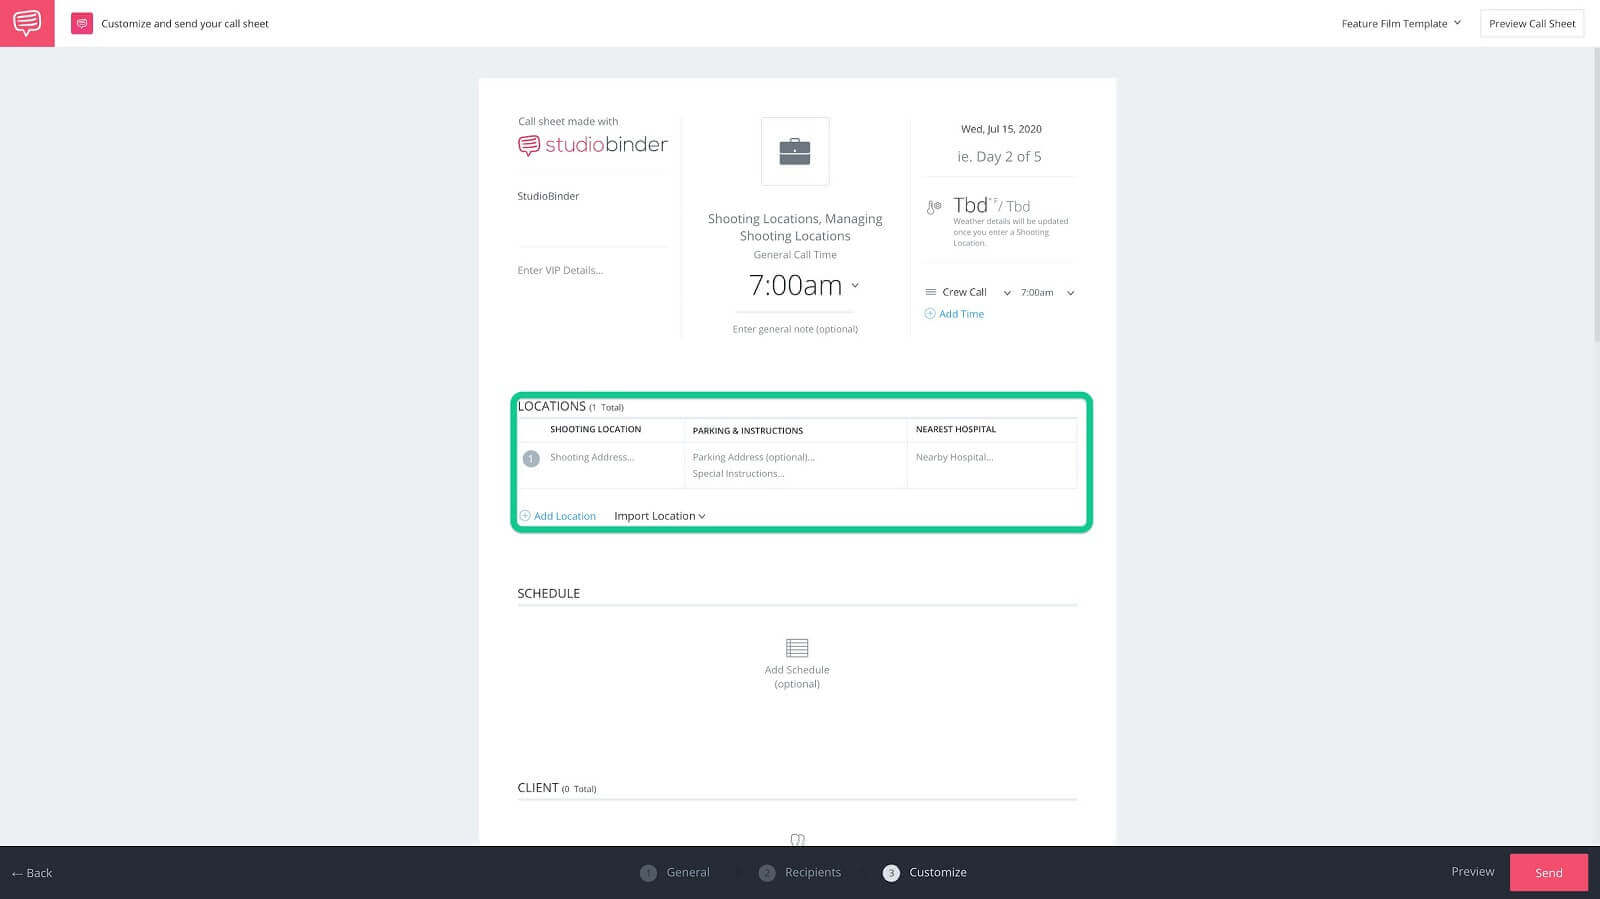
Customize page • Locations section
To assign a location that has been input on the shoot locations page, click Import Location.
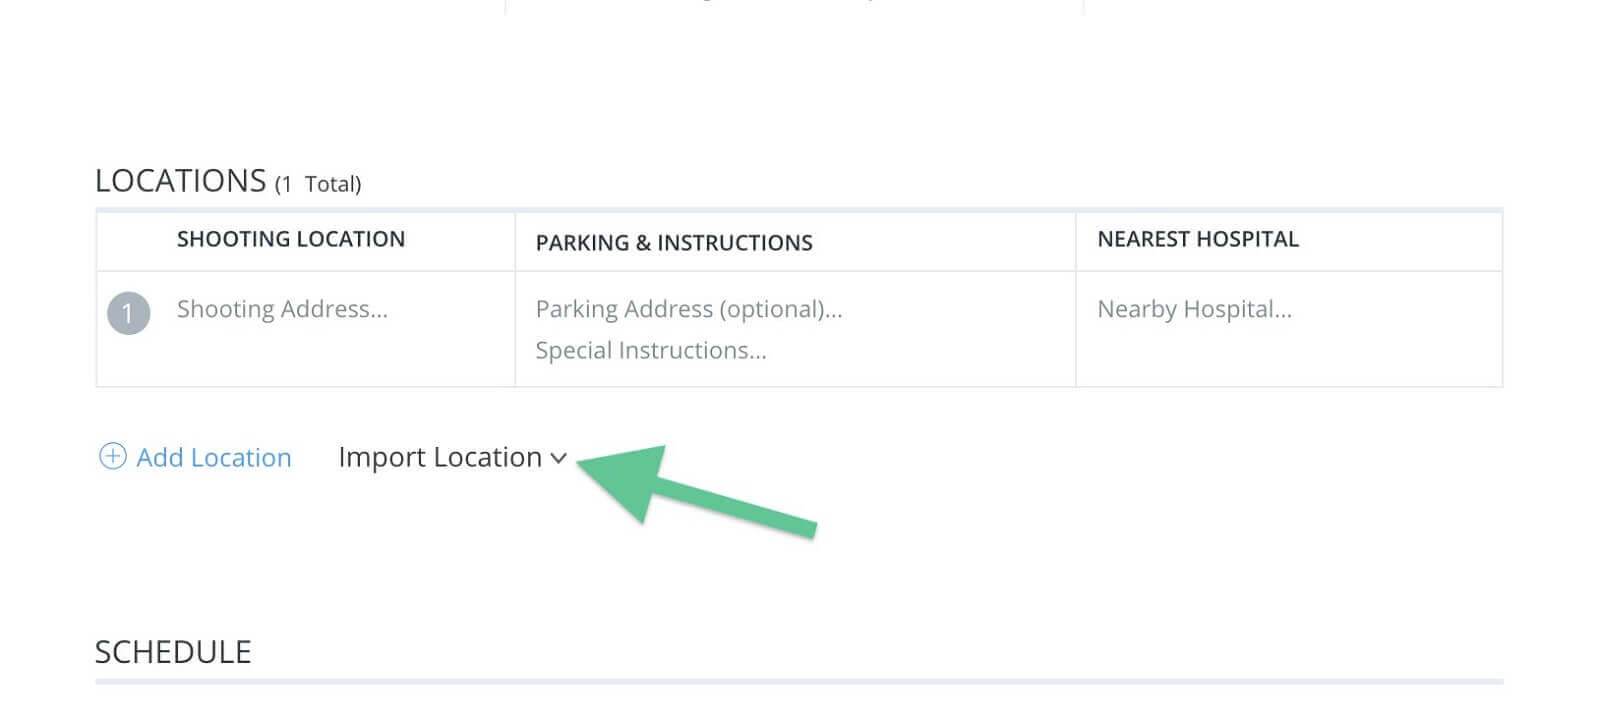
Locations section • Click import location
Now, select the location from the drop down menu and like magic all of the information you put in is added to the call sheet. You’ll also notice that the weather information is automatically added once a location has been selected.
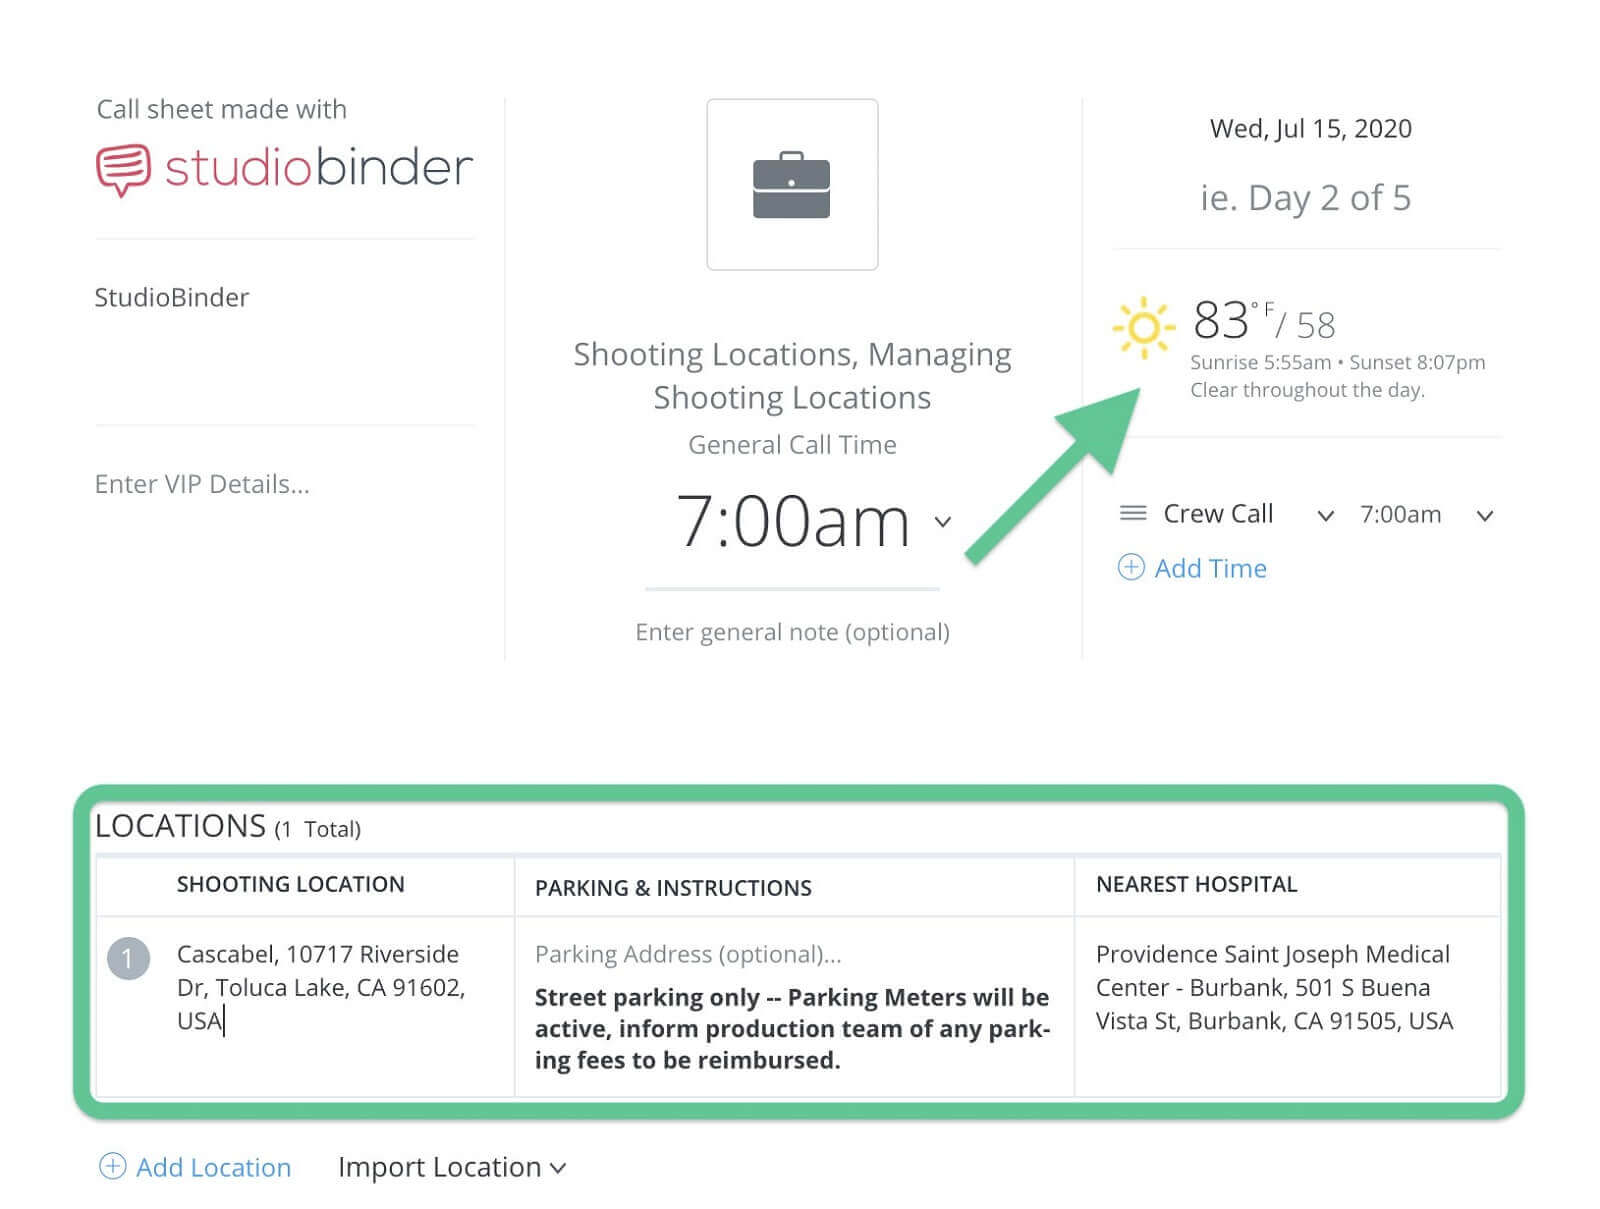
Populated location • Populated weather information
So as you can see, assigning locations is a breeze. Just pay close attention to the details, put the information in once and you’re well on your way.
Print or Save
Bonus Step: Save locations page
Hard copies are somewhat a thing of the past, but they still serve a purpose. Having a hard copy of your locations and location notes could come in handy if say your computer or phone dies. You don’t want to be caught driving down the road without an address to reference.
So, from our Shoot Locations page, click the print button...
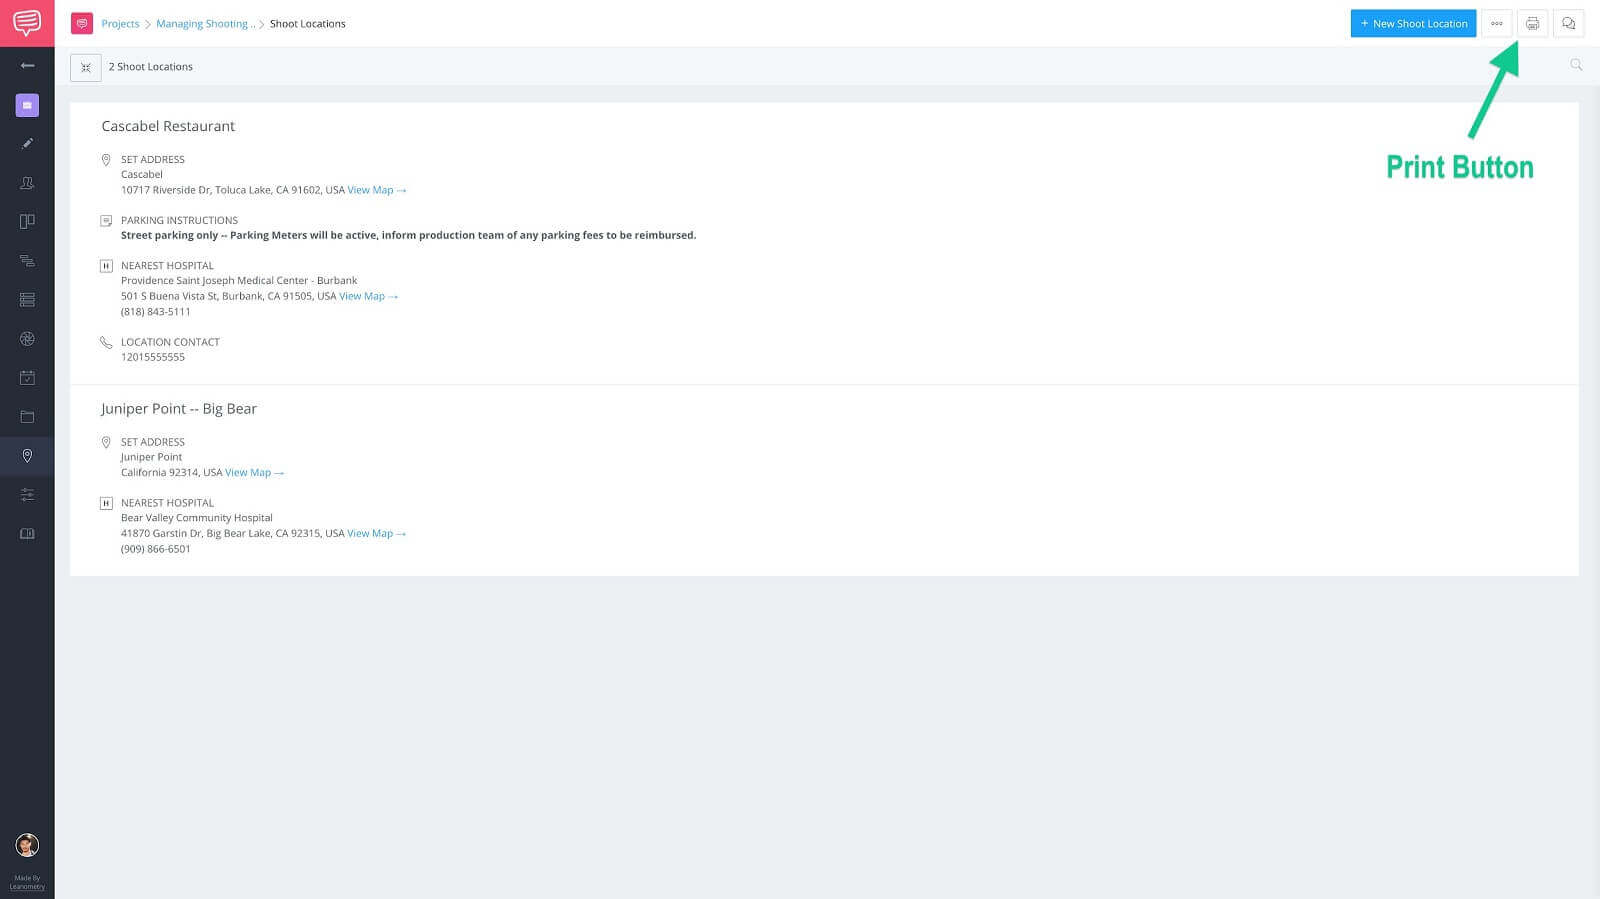
Shoot locations page • Click print button
...then, in the print dialog box, under destination select Save as PDF or your printer, then click save/print.
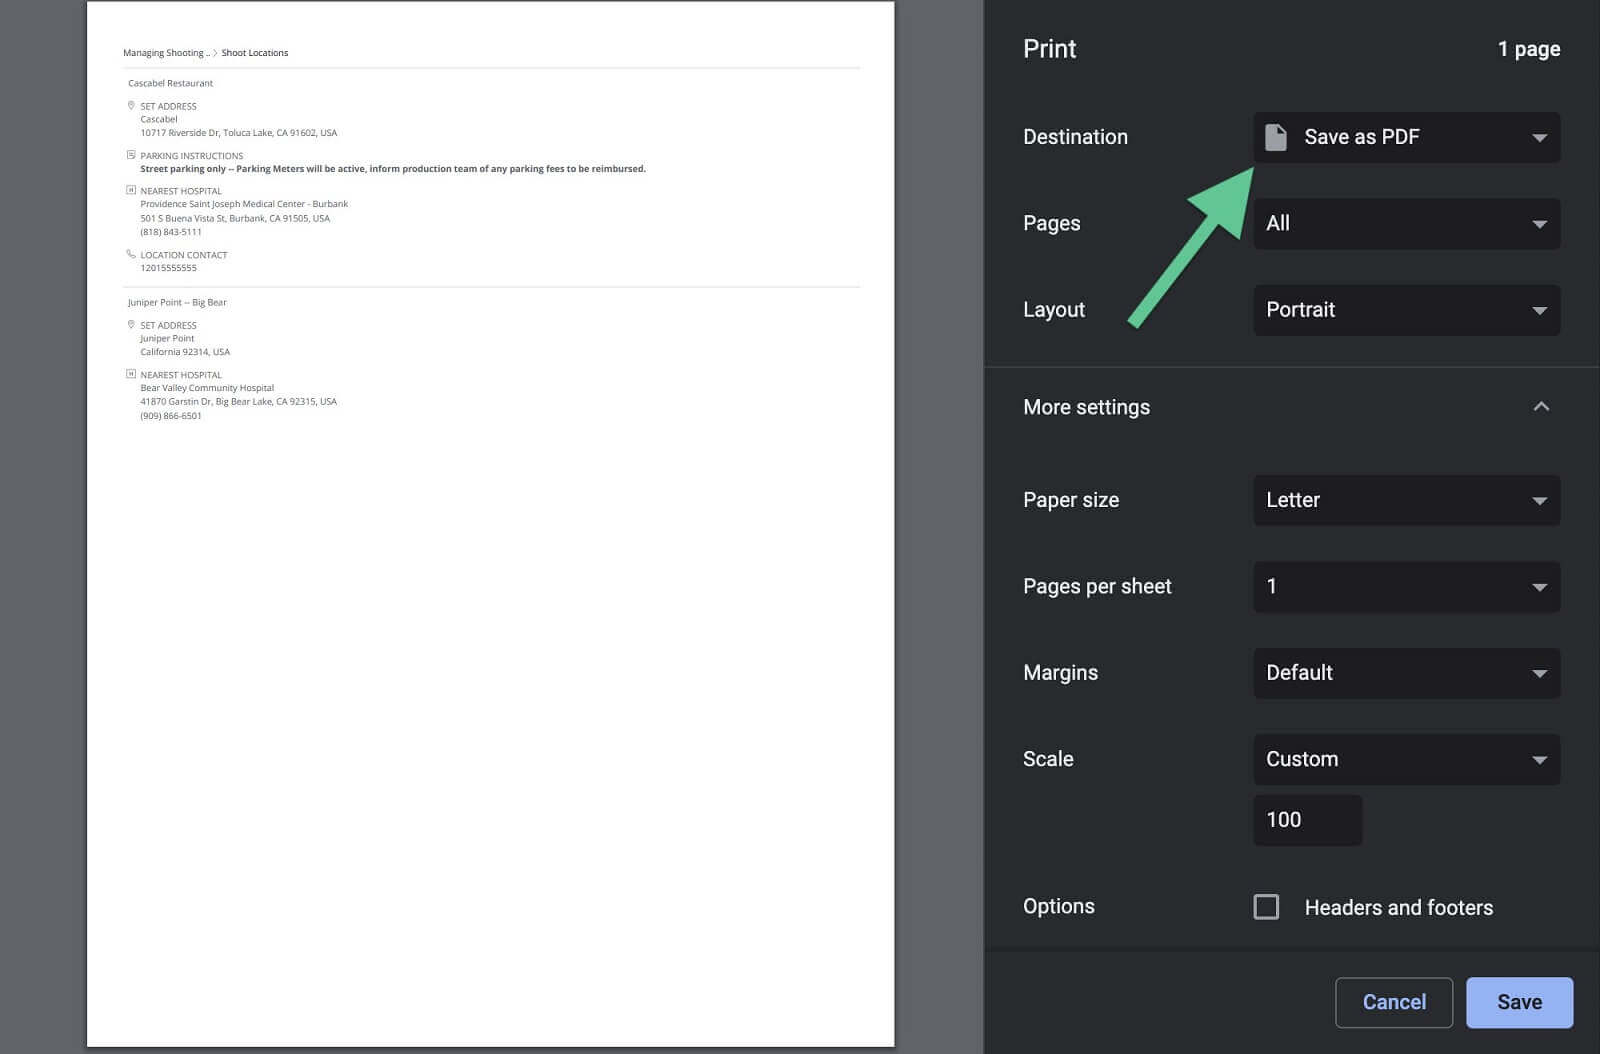
Print dialog box • Select save as pdf or printer
Now, you have either a digital or actual hard copy ready to be taken with you to set. Easy peasy.
So there you have it. Managing locations doesn’t have to be such a redundant process anymore. StudioBinder’s tools are here to help you save both time and sanity. Time to get out there and shoot!
Up Next
Securing shooting locations
Locking down shooting locations is a whole other process in and of itself. No worries though, we’ve got you covered. Come along to see How to Secure Film Locations! How do you currently manage your shooting locations? Let us know in the comments!
