You, a production professional, know how to make script sides.
The 2nd AD tells you, “Make script sides and distro when they’re done.” But what if you’re responsible for sending script sides to actors and crew? What are sides, exactly, and why are they so important in production? How do you make them? What does distro mean? In this article, we’ll cover how to make script sides like a master. By the end, you’ll be ready to take your productions — and your career — to the next level.
How to Create Script Sides in StudioBinder
Making and Sending Script Sides
Make script sides: a step-by-step guide
In this article, we’ll cover how to make script sides traditionally as well as how to create them with modern tools.
You’ll want to get a good grasp on both methods. Some productions run on cloud-based software, while others go more “old-school.” Since you’re a pro, it’s important to understand how they both work.
SCRIPT SIDES DEFINITION
What are script sides?
“Sides” are the pages of the script that are being shot during that day in production. Because movies and TV shows aren’t shot in a linear way, it’s more convenient to provide script sides so the cast and crew know what tomorrow’s work is. For performers, sides for acting are essential in preparing for auditions and rehearsals, helping them focus on the specific scenes required. So, if you’re still wondering, “What are sides?” just consider them a blueprint for the day’s work.
Television actor sides are typically sent out to talent the night before, and printed off by the dozens (or the hundreds) for the crew the next morning.
Making and Sending Script Sides for Actors
5 Steps for making script sides
Before diving into the process, let’s quickly revisit what script sides are in the context of film and TV. Sides refer to the specific pages of a script that are needed for a particular day’s shoot.
Creating script sides is pretty straightforward, but there are some good rules of thumb to follow to make sure you’re presenting yourself professionally and clearly. For practice or independent projects, sides can also be pulled from published plays, providing structured material that actors and directors can work with outside of original screenplays.
We'll be using StudioBinder's Script Sides generator to visualize these steps, but the process is universal.
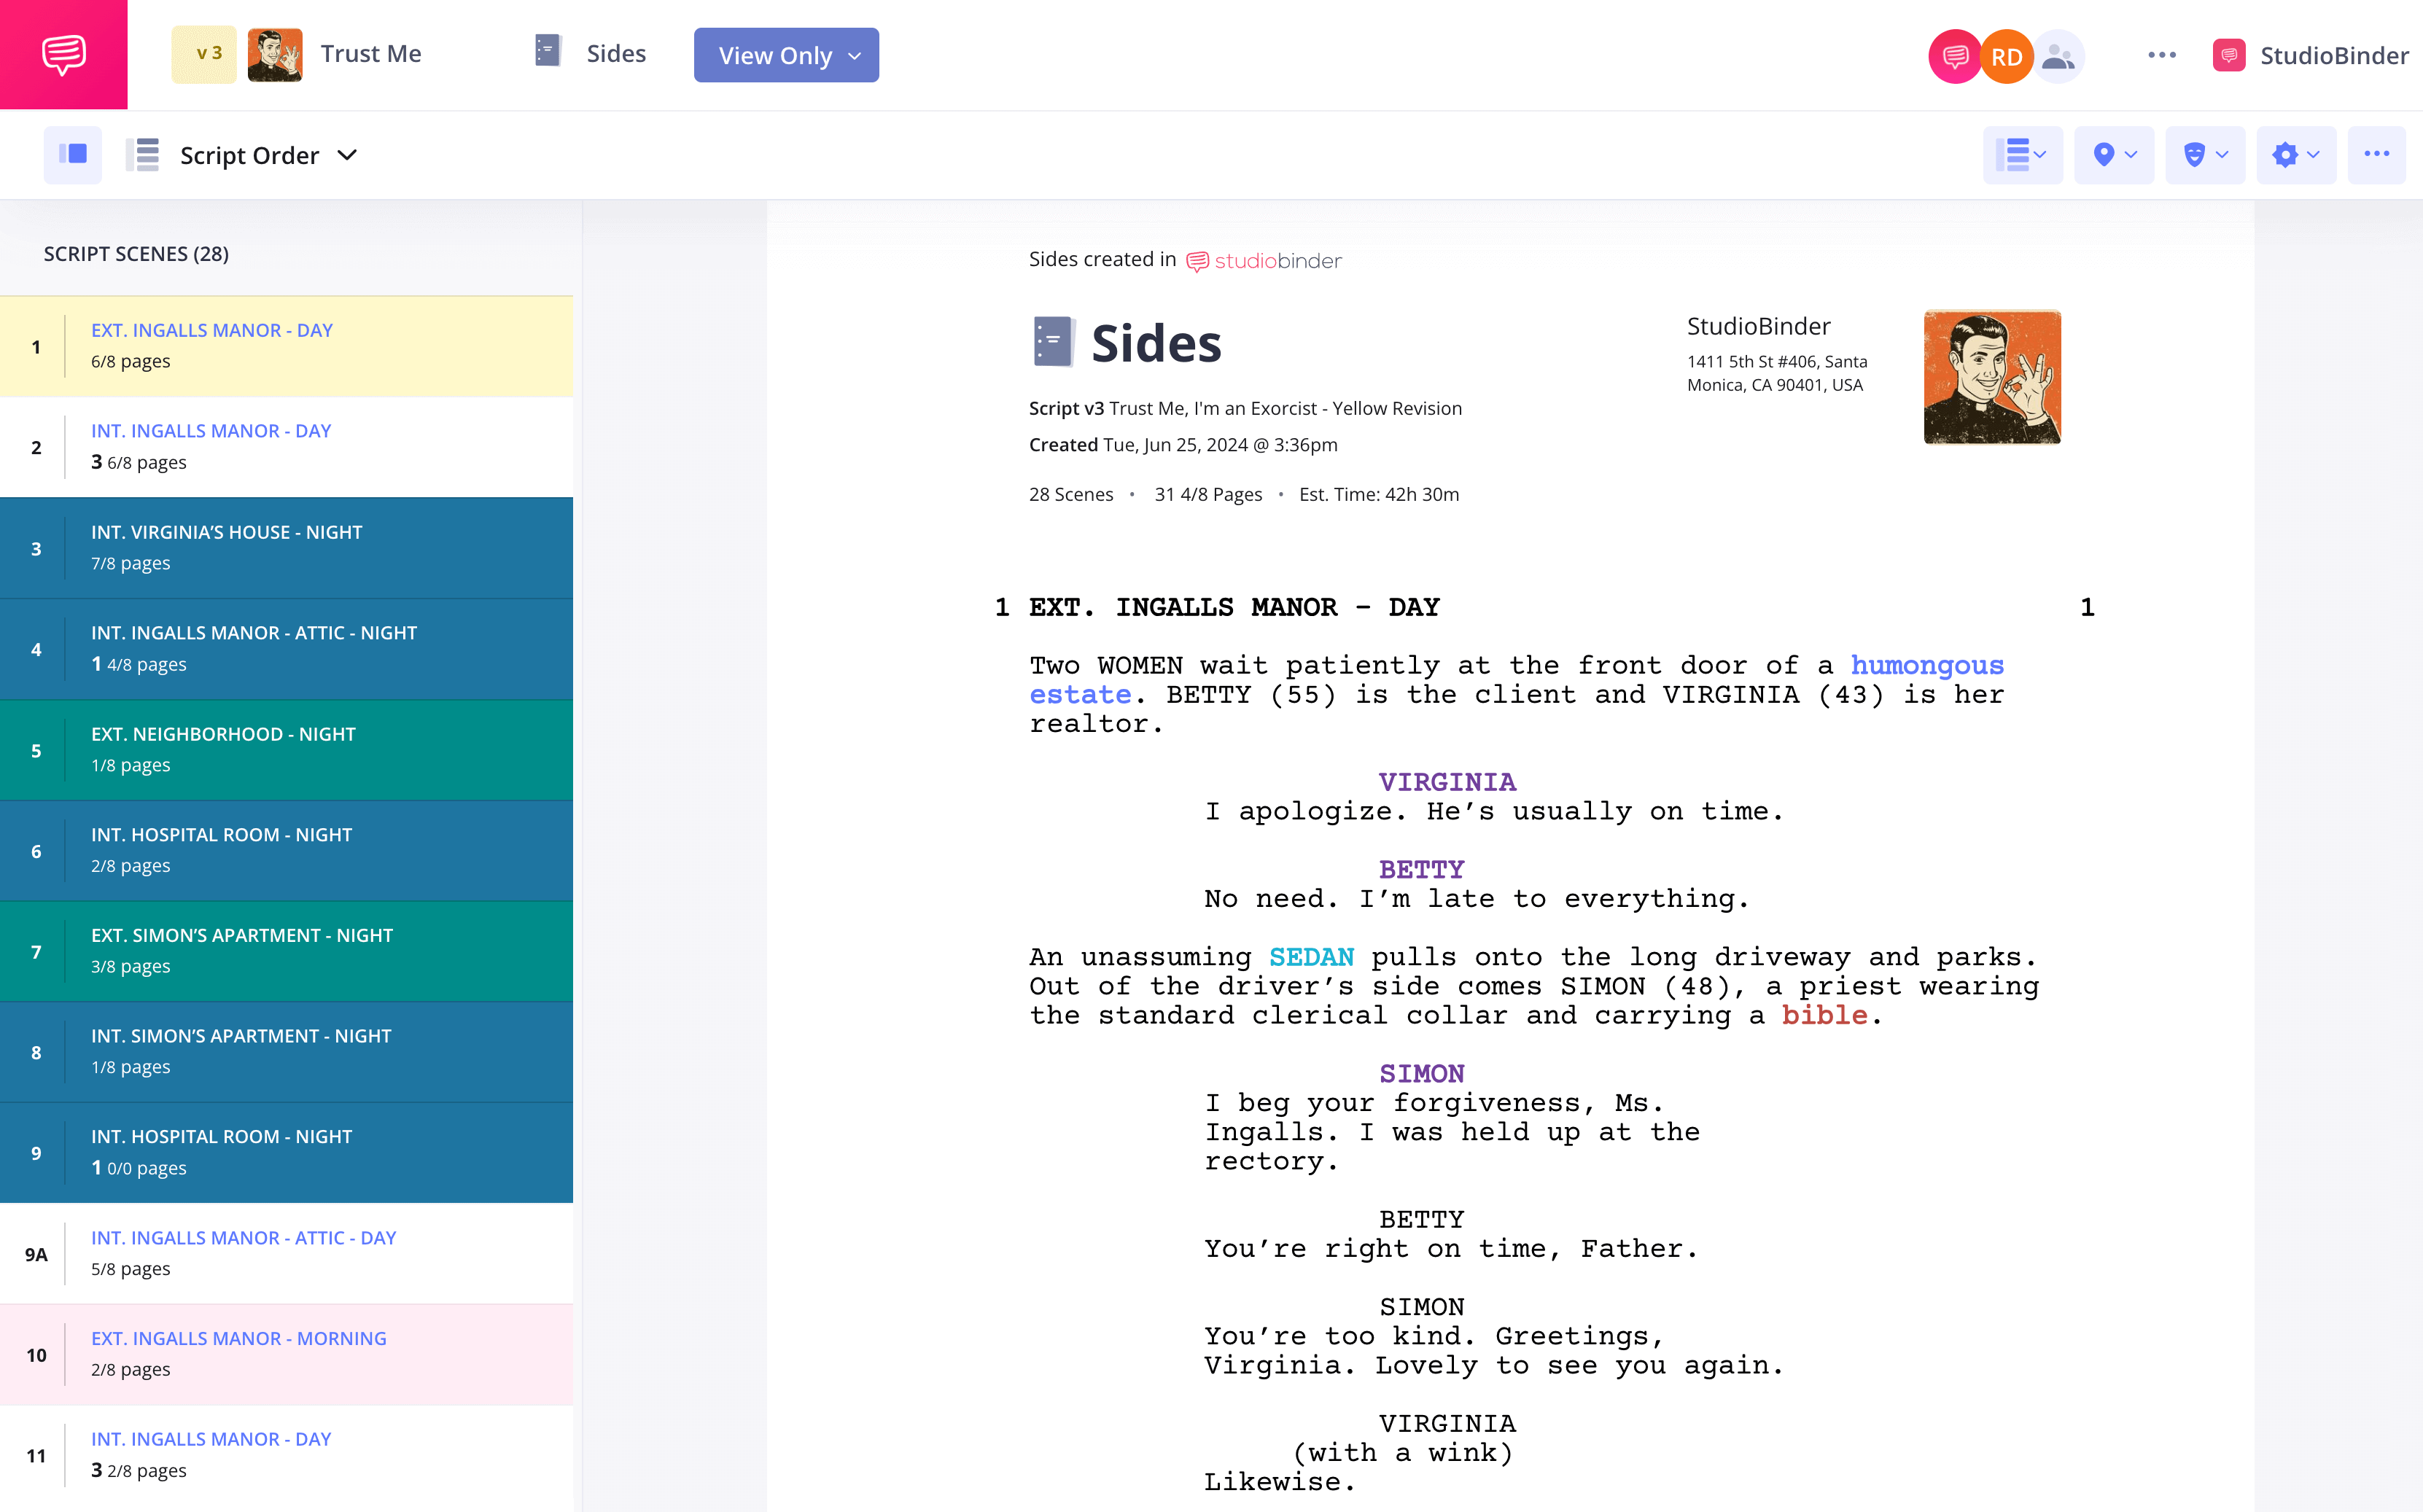
To start, here's what script sides typically look like.
Script sides example
Thanks to modern technology, making script sides is a whole lot easier. Now, time to choose a side!
1. Choose the scene(s) for actor sides
This should come as no surprise, but you’ll want to confirm what scenes you need sides for. A director may specify which pages they want for an audition or rehearsal, or you can consult the shooting schedule to determine which pages are needed for production.
When selecting sides for acting, it’s important to choose scenes that showcase an actor’s abilities and provide enough context for a compelling performance.
In StudioBinder, once you've imported a script, each scene will be clearly marked and accessible on the Sides page.
Script sides page
pro tip
When choosing sides for acting auditions, casting directors should consider what they are looking to see from an actor. They may want to find sides that highlight an actor’s range, their comic timing, their ability to play off of other actors, or something else entirely.
Related Posts
2. Separate the scenes in script sides
With your scenes selected, it’s time to lift them from the rest of the document. If you’re using a PDF, you’ll delete all the unnecessary pages. If you’re using a hard copy, simply remove the pages you don’t need. Of course, make sure you have backup copies when you’re doing this, deleting/removing.
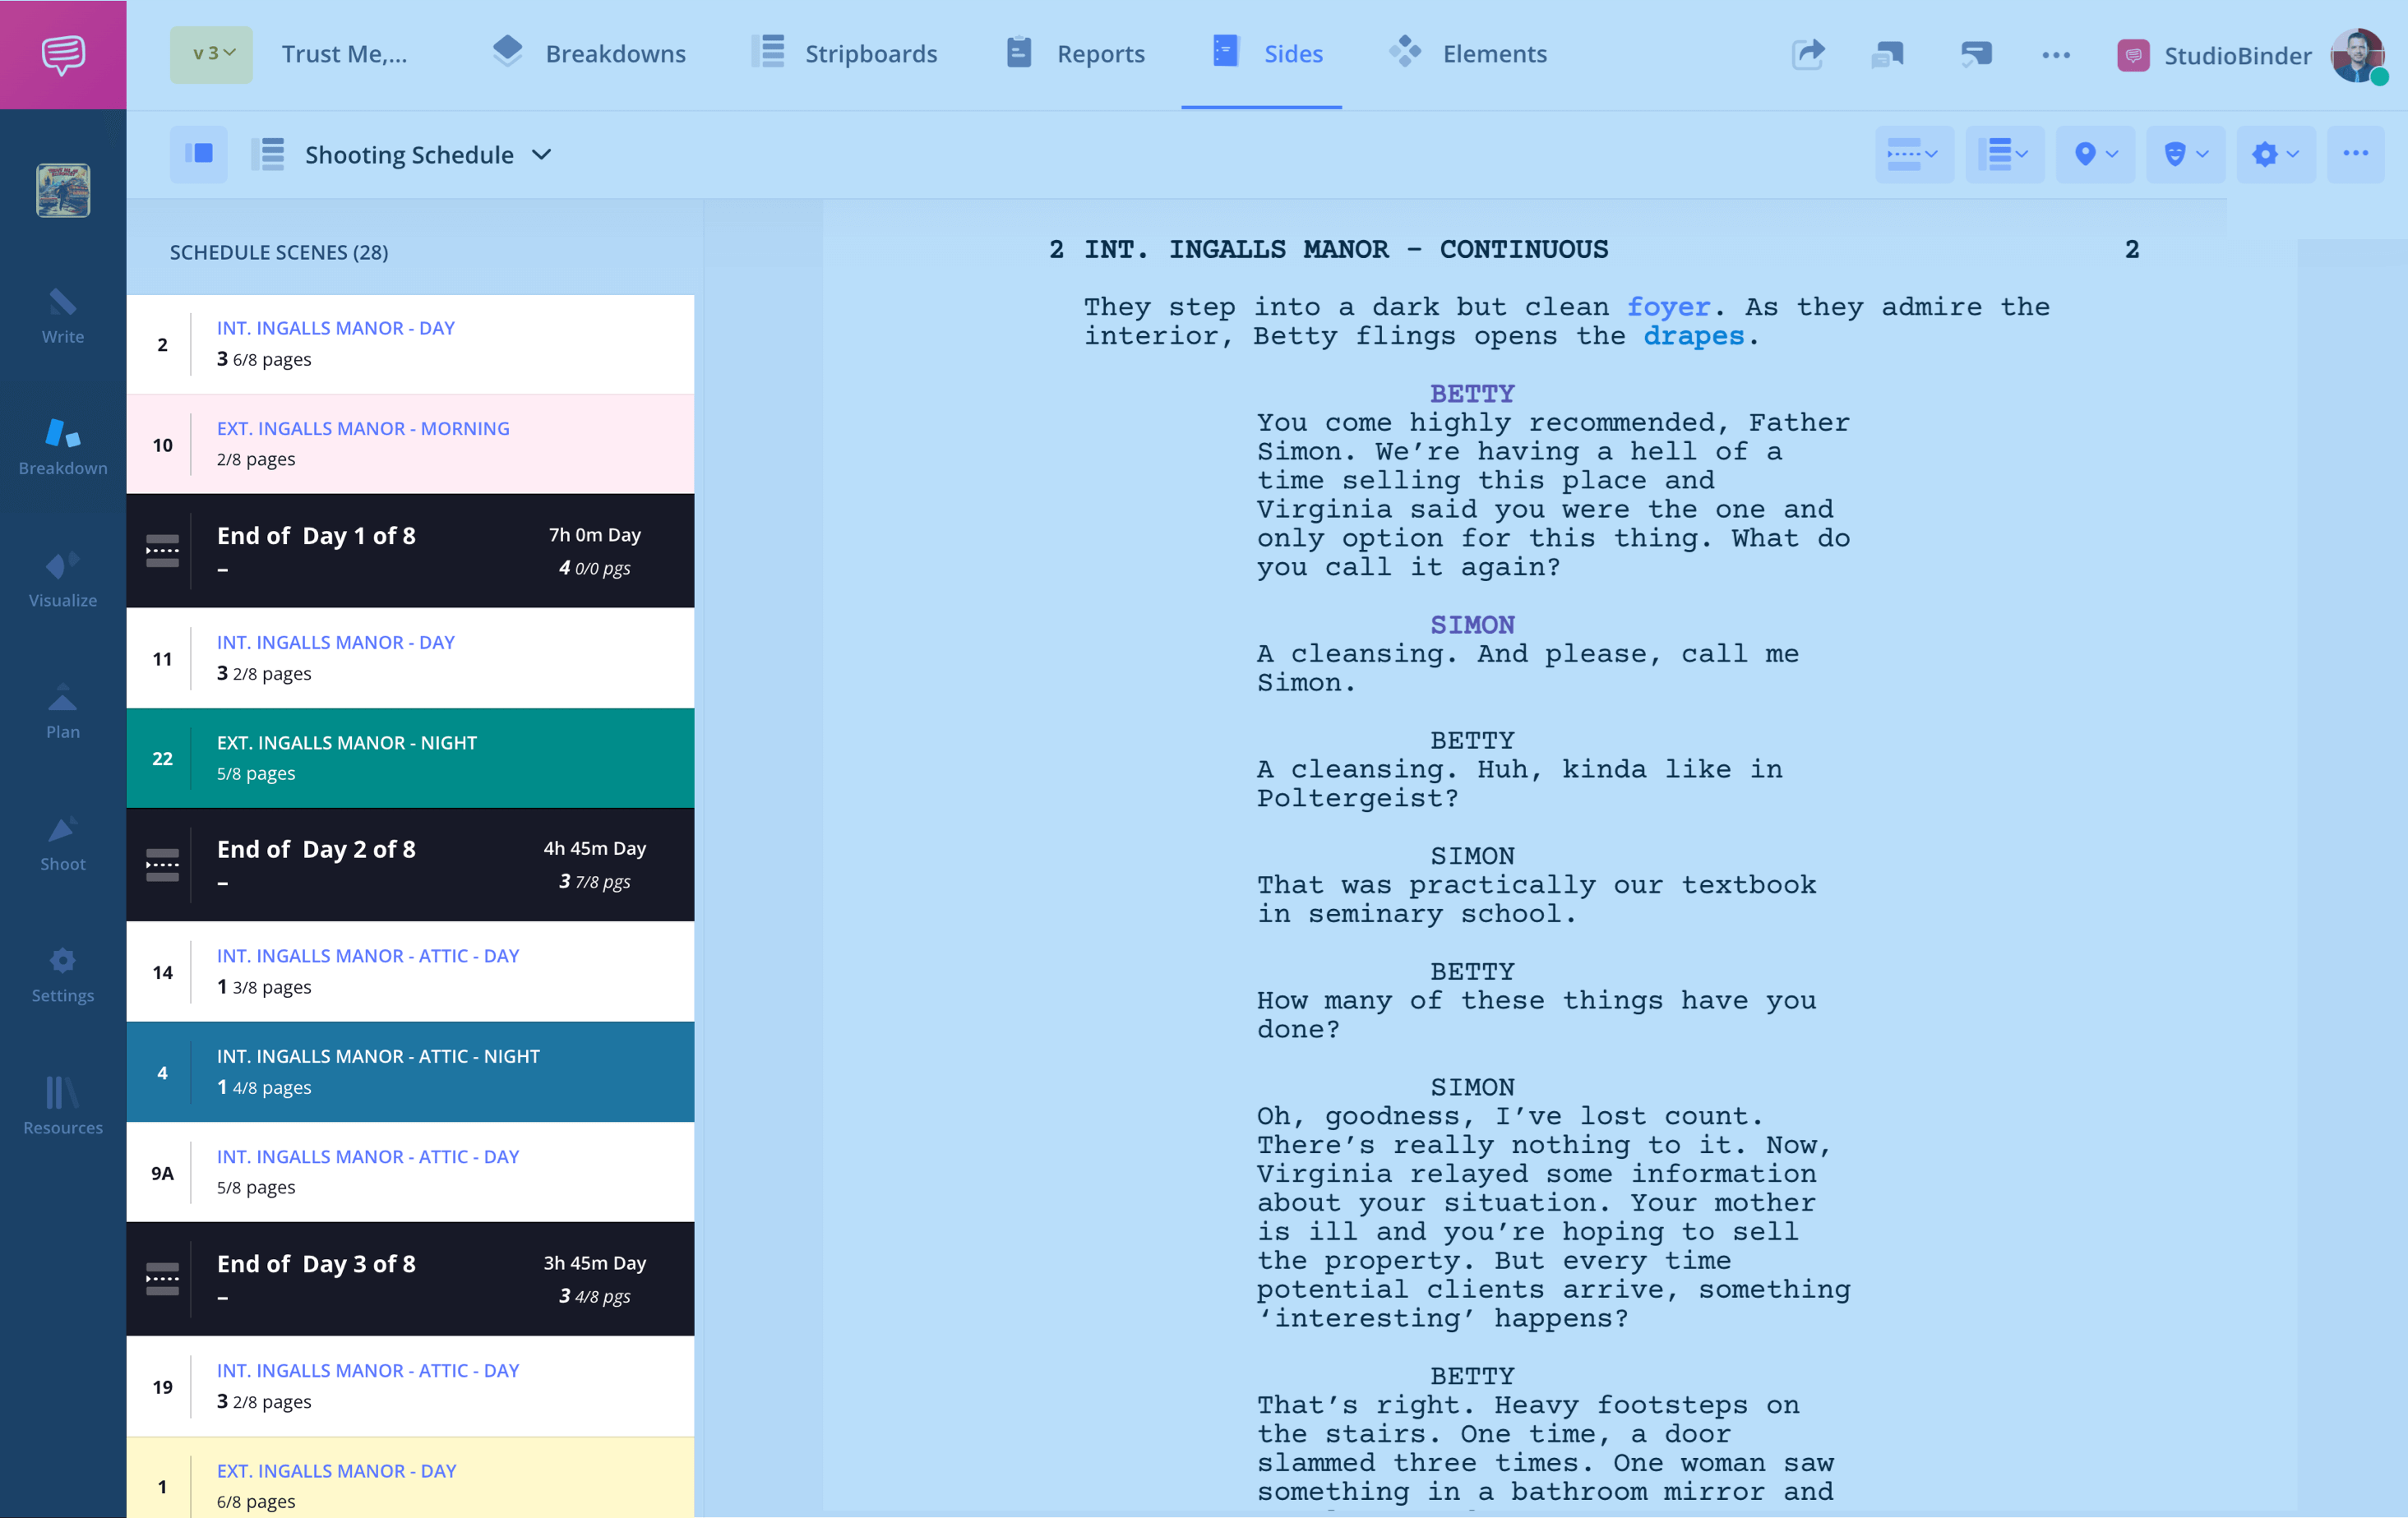
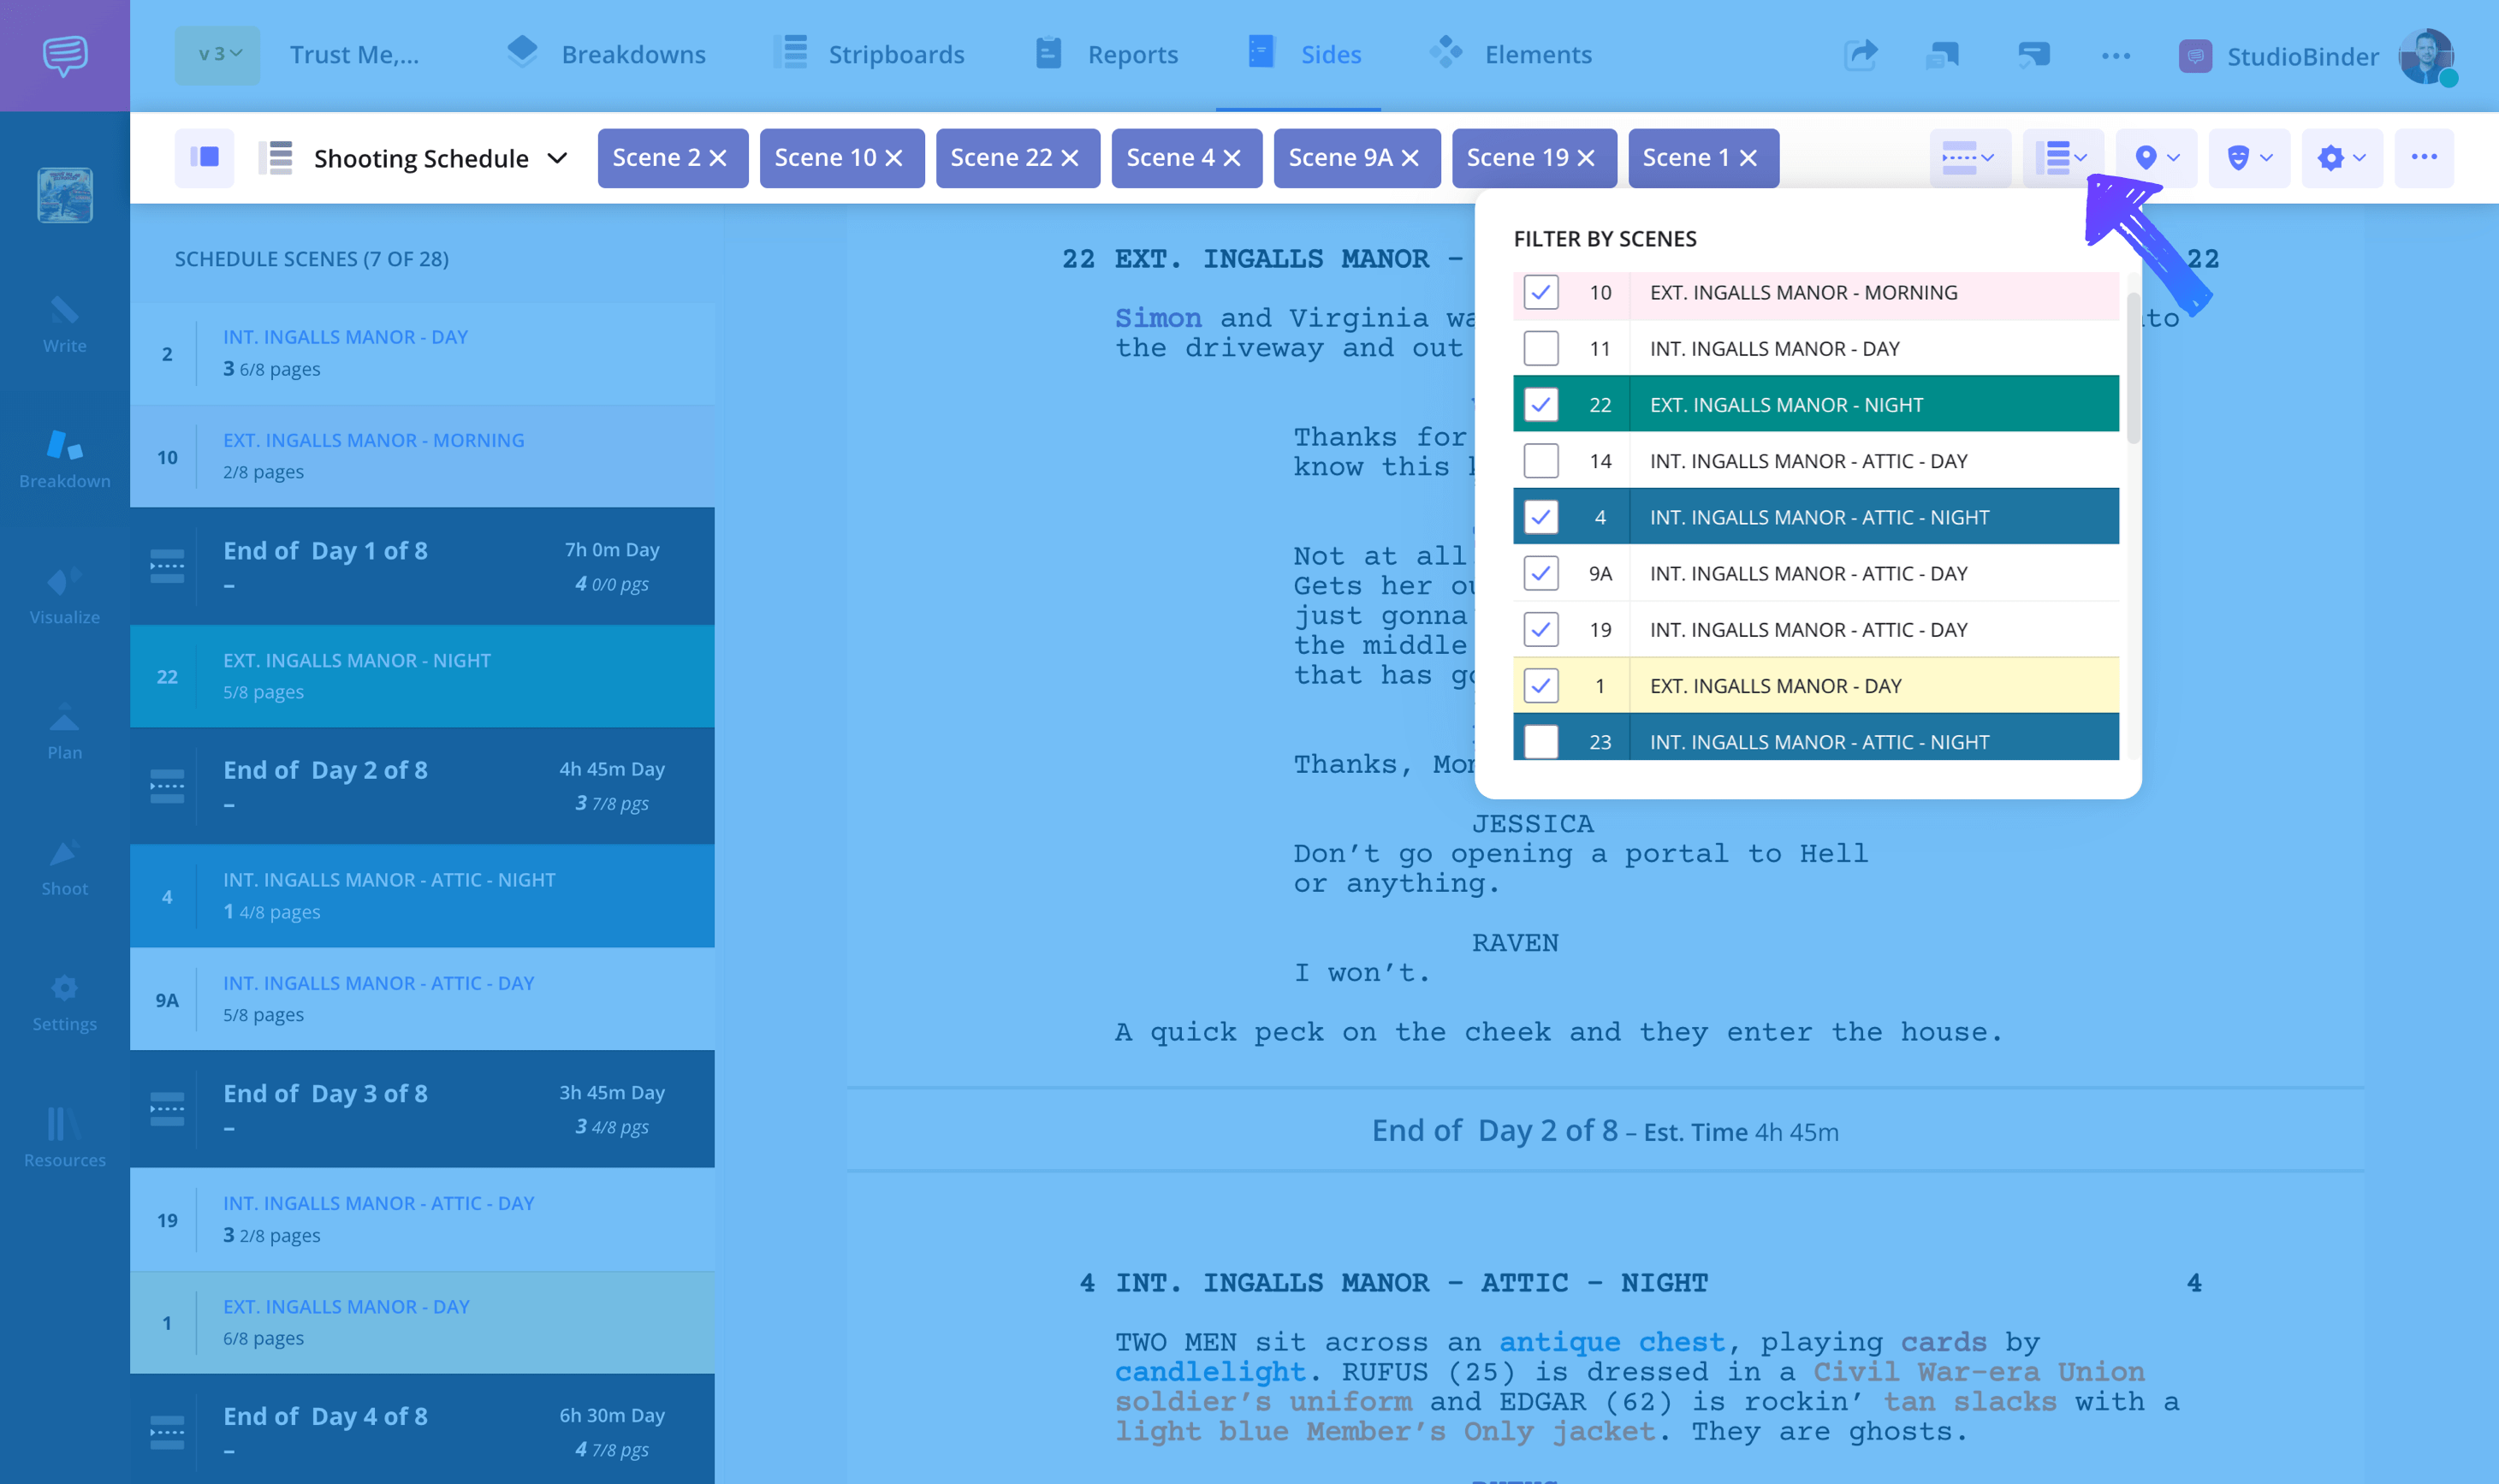
If you’re using StudioBinder, meanwhile, you can use the Sides feature to sort desired scenes by shoot day, by location, or by character. No deleting necessary.

Filter script sides by day
3. Cross out unneeded material
Relevant pages may contain parts of scenes that you won’t be shooting. To avoid confusion, cross out anything that won’t be shot or rehearsed. If you’re using a hard copy, then just take a black marker to the script. For 1/4 page scenes, it’s especially important to ensure only the necessary portions remain visible, as the condensed format leaves little room for unnecessary content. Traditionally, this would mean drawing a box around the unwanted material and then a single, diagonal line inside the box.
For sides for auditions, it’s especially crucial to remove unnecessary lines or context that could distract from the core performance material.
With StudioBinder, you won’t have to worry about this step, since the software will organize your scenes with everything else automatically excluded. Forget the rulers and Sharpies — this is much quicker and cleaner.
Script sides on StudioBinder
4. Print the script
If you haven’t already, it’s time to print. Sides are usually printed on half-size sheets of paper (8.5” x 5.5”), but for certain productions, 1/4 page scenes may be preferred to condense material while keeping it readable. Selecting the “2 pages per sheet” option can help optimize formatting. Including the page number on each side is crucial for quick reference, ensuring actors and crew can easily locate their scenes. This saves paper and takes up less space.
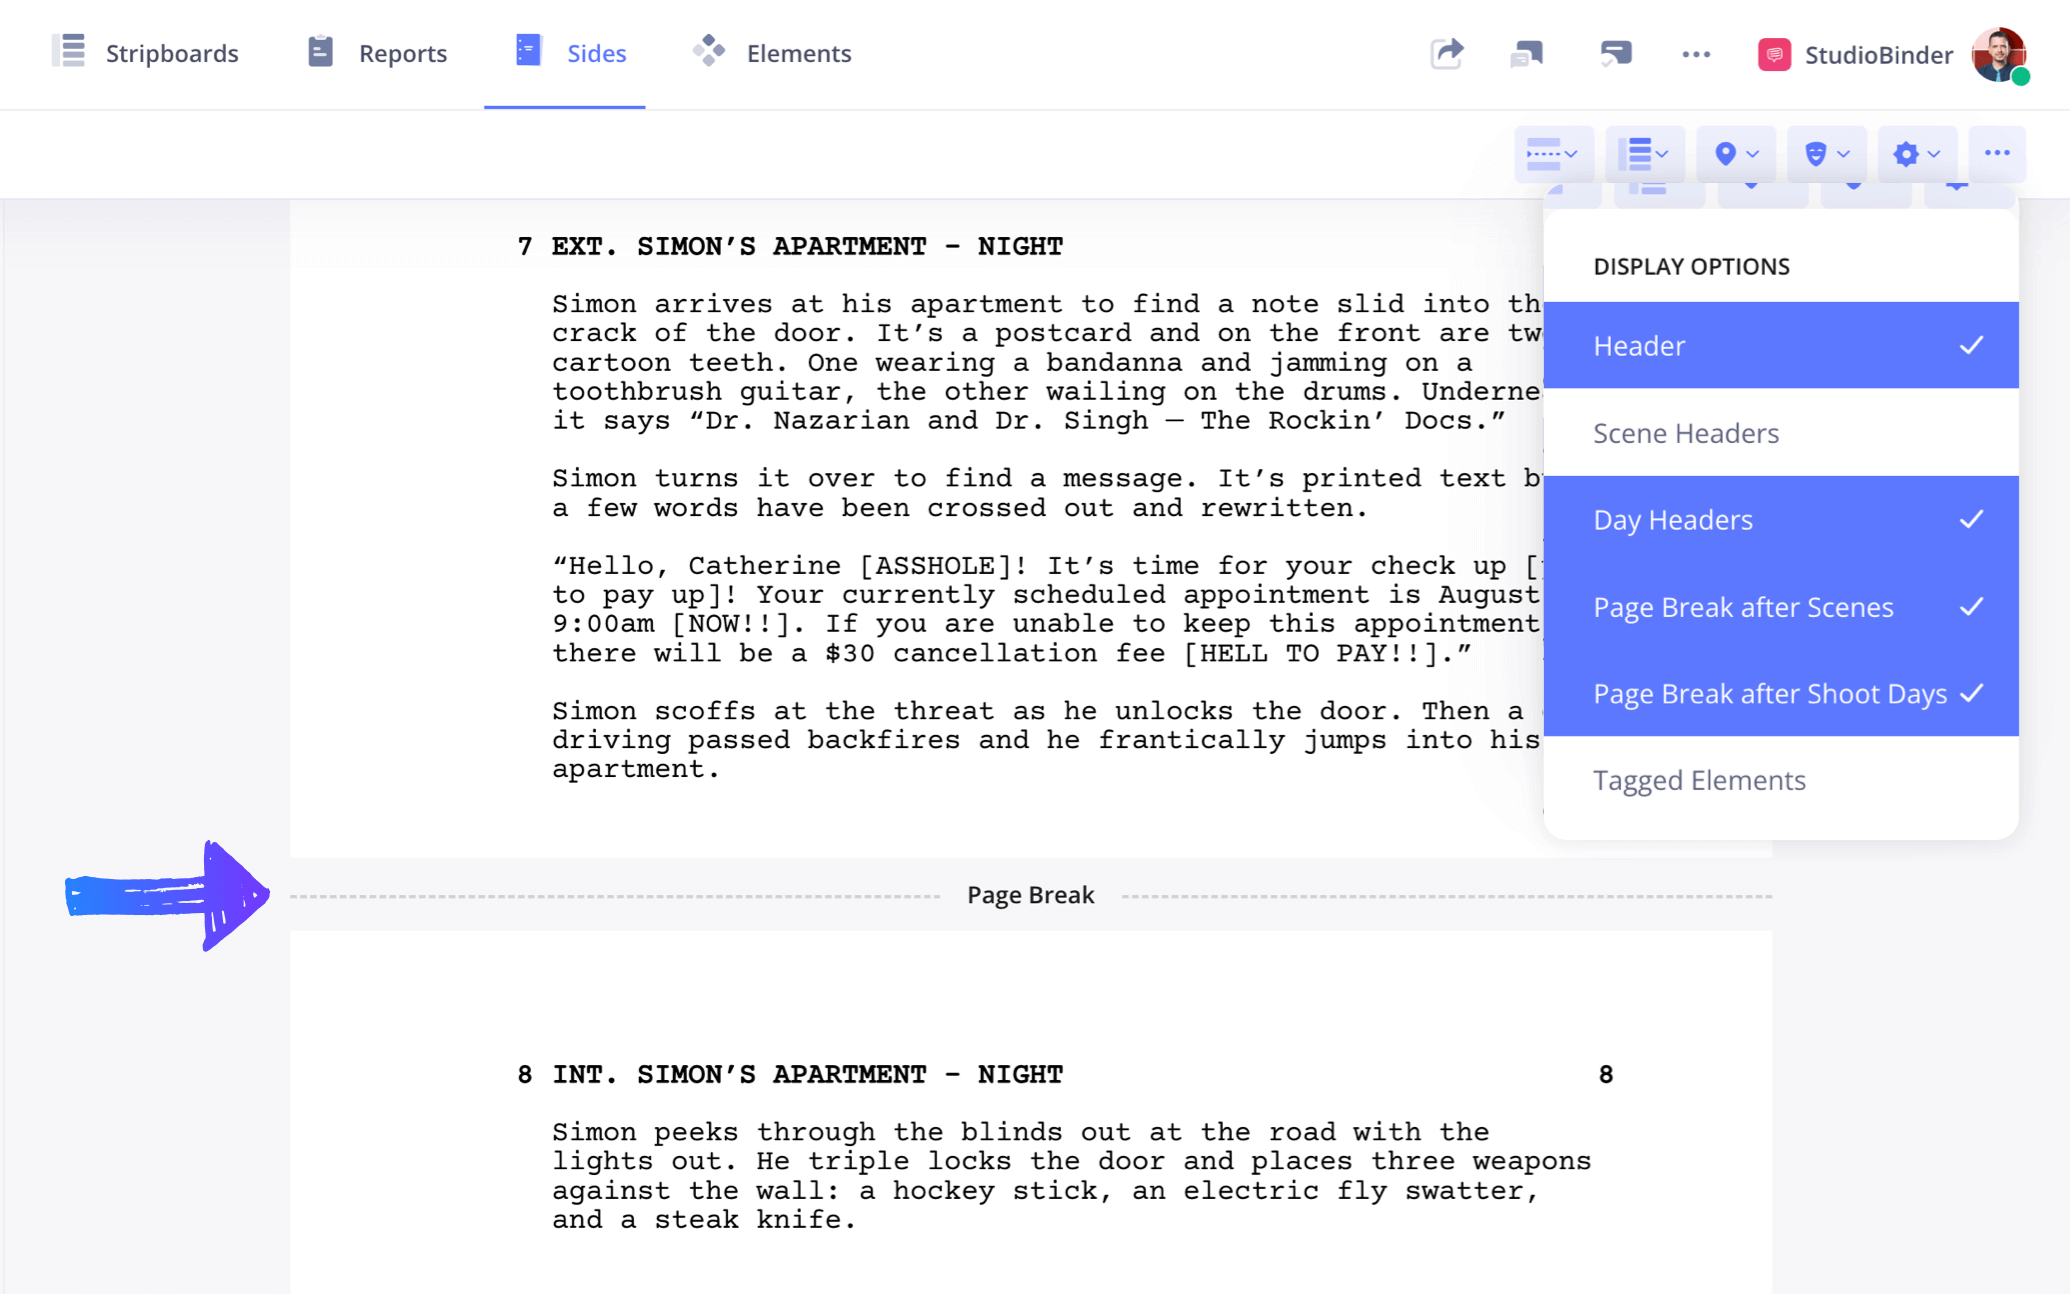
StudioBinder will grant you multiple formatting options when printing. You can add page breaks after scenes or shoot days, and you can include tagged elements as you wish. Then, when creating your PDF, you can have up to 16 pages per sheet.

Exporting script sides
Related Posts
5. Assemble and send script sides
Now you have your physical copies. Collate your pages in your desired order (typically this is the shooting order that aligns with the day’s schedule), and then assemble them. If using 1/4 page scenes, make sure they are printed and formatted correctly to avoid any confusion on set. Finally, you can hand them out to the cast.
Sending script sides is crucial for ensuring everyone receives the necessary pages on time. StudioBinder gives you the option to distribute sides digitally. Create a "view-only" share link, and you can send it to anyone, whether they have a StudioBinder account or not.

Sending script sides to actors and crew
You can also attach the PDF to your call sheets and send them to anyone on your contact list.

Attach and send script sides with a call sheet
Related Posts
UP NEXT
Make your script sides the right way
Now that you know how to generate and distro script sides, it's time to take the next step. Import your script into StudioBinder and generate professional and clean script sides in minutes. Once you go digital, you'll never go back.
![How to Create Script Sides for Film & TV [with Examples] 1 How to Create Script Sides for Film & TV [with Examples] StudioBinder](https://s.studiobinder.com/wp-content/uploads/2024/06/How-to-Create-Script-Sides-for-Film-TV-with-Examples-StudioBinder-2500x1406.jpg)


