iMovie has become a game changer for amatuer filmmakers on a budget. But just because you’re on a budget, doesn’t mean you can’t use some visual effects in your work. Using a green screen can open up new doors for stories you want to tell. So in this article, we’ll take a look at each step on how to use a green screen in iMovie.
How to Use Green Screen in iMovie
Upload your clips
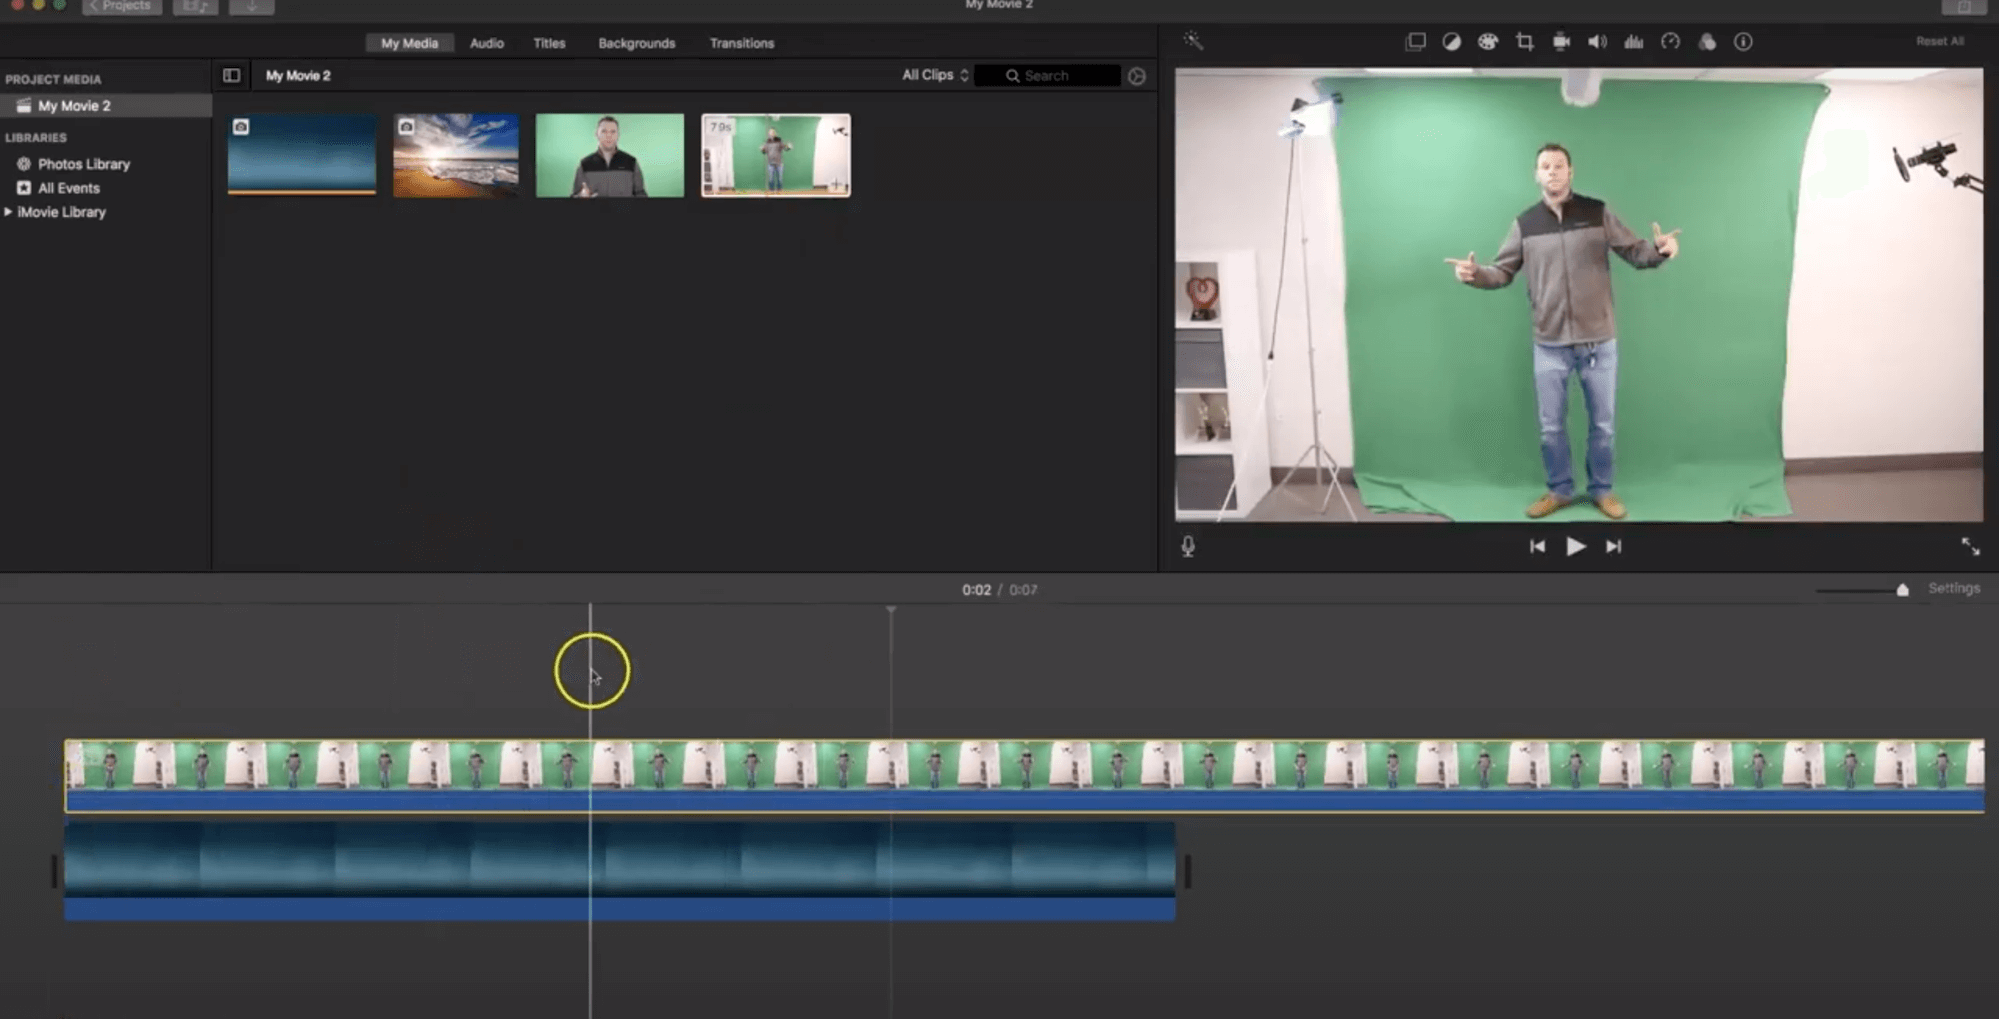
The very first thing you will need to do when learning how to use green screen in iMovie is to upload your clips into the media bin. These clips should be both the footage you should use against a green screen as well as the background you want to use in place of the green screen.
Throughout this tutorial, we’ll be following the same steps laid out by VideoZeus in this video below.

How To Use Green Screen On iMovie
Remember that the shot you use to replace your green screen can be a static shot that you have taken, a photo, or one you’ve downloaded online from our list of the best green screen background videos.
Green screen iMovie tutorial
Drag the background onto timeline
Next on how to use green screen in iMovie, you’ll need to place your desired background into the timeline. Do this by simply dragging the clip of your desired background from your media bin directly onto the timeline.

How to Use Green Screen in iMovie • Selecting your background
Keep in mind that the shot you have may vary and may not fit perfectly into your desired aspect ratio. To fix this, select the cropping tool and select “Fit.”
Green screen iMovie tutorial
Drag green screen clip onto timeline
Now it’s time to place your clip that you’ve shot against the green screen onto your timeline. The process is exactly the same as the background clip.
Simply drag the green screen clip from your media bin onto the timeline. Only this time place the green screen clip directly above the background clip in the timeline like you see below.

How to use green screen on iMovie • Selecting your background
Like the image above, your green screen clip may be longer than your background image. To fix this, you can either trim your green screen clip or extend your background clip by dragging in or out from the ends of the clip in the timeline. Make sure that both your green screen clip and background clip are the same exact length.
Related Posts
How to Use Green Screen in iMovie
Drag the background onto timeline
Next, you’ll want to click your green screen clip within the timeline so that it is selected. Then, in the panel above the video playback, click the “Video Overlay Setting” icon.
Green screen iMovie tutorial • Video Overlay Setting Icon
Once you click this icon, you will see a drop down menu on the left that defaults to “Cutaway.” Click this menu and select “Green/Blue Screen” from the drop down menu.

Blue Screen / green screen iMovie tutorial
Once selected, your desired background should take the place of the green screen. You may find that there are a few areas within your shot that are not replaced with your background due to your DIY green screen setup or shadows. You can fix this by using the “Clean Up” tools found above the video playback.
Related Posts
Up Next
A Guide to Green Screen Lighting
Using a green screen involves more than just proper editing. For the best green screen shots, you’ll need to plan and shoot like a pro. In our next article, we take a look at how to light your green screen shots like a pro to ensure that your background pops.
Up Next: Green Screen Lighting →
Share your vision with elegant shot lists and storyboards.
Create robust and customizable shot lists. Upload images to make storyboards and slideshows.

![6 Ways to Edit Any Scene — Essential Film & Video Editing Techniques Explained [Shot List Ep. 10]](https://i.ytimg.com/vi/FVR8zz8ci2k/hqdefault.jpg)
