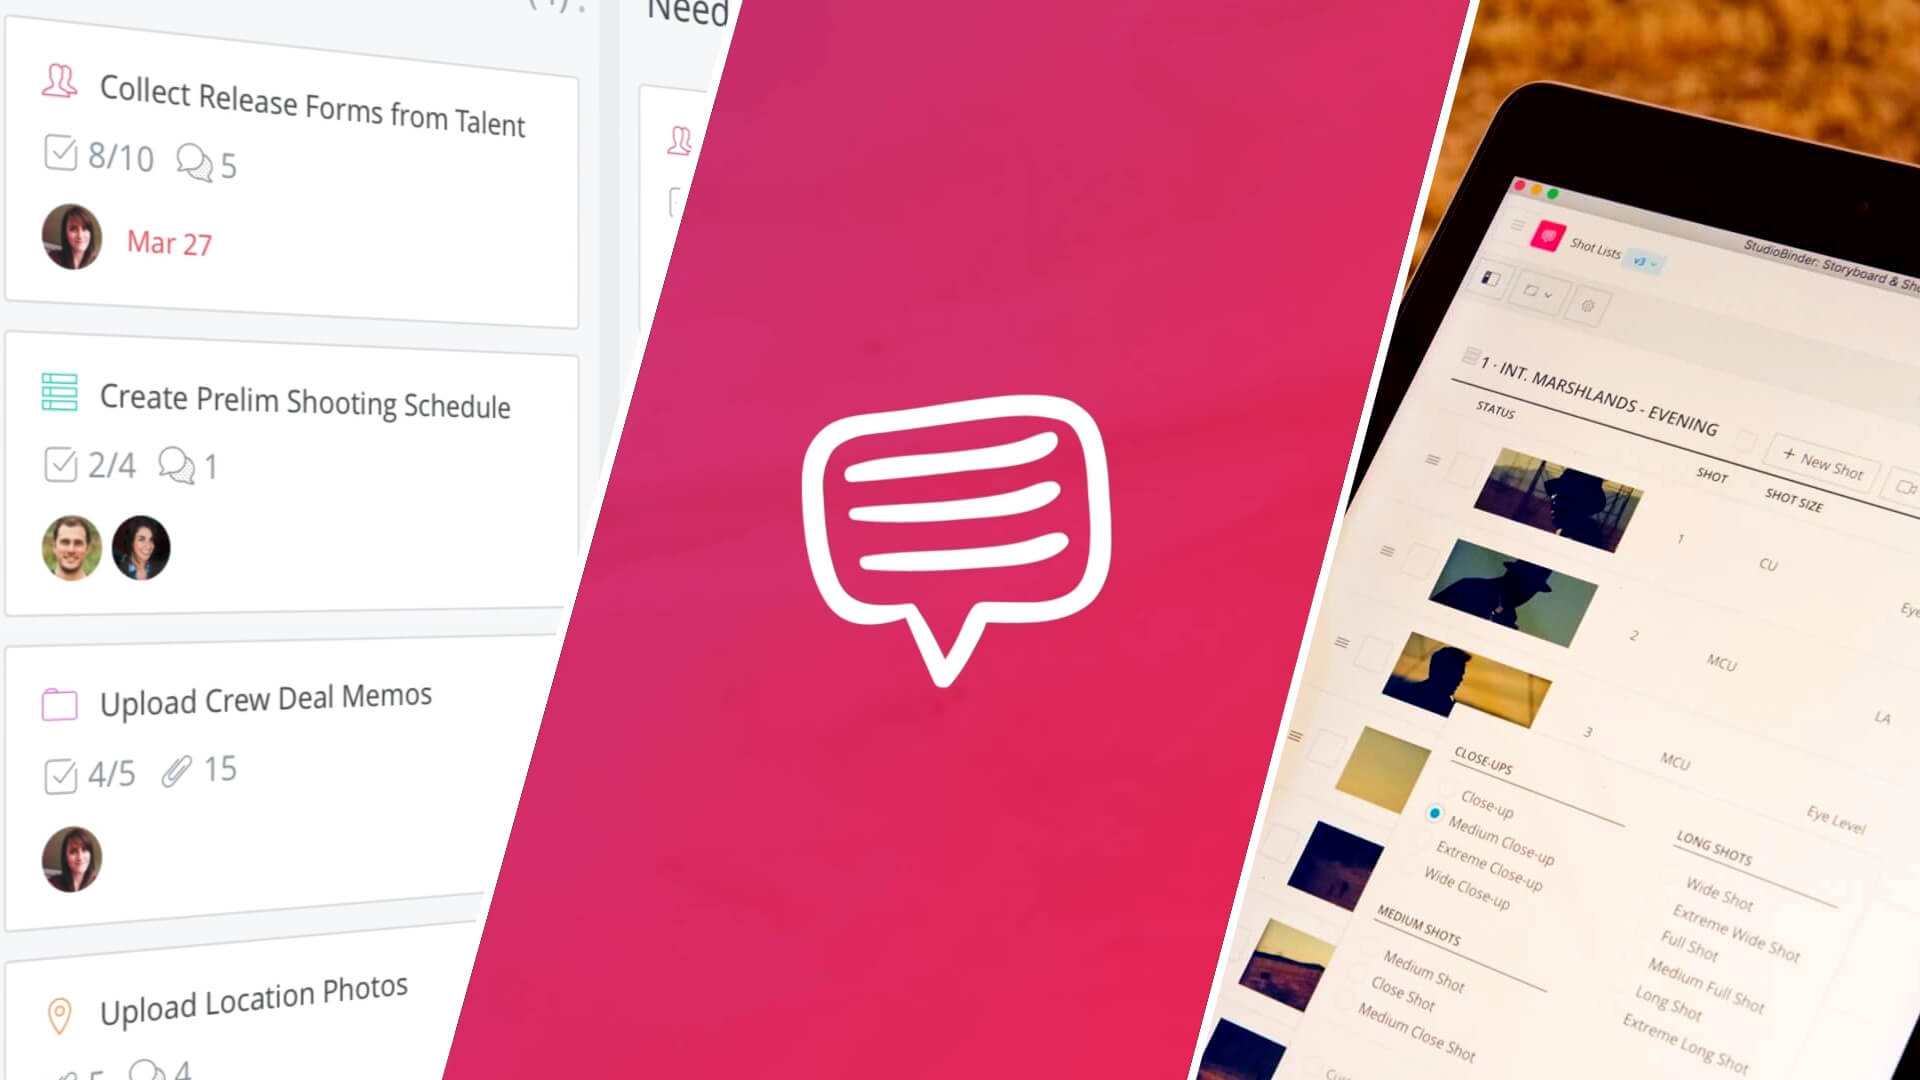
The script has been written and your project has progressed to the point where you’re ready to start planning the production, but maybe it’s your first time. If you didn’t happen to go to film school like myself, it can be hard to know where to start and what comes next. This is where I use StudioBinder’s task card feature to layout to-do lists, so I always know what’s done and what’s up next. Come along as I set up a project by adding task cards to individual pages of my project.
Introducing Task Cards
First, what are task cards?
Before we jump into the project, let’s go over what a task card is in StudioBinder and what it contains.
Task Cards Definition
What is a task card?
In StudioBinder, task cards are a way to assign tasks to individual pages as well as teammates inside of a project. Allowing you to keep everyone involved in the production accountable and productive by tracking progress on the workflow page. Tasks may also be assigned to calendar events on the production calendar. These will also be aggregated to the workflow page.
What fields does a task card contain?
- Name
- Assign User
- Start / Due Dates
- Description
- Tasks
- Attachments
- Comments
- Assign workflow
If you’re more of a visual person, like myself, give this video a watch.
Guided tour: workflow • Support videos
Wow, I mean, you probably get the gist of task cards and the workflow page just from that video. So, I won’t take offense if you just go it on your own, that’s typically how I learn the best.
That being said, I’m going to be assigning task cards in an order that loosely follows this Pre-Production process. It might not cover everything, but it should give you an idea of what could be possible.
Project Details
Step 1: Create project & import script
Alright, before we can start assigning tasks we’ll need to create the project in StudioBinder and import the script so all of the pages of the project are populated.
So, here on the account dashboard page click + New Project, give the project a name and click next…
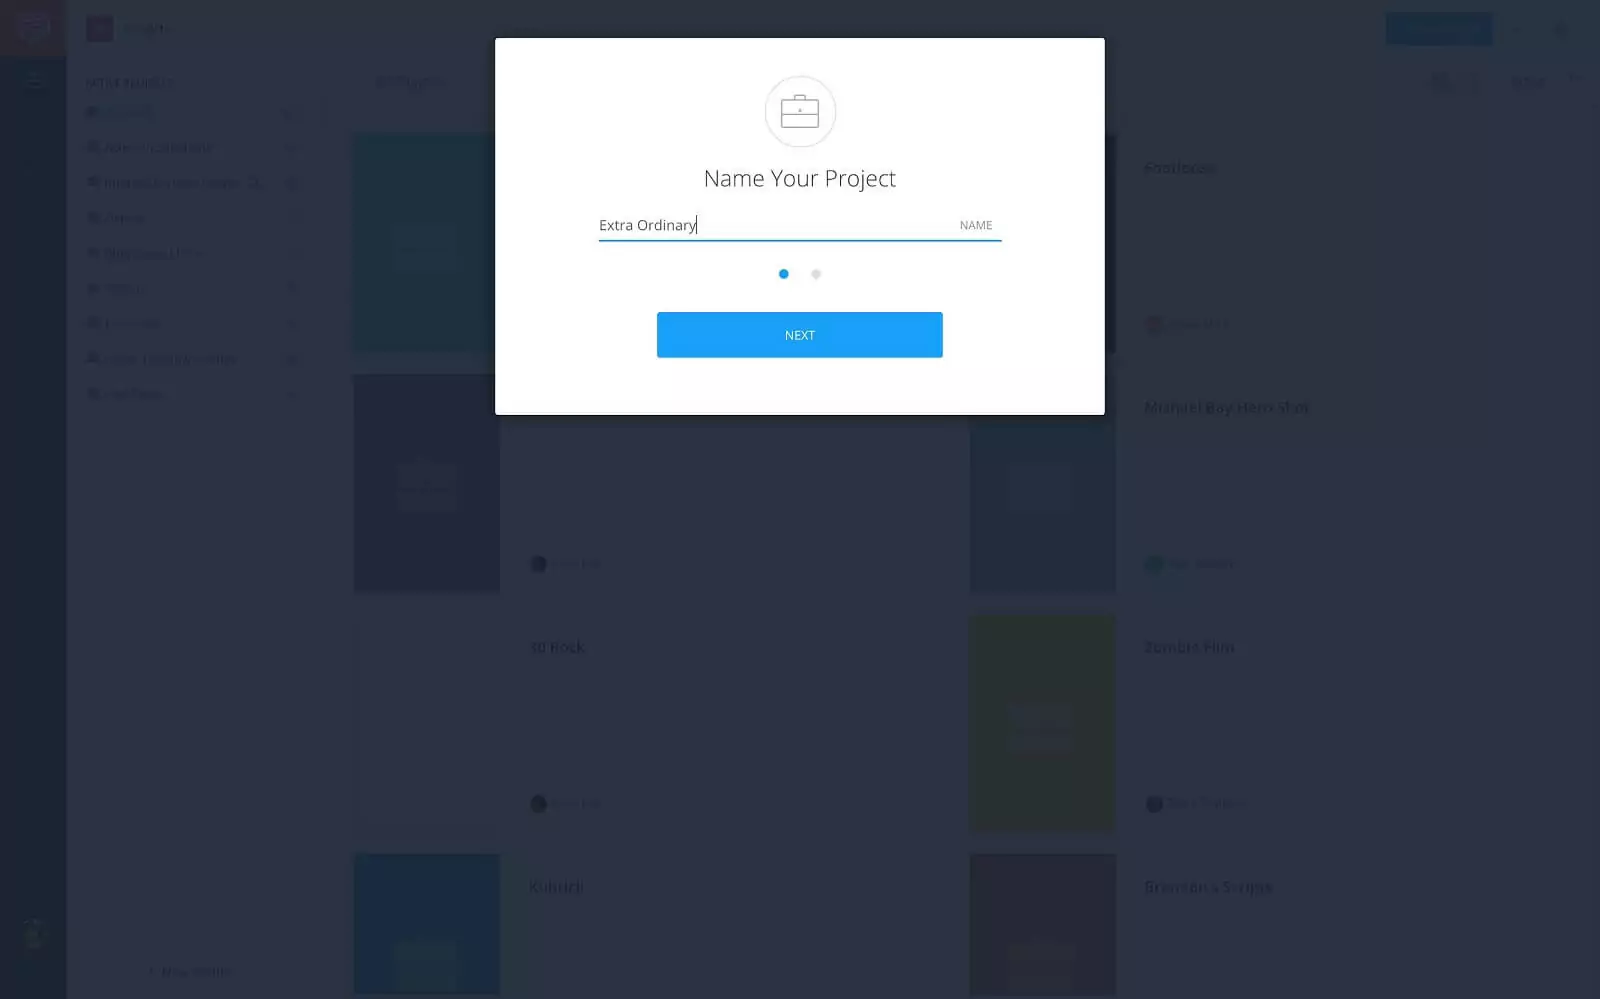
Name your project box • Click next
...then select your project features. By default all of the features are selected, I recommend leaving them this way to avoid confusion later. Then click, Create Project.
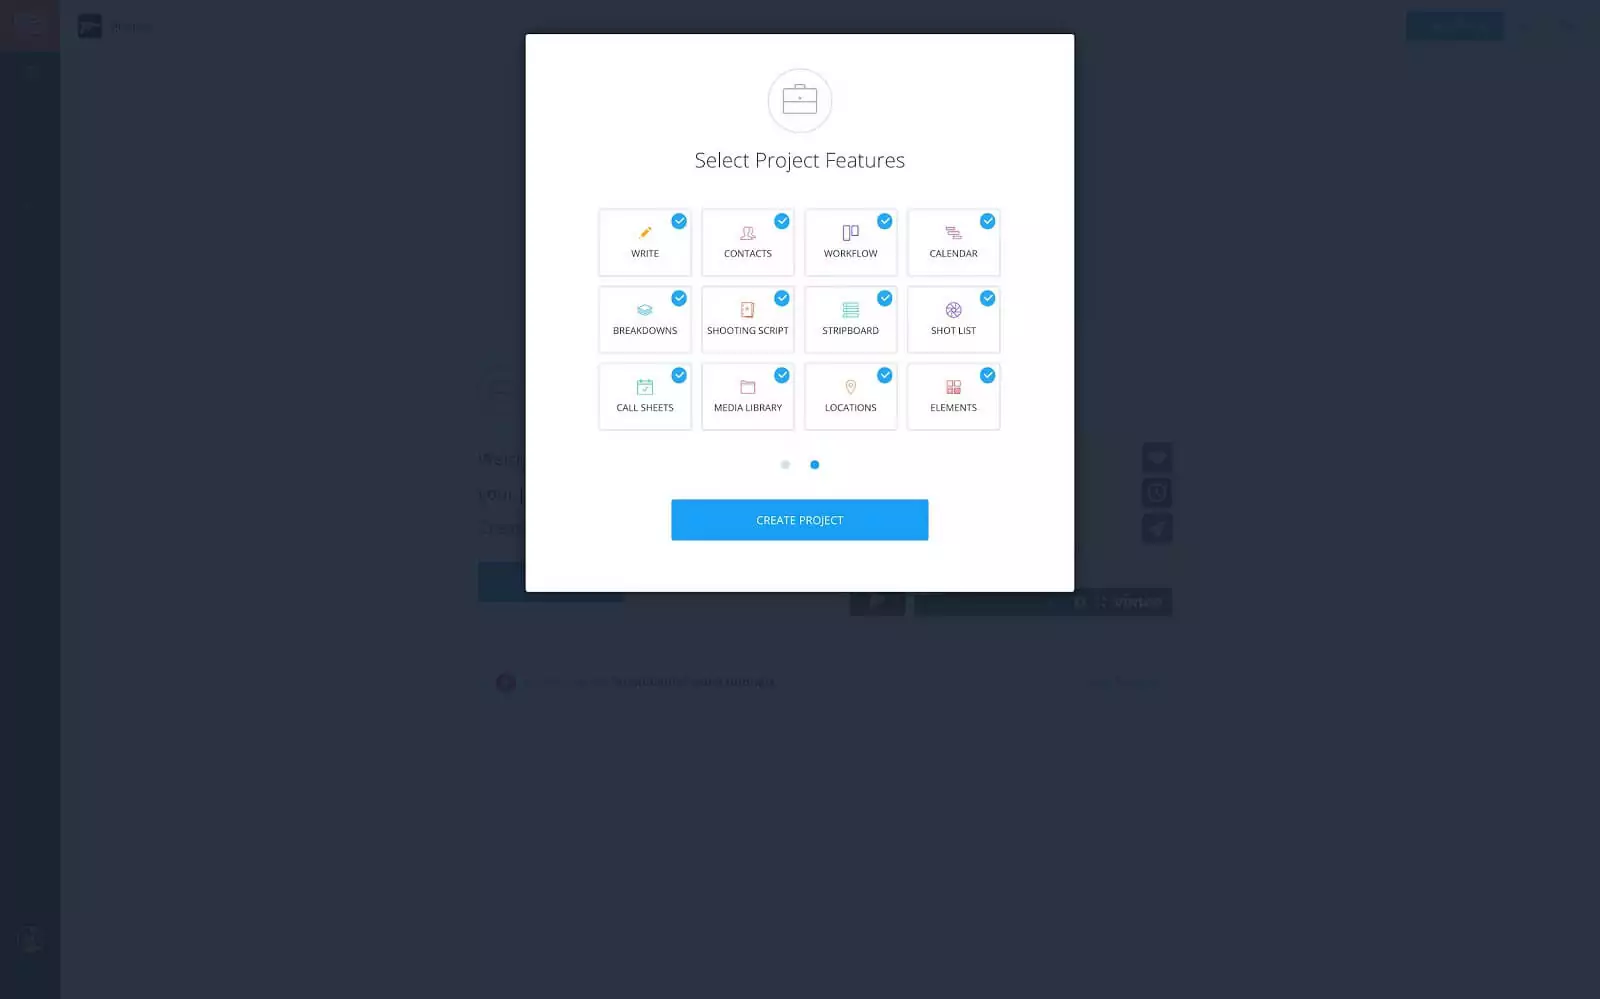
Select project features • Click create project
This takes us to the project overview page.
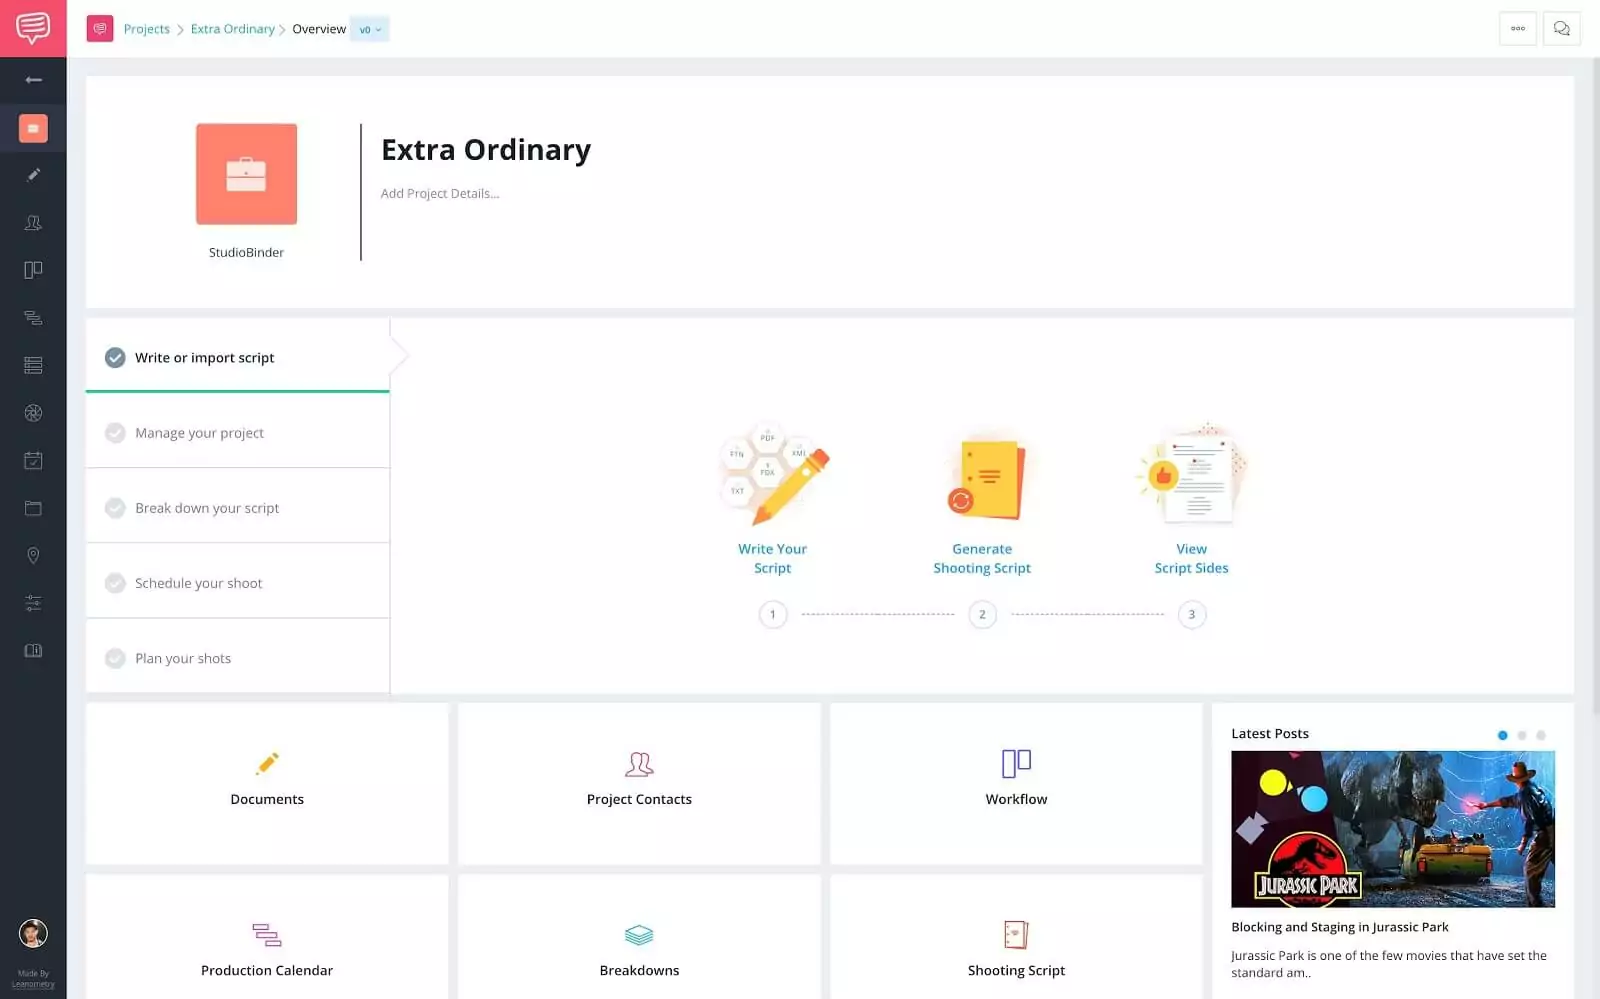
New project • Project overview page
Ok, with the project created now the script needs to be imported. For that I'll head to the shooting schedule page.
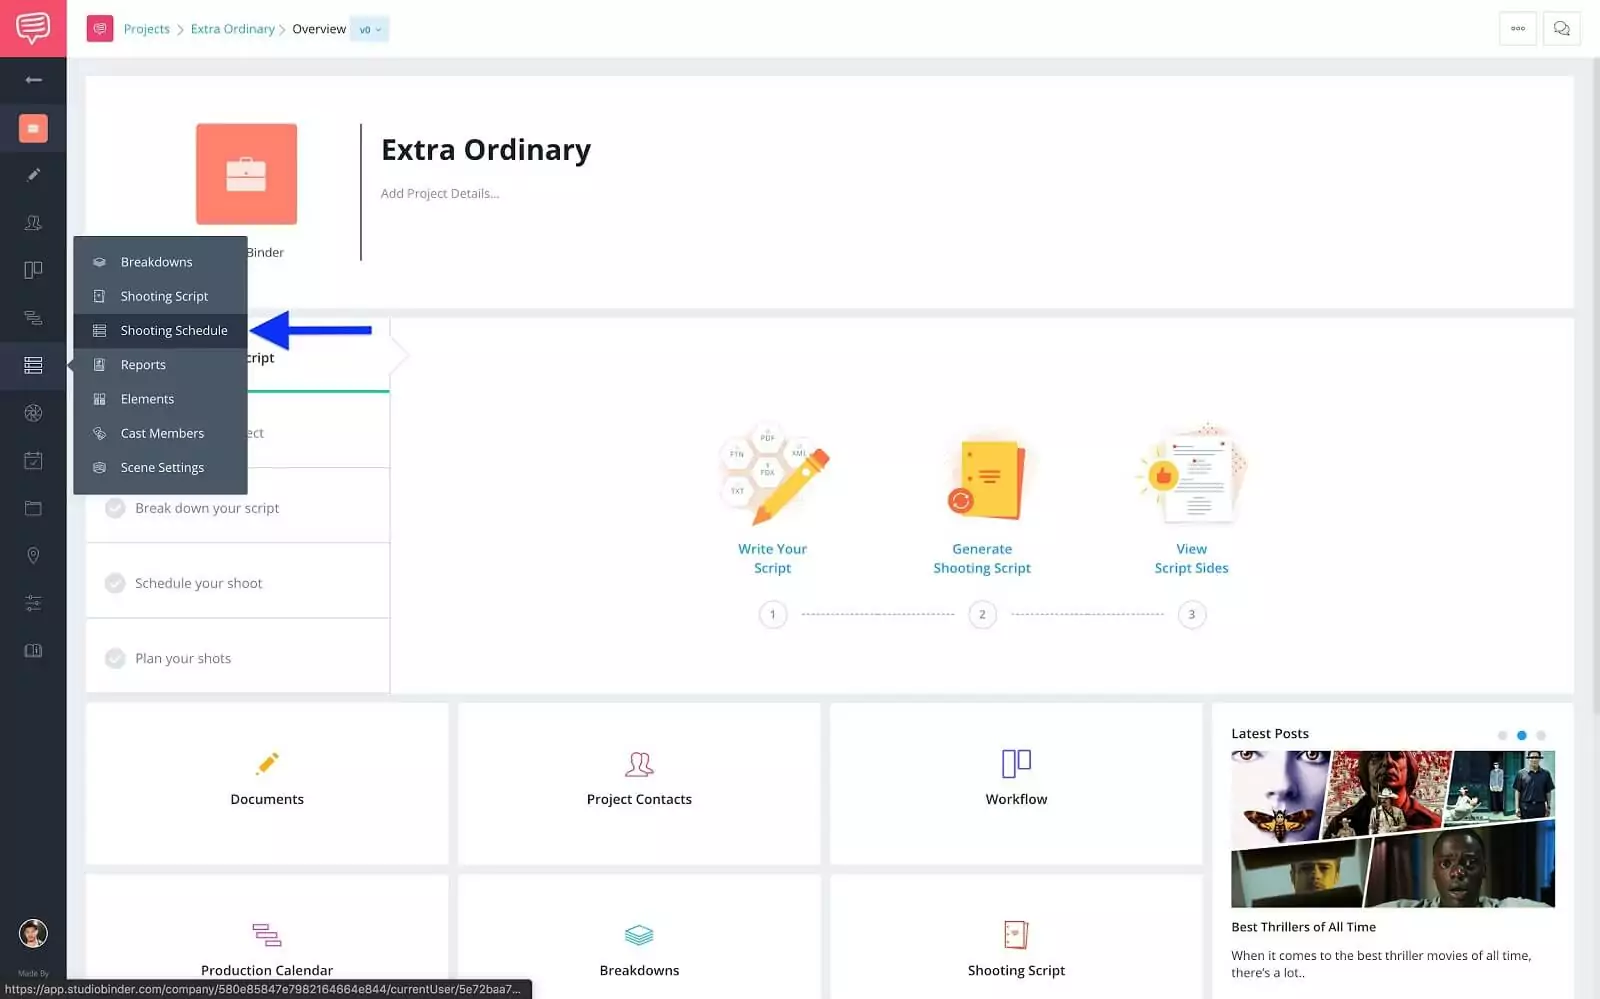
Project overview page • Navigation sidebar
Let’s see exactly how to import a script into StudioBinder in this video.
How to import a script file • Subscribe on YouTube
Alright, now that the script is imported all of the pages of the project have been populated with the scene information.
Before we start assigning tasks let’s take a look at the workflow page.
Customize Workflow
Step 2: Customize workflow columns
The workflow page is where all of your task cards and calendar events will be aggregated. Allowing you to move cards down the line as you progress through the workflow.
As we saw in the video earlier, you can assign the stage of the workflow when creating a task card. You can also add columns and edit the existing column headings.
By default the column headings read:
- On Hold
- In Progress
- Needs Review
- Approved
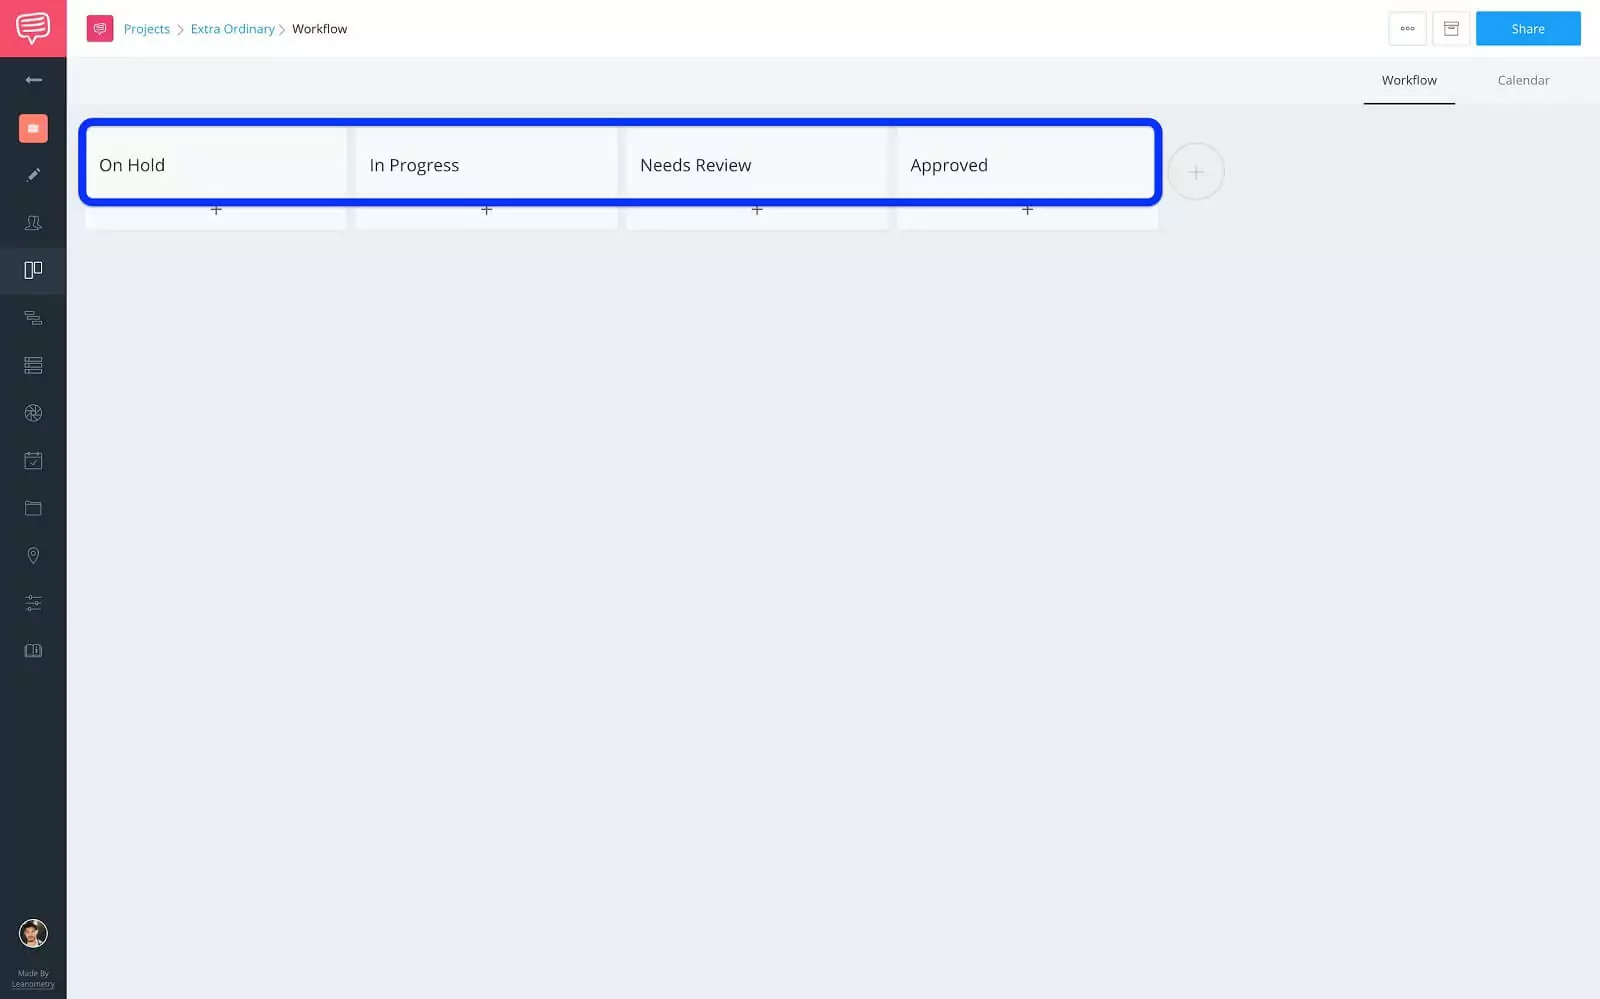
Workflow page • Column headings
I’m going to keep these headings as they are, but you can customize your headings to fit your specific workflow.
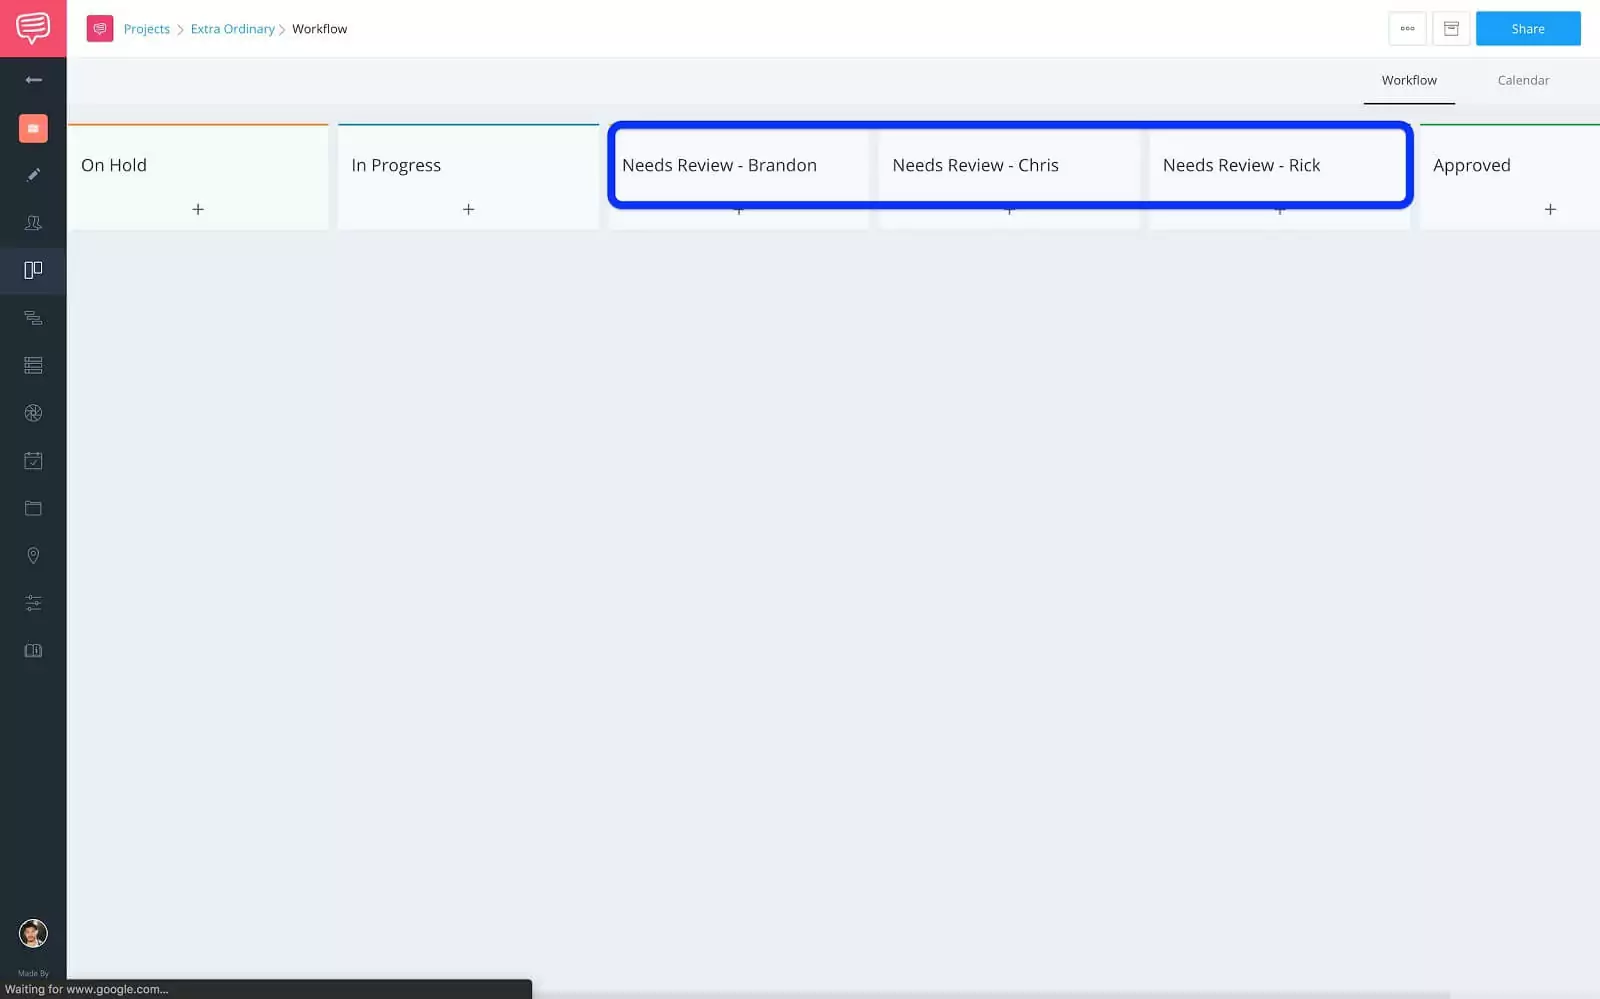
For example, say your Needs Review stage needs to be more specific by having who needs to review the cards.
Shot Lists & Storyboards page • Click +New Shot List
Now, when each person logs in and accesses the workflow page they have a clear list of what needs to be reviewed.
Alright, now that the workflow has been set, we can start adding task cards to the different pages of the project. This is where the Pre-Production process will come into play. One of the first things that has to be done is format a shooting script.
Documents Page
Step 3: Format the shooting script
Formatting a shooting script is part of the 1st AD duties and involves prepping the script to be broken down, scheduled and filmed. This is a very important step as the whole production could be halted if a location was missed due to a misspelling.
So, this is where I head to the Documents page to add my first task card.
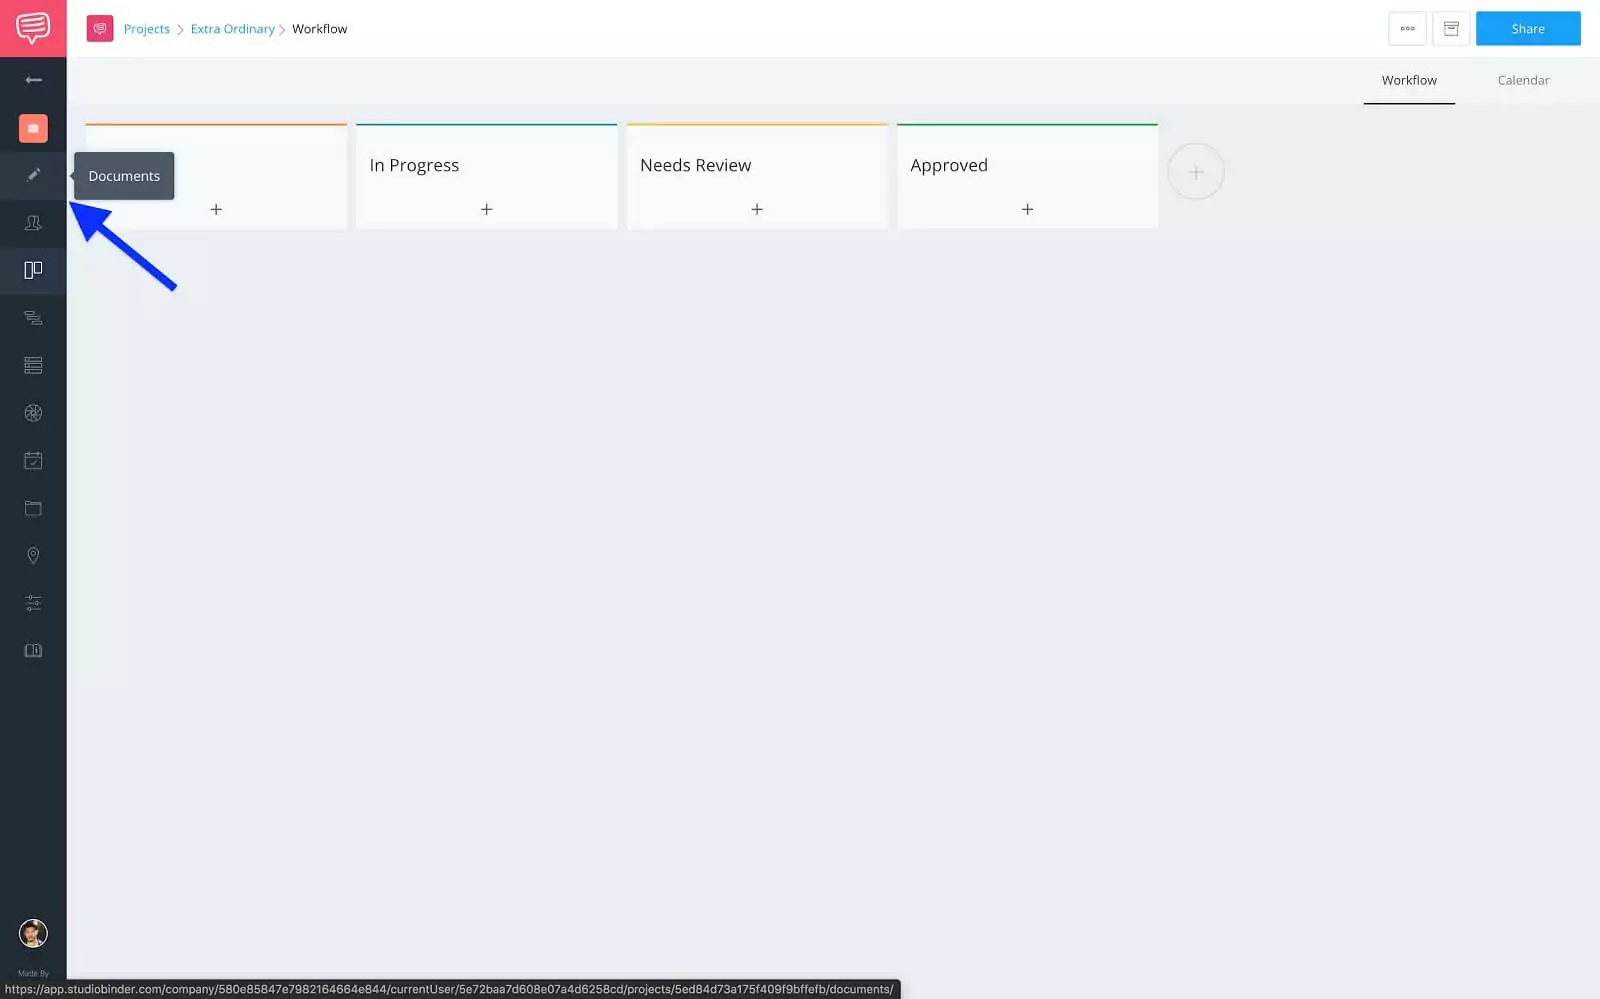
Navigation sidebar • Documents button
On the documents page, I click the scripts folder...
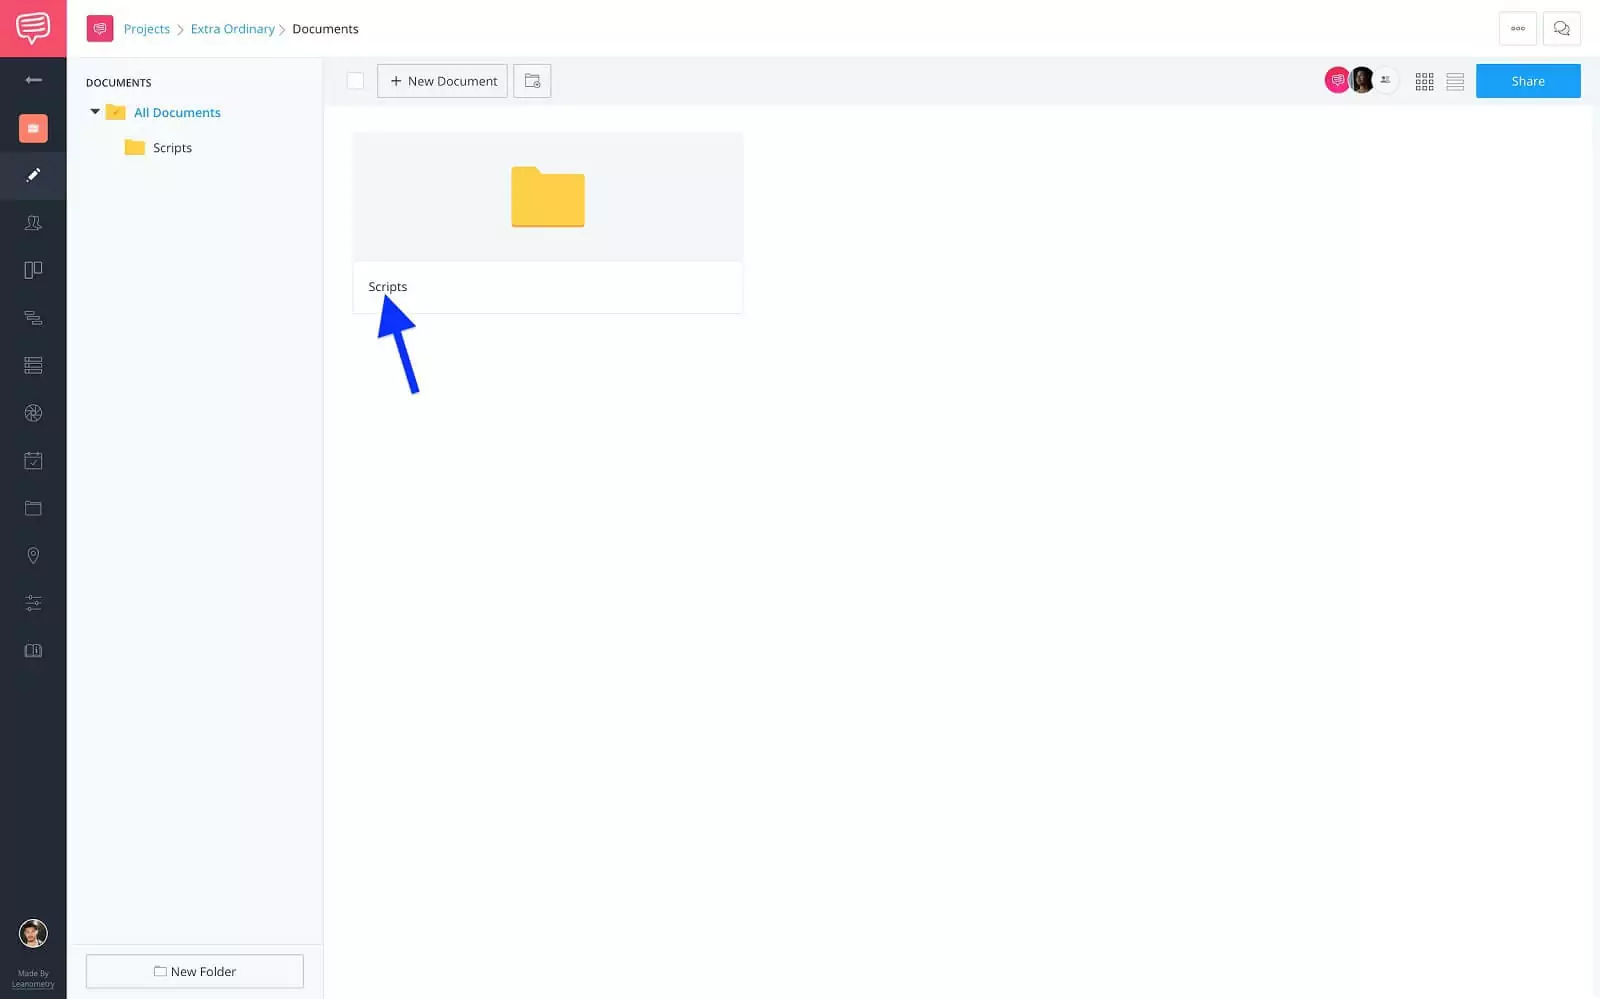
Documents page • Click scripts
...then click on the script name to open the document.
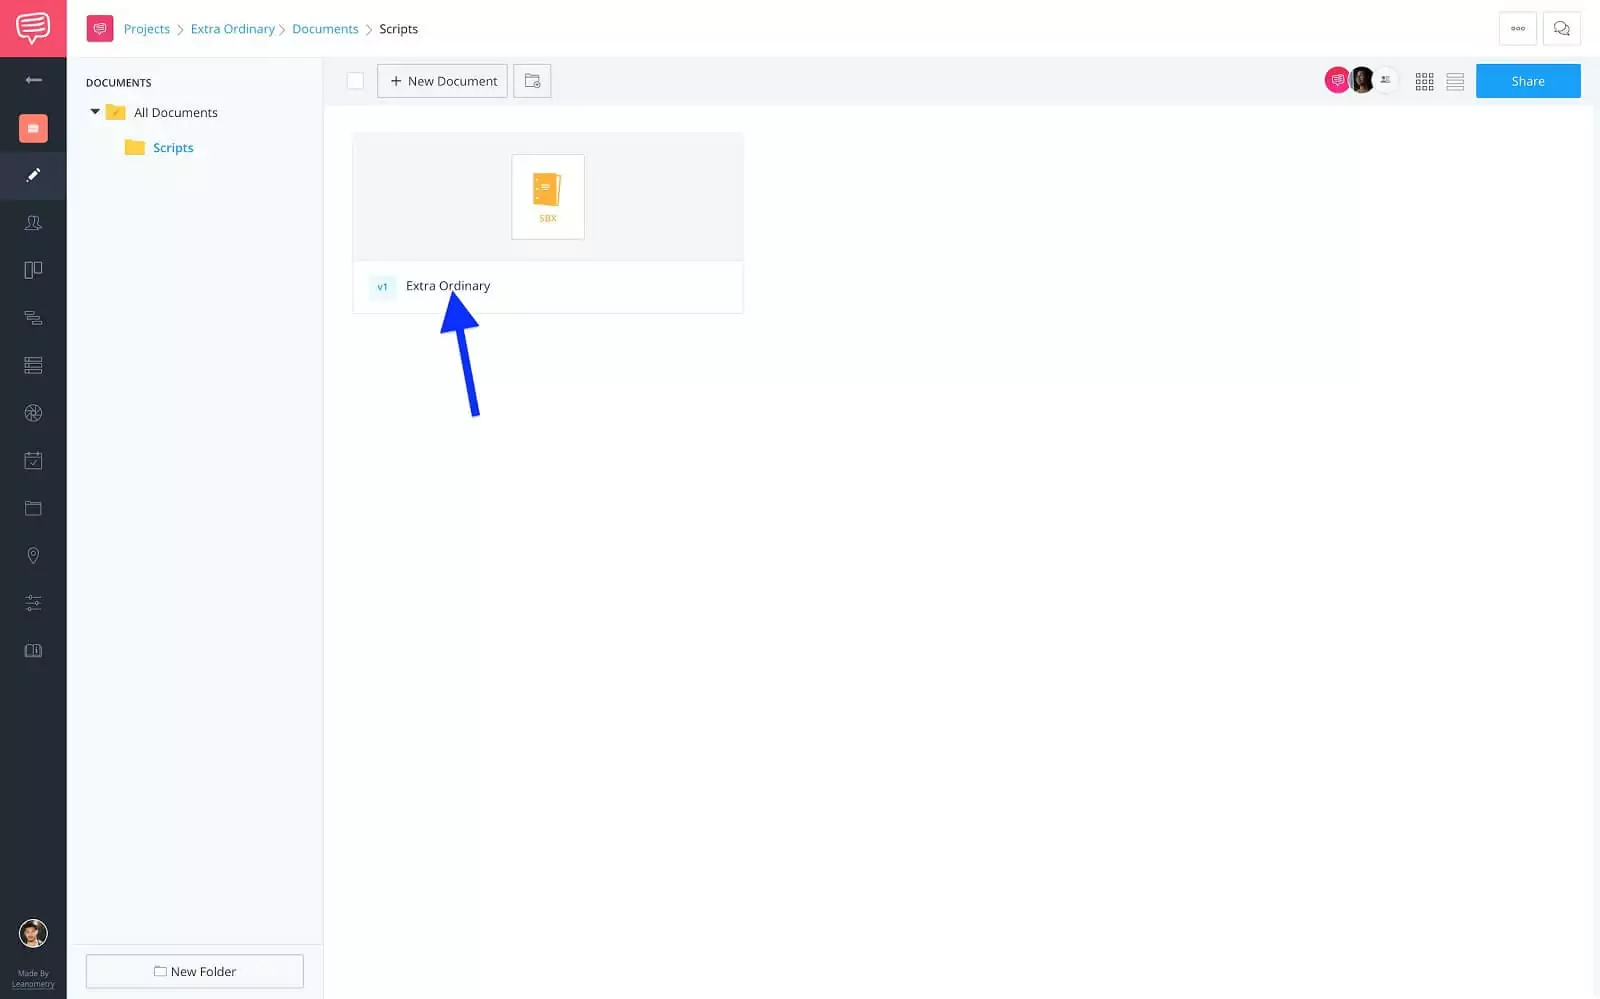
Documents page • Click scripts
Here on the screenwriting page is where the script that we imported lives. To add a task card, click on the comments sidebar button…
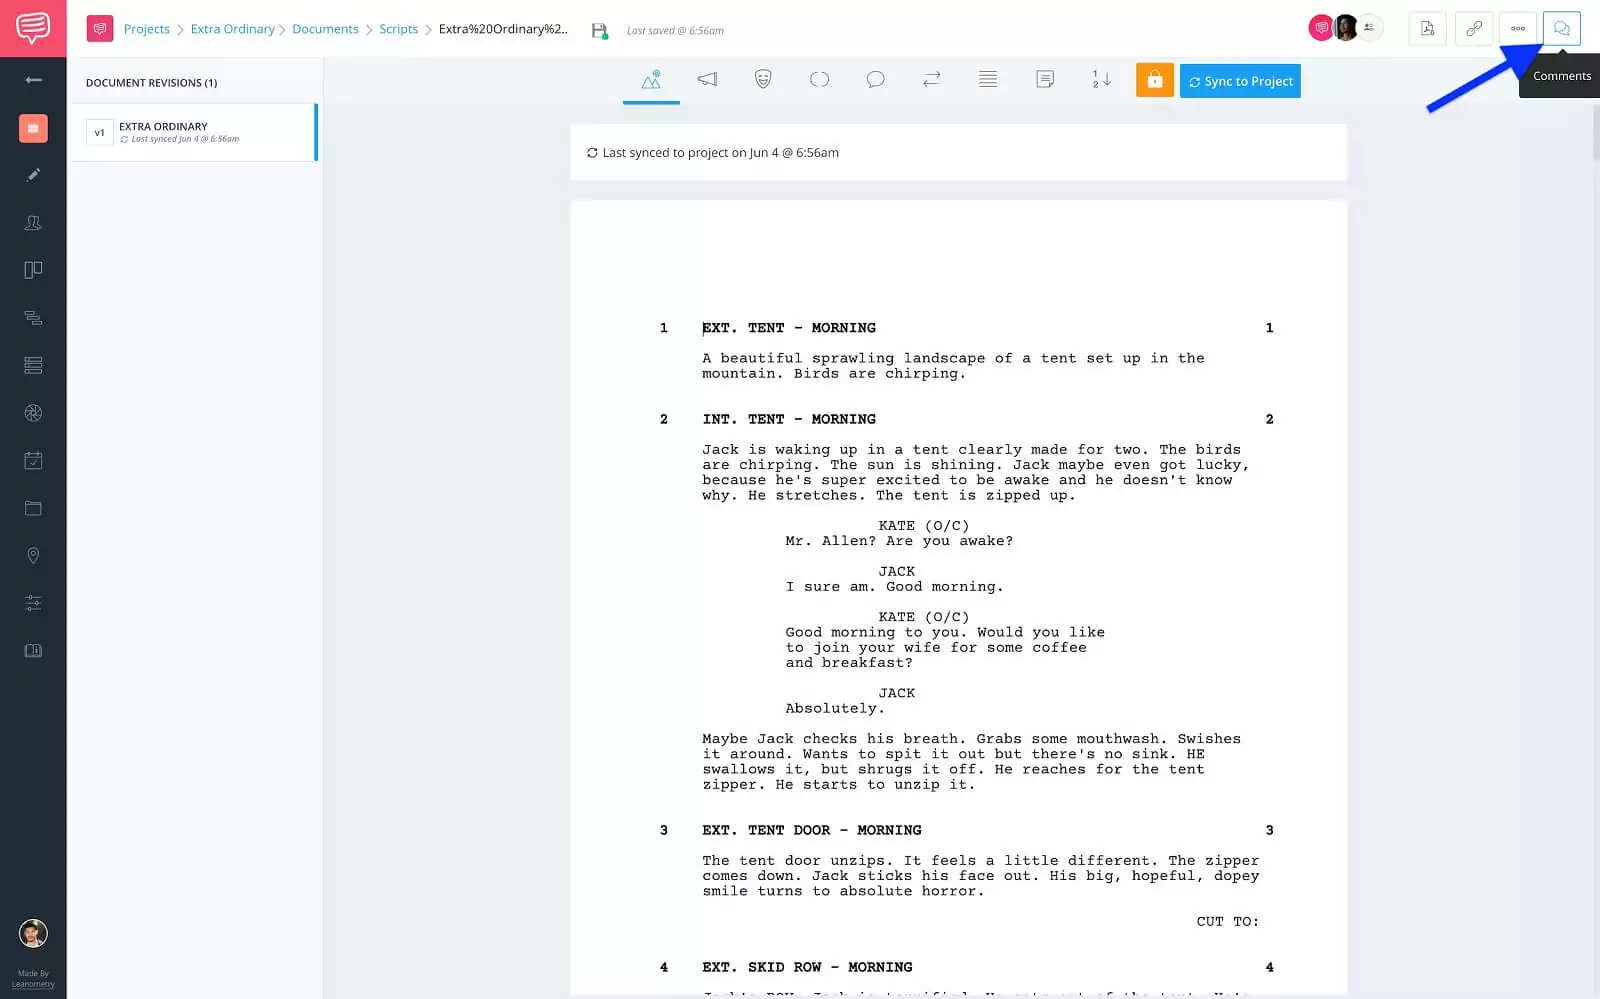
Screenwriting page • Click comments
...then click on tasks...
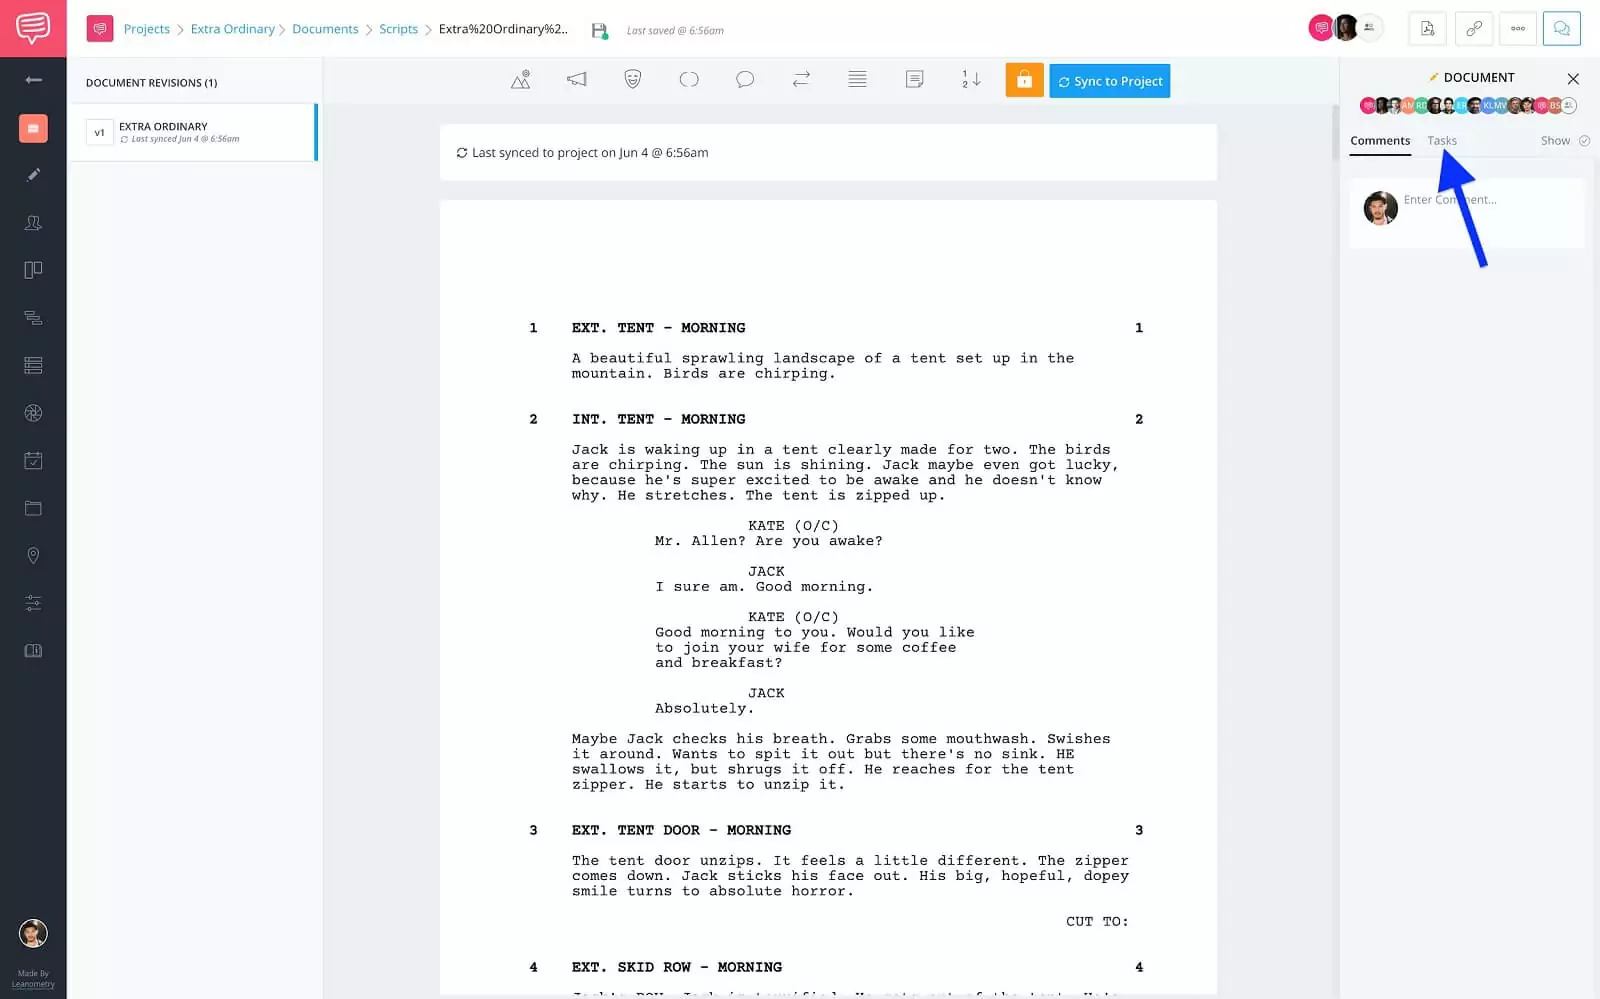
Screenwriting page • Click tasks
...then click, + New Task Card.
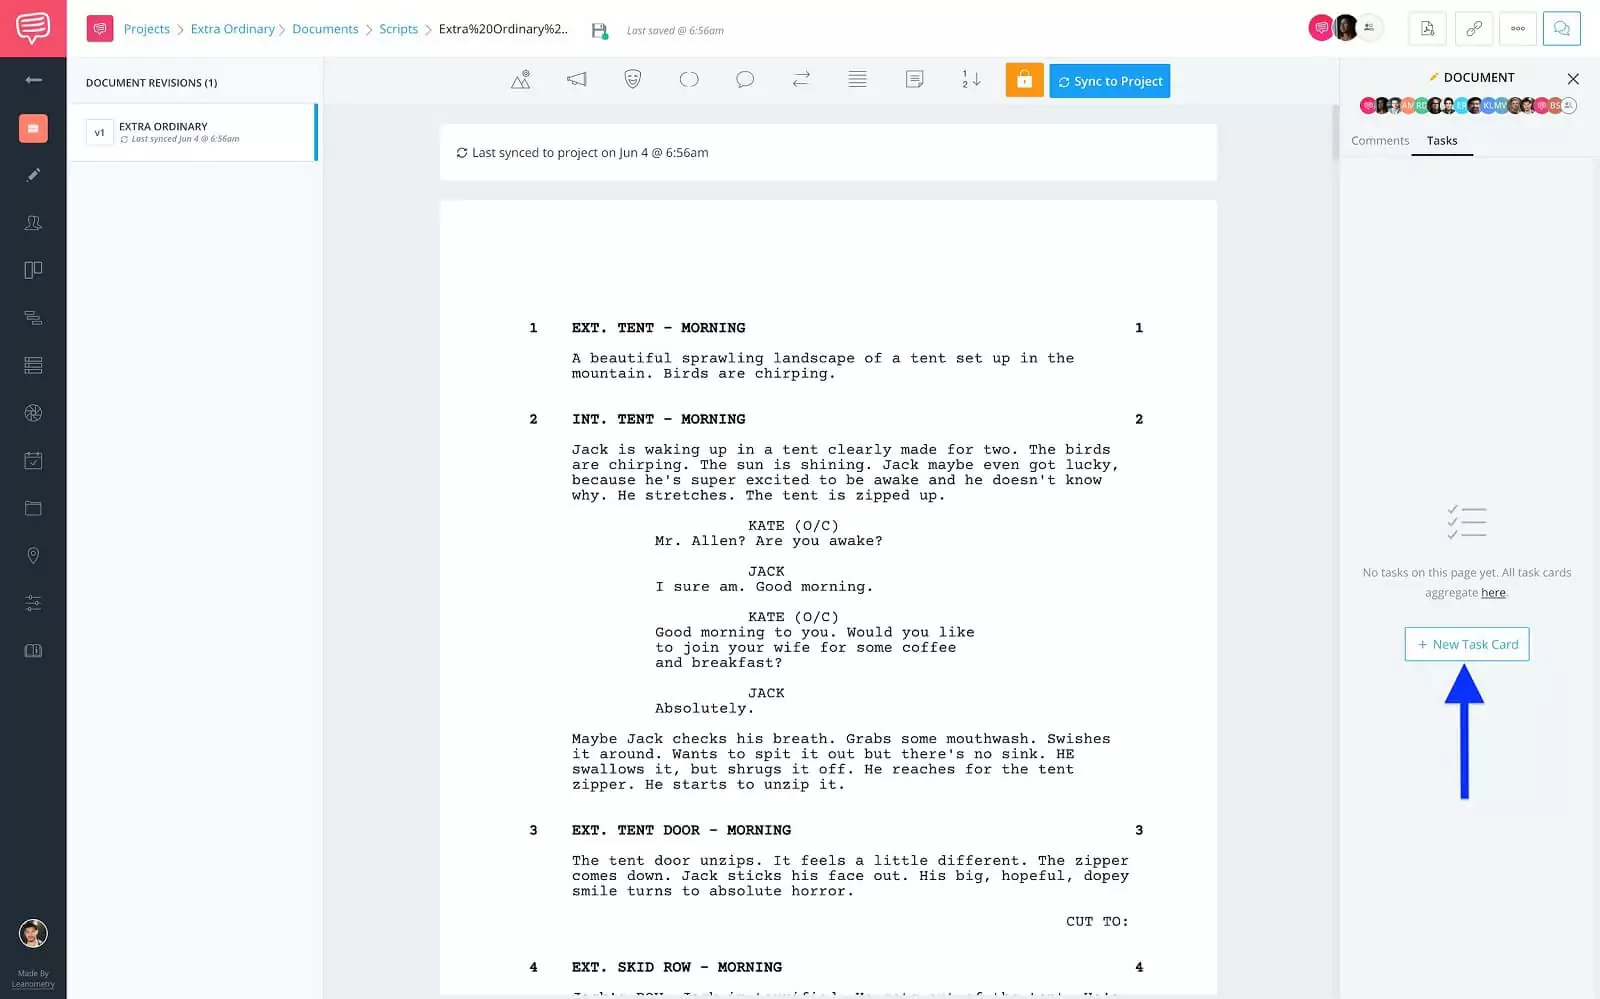
Comments sidebar • Click + New Task Card
You’ll then be prompted to give the card a name. I’m going to name this one Format Shooting Script...
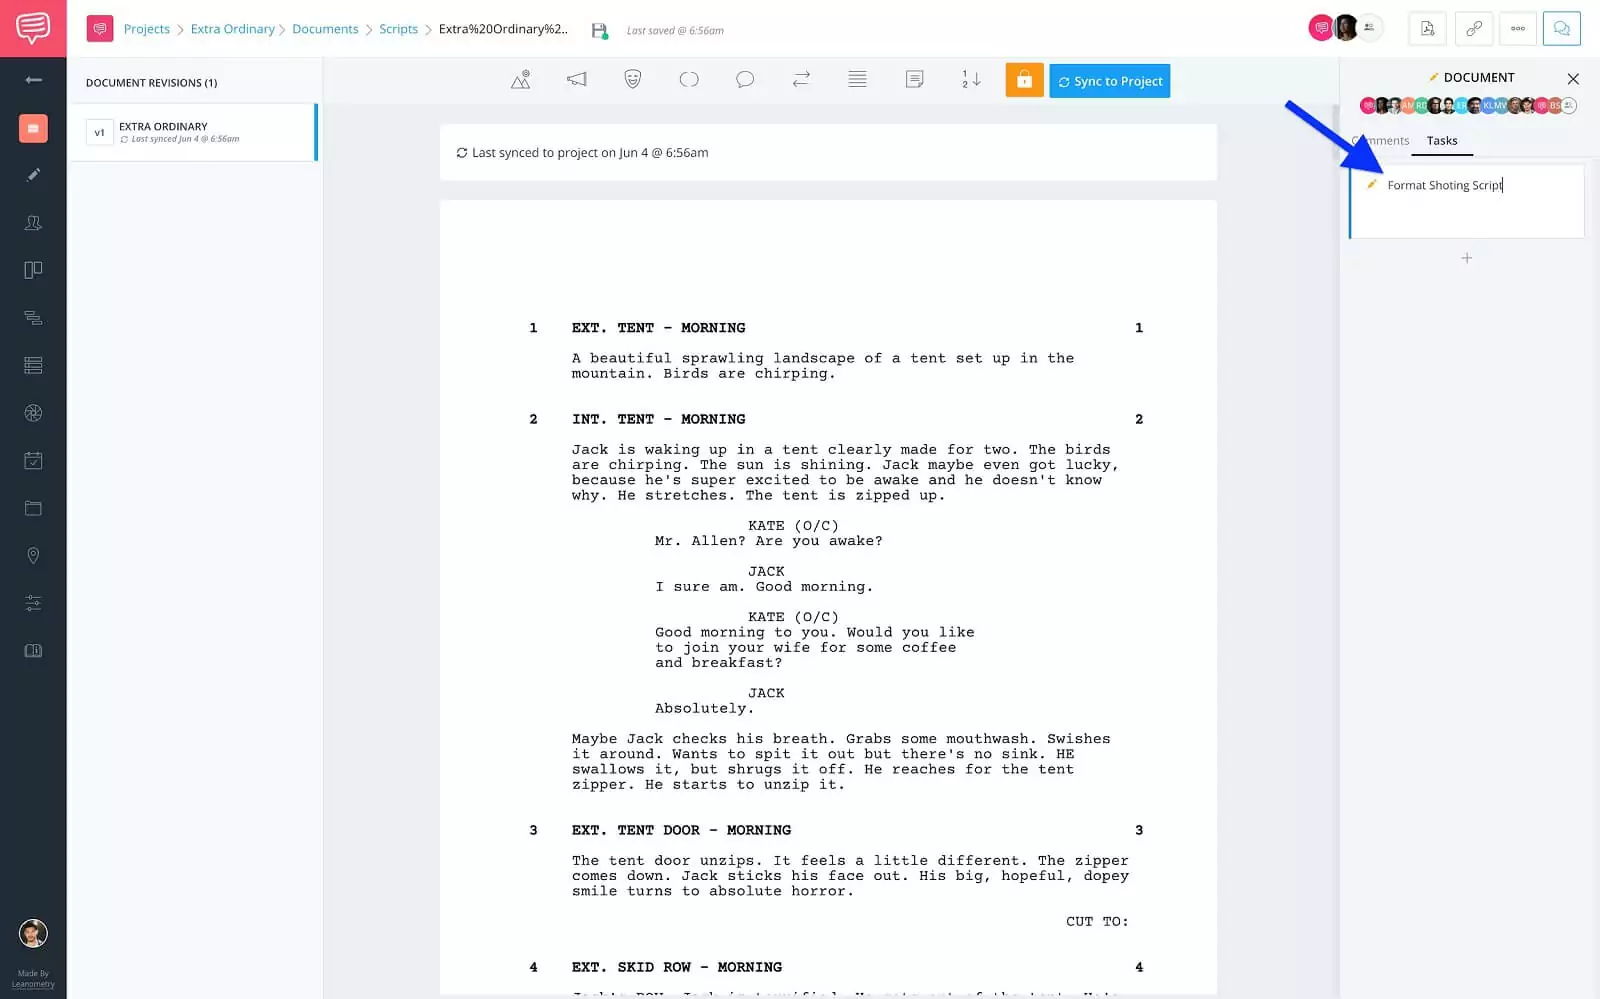
Tasks sidebar • Name task card
...then press enter and the task card will pop-up.
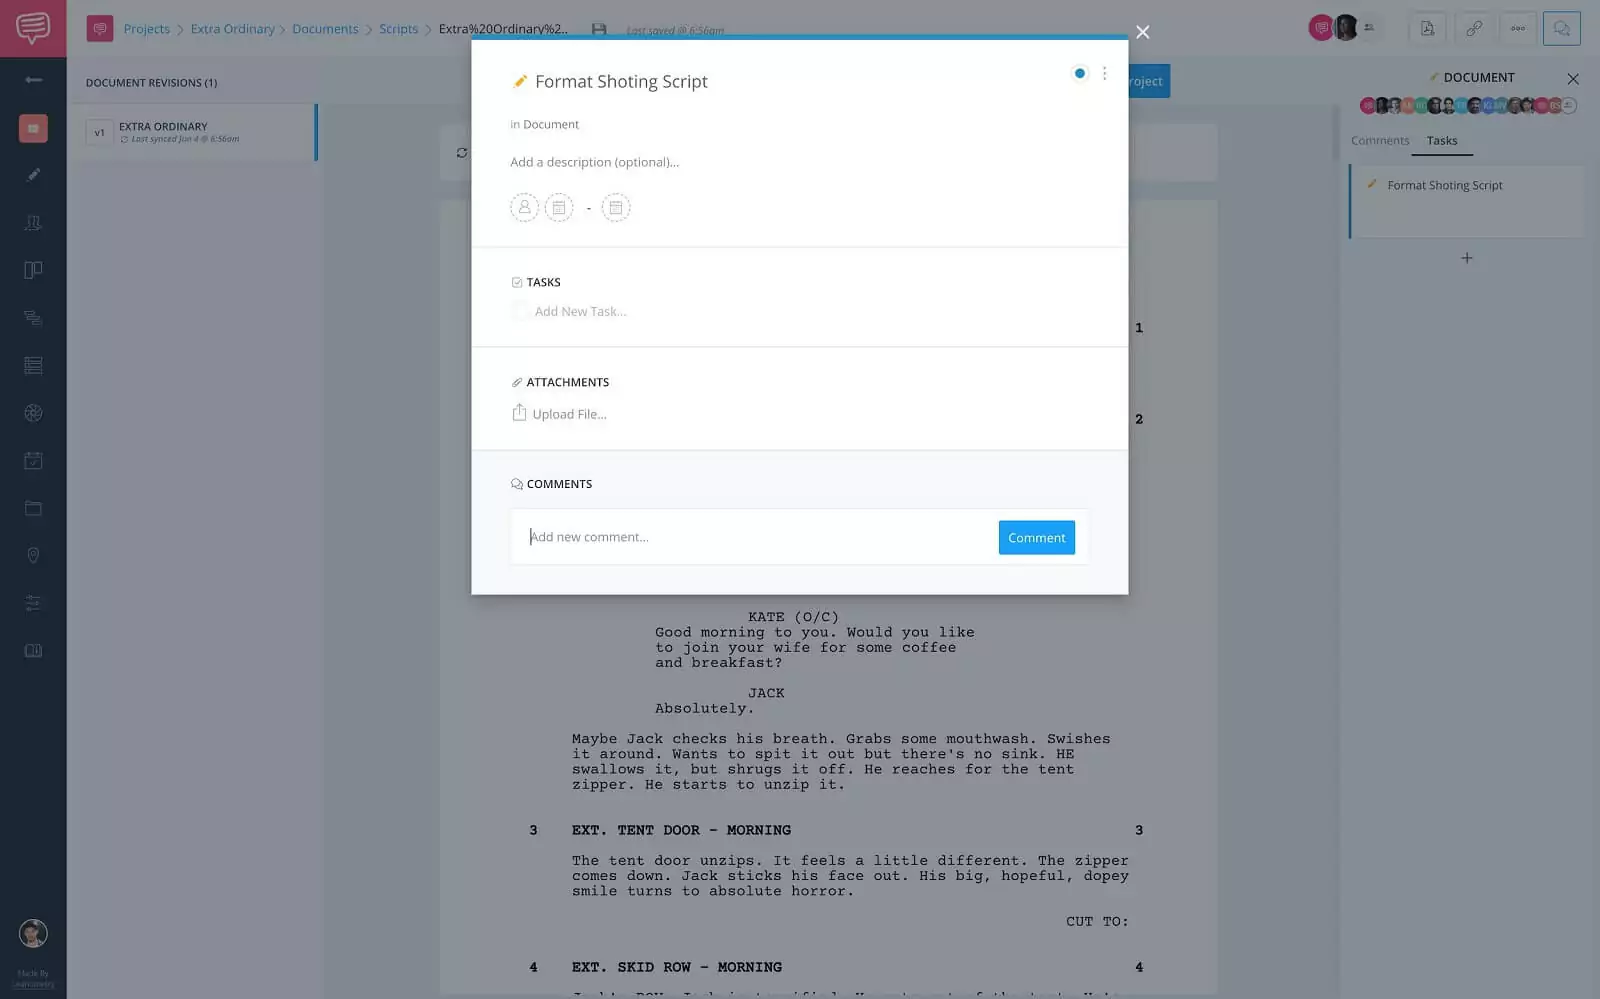
Task card • Format shooting script
What I really like about this is if I’m working with someone who might still be learning, I can paste links in the comments or description sections for them to review before completing the tasks.
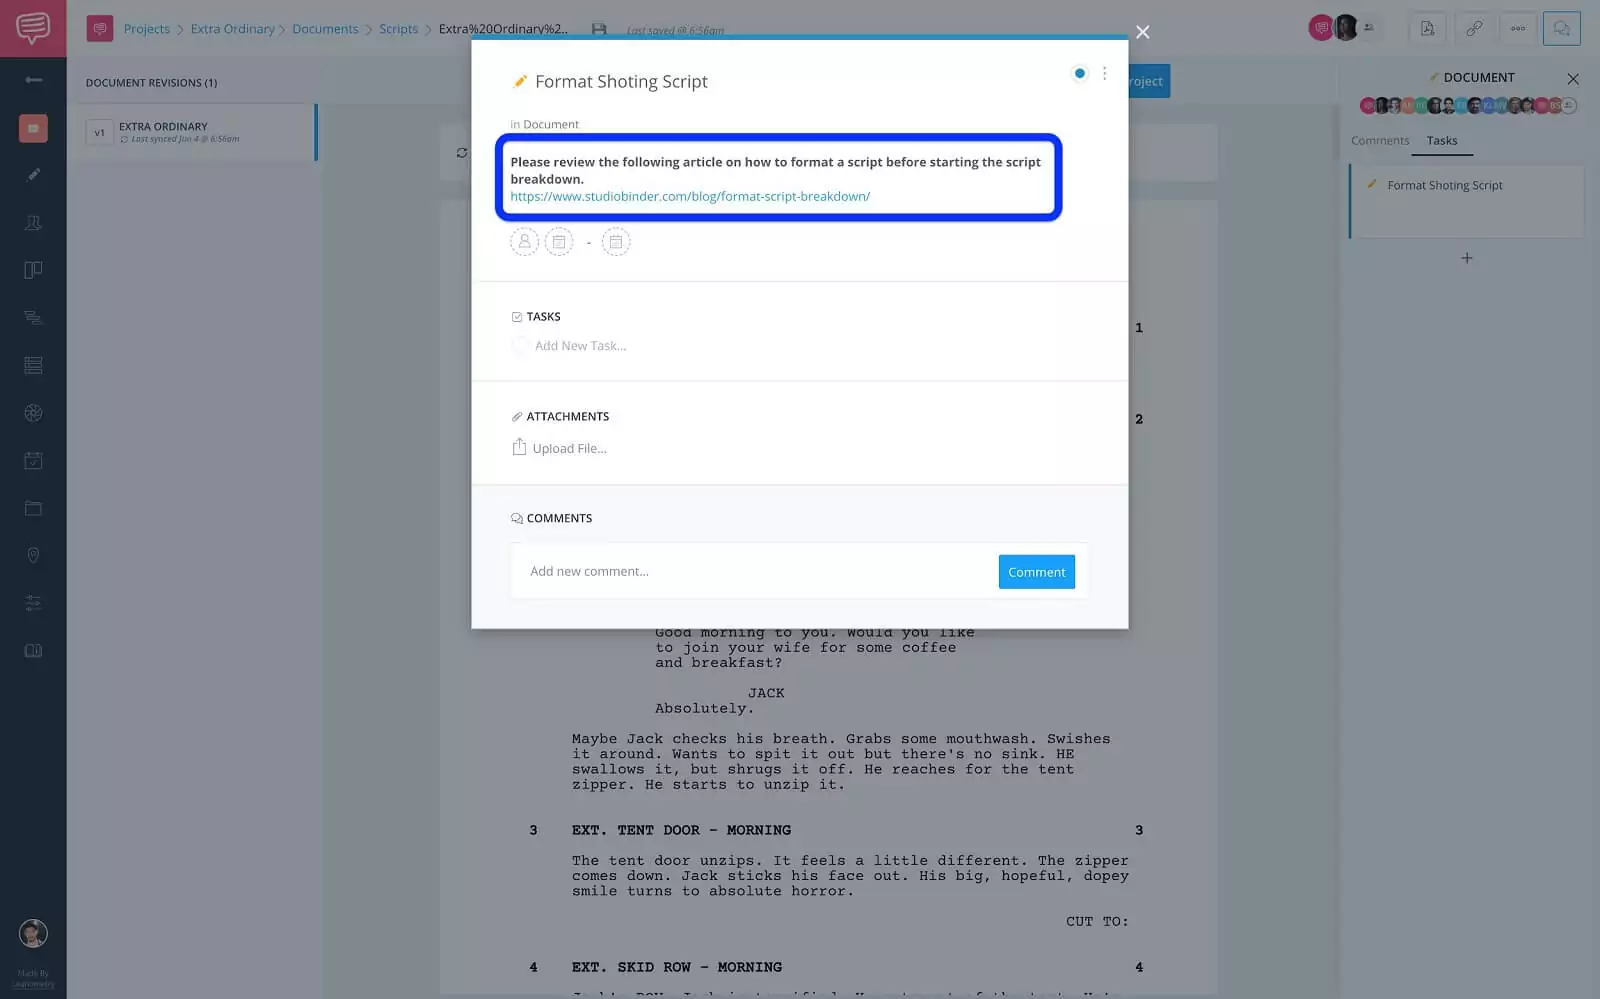
Task card • Description link
As for the actual tasks, I list out what to look for when formatting the shooting script.
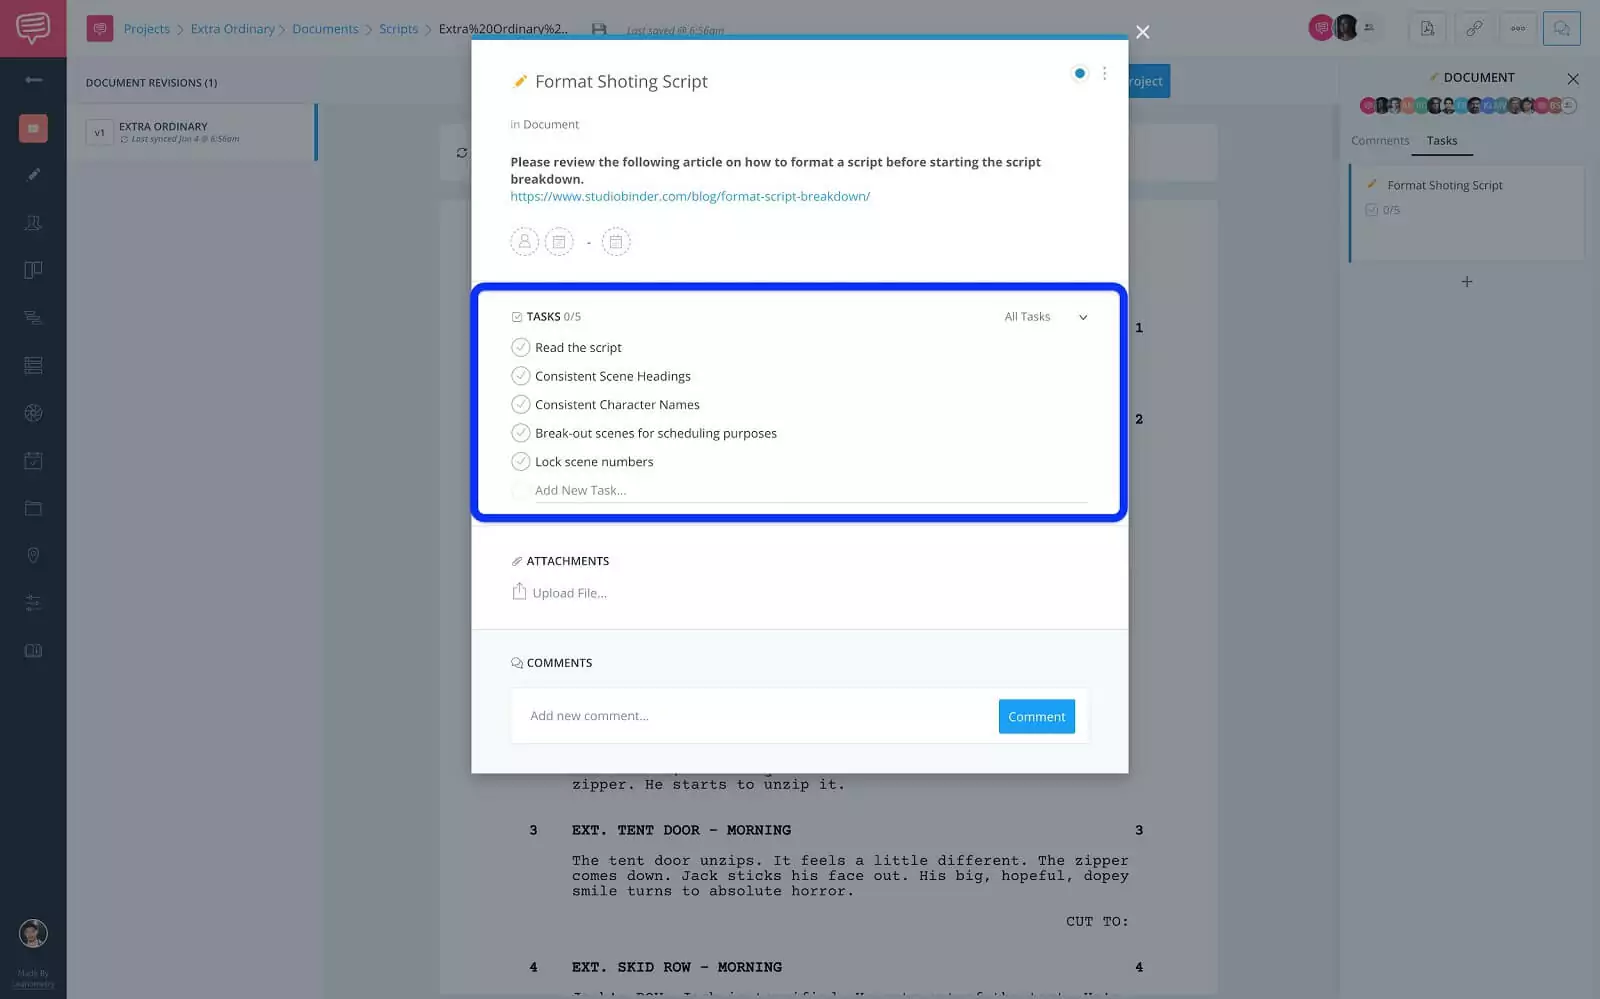
Task card • Task list
That first one might seem like a no brainer, but just by reading the script you can be informed of valuable information. Like if the script has a lot of time jumps that will have to be accounted for.
Alright, with the first task card done let’s move on to what the next step of the pre-production process would be. Breakdown the script.
Breakdowns Page
Step 4: Breakdown the script
Breaking down a script is the process of tagging all of the required elements for each department of a scene. Leaving you with an inventory list of everything that will be needed to film that scene.
The breakdown is vital to a production and contains a lot of specific information that departments must be aware of. So having a task card is a visual reminder of everything that needs to be tagged.
So here on the breakdowns page, I’ll click + New Task Card and name it Breakdown the Script...
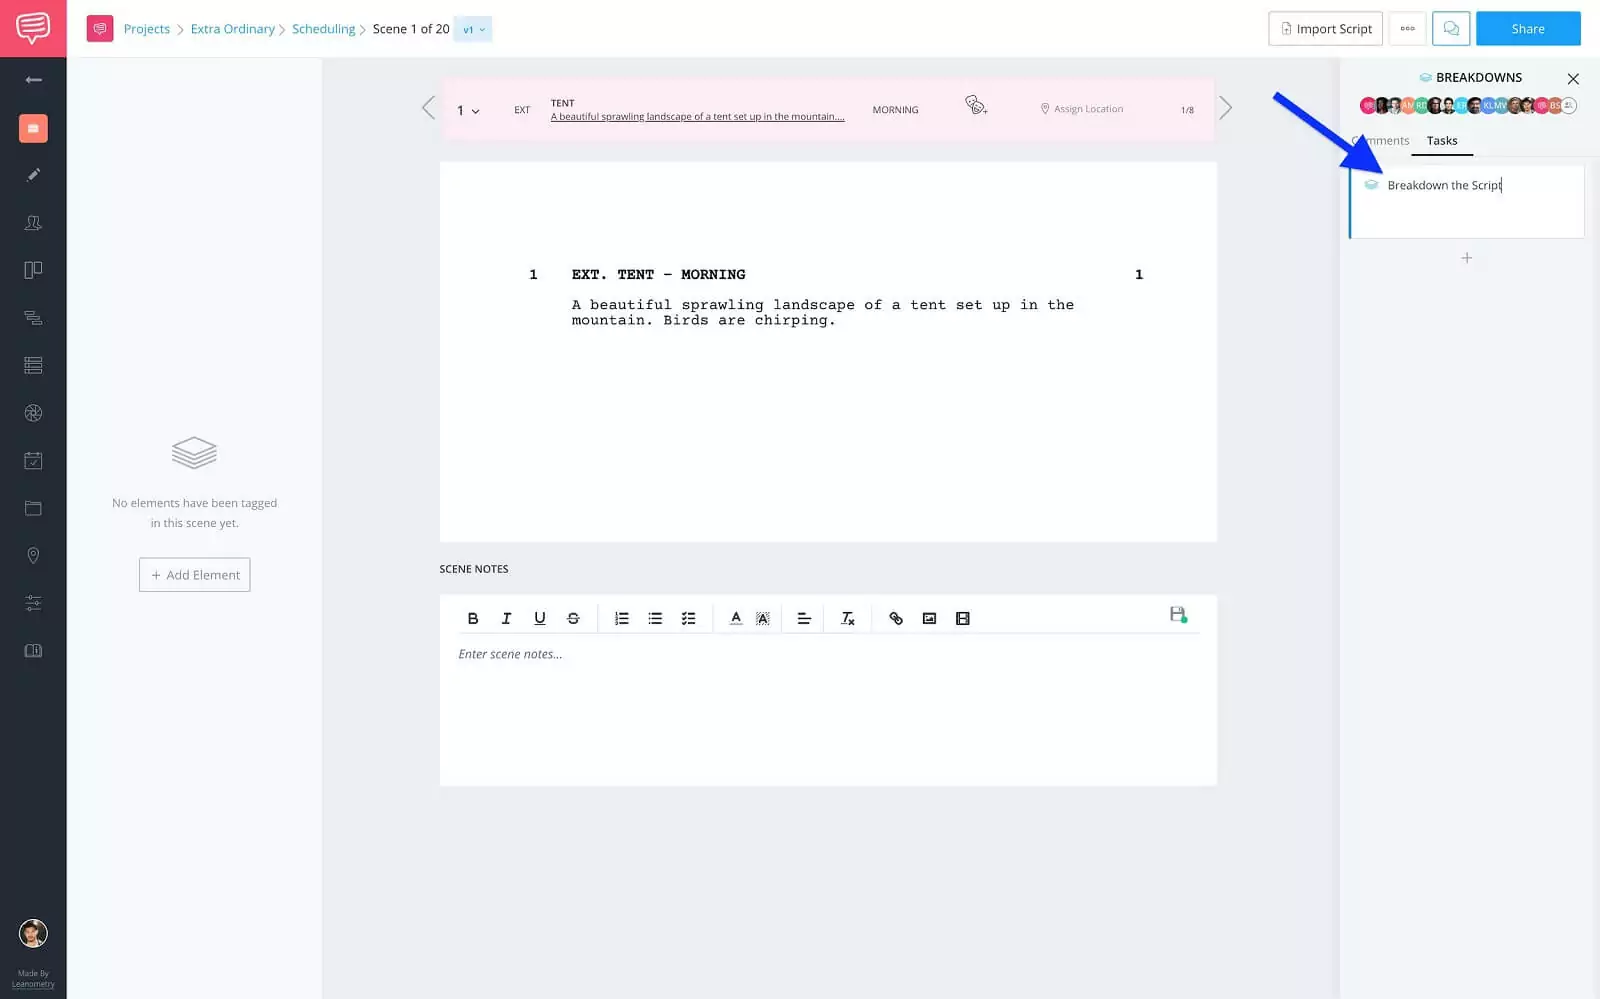
Click + new task card • Name task card
...then add my tasks and any other relevant information.
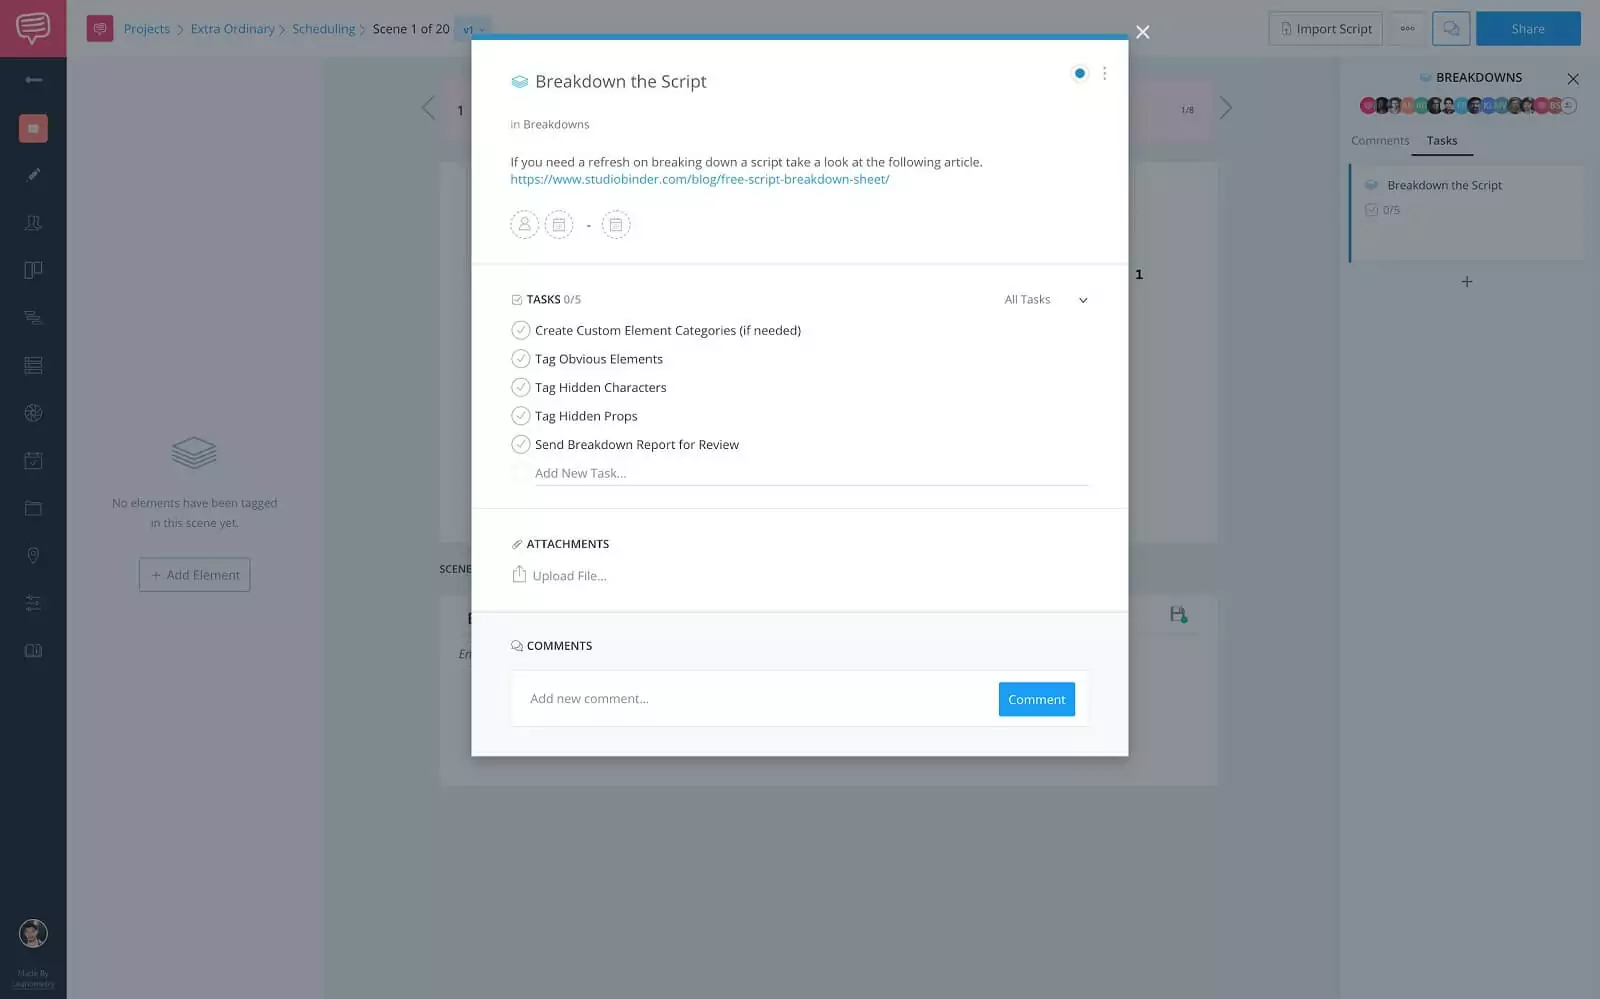
Breakdown the script task card • Task details
If you’re wondering what hidden characters means, StudioBinder automatically tags a character if they are formatted as a character and have dialogue in a scene.
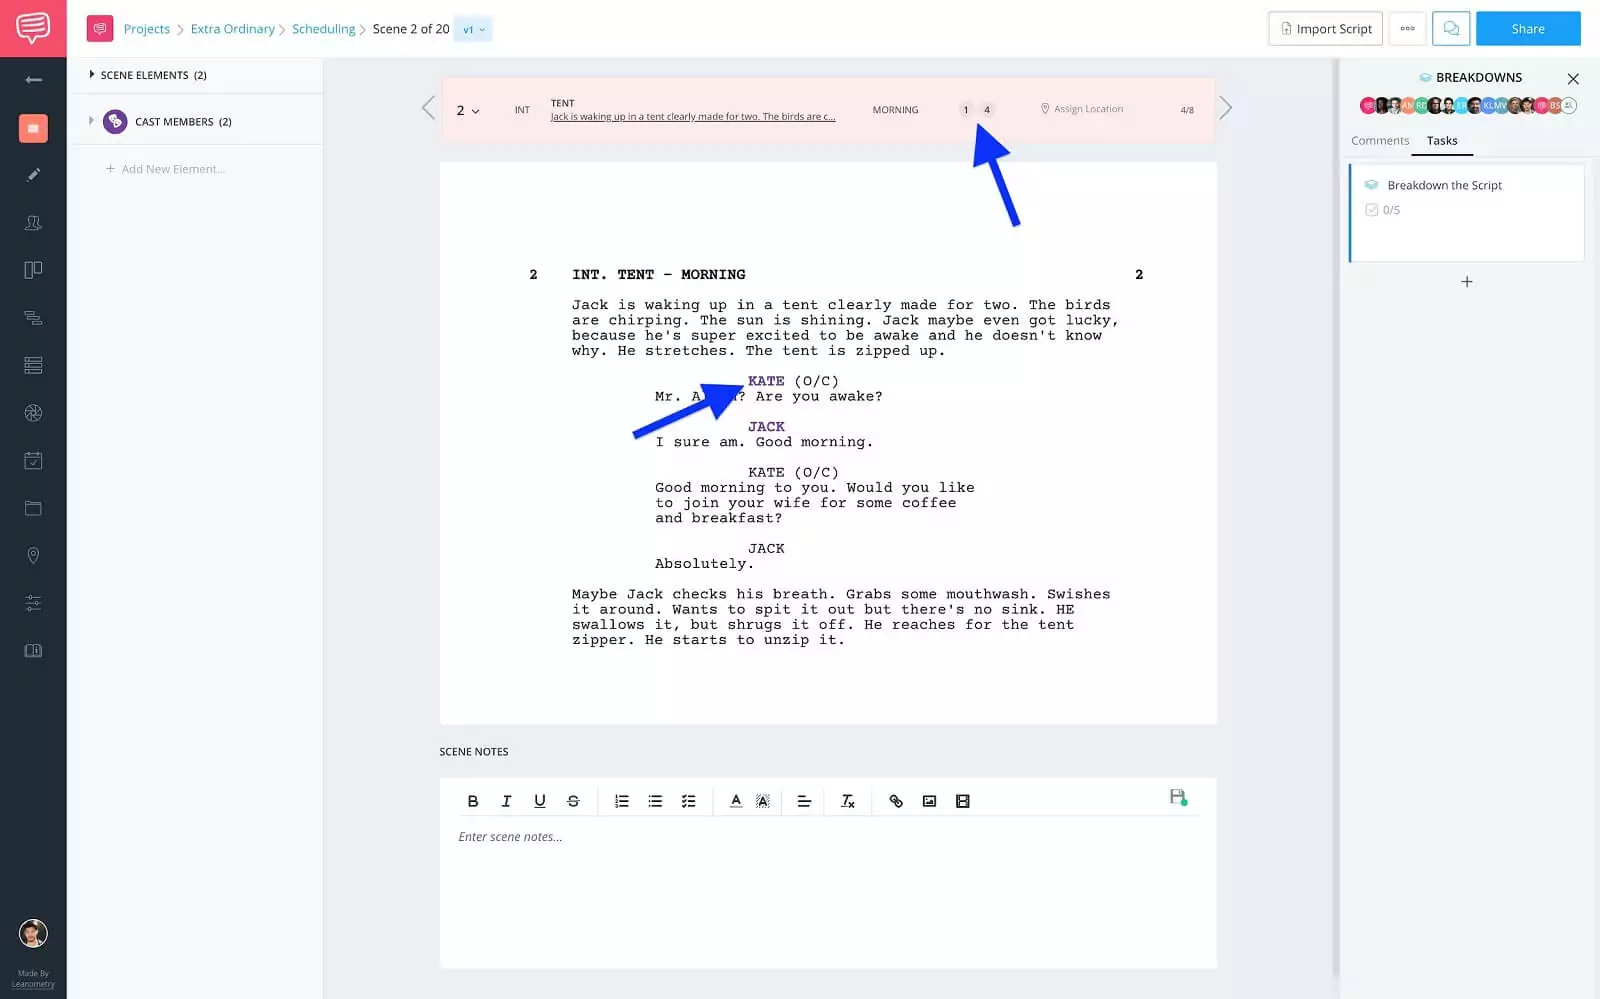
Formatted character • Tagged element
However, say a character doesn’t have dialogue but they appear in the scene in the action lines.
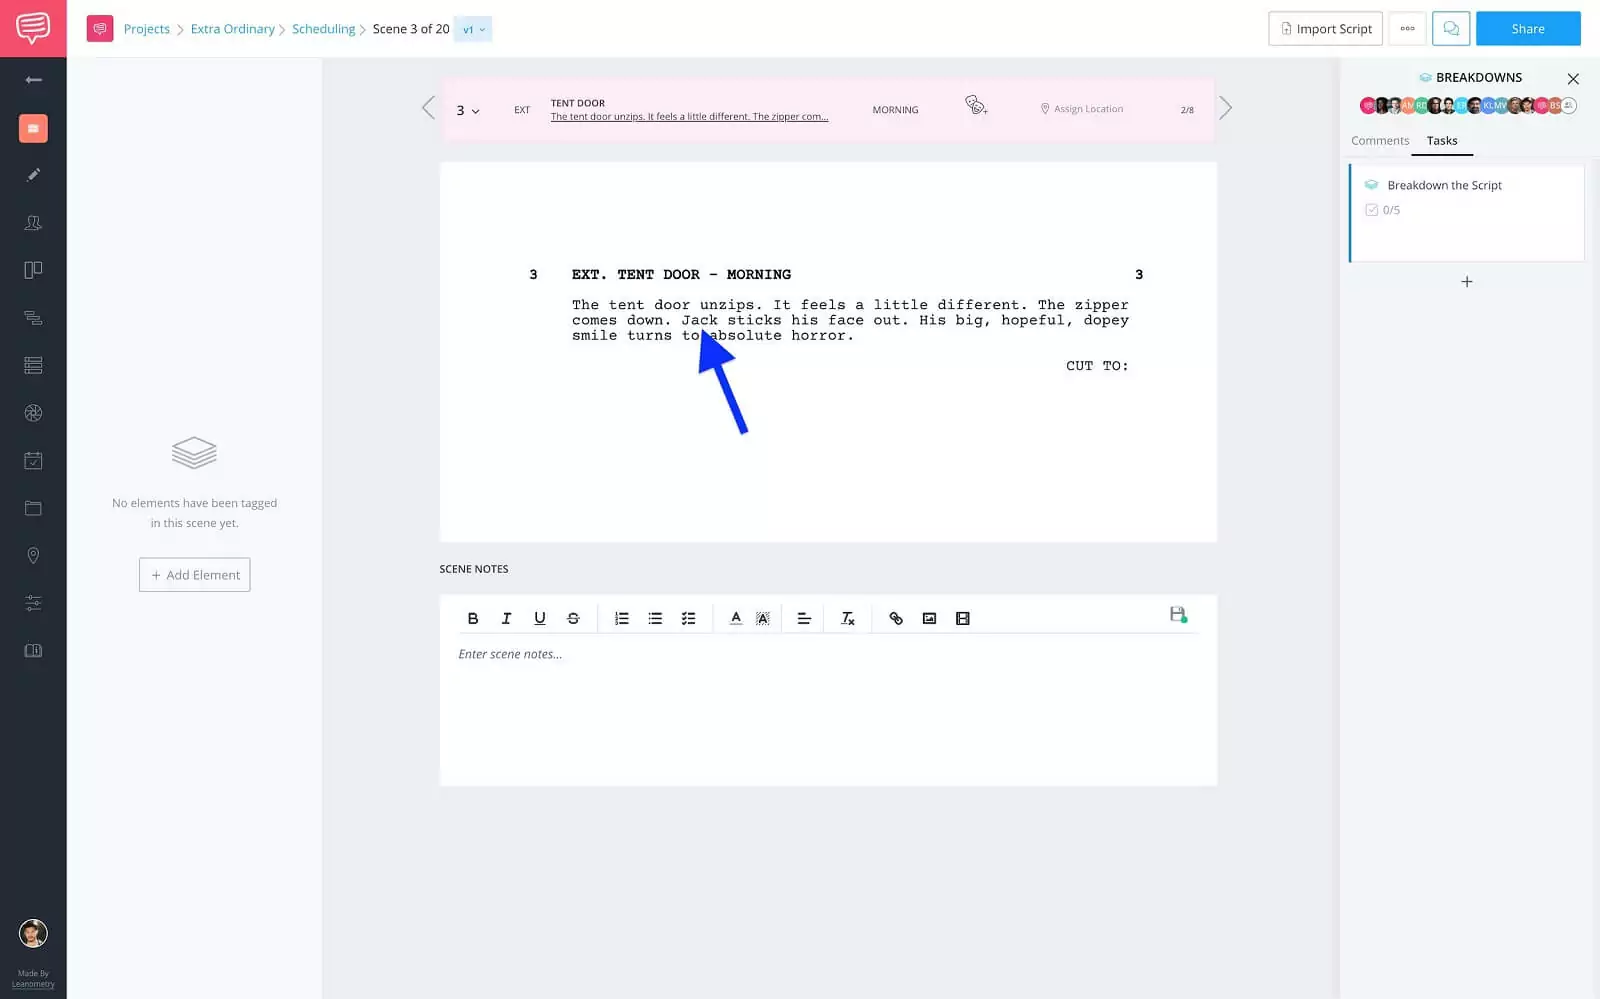
Action lines • Character in scene
This is what is considered a hidden character, and is very important that it is tagged. Can you imagine not having the talent there for the scene. Luckily, since you’re planning everything out you won’t miss it!
Alright, we’ve added tasks to format the shooting script and breakdown the script. Now, let’s jump over and add tasks to the shot lists & storyboards page.
Shot Lists & Storyboards Page
Step 5: Create a shot list
The shot list is where you plan out each shot that you will need to film in order to create your project. It not only informs of what the shot is, but also what equipment, aspect ratio, and really any information that the DP or Cinematographer might need.
So I’m going to add a task card and name it Create a Shot List.
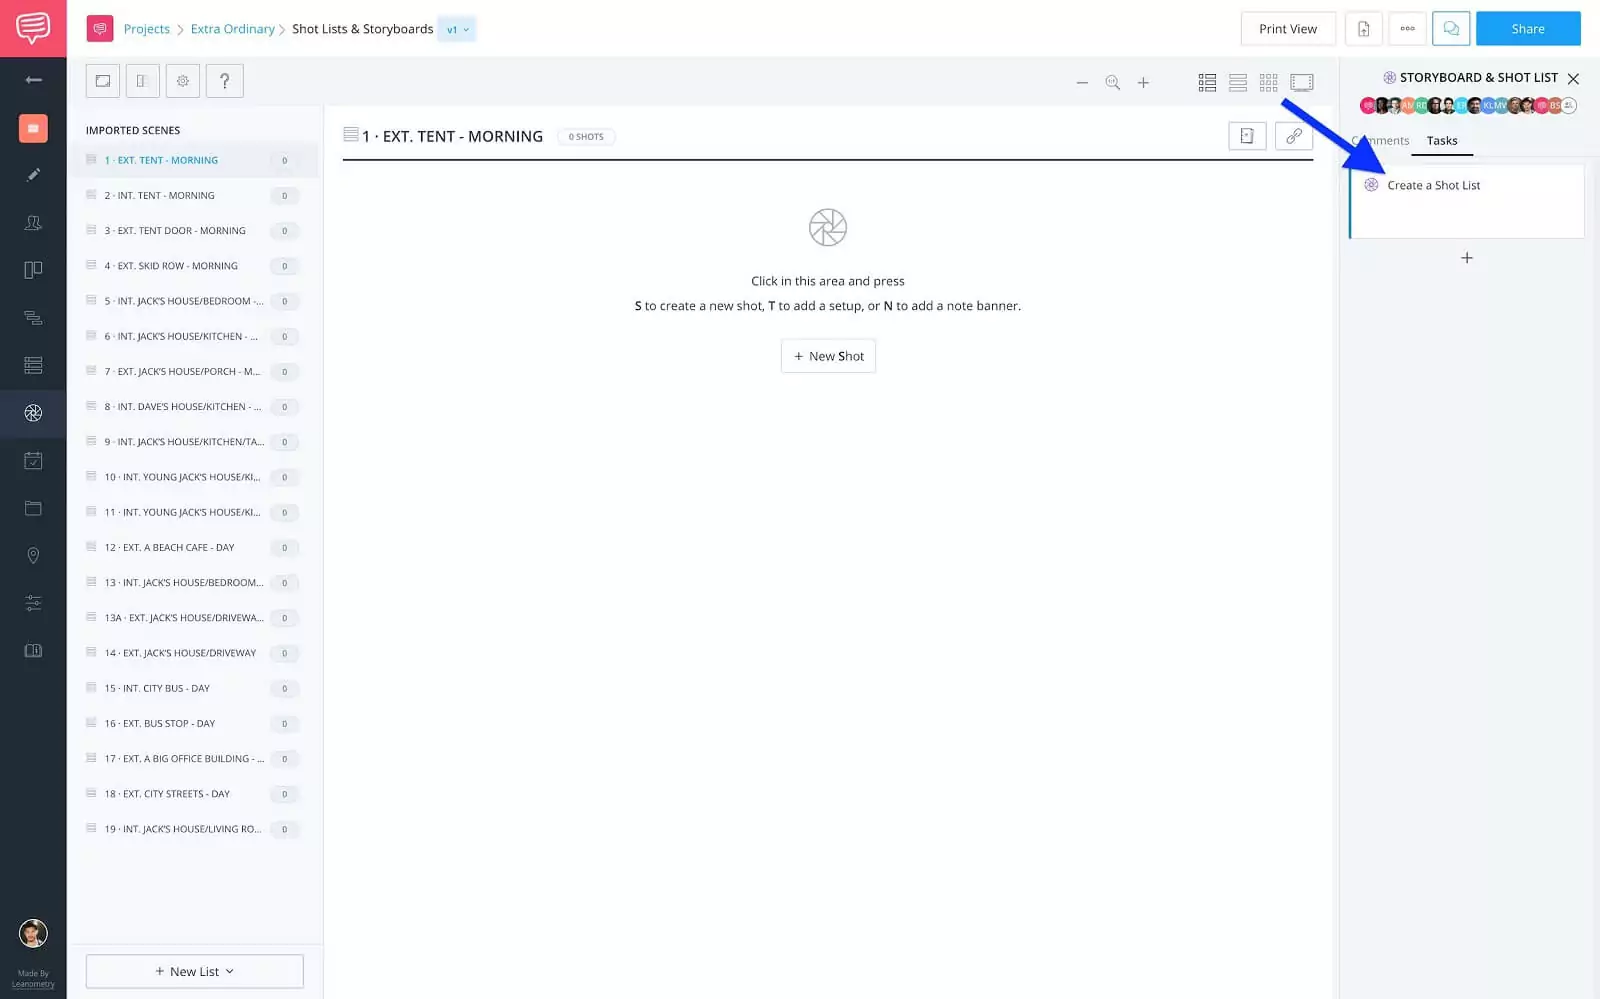
Click + New Task Card • Name task card
I’ll add instructions to the description and list out my tasks.
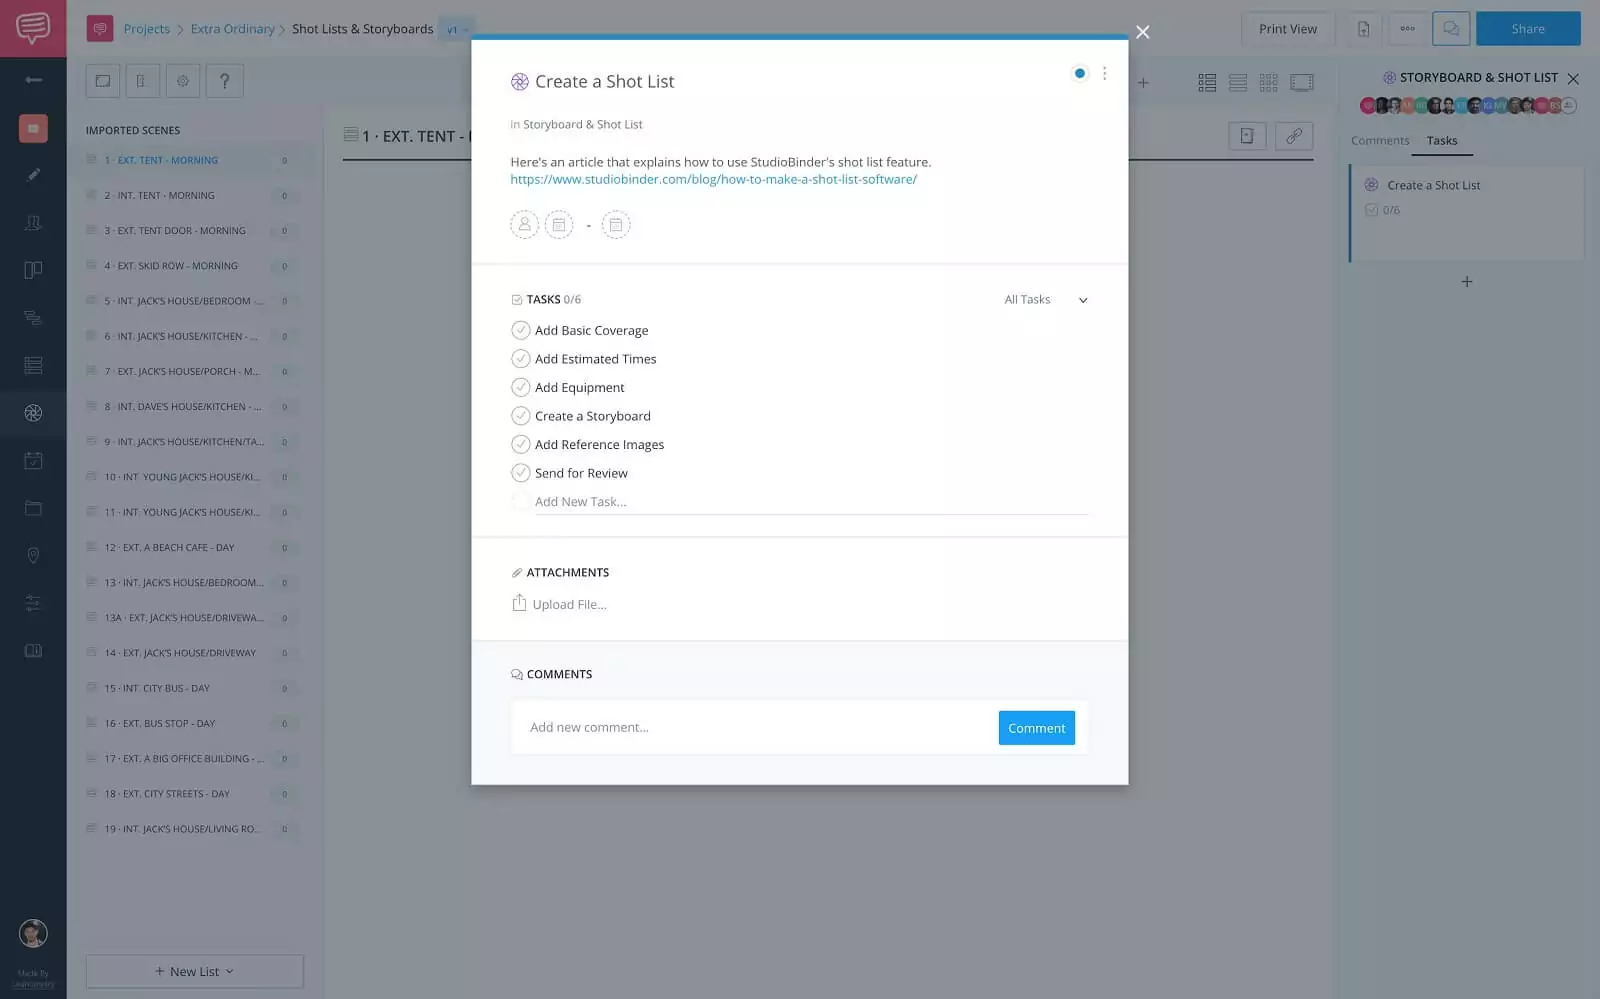
Create a shot list task card • Description and tasks
Creating storyboards used to be a whole other process in and of itself, but StudioBinder combines the Shot List & Storyboard feature into one. This allows you to input info once and view it in different page layouts.
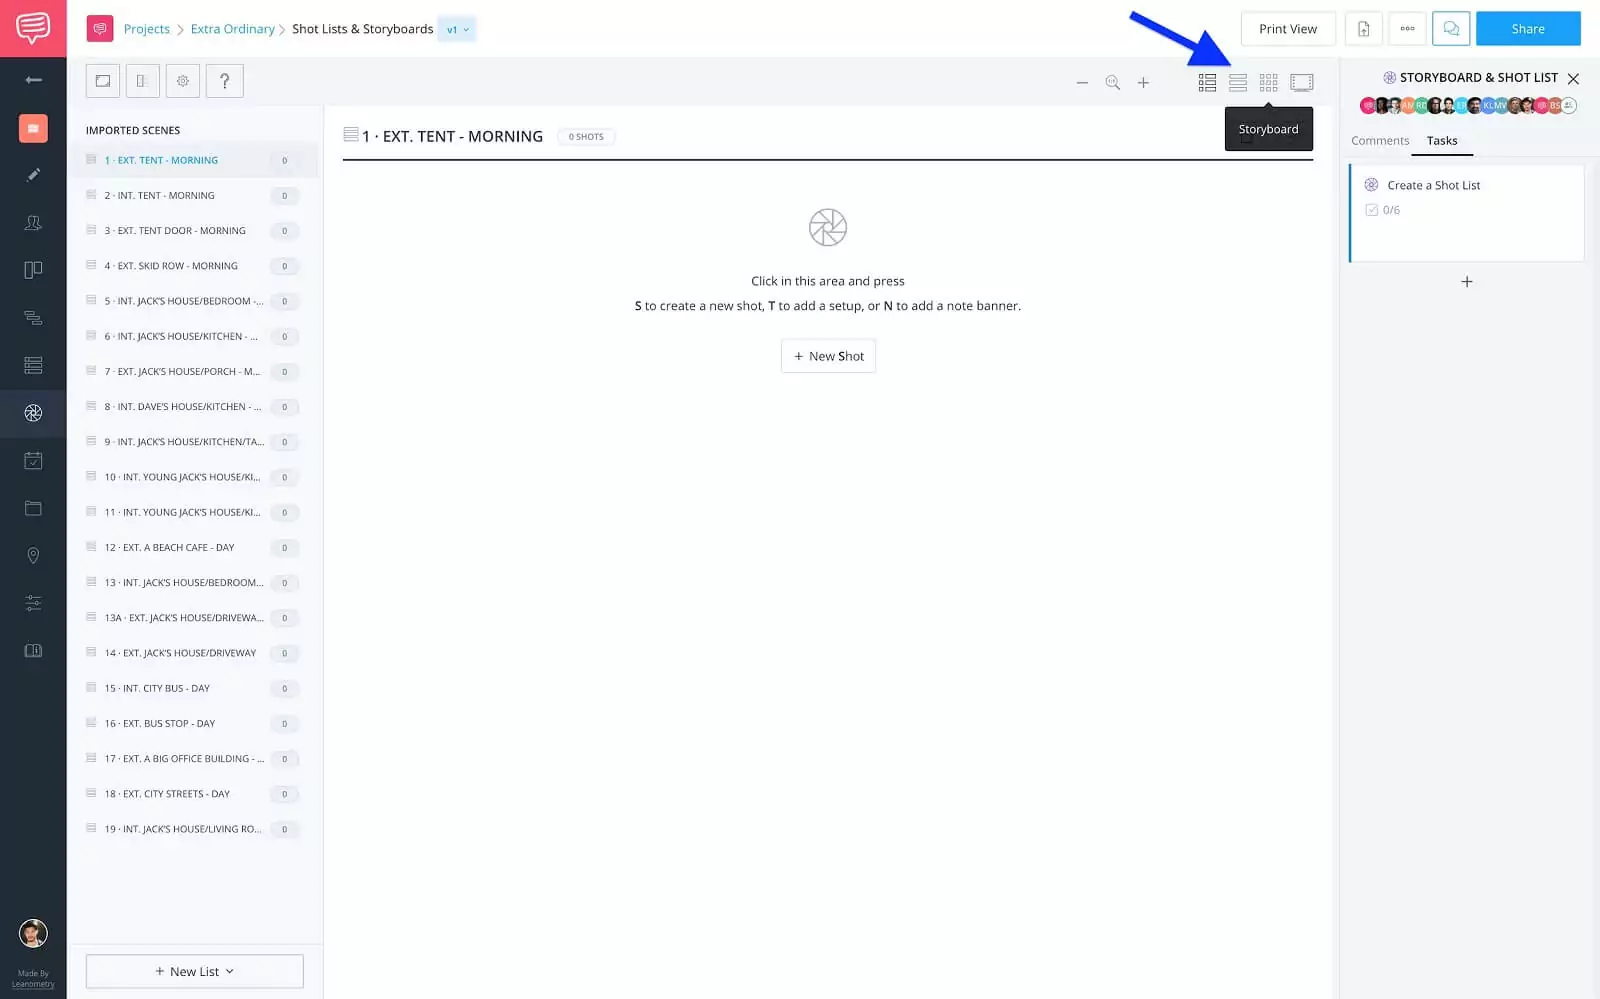
Shot lists & storyboards page • Page layout options
Ok, with tasks to format the script, break it down, and create a shot list, the next step would be to set a shooting schedule.
Shooting Schedule Page
Step 6: Set a shooting schedule
A shooting schedule is a plan that every film, TV show, and commercial follows to make sure the production goes smoothly. It's a simple breakdown of scenes, talent, time, cast, company moves, and day breaks.
All of this information has to be checked and double checked, so having a task card here keeps you informed of what has been done and what you still need to do.
So, I’ll add my task card and name it Set Shooting Schedule...
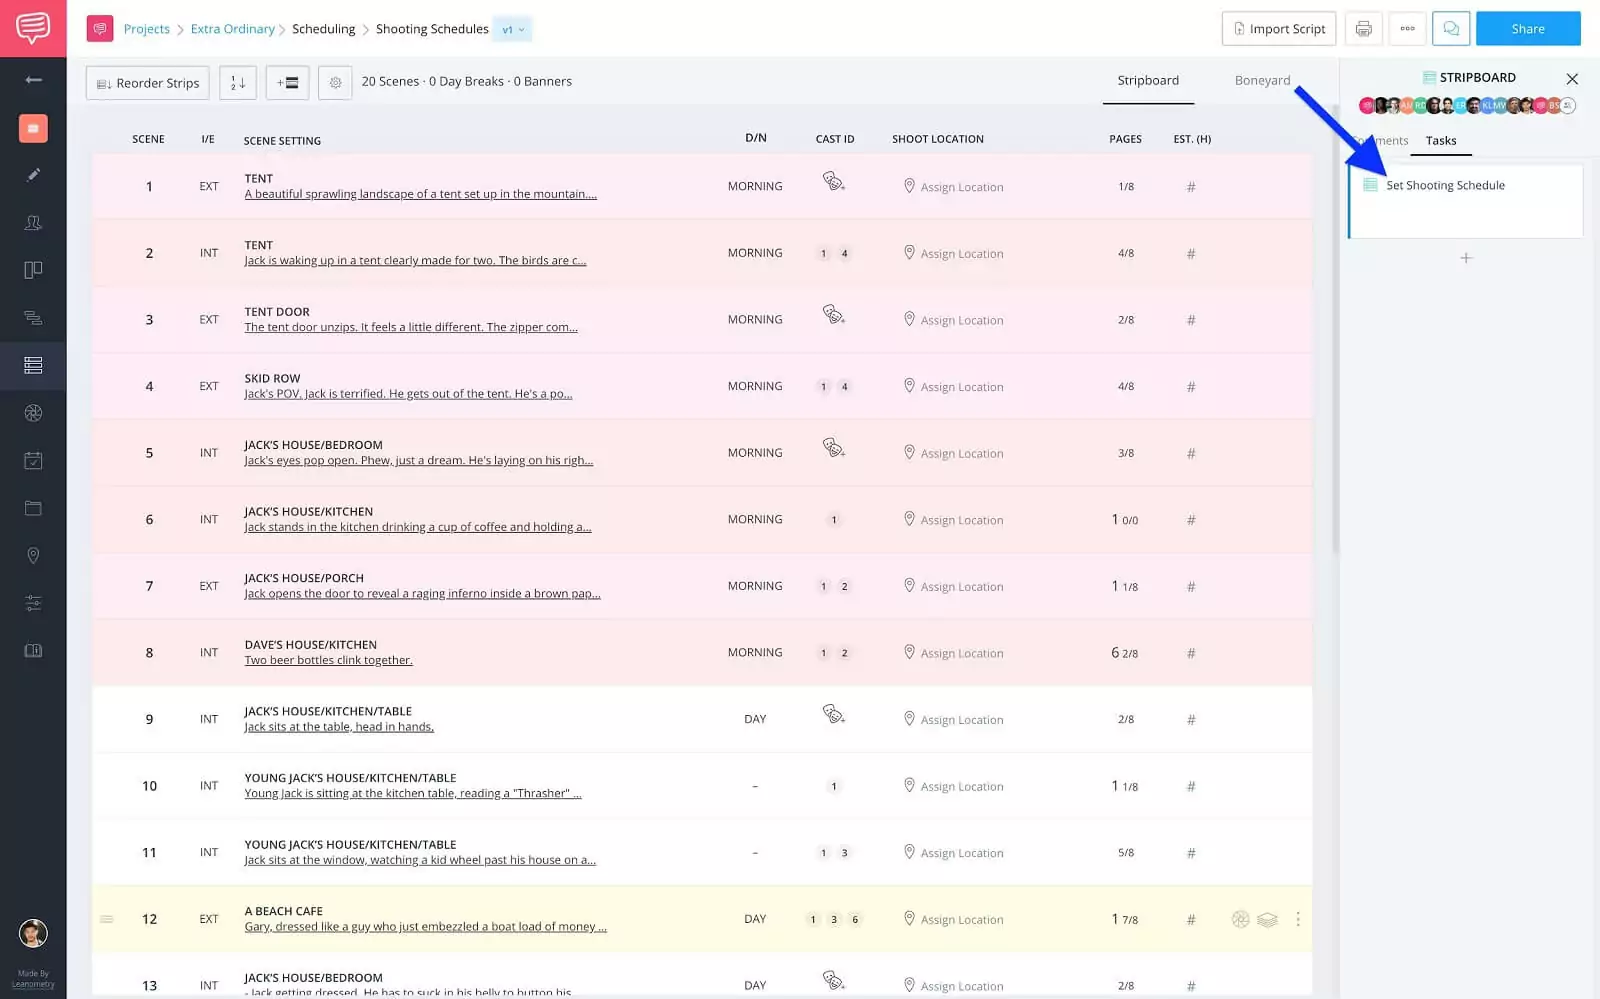
Shooting schedule page • New task card
...then fill in my description and tasks.
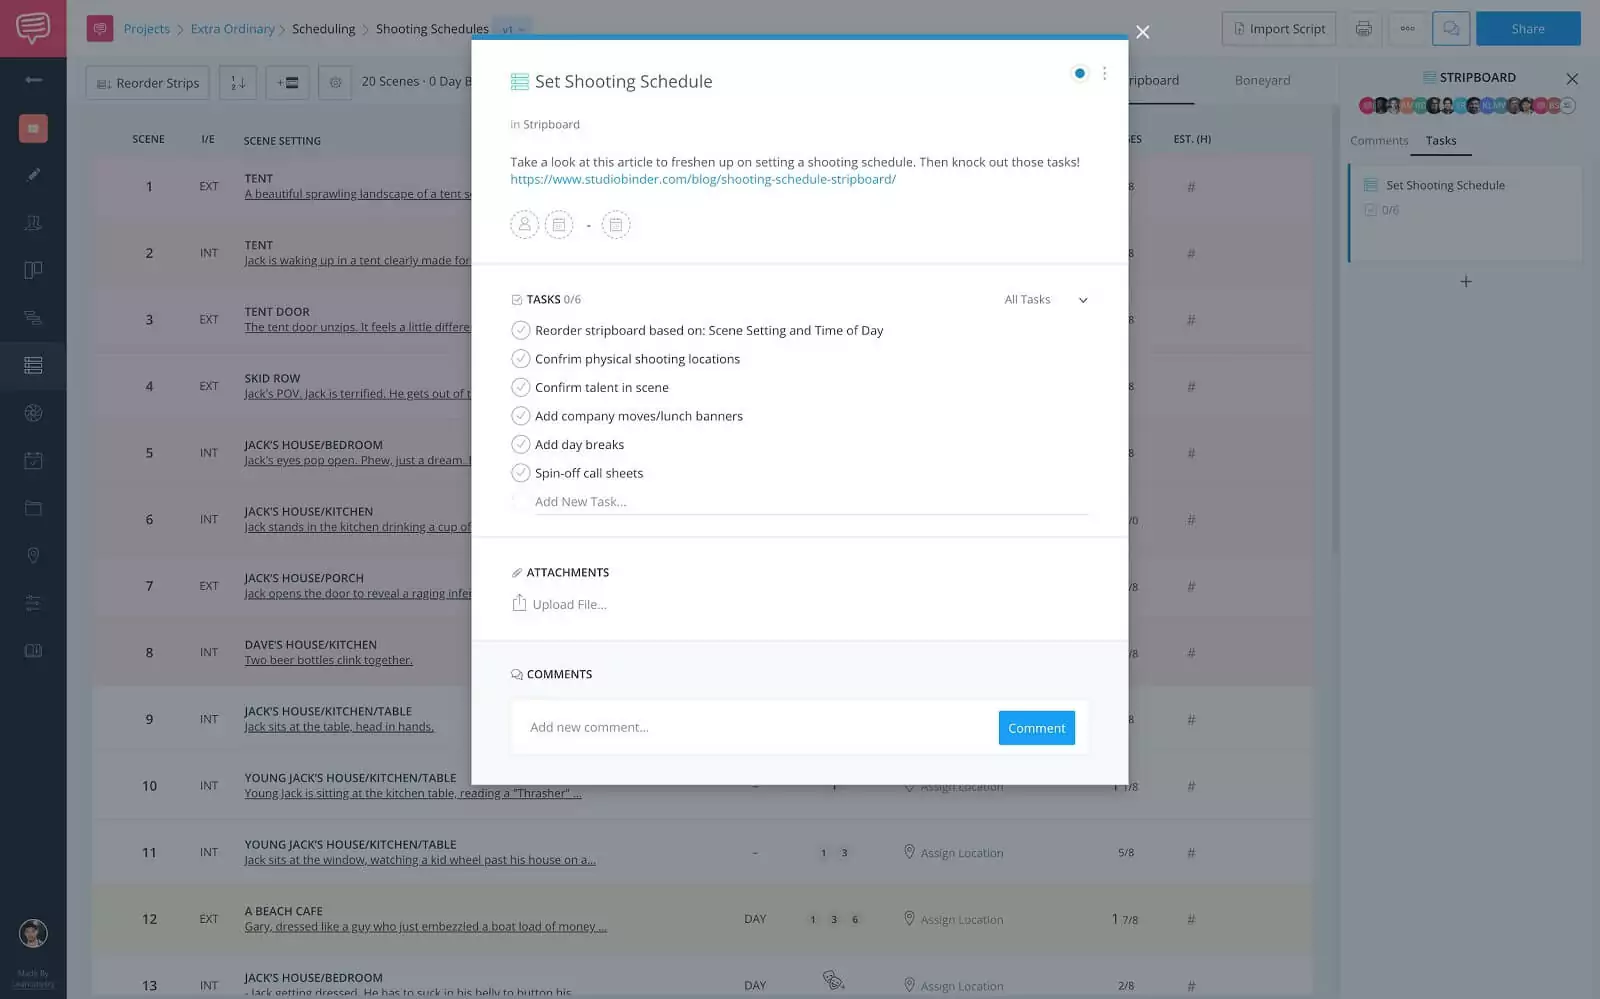
Set shooting schedule task card • Description and tasks
You’ll notice that you are able to tag characters and shooting locations on both the shooting schedule page as well as the breakdowns page. This is because those are extremely important to have tagged. So, having a task on both pages wouldn’t hurt.
Ok, we did it. We have tasks on the major features of our project. Now, you can go back to the workflow page at any time to manage your tasks.
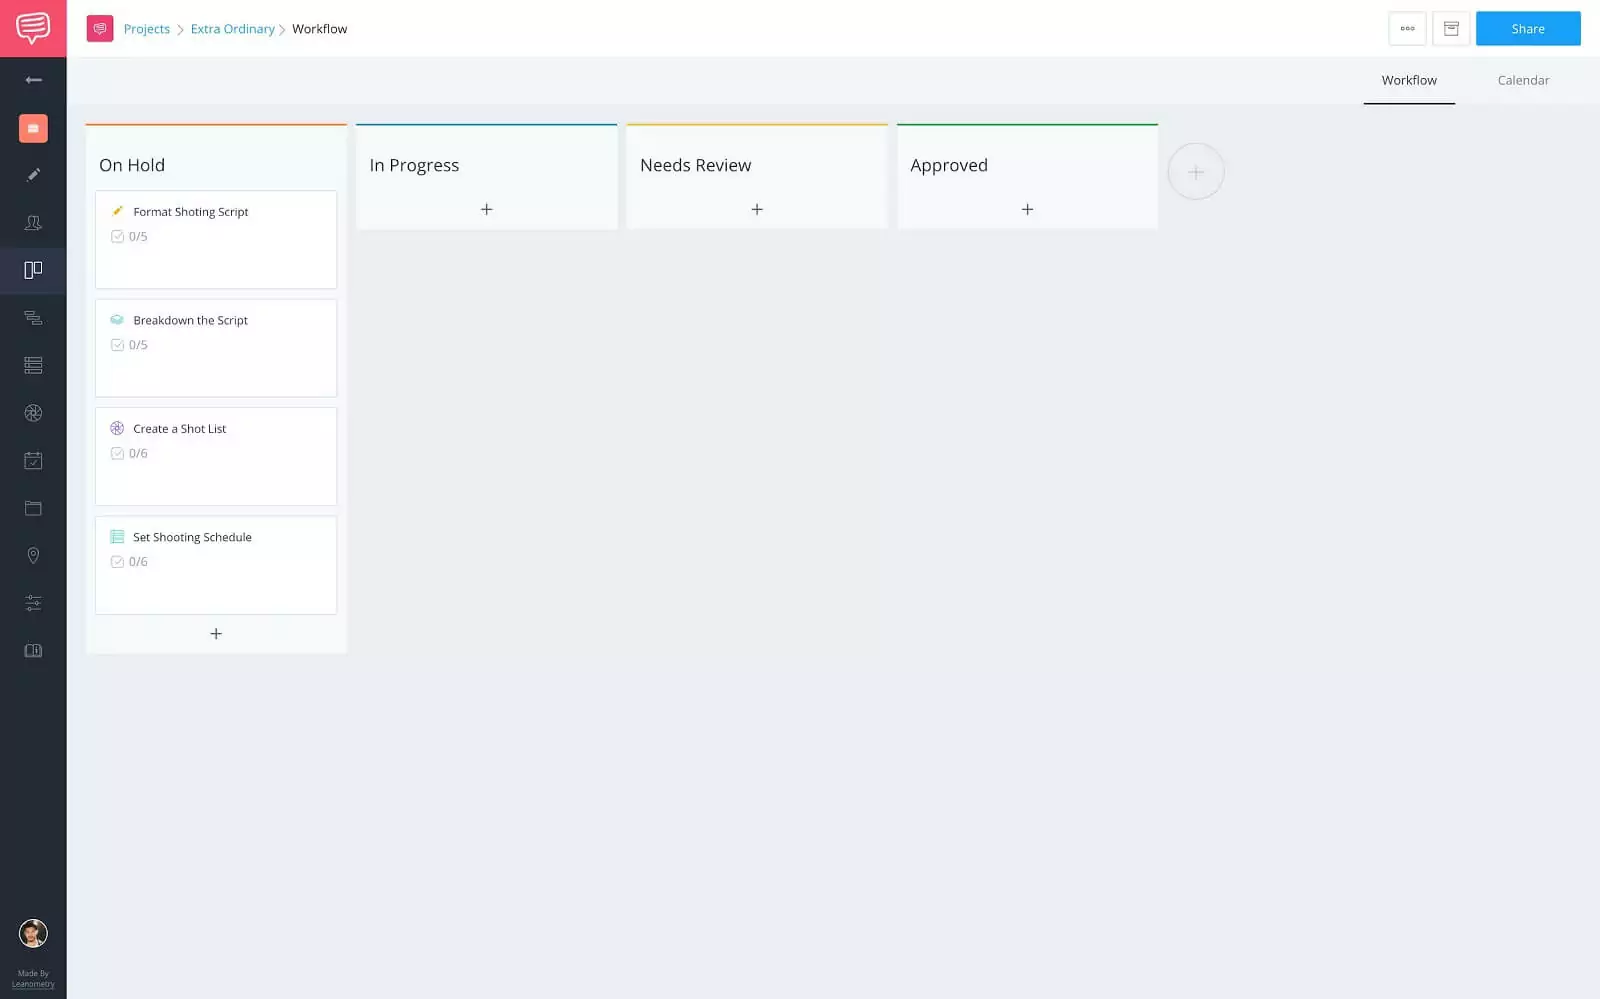
Workflow page • Populated task cards
Like I mentioned earlier, this didn’t cover everything within the Pre-Production process, but this will give you a great starting point. Use the workflow to your advantage, add tasks to pages as you think of them. Just stay productive, be creative and keep on keepin' on.
UP NEXT
Team collaboration in StudioBinder
Ok, you’ve set up the project for success, now, how do you work with your colleagues on the project? Come see how teams can collaborate in StudioBinder. What are some tasks that you leave for yourself or others? Let us know in the comments!
