The days of Avid Media Composer serving as the industry’s only standard video editing program are coming to a close. With David Fincher and Coen Brothers having turned to Adobe Premiere Pro for their post-production needs, the barrier to entry of professional-level video editing is shrinking. There are many reasons why one would want to reverse a clip in Premiere and, luckily, it is a fairly simple effect to pull off. We’ll walk you through how to reverse a clip in Premiere Pro step-by-step.
Premiere Pro reverse clip
1. Import your footage
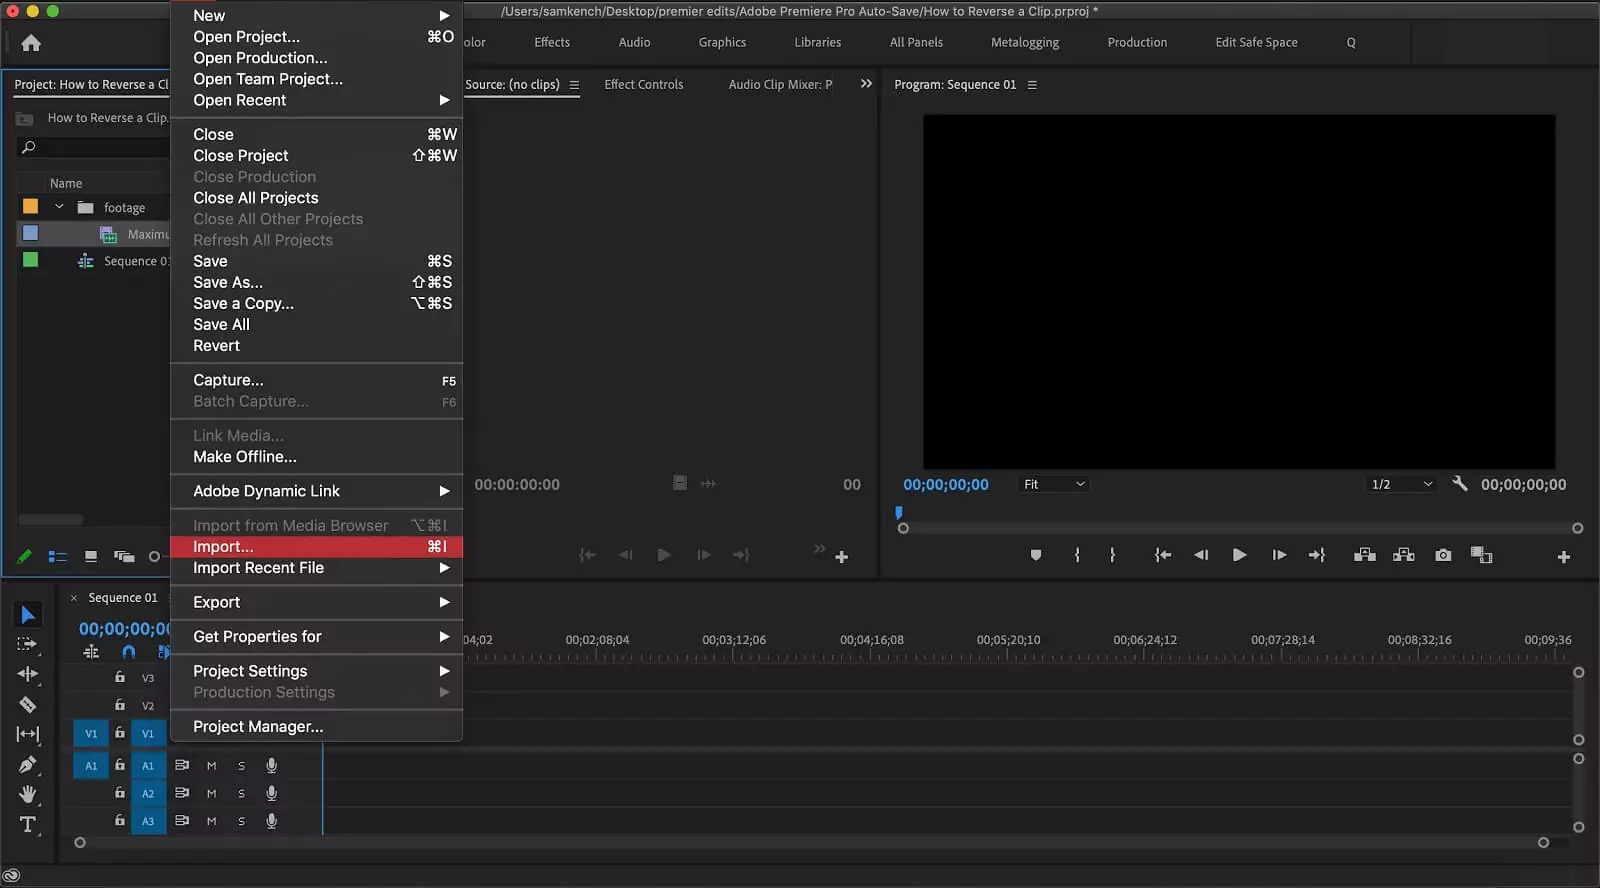
Once Adobe Premiere Pro is open and you have created a new sequence, the first step to reverse a clip in Premiere Pro is to import the footage that you wish to reverse. You can do this by either clicking “File” → “Import” or by simply dragging the video file(s) into your project bin in Premiere.
Reverse video in Premiere
For a more detailed explanation of how to best import and organize your video footage, check out the video below.
Joe Allam shares best practices for importing into Premiere
Once your chosen clip you have chosen to reverse in Premiere has been imported, you are ready to make your selection and prepare it for the timeline.
How to reverse a clip in Adobe Premiere Pro
2. Prepare your selection
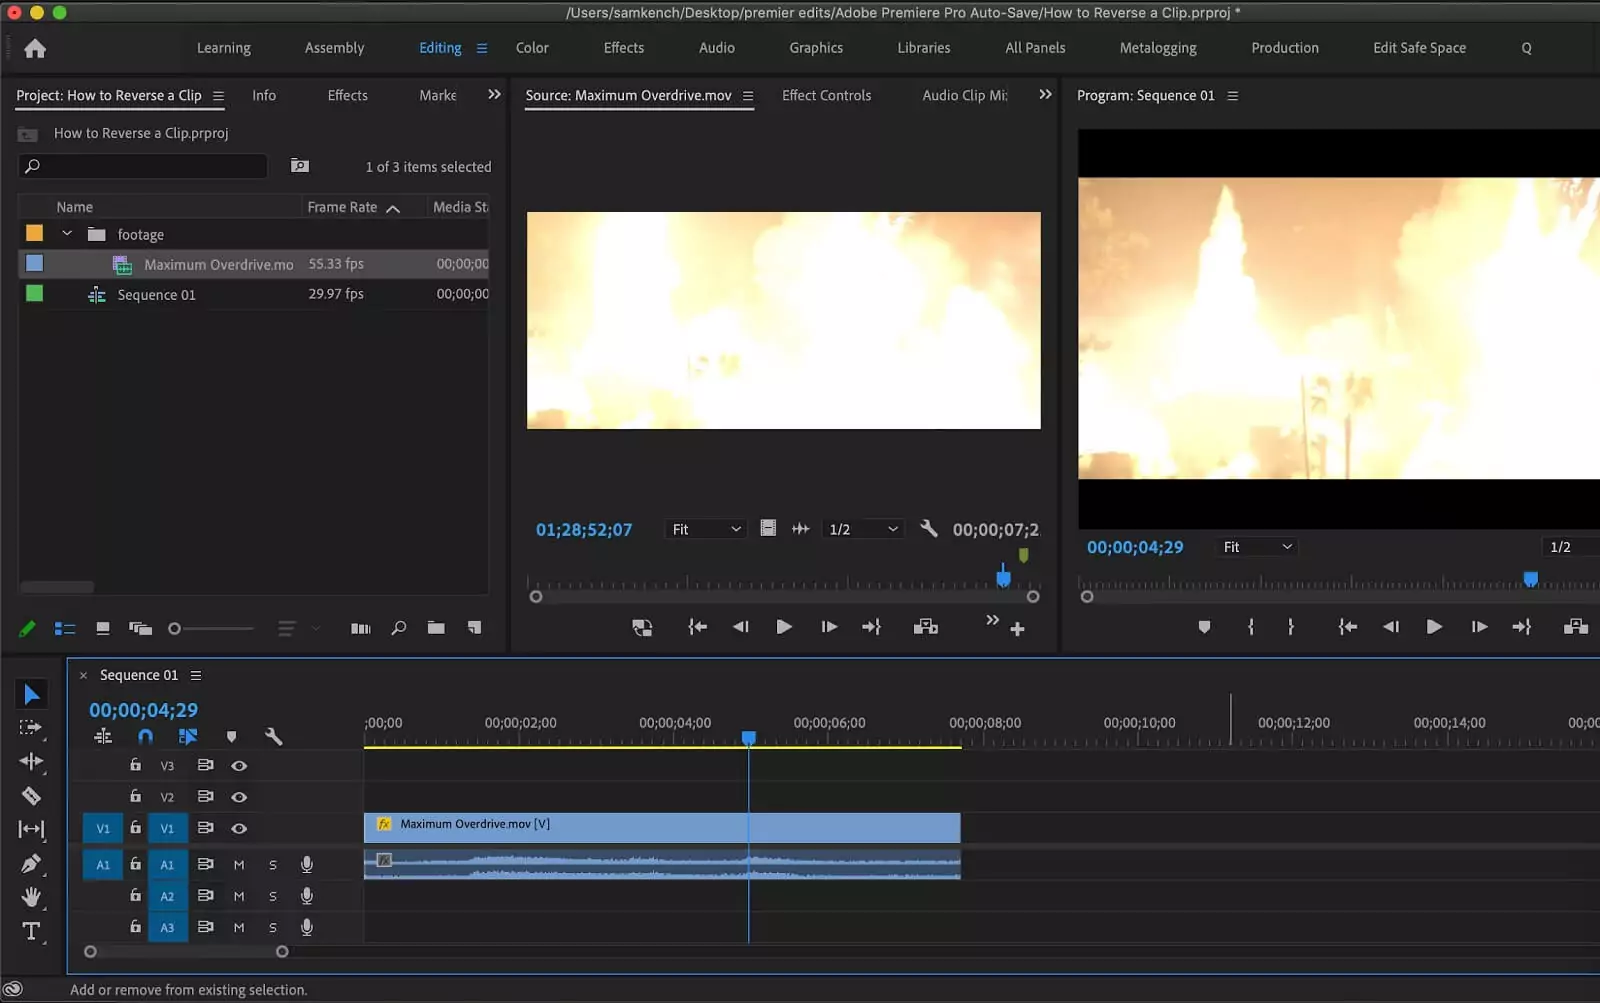
The next step to reverse a clip in Premiere is to get the footage onto the timeline. If you plan to reverse the entire clip, then you can simply drag it into the timeline or use the keyboard shortcuts “,” or “.”.
How to reverse a clip in Adobe Premiere
For a quick guide to keyboard shortcuts that may prove helpful when attempting to reverse a clip in Premiere Pro, take a look at the below video.
Keyboard shortcuts to speed up your editing process
If you only want a portion of the clip to be reversed, then be sure to separate that segment from the rest of the video. You can do this by setting in and out points with the “I” and “O” keys, or by splitting your clip into pieces.
Splitting a clip can be done in a number of ways with the easiest being to park the play head where you want the cut to go, then holding “command” and pressing “K,” if you are on editing on a Mac, or “Ctrl+K” if you are editing on windows. Refer to our guide if you need help in choosing the best laptop for video editing.
Adobe Premiere Pro reverse clip
3. Reverse it!
Now all that’s left to do is reverse the clip in Premiere. Adobe makes this a pretty easy effect to pull off and allows plenty of room to tweak variables and experiment in order to fine-tune your results.
Reverse clip Premiere Pro
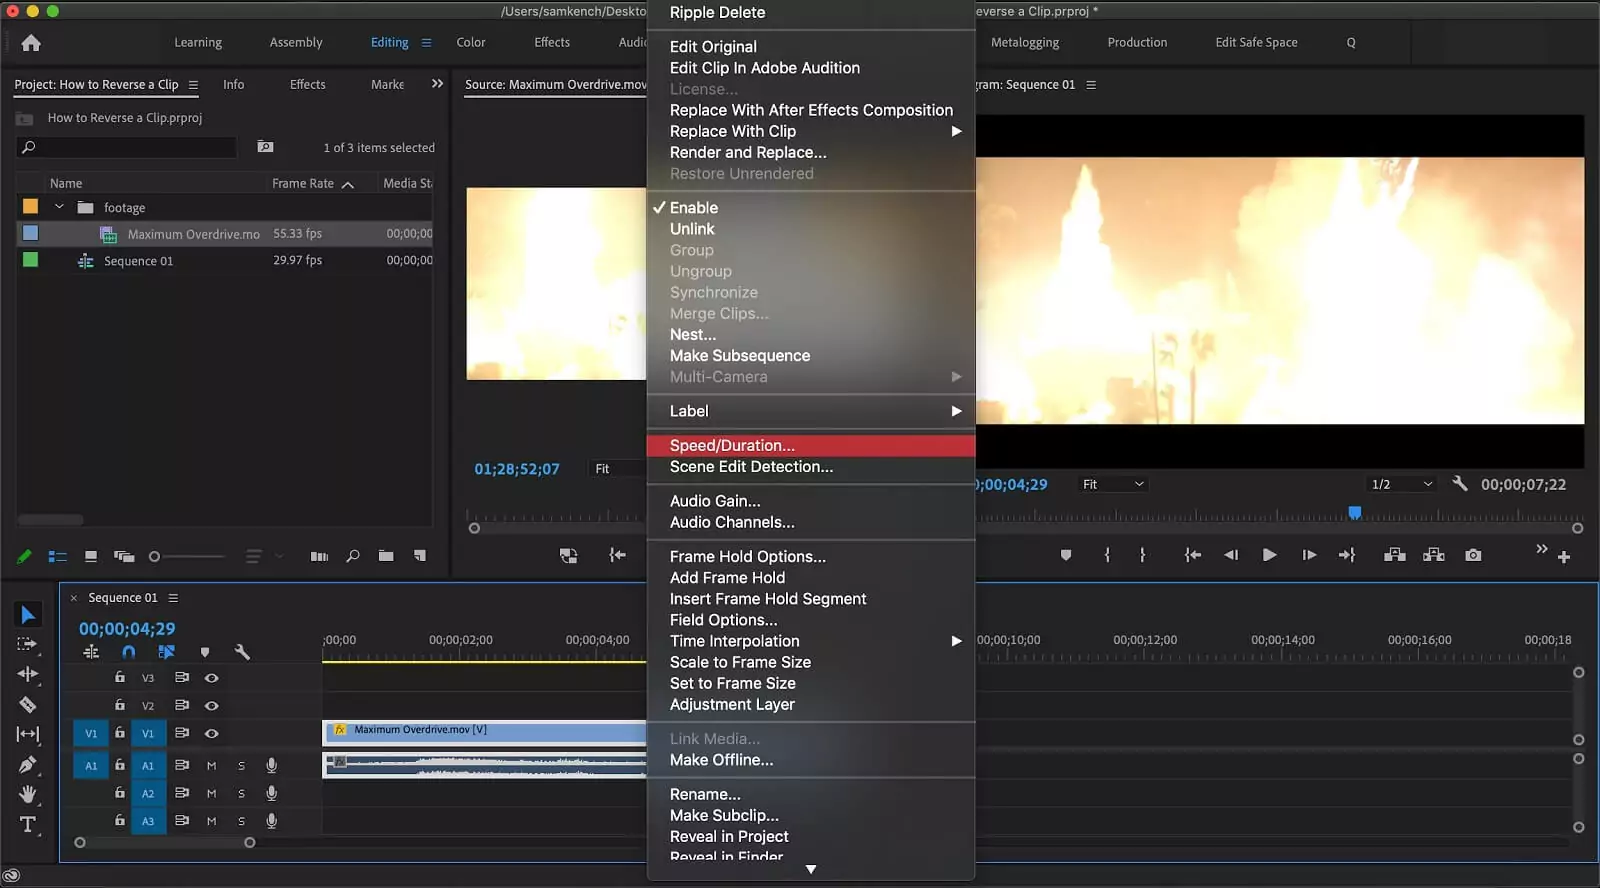
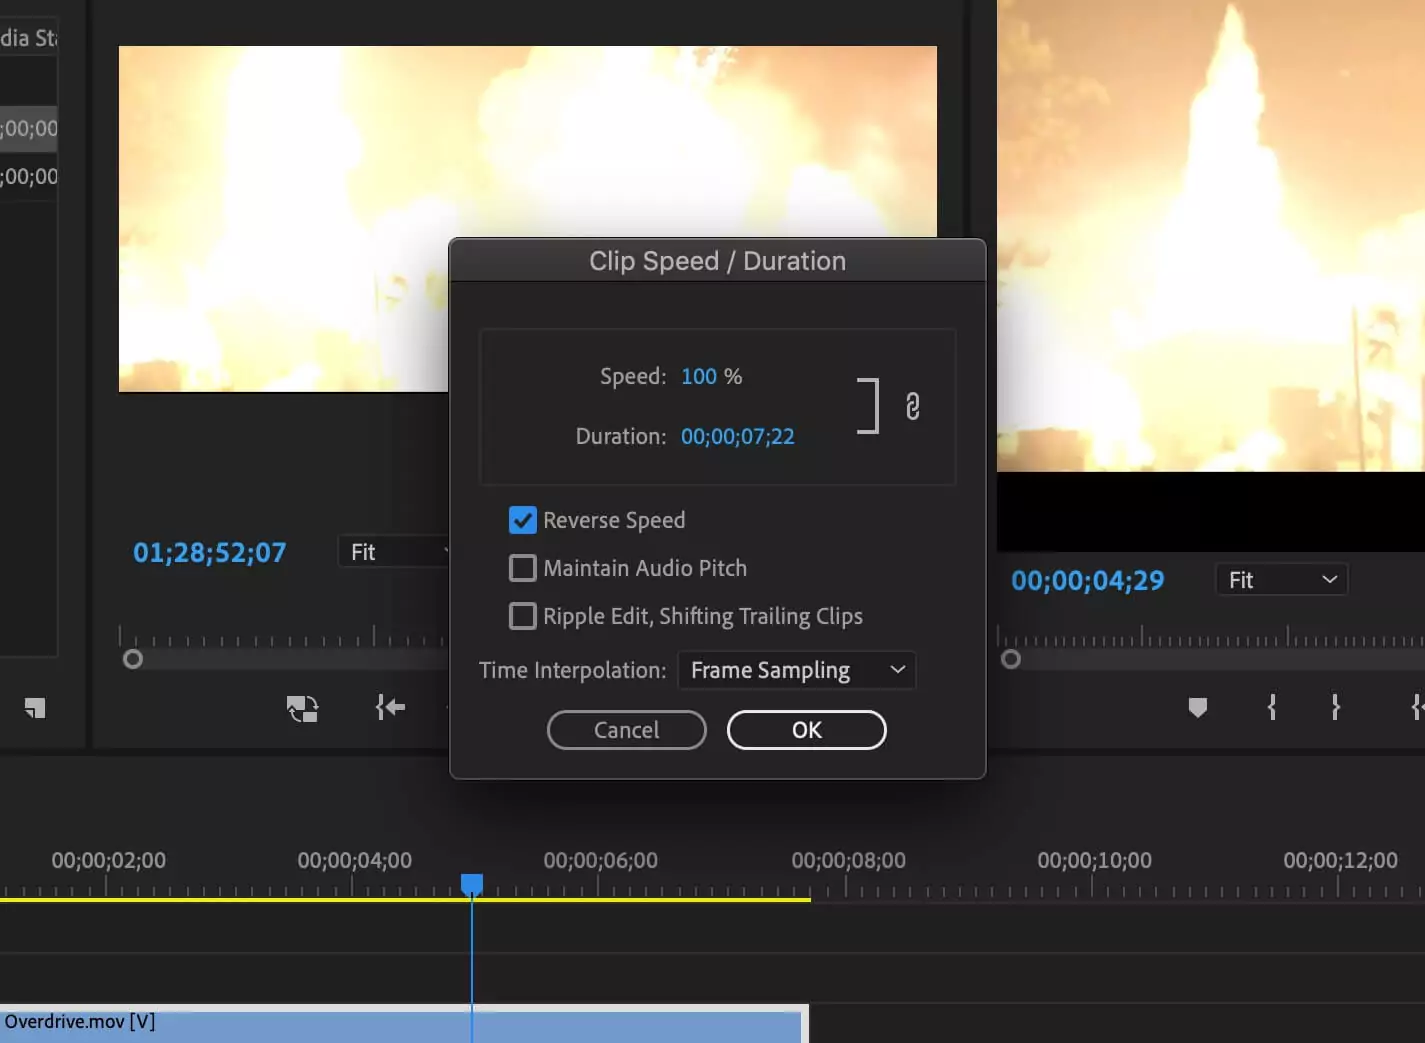
To reverse a clip in Premiere Pro, right-click on it and select the option that says “Speed/Duration.” A window will pop up with a checkbox that reads “Reverse Speed.” Checking this box will reverse your clip, it’s as simple as that.
You can alter the speed of your clip from this same pop-up box. If you want your clip reversed and sped up/slowed down, you can do both at the same time. Along with neat tricks like reversing video, using slow motion can also be a great way to enhance moments in your videos.
Premiere pro reverse a clip
And if you want the associated audio with the clip to sound relatively normal after altering the speed, be sure to check the box labeled “Maintain Audio Pitch.” Keep in mind that this only works up to a certain point and then the audio will be compromised. The best strategy here is to plan ahead in your shot list and shoot with your intended frame rate.
UP NEXT
Davinci Resolve 16 Breakdown
So that was how to reverse a clip in Premiere Pro. If you are interested in learning about a different editing program, check out our breakdown of Davinci Resolve 16. Davinci Resolve has become one of the main competitors in the home editing market. Read on to learn about the pricing and features of Resolve and to see how it stacks up beside the other top editing programs.
Up Next: Resolve Breakdown →
Share your vision with elegant shot lists and storyboards.
Create robust and customizable shot lists. Upload images to make storyboards and slideshows.
