Time equals change, and unless your entire script takes place over a single day or in some alternate universe where time doesn’t exist, you’re going to have multiple days, months, or even years to account for. Storylines are not always written in chronological order, and rarely are they shot in order. So how are you supposed to keep track of all of this? Story days. By marking story days throughout the script, you have a quick reference of when you are in the story. Follow along as we go step-by-step on how to mark story days in your script.
Introducing Story Days
First, what are story days?
Before we get to the nitty gritty of it all, let’s take a minute to really understand what story days are and why they are important.
Story Days Definition
What are story days?
Story days are the timeline of your script. When a scene goes from one day in the story to the next (NIGHT then DAY), this is considered a new story day. Also known as script days or dramatic days, they are the best friend of the Script Supervisor. They are used to inform the various production departments of vital continuity information. As not only will characters' clothes change with each story day, but there may be other physical changes, too.
What departments are typically affected by story days?
- Script Supervisor
- Art Department
- Props
- Costume
- Hair & Make up
If you’re still on the fence, script supervisor Tim Hunt, is here to tell you of the importance of story days.
Script supervisor Tim Hunt • What is a story day?
The best way to mark your story days is within the script breakdown. During the script breakdown process, you'll be tagging elements like props, costumes, extras, and more. The way to keep everything organized is to mark story days at the same time.
Here's a quick refresher on how script breakdowns work:
StudioBinder Script Breakdown • Subscribe on YouTube
Alright, now that we’re all experts on story days, let’s get started marking them in our script.
Element Categories
Step 1: Create an element category
Not every production is created equally. Being as such, the predefined list of element categories may or may not suit your specific needs. If a category doesn’t exist for an element that you need, you simply create a custom category.
So, let’s create a custom Story Days element category. The great thing about tagging them as script elements is that once you’re finished you have a fully populated report ready to go. We’ll get to that a bit later, on to the Elements page!
Using the navigation sidebar, click Elements in the scheduling menu.
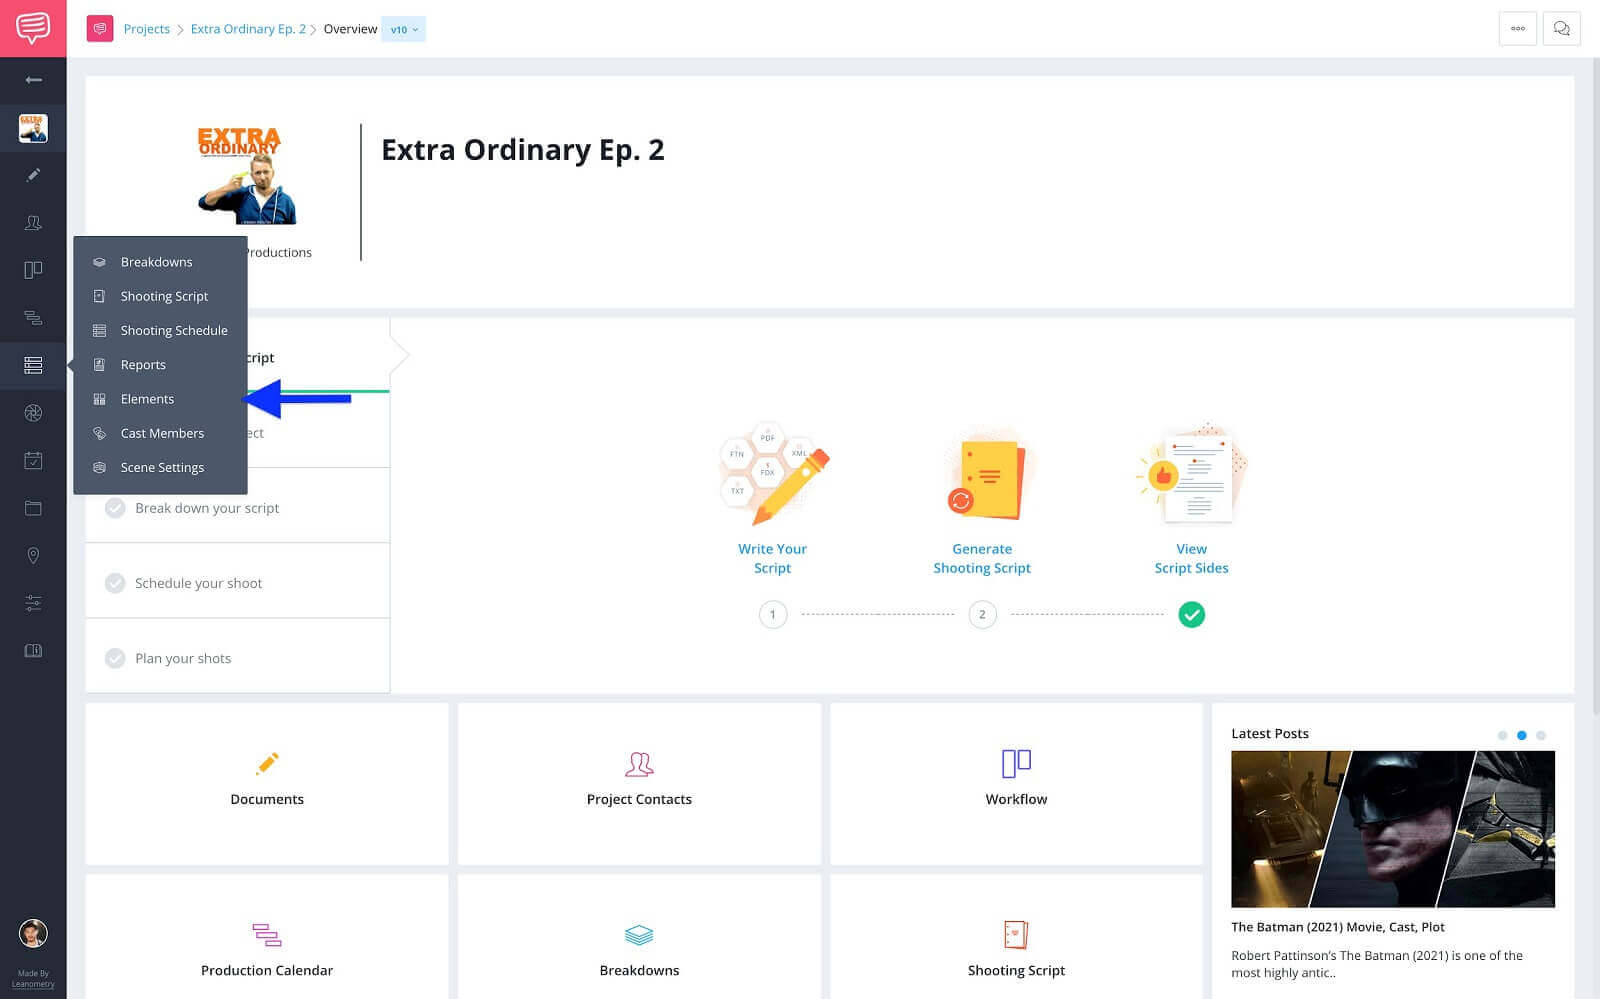
Navigation: scheduling menu • Navigate to elements
Here on the elements page you’ll see all of the pre-populated element categories that will be available when creating your script breakdown.
To create a custom category click +New Category:
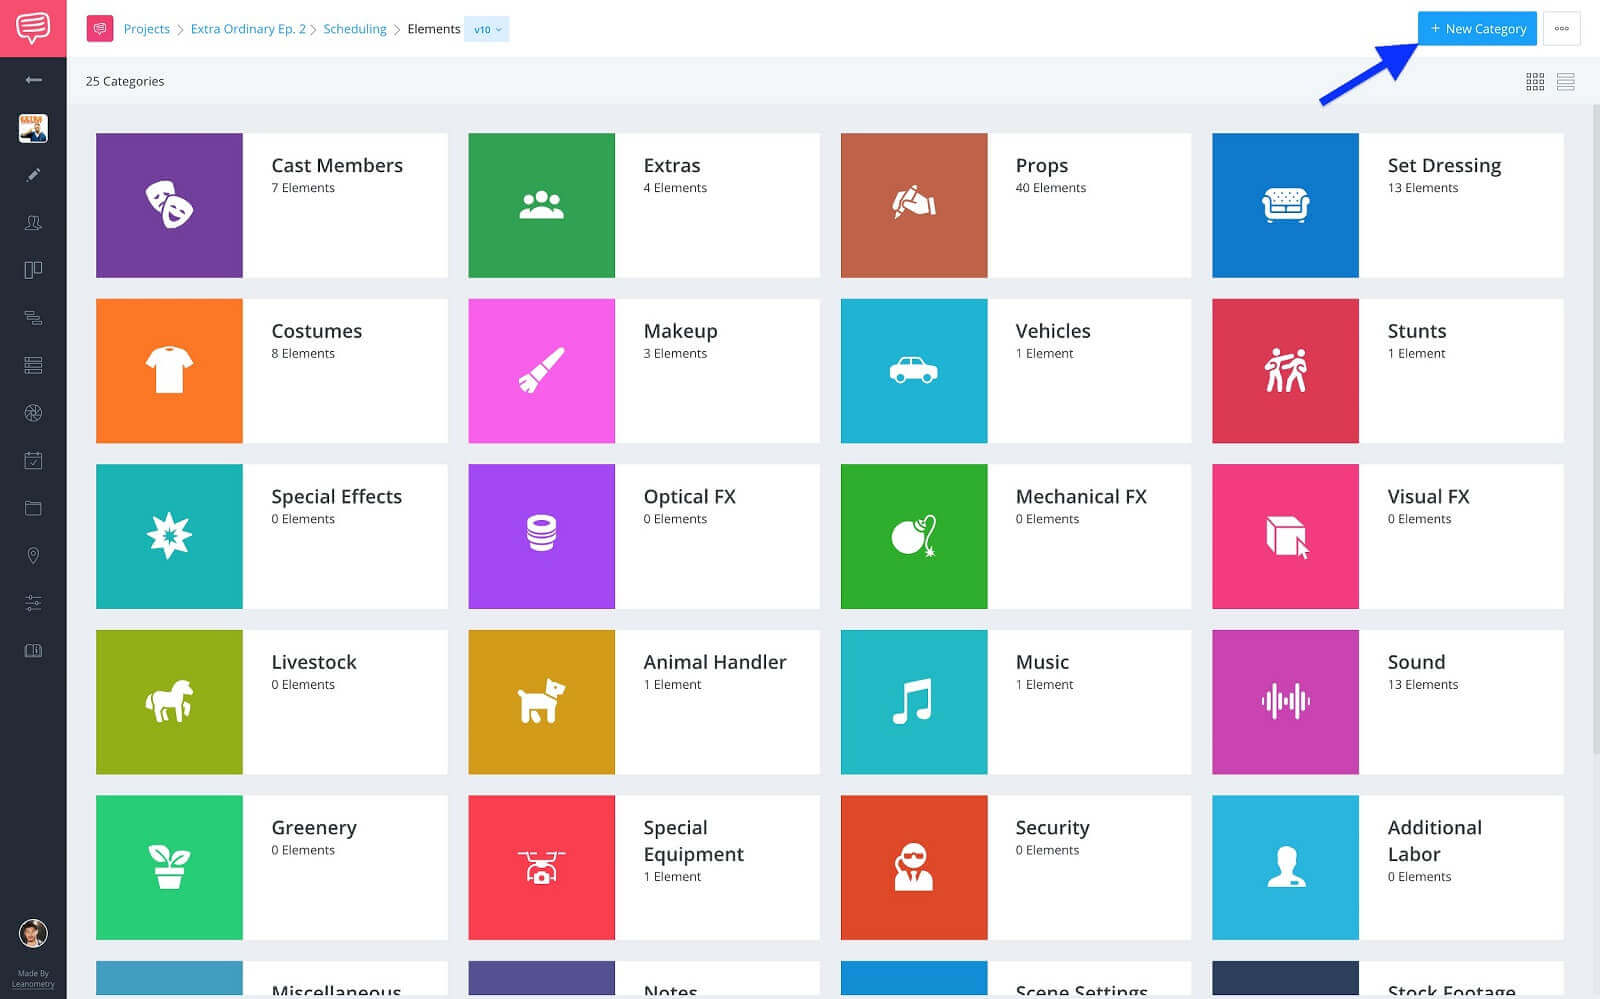
Breakdown element categories • Click +New Element
In the create new category pop-up, type “Story Days” in the field, and assign a custom color to it.
Once the color is locked in, click create.
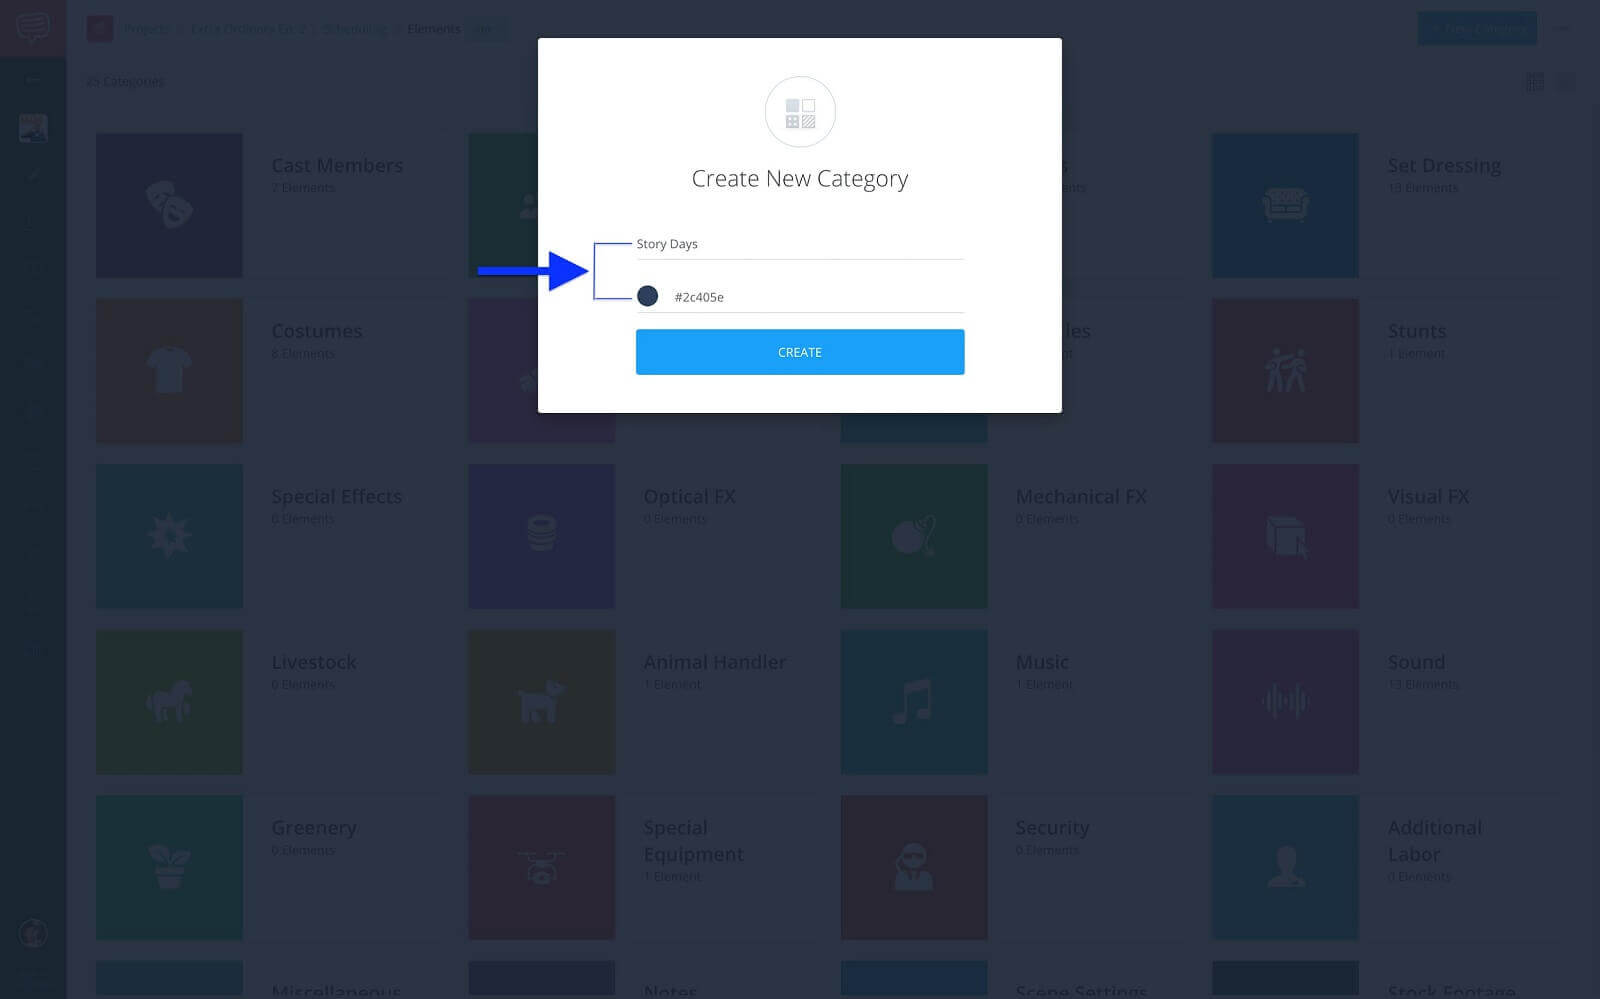
Create new category box • Assign category name, color
To confirm the category has indeed been created, scroll down to the bottom of the elements page.
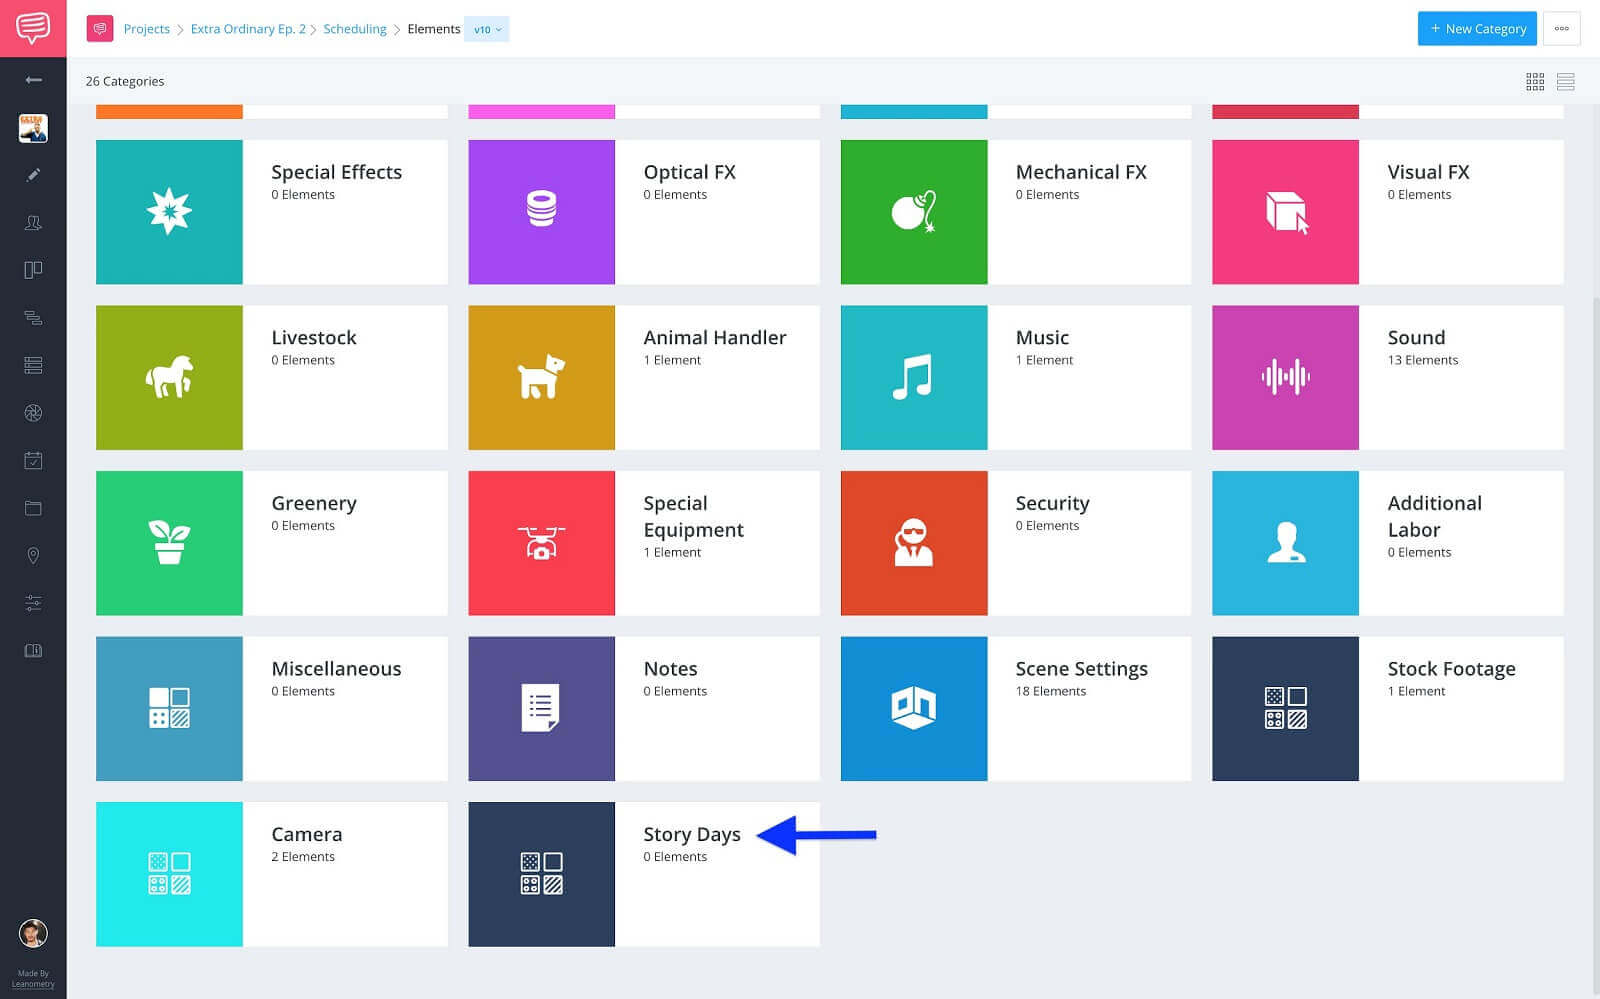
Breakdown element categories • Story days category
With the category created, it’s time to start marking those days. Head over to the Breakdowns page.
Script Breakdown
Step 2: Tag story days
Now, for the story days to serve their purpose, we need to tag them as elements in the script. Just like tagging any other element we’ll be using the breakdowns page to tag our story days.
Using the navigation sidebar, click Breakdowns in the scheduling menu:
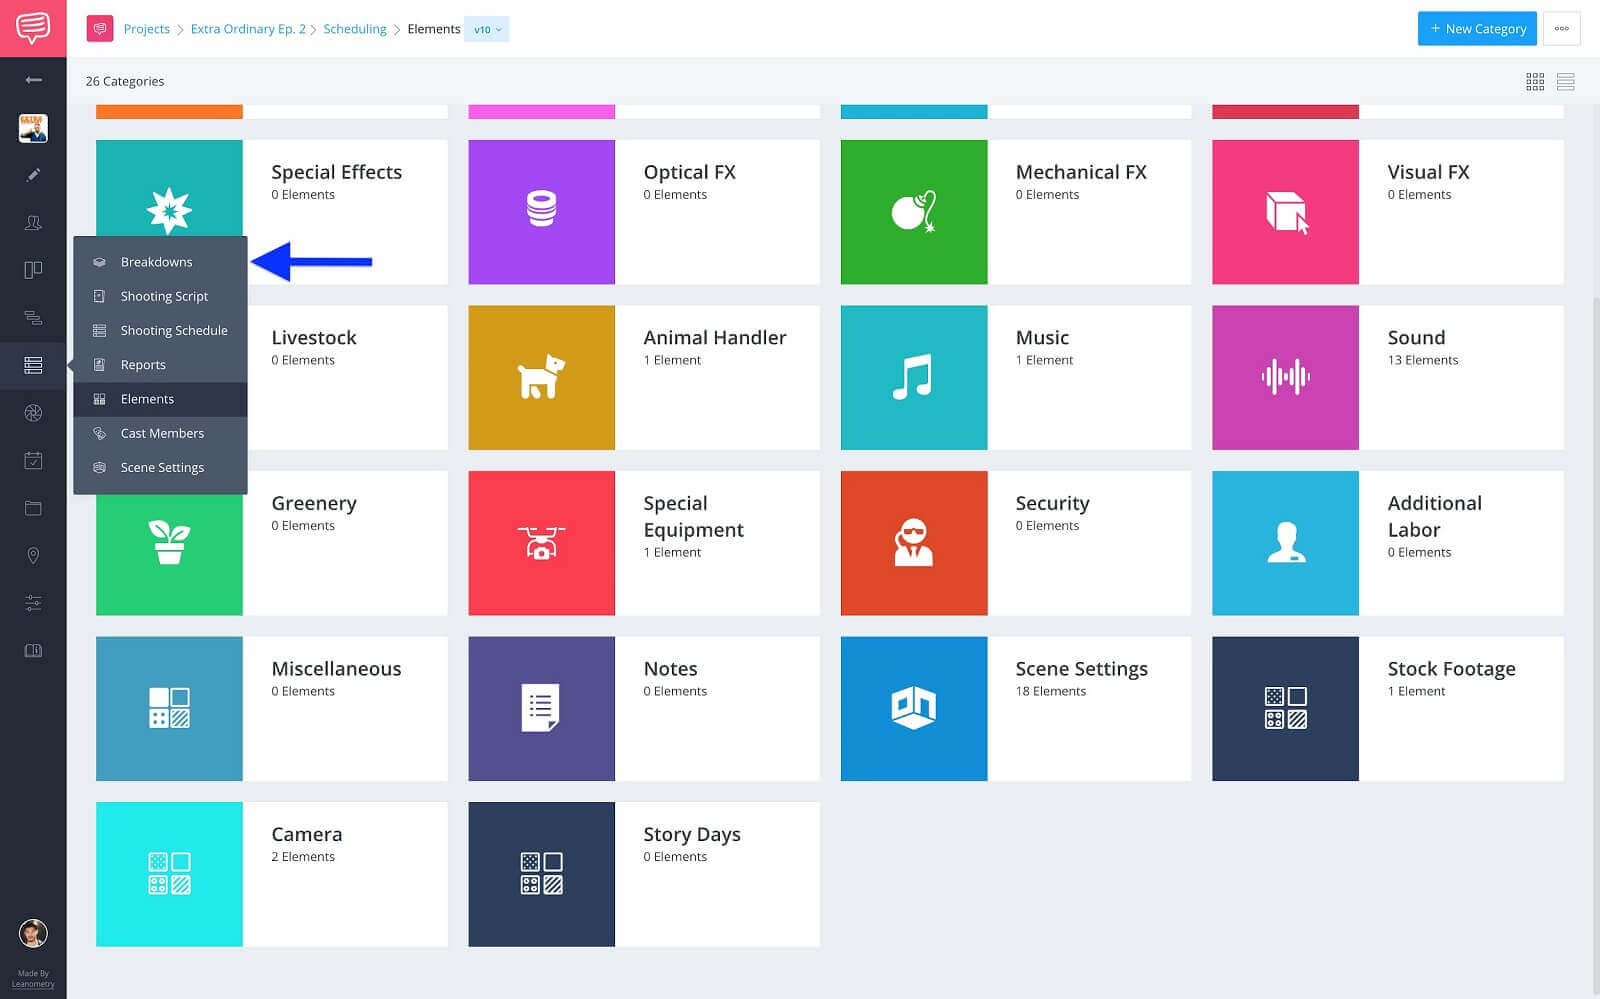
Navigation: scheduling menu • Click breakdowns
You might be wondering how you’re going tag the story day if there isn’t any text to tag in the script. This is where you would use the sidebar to the left of the scene.
Pro tip:
Use the elements sidebar to tag any elements that don’t physically appear in the script. This includes characters, props, set dressing, or anything that is needed on set for that scene.
Using the sidebar, click +Add New Element:
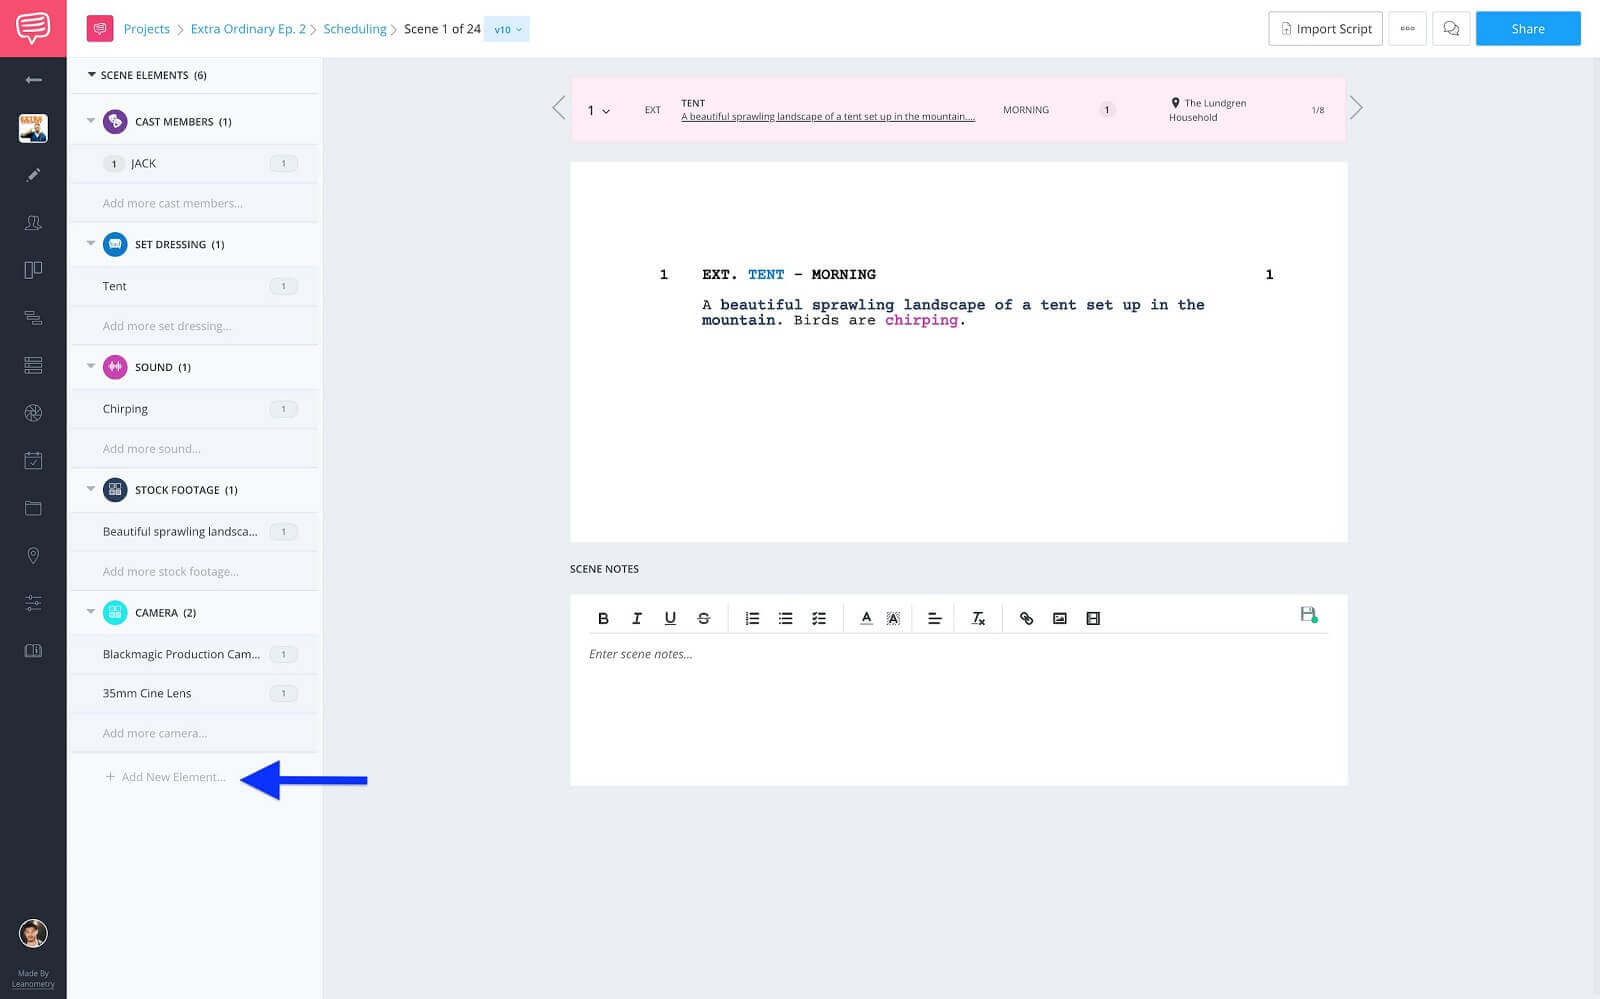
Scene elements sidebar • Click +Add New Element
...and then assign the story day number that corresponds with the scene you are currently on. For example, let’s say Scenes 1 and 3 occur on the same story day and Scenes 2 and 4 take place on the same story day. Scenes 1 and 3 would be tagged as Story Day One and 2 and 4 would be Story Day Two.
Select Story Days from the category list and then click Add Element.
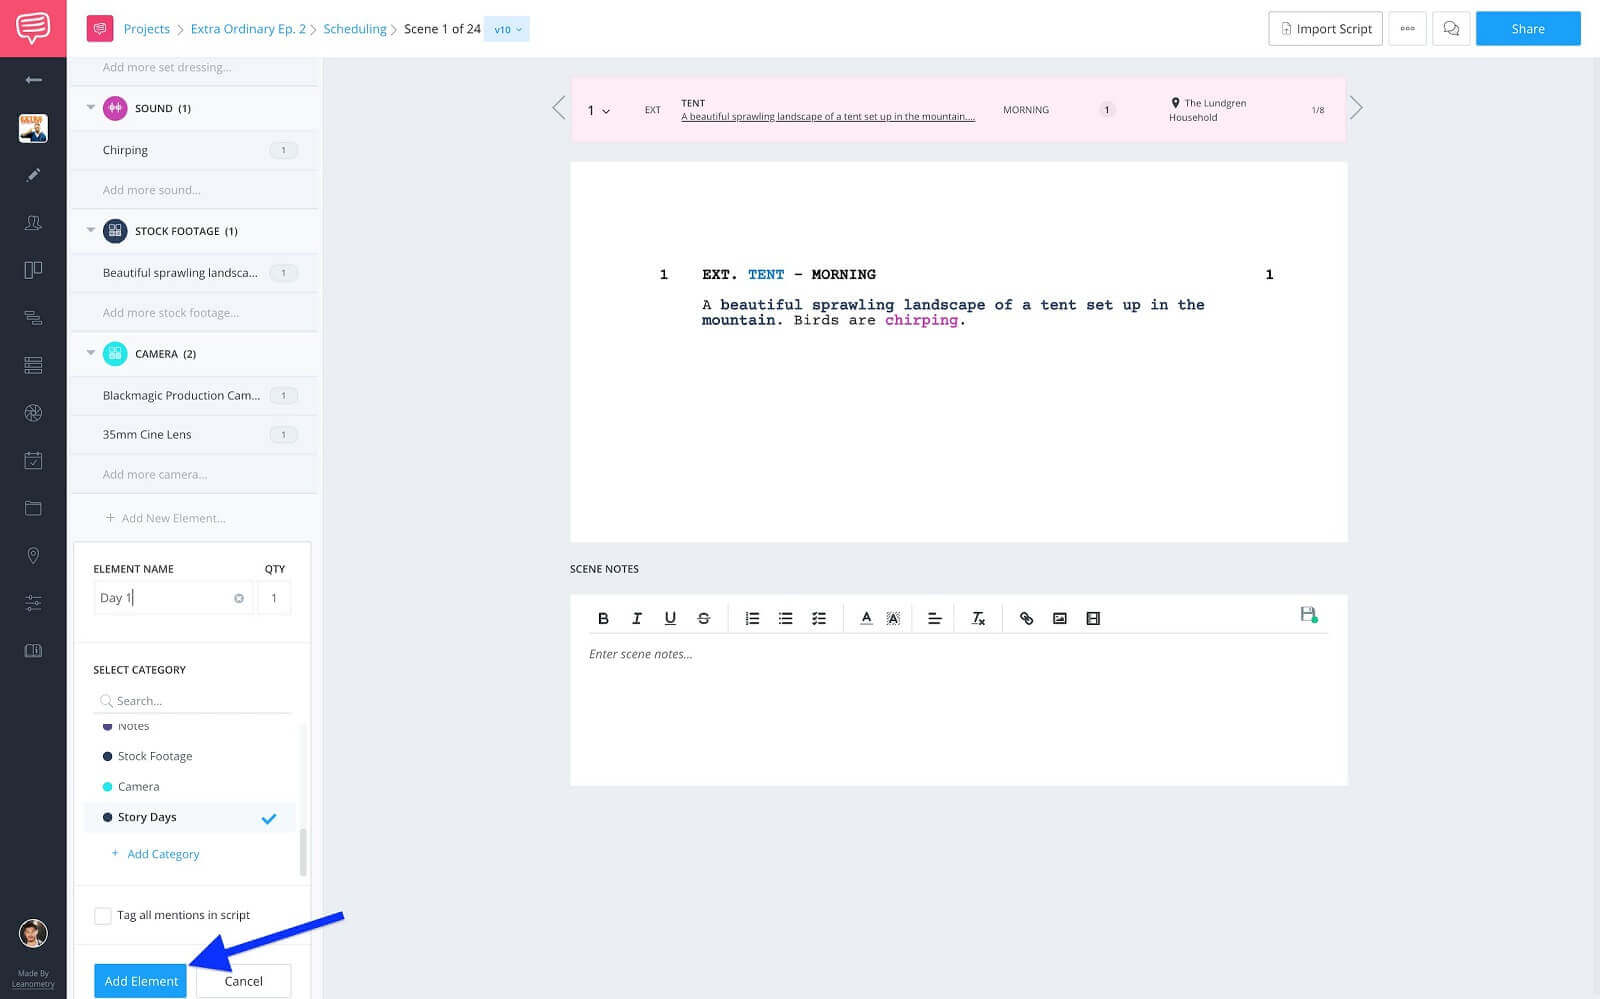
New element modul • Assign story day details.
Repeat this process for every scene in the script. Once finished you’re ready to select which report(s) to bring to set with you.
Reports
Step 3: Select your report
Depending on preference or necessity for you and your project, each of the following Production Reports offer various levels of information. So let’s see which reports are right for you, because you did the work and if you want to have every report on hand, more power to you.
First up, we have the Breakdown Summary, which lists scene by scene all of your tagged elements. This tends to be the most robust report as this incorporates the entire script.
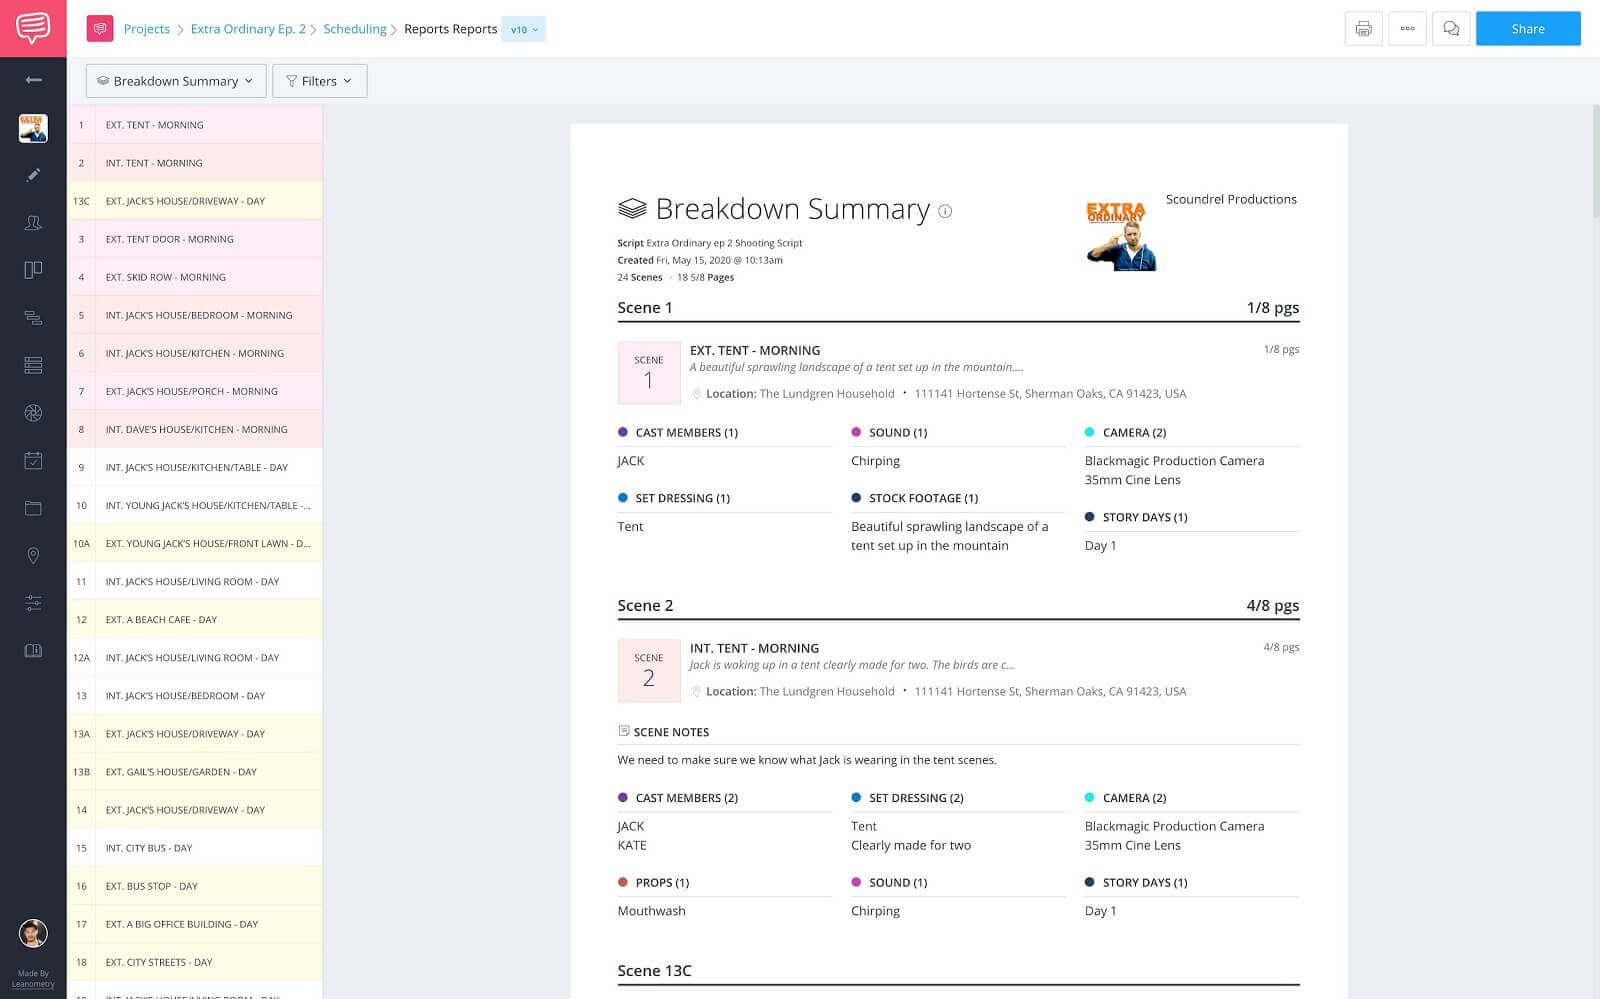
StudioBinder reports page • Fully populated breakdown summary
Next up, is the Elements List which can be filtered to only show the story days category. This is really useful when you're on set and need to quickly reference what story day a scene takes place in.
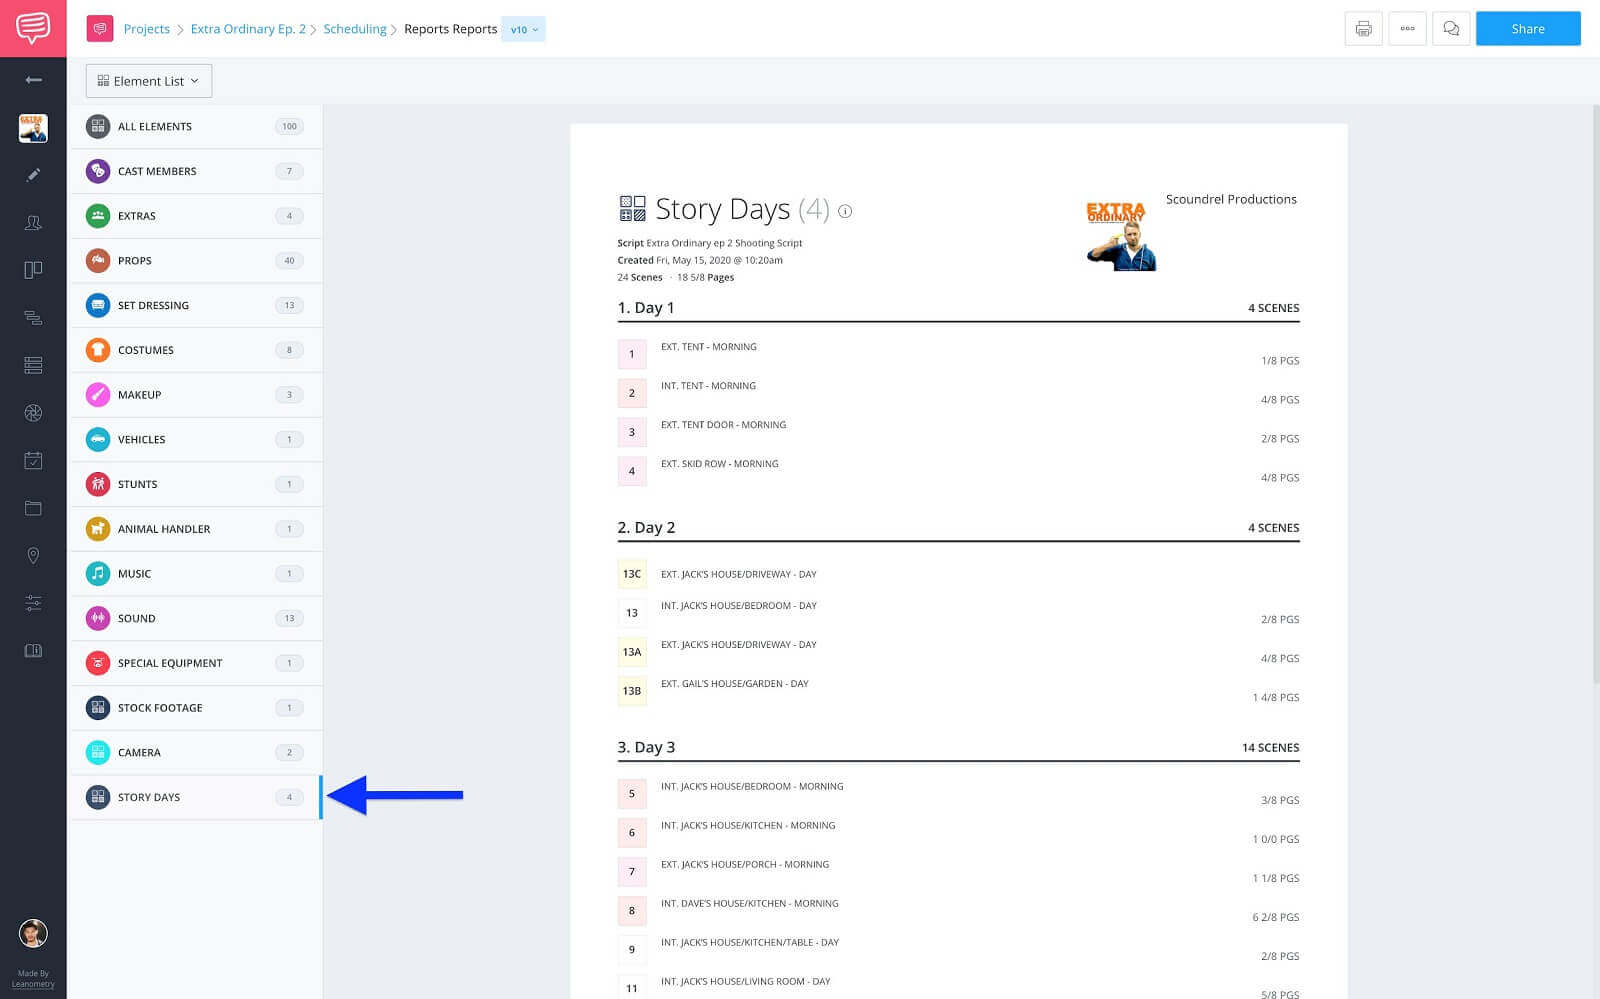
Elements list report • Filtered by story days
And last but not least, the Unique Daily Elements report. If you added day breaks when creating your shooting schedule, this report will aggregate all of the tagged elements for the scenes to be shot that day.
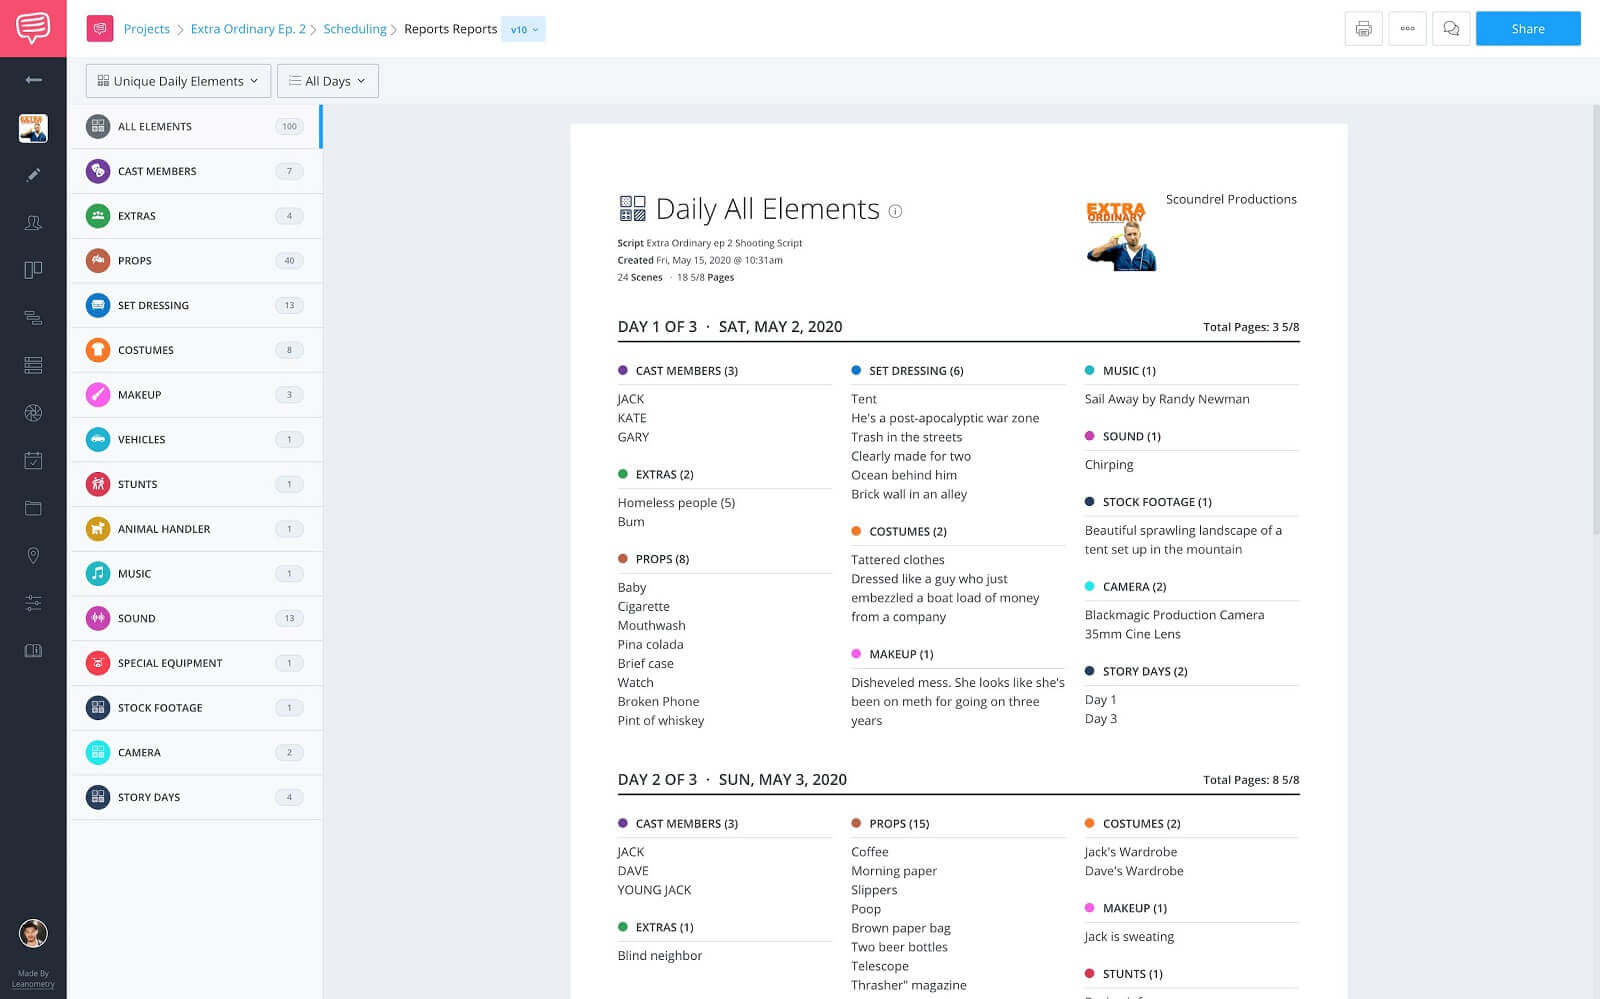
Unique daily elements report • No filters
This is essential when prepping production since it lists out absolutely everything that is needed for that shoot day, given it was tagged during the script breakdown process. Once you’ve chosen your report you’re ready to download a copy.
Distribute
Step 4: Print, save, or share report
With all of the “hard” work done, all that’s left to do is to get your copy of the report ready to go on set.
Print or save pdf
You’re obviously going to need a copy of the report on set with you. Especially if you’re shooting in a remote location without internet access. However, with the emergence of tablets you might just need a downloadable pdf.
To print or save, click the print button on the toolbar:
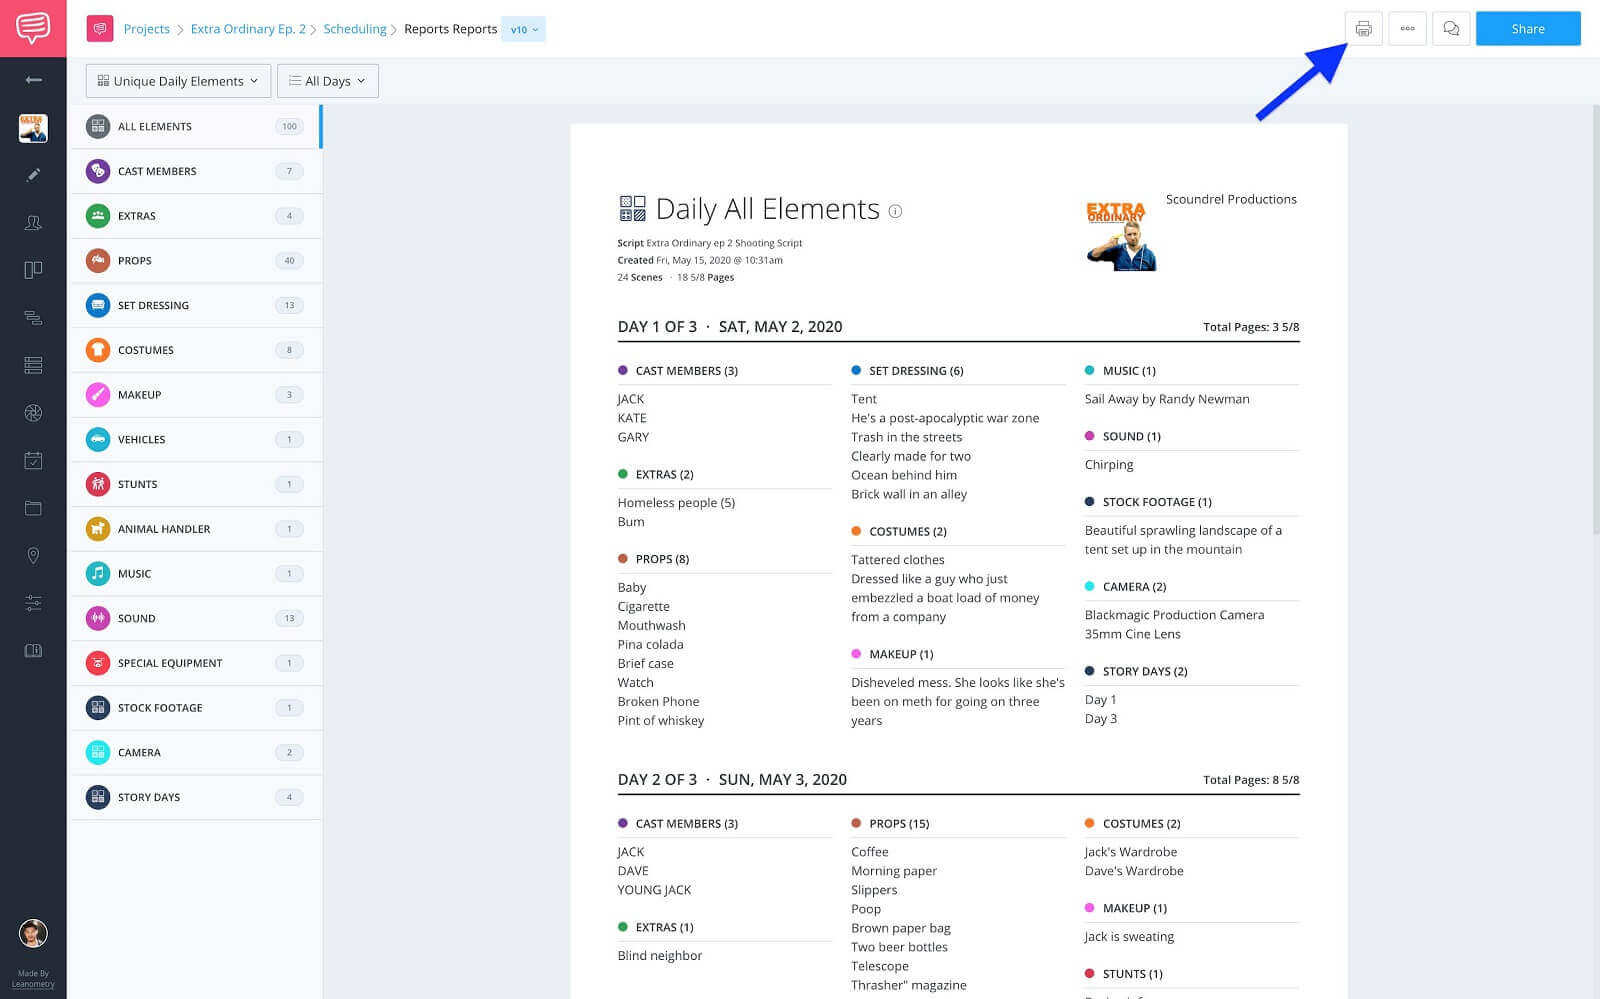
Unique daily elements report • Click print on toolbar
In the print dialog box, set your Destination, Pages, Layout and click Save or Print.
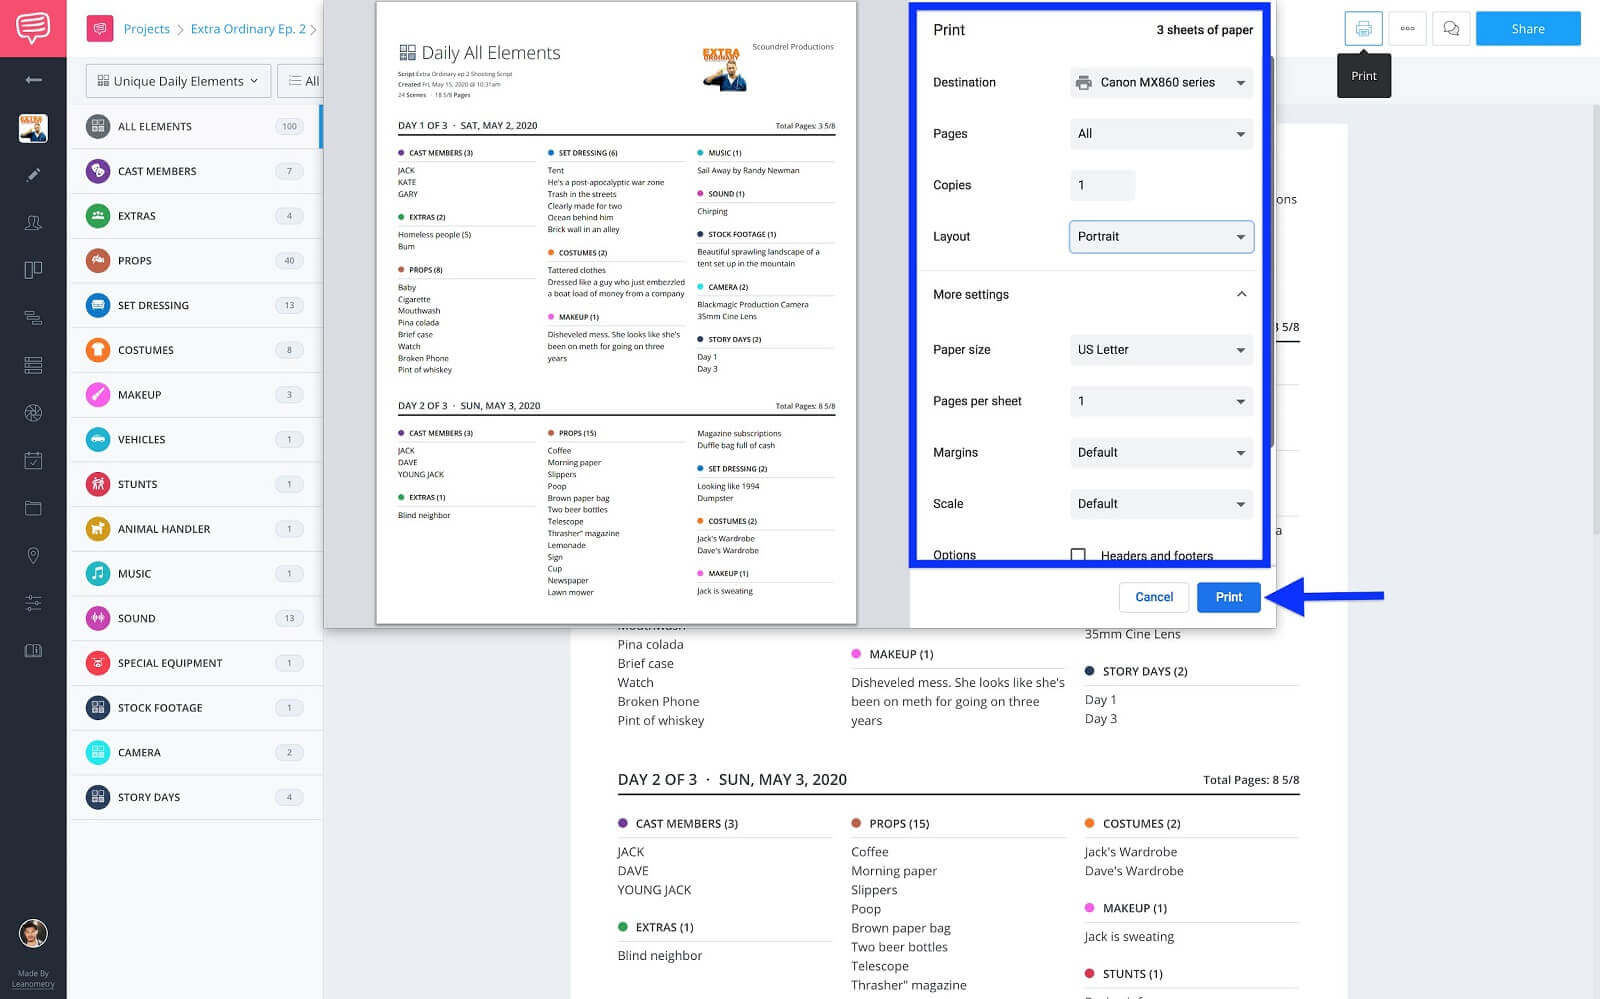
Adjust print/save settings • Click save or print
Share
If you’re looking to maintain an environmentally-friendly production, you can opt to share a view-only link of the report. This really helps cut down on paper waste. For example, if you need to make any changes, the page will be updated for the viewer automatically.
To share, click the Share button.
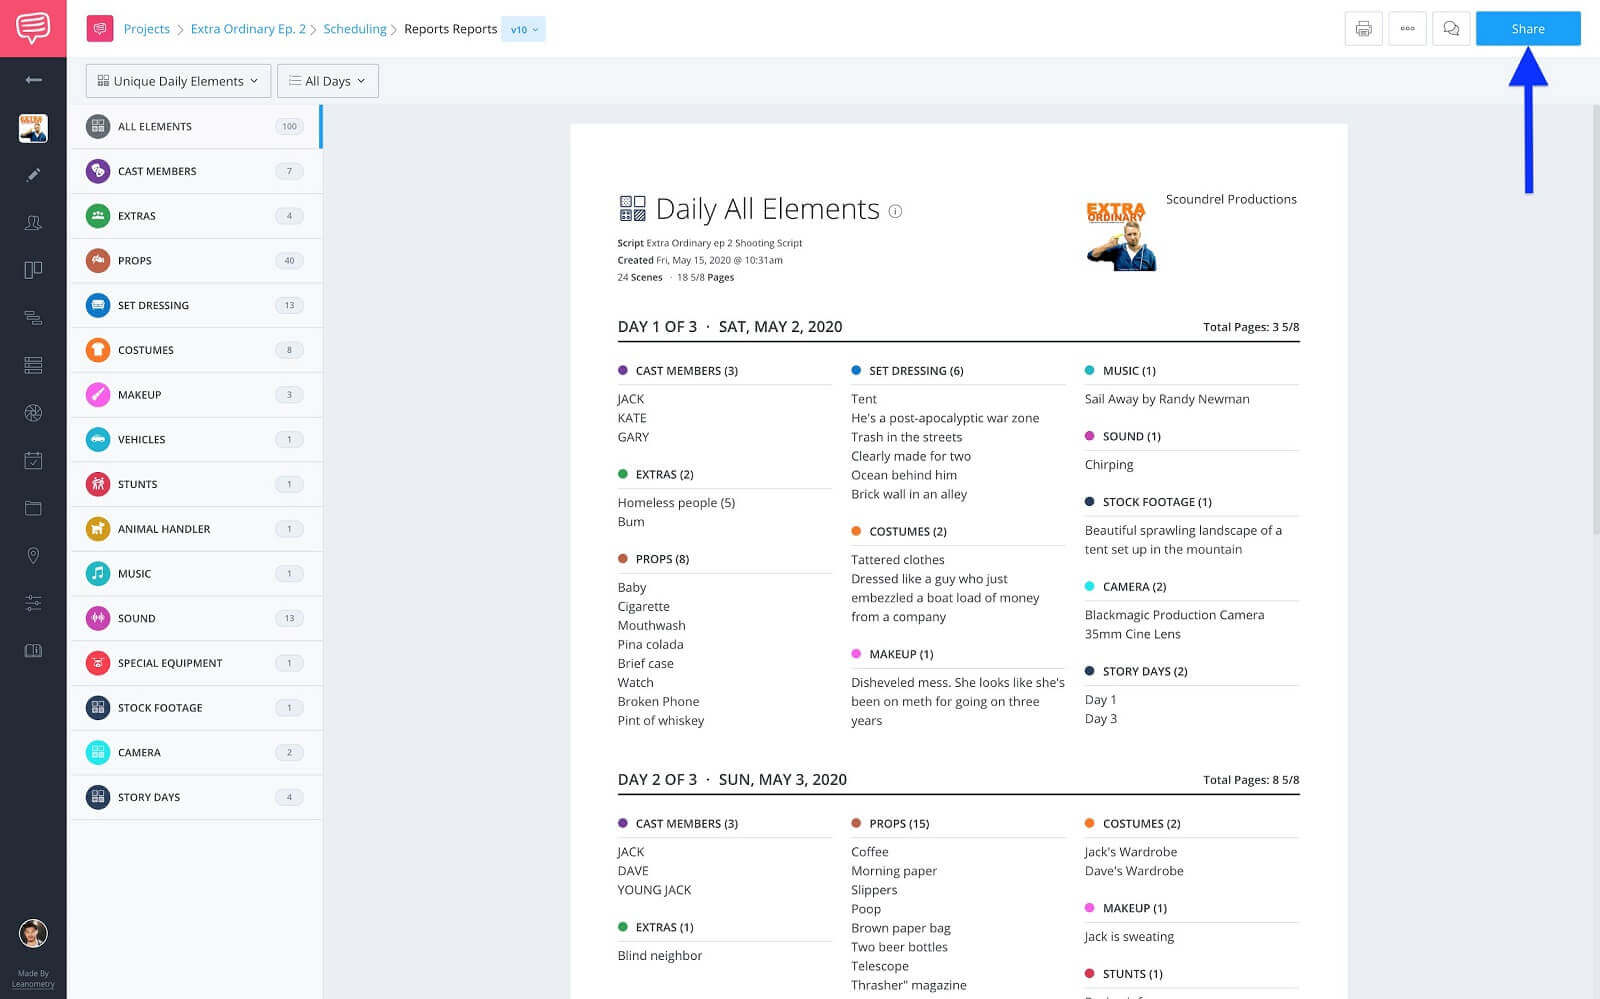
Sharing unique daily elements • Click share button
In the pop up, click Generate Share URL then click Copy:
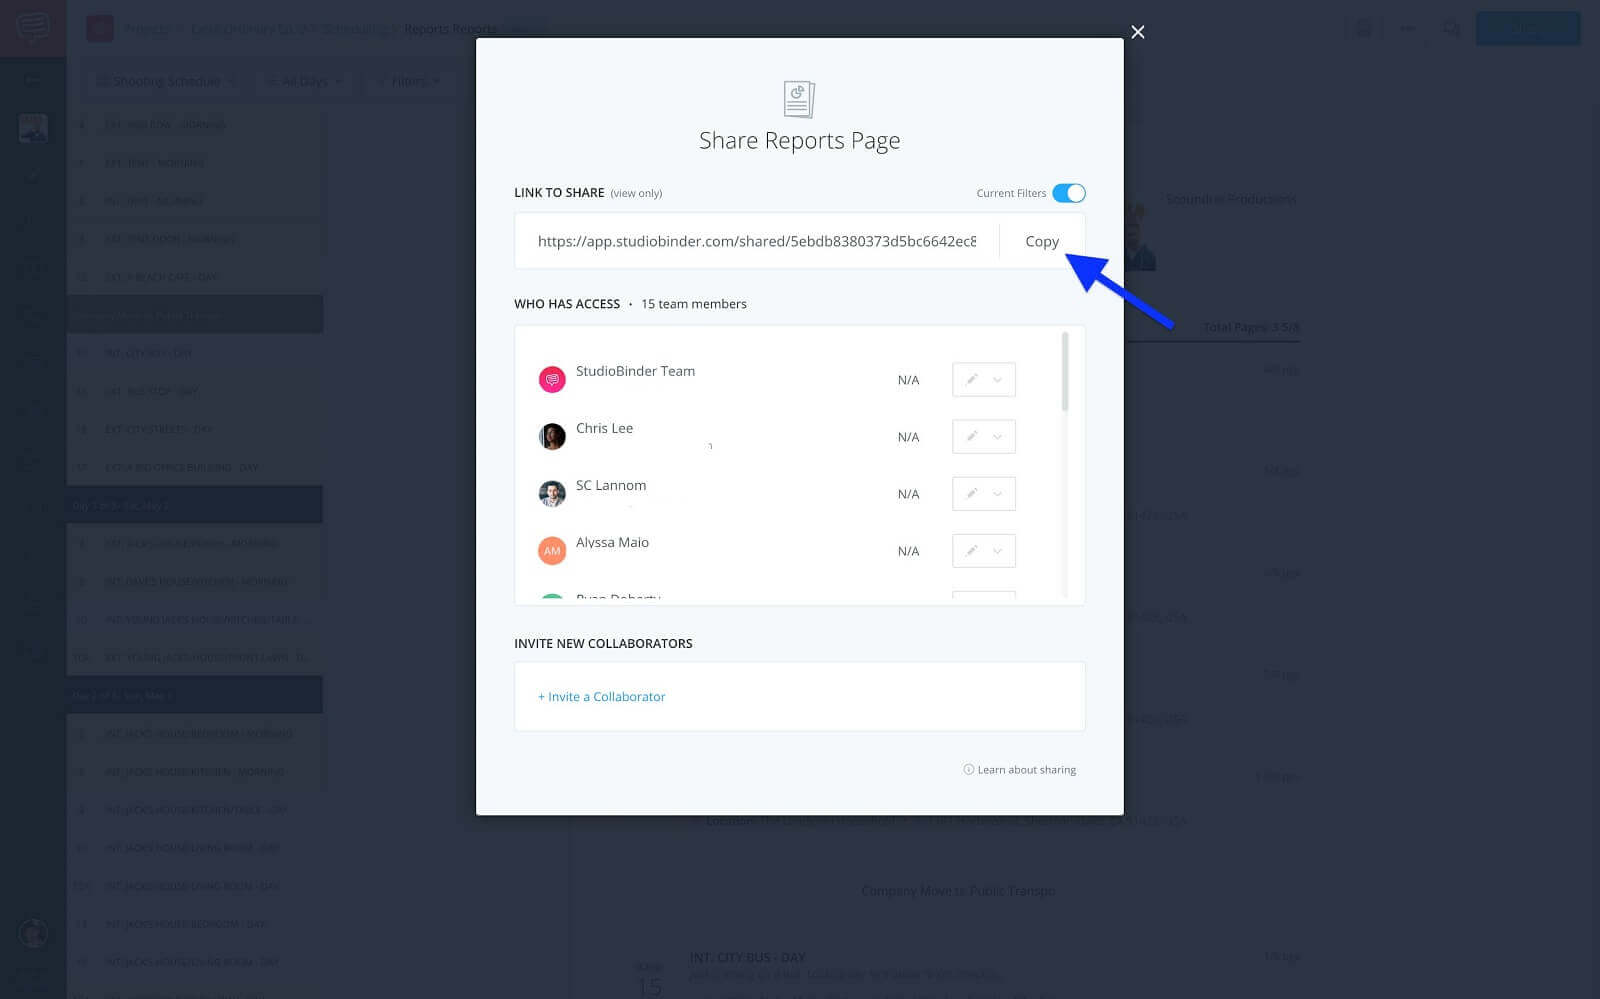
Share reports pop up • Click generate share URL & copy
Now, simply paste that link in a contact message and you’re good to go.
The great thing about having this report as a script supervisor, is that because you’ve done this prep work you really get to focus on the details. This is going to dramatically cut down continuity errors and eventually get you more work.
As the saying goes, work begets work.
UP NEXT
Create your script breakdown
Now it’s time to log in to your account and put everything you’ve just learned to practice. What are some other custom element categories you could create? Let us know in the comments below!

