Everyone loves options. Especially when it comes down to money, and as we all in the filmmaking world know, time is money. So, if you’re an AD, having multiple versions of the shooting schedule comes in handy when presenting to the higher ups. So, how do you do that? With StudioBinder’s version history manager, which lets you create multiple versions of the schedule that you can jump back and forth between. Follow along for a step-by-step guide on how to create multiple versions of the shooting schedule.
Shooting Schedule Hacks
Why use multiple shooting schedules?
In film production, the shooting schedule is immensely important. Knowing how to create a shooting schedule, including knowing how to estimate shooting times, involves strategy and forethought. When done right, a shooting schedule can build momentum throughout the shoot instead of the entire crew burning out after Week One.
There are pitfalls to any schedule with common shooting schedule mistakes but those can be avoided. But no matter how strategic you are, something will always come up. You might have to adjust to shooting in the rain or get forced into scheduling a 10-page shoot day to reach the finish line.
This is where having multiple shooting schedules prepared will save your production from tumbling into chaos. If the weather forecast is dubious or the lead actor's schedule may change at last minute, having a Plan B, C and D at the ready will keep heads cool and the process smooth. Now, let's go through each step of how to create multiple versions in a StudioBinder project.
PROJECT OVERVIEW PAGE
Step 1: Navigate to shooting schedule
Early in the Pre-Production process when you’re creating a preliminary budget, you might also be creating a preliminary shooting schedule. This is where you’ll want to have options to present.
For example, say you have a big action sequence that is going to take an entire day to shoot.
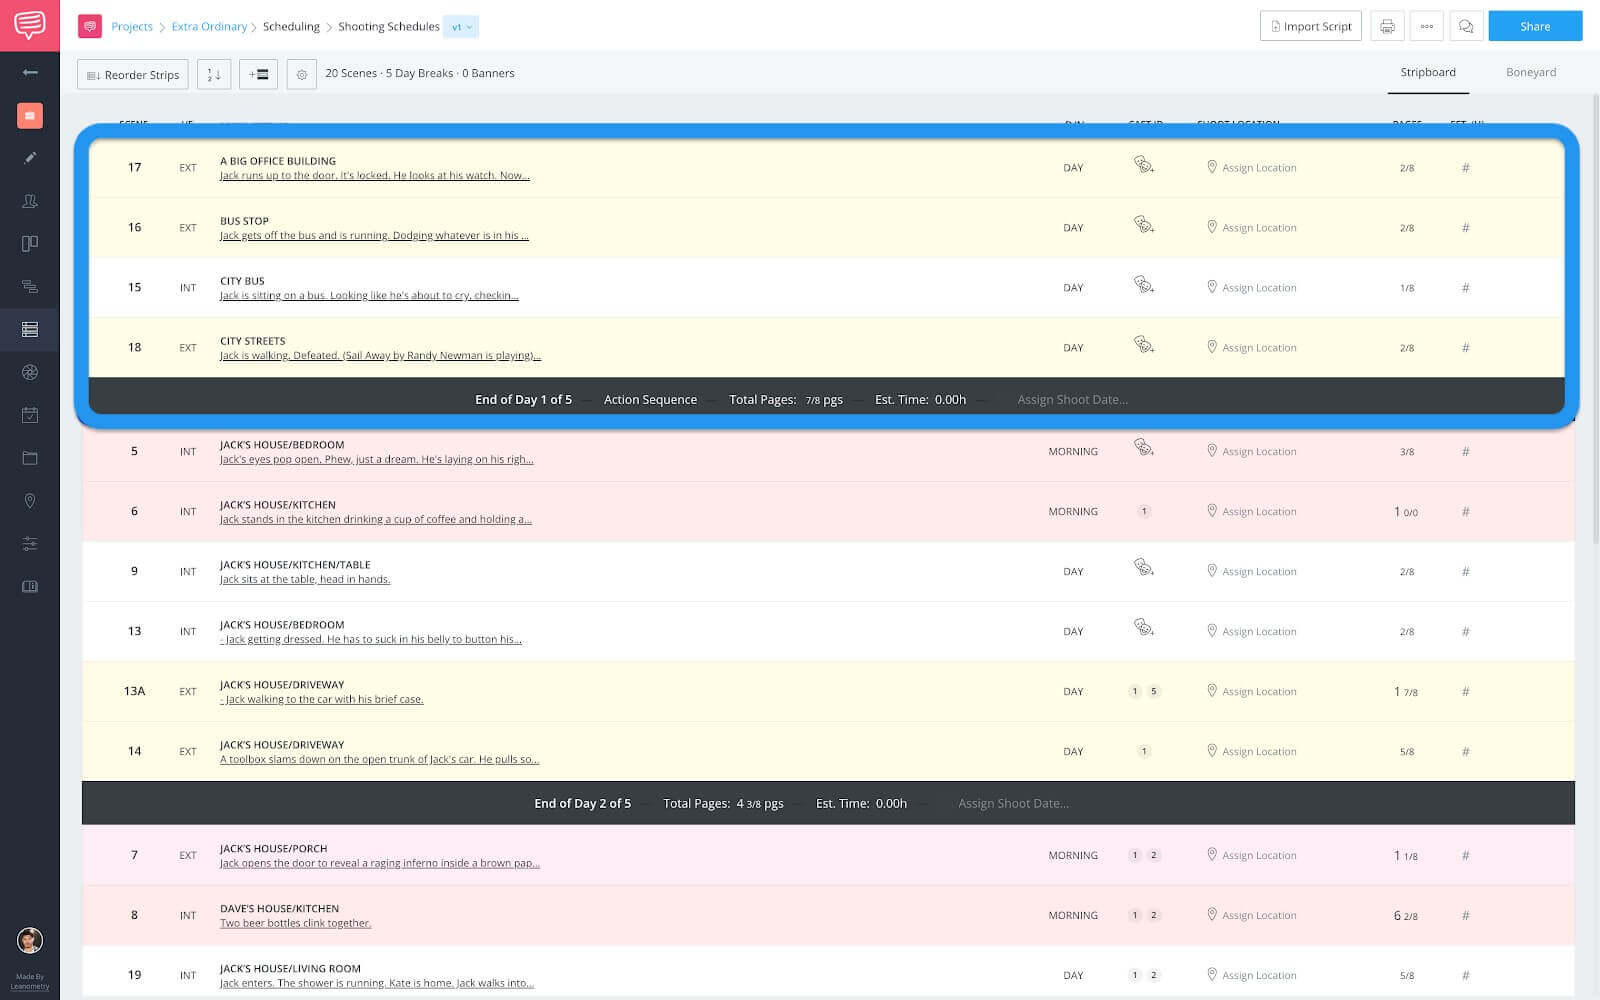
Shooting schedule • Day 1 action sequence
You might want to send a few options to the Producers and Director on when in the schedule that would be shot.
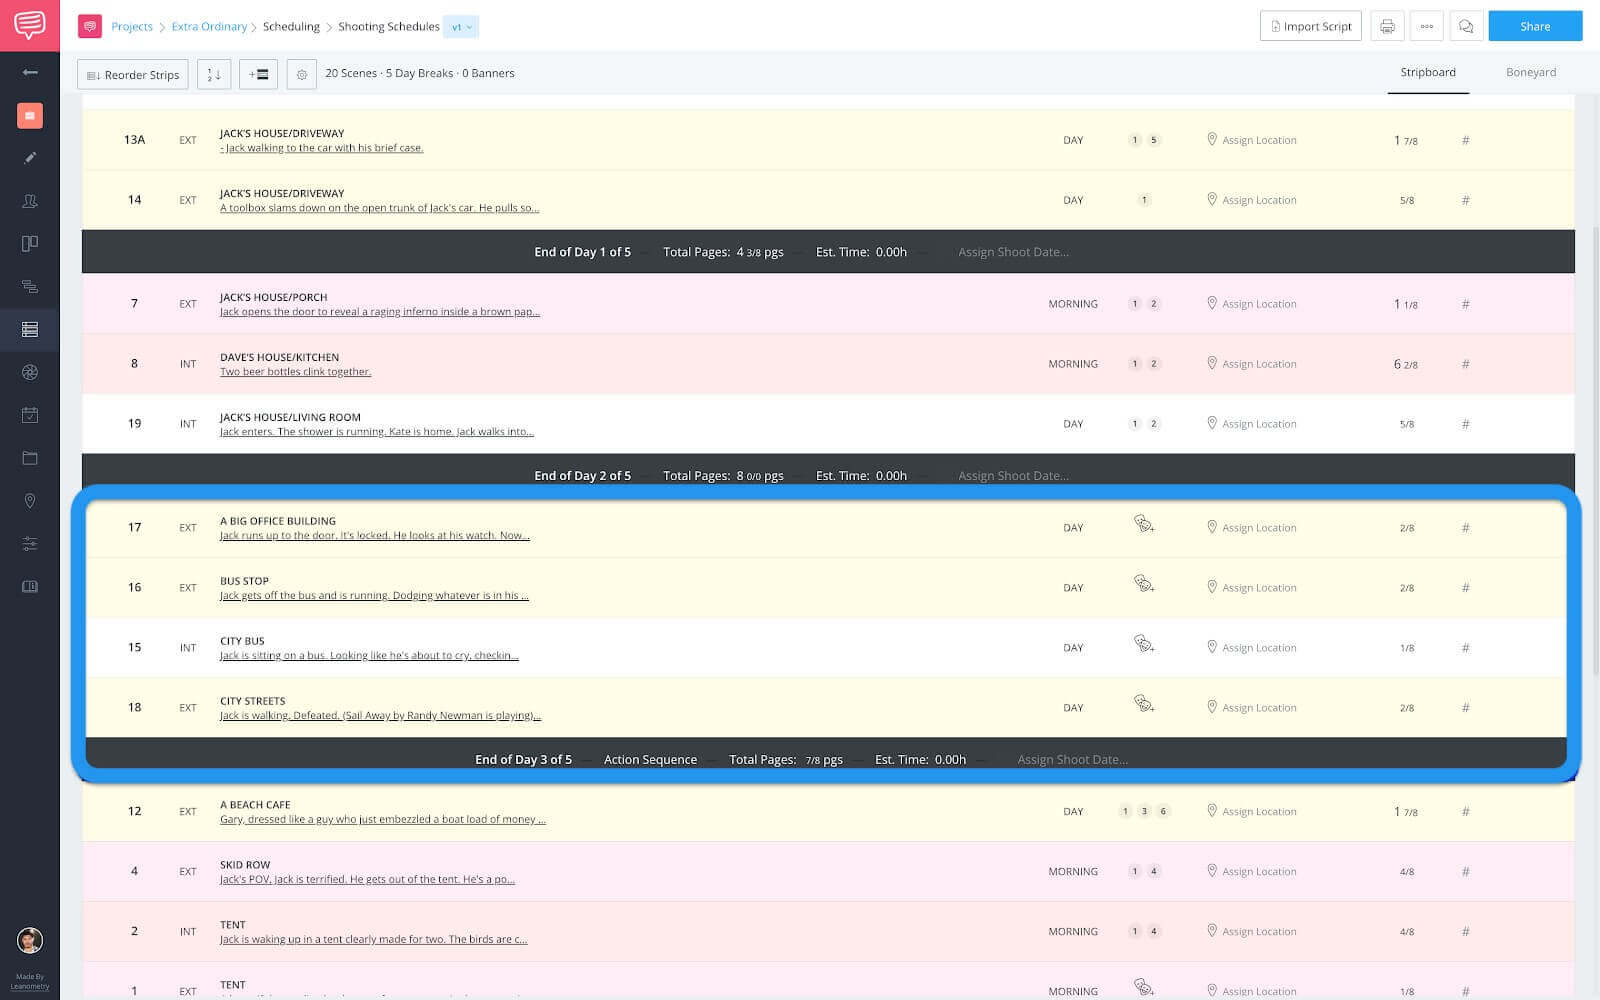
Shooting schedule • Day 3 action sequence
This would let them decide when to secure the shooting locations.
Alright, before we get to how to create multiple versions just be aware that this process will create a new version of the script breakdown as well. So, this is recommended before the breakdown has been done.
Ok, now that that is out of the way, head to the shooting schedule page. From the project overview it’s the three strip icon on the navigation sidebar.
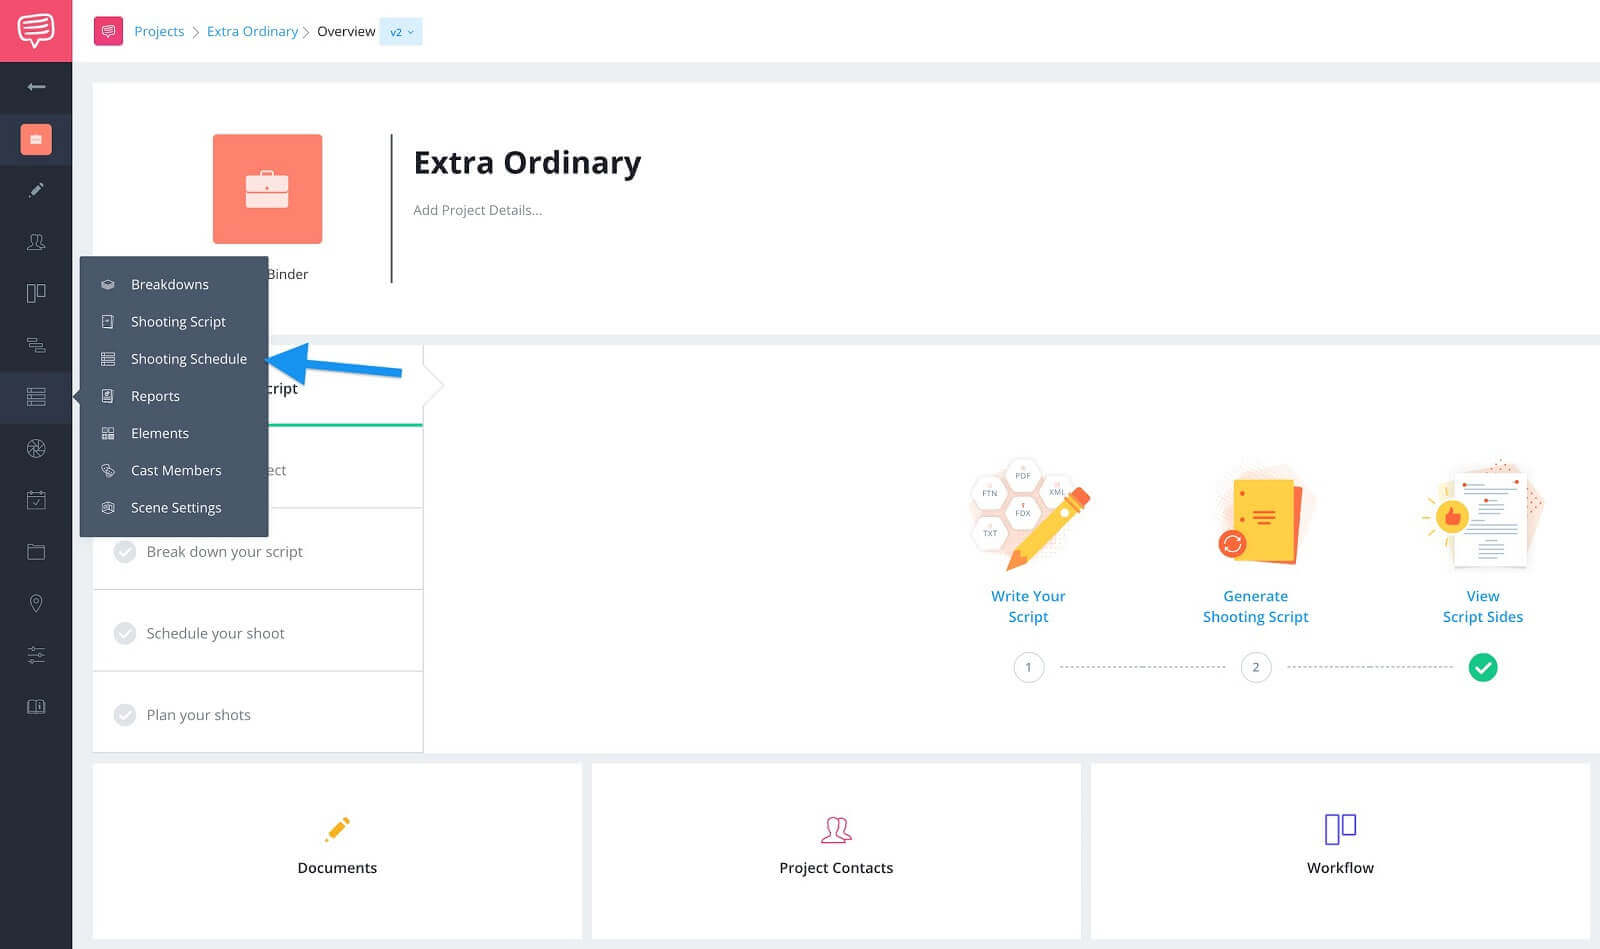
Project overview page • Navigate to shooting schedule
This leads us into the next step…
Shooting Schedule Page
Step 2: Import the script
First, I’ll click the import script button…
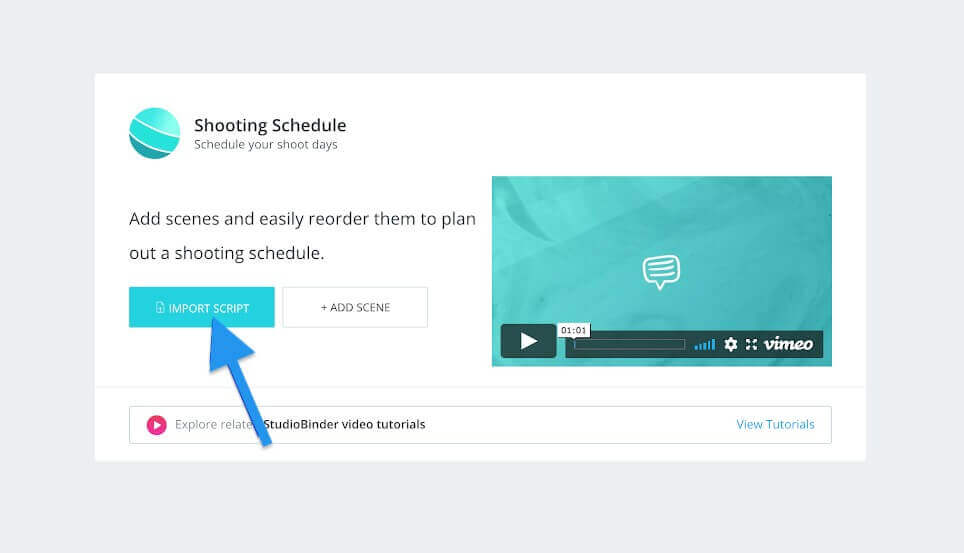
Shooting schedule page • Click import script
...and then drag and drop my script file onto the page.
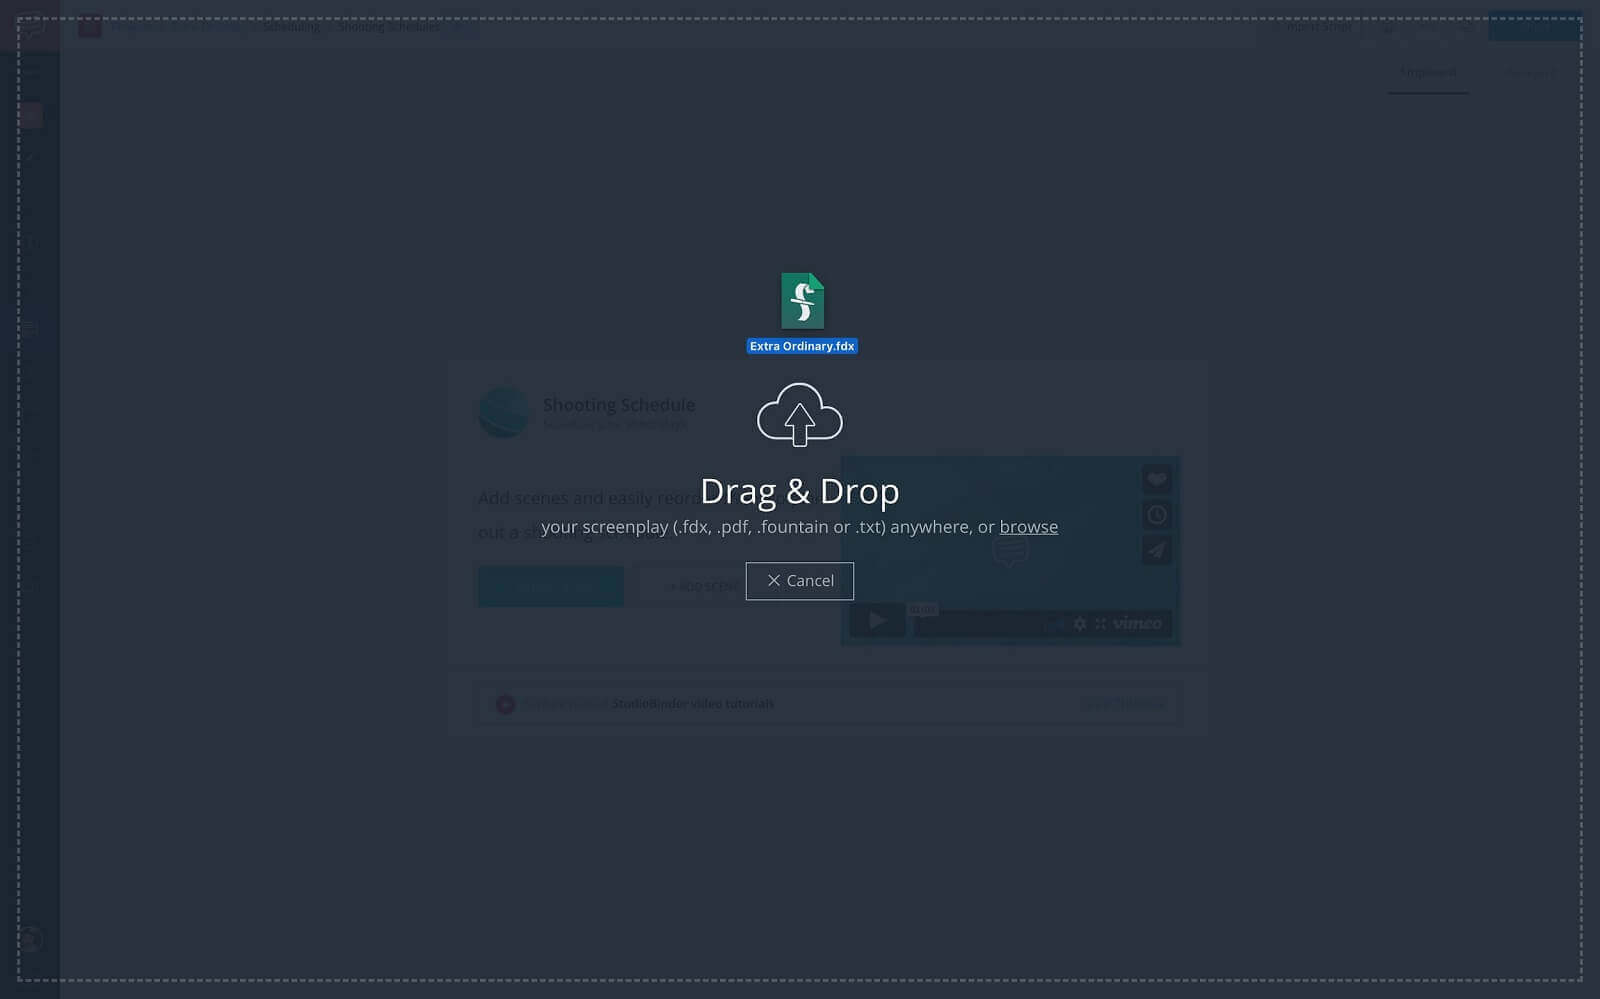
Shooting schedule page • Import script file
Now, you’ll see the populated stripboard and a v1 in the version manager.
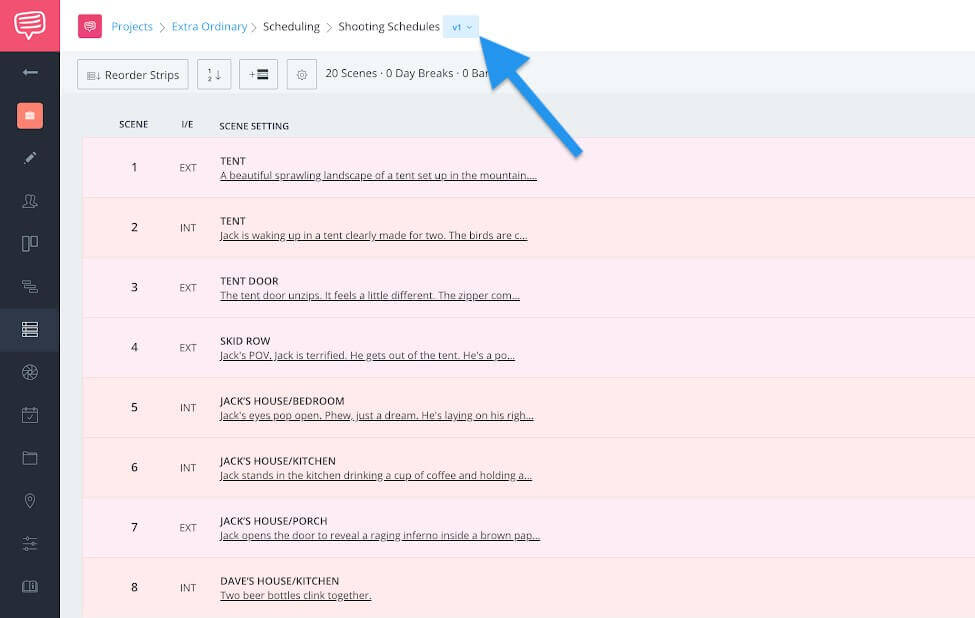
Shooting schedule page • Version indicator
To create another version of the schedule, import the script again. After dragging the file onto the page you will see the sync screenplay screen and you will notice a new version number.
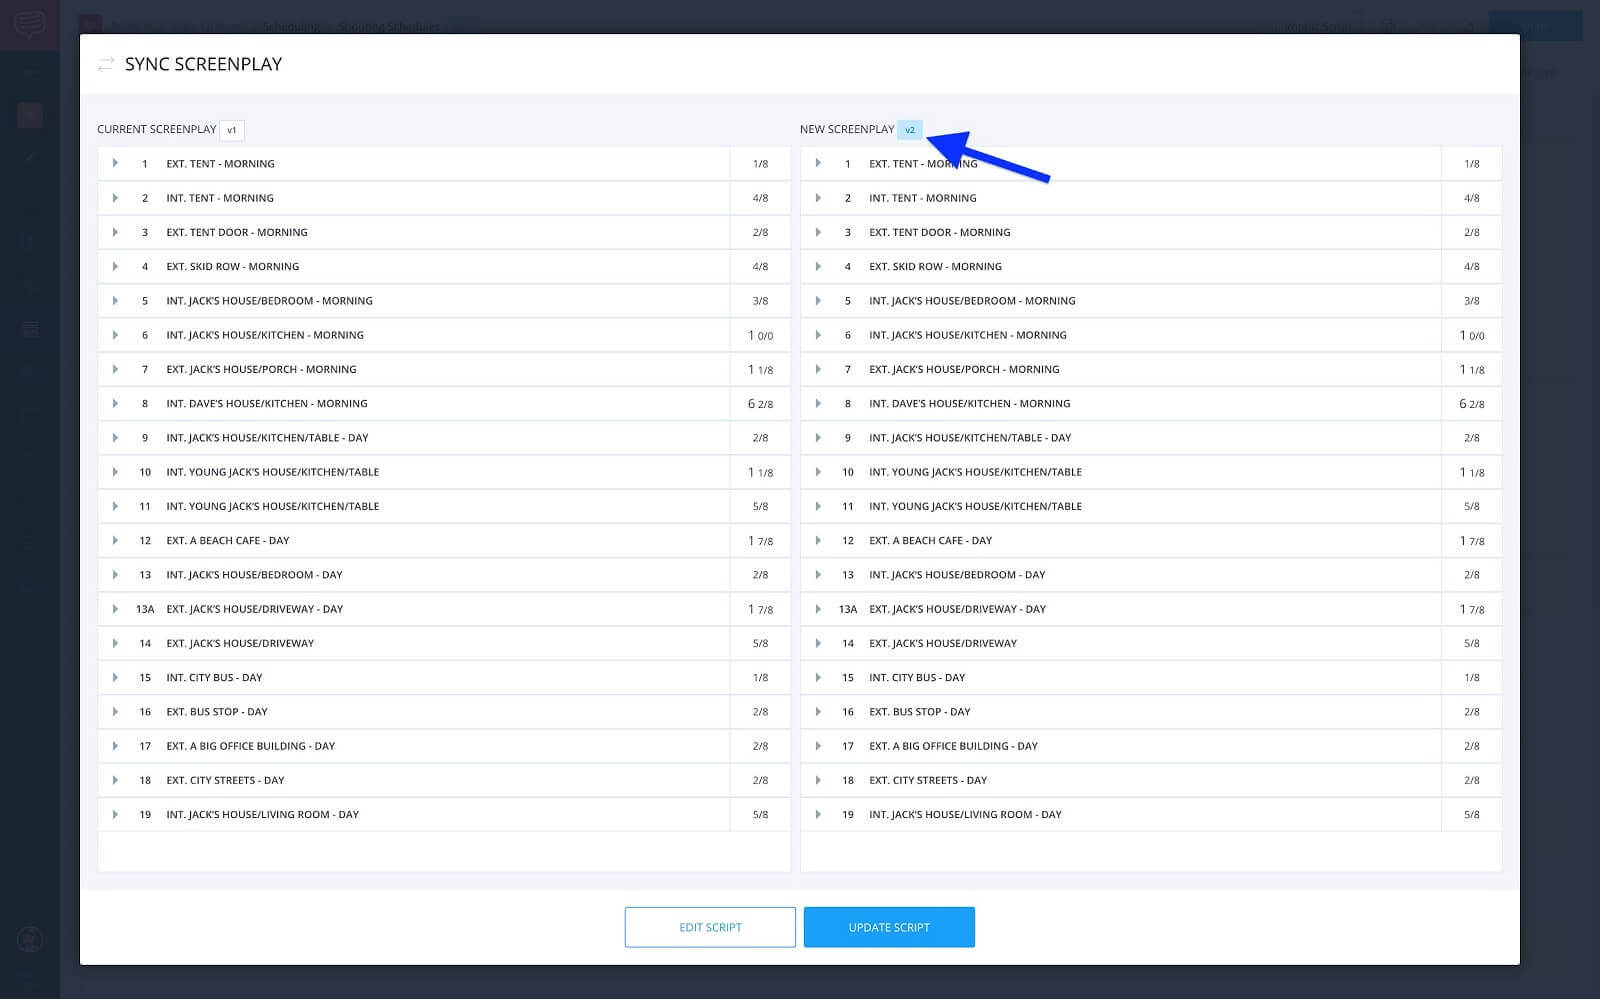
Sync screenplay screen • New version number
You’d repeat this process for as many different schedule variations as you want. Once you’re finished creating as many versions as you’d like, it’s time to move onto the next step…
Version History Manager
Step 3: Rename the versions
OK, since we’ve imported the same script multiple times every version has the same name, which is the name of the script file that was imported. So, to make sure there is no confusion it’s a good idea to rename the various versions. That way you can quickly open the version history manager and see exactly which version you’re on.
To do this, click the version history drop down menu.
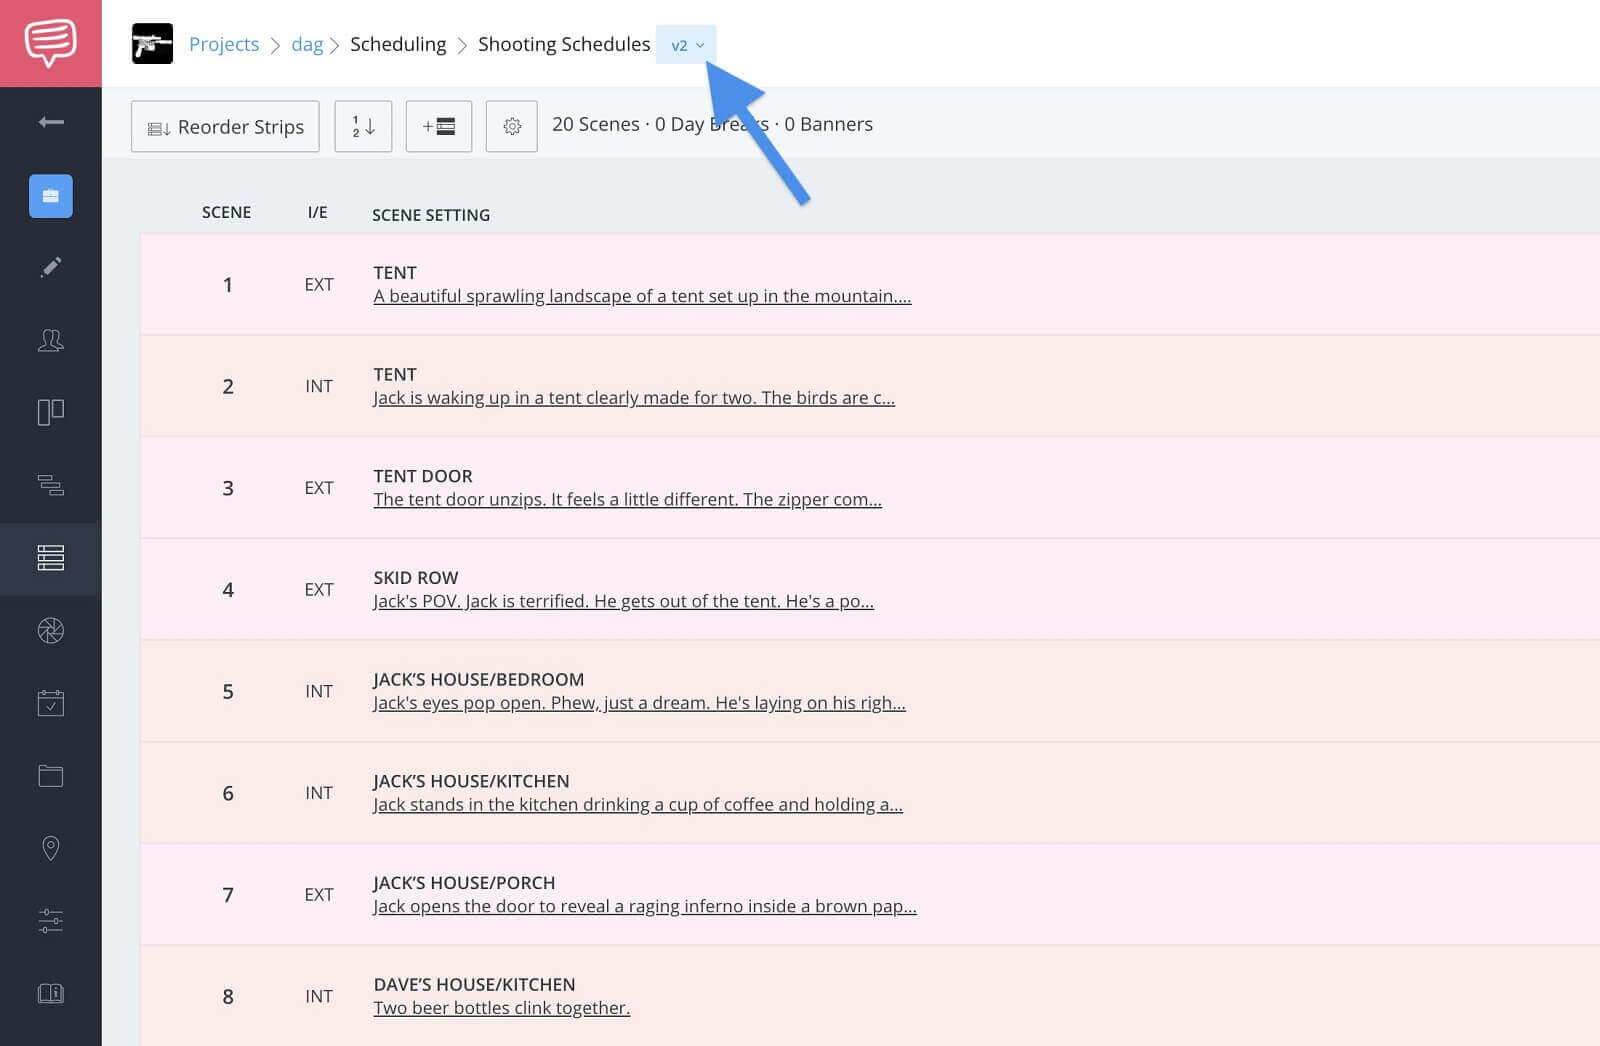
Shooting schedule • Version history drop down
In the version history pop-up you’ll see a list of all of the versions with options to make current, rename, or remove. To rename, click rename version and give it a new name.
I’m going to name them Extra Ordinary — Schedule 1 and Extra Ordinary — Schedule 2. You can name yours whatever you’d like, as long as it makes sense to you that’s all that matters.
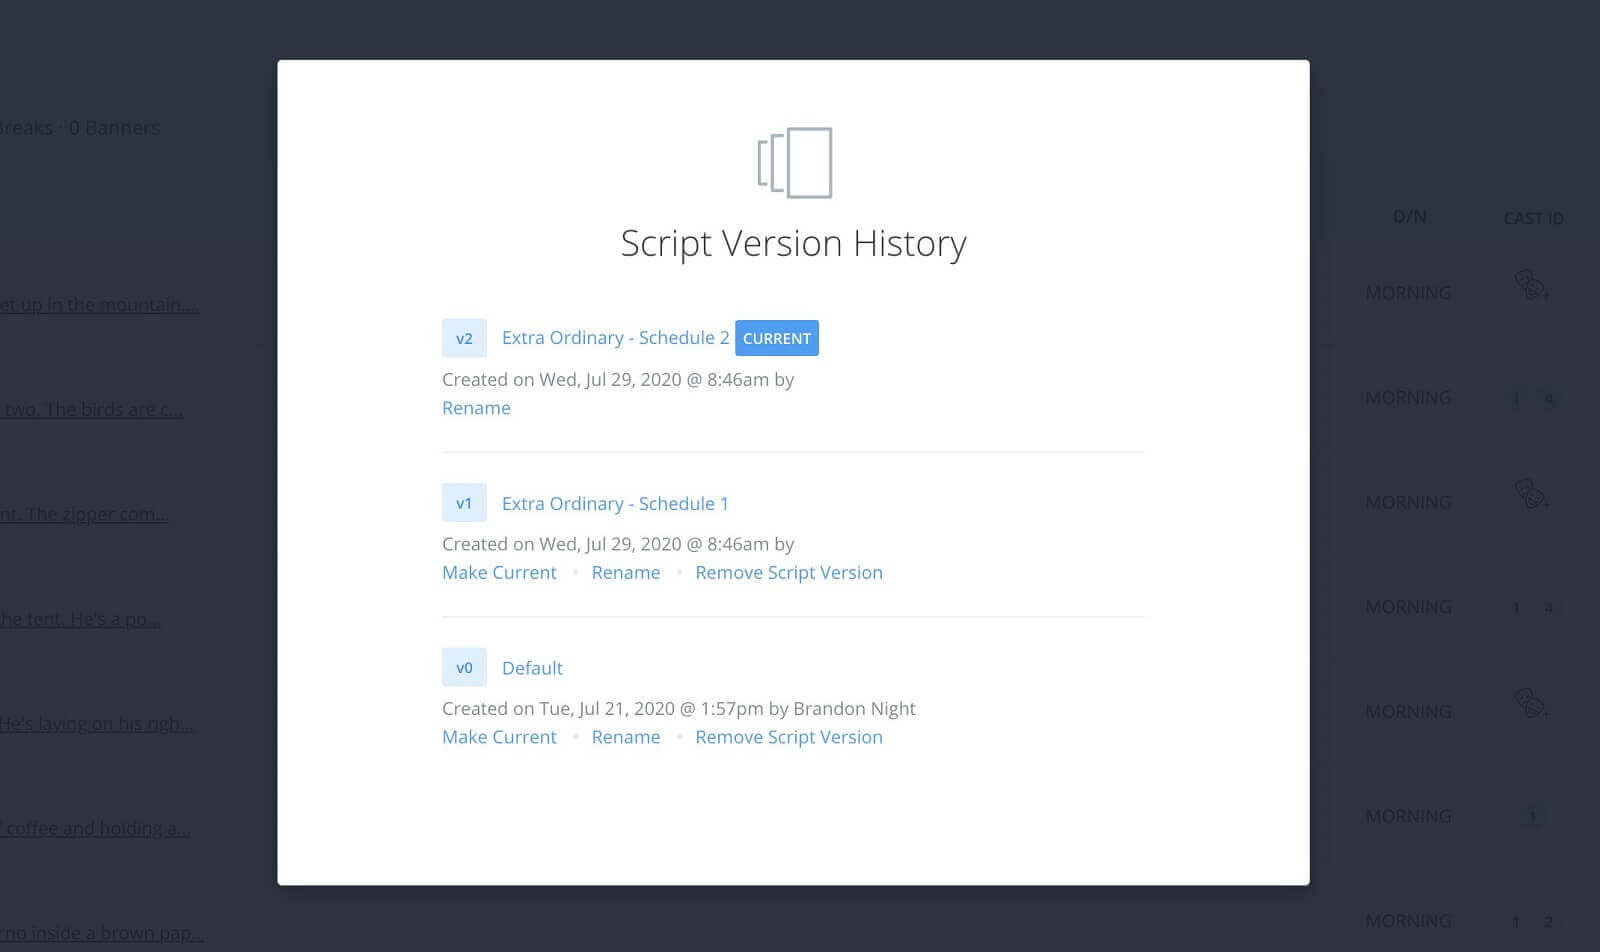
Version history manager • Rename versions
Now, you’re all set to adjust each schedule independently. Easy as that.
Then, once you’ve locked in on a schedule you can remove the other versions to avoid any confusion moving forward.
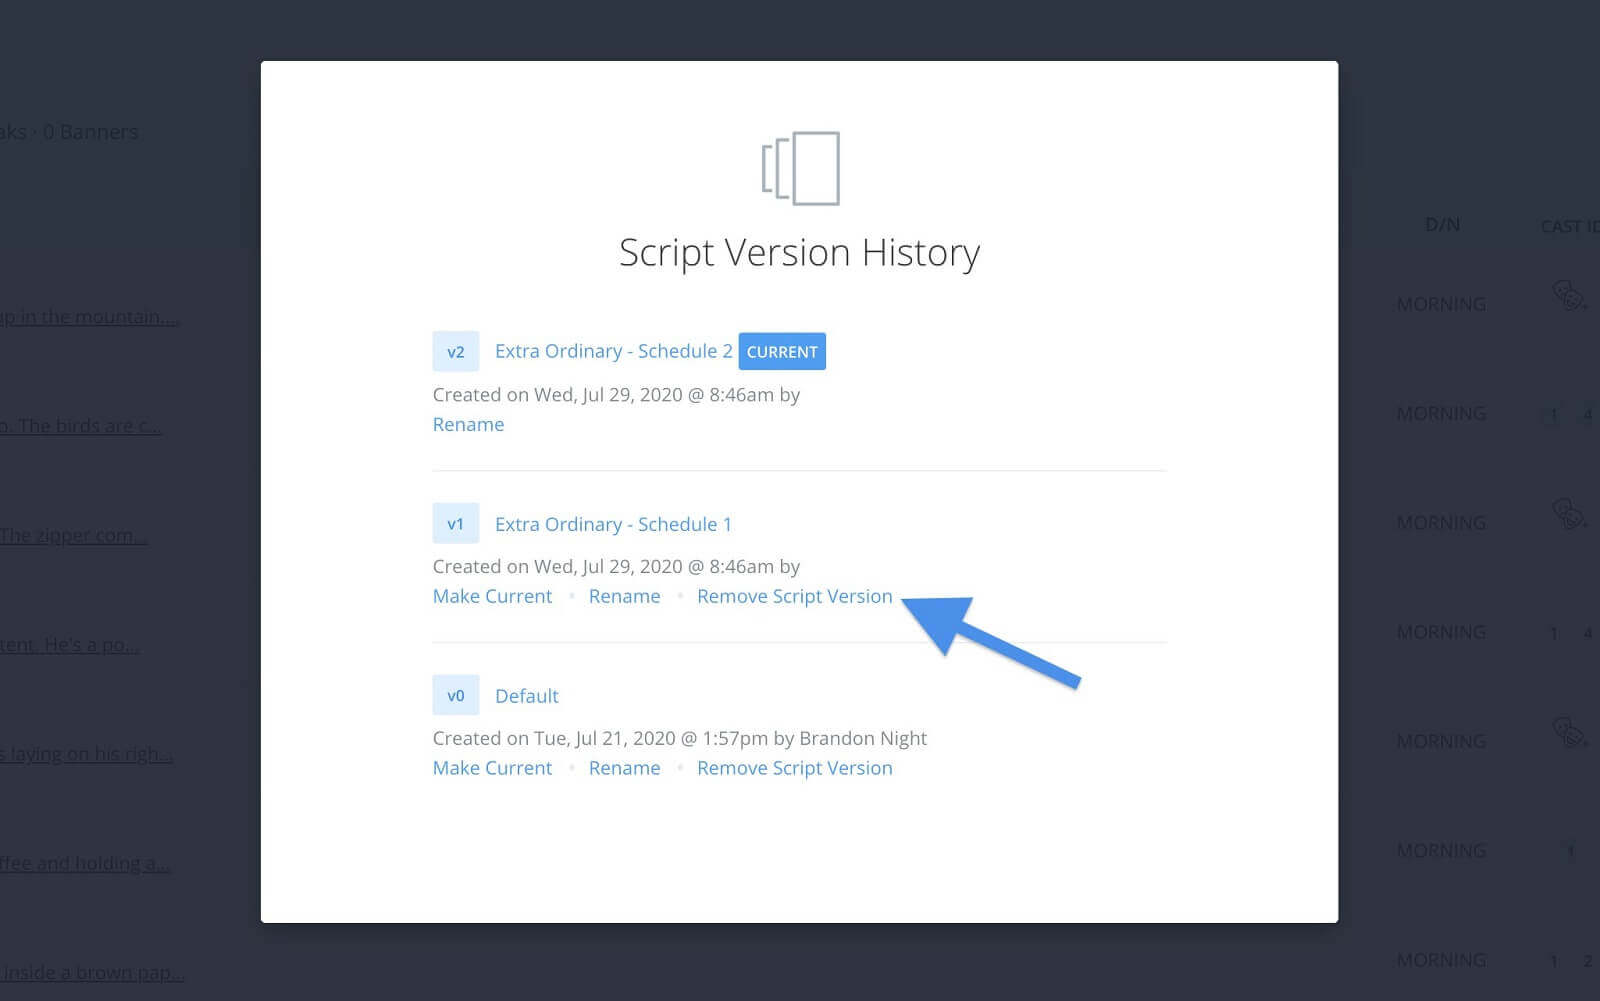
Version manager screen • Remove script version button
So, there you go. Creating multiple versions of the shooting schedule is as easy as importing a script. Just remember that this will create a new version across the other project pages, so this is recommended before any other production planning work has been done. There’s no better time than the present to get your next project off the ground, time to get to it. Cheers!
Your Move
Create a better shooting schedule
Okay, you know how to create multiple versions of the schedule. Now, dive head first into how to create the best schedule using StudioBinder’s stripboard feature. Have you found any other ways to use the version manager? Let us know in the comments!
