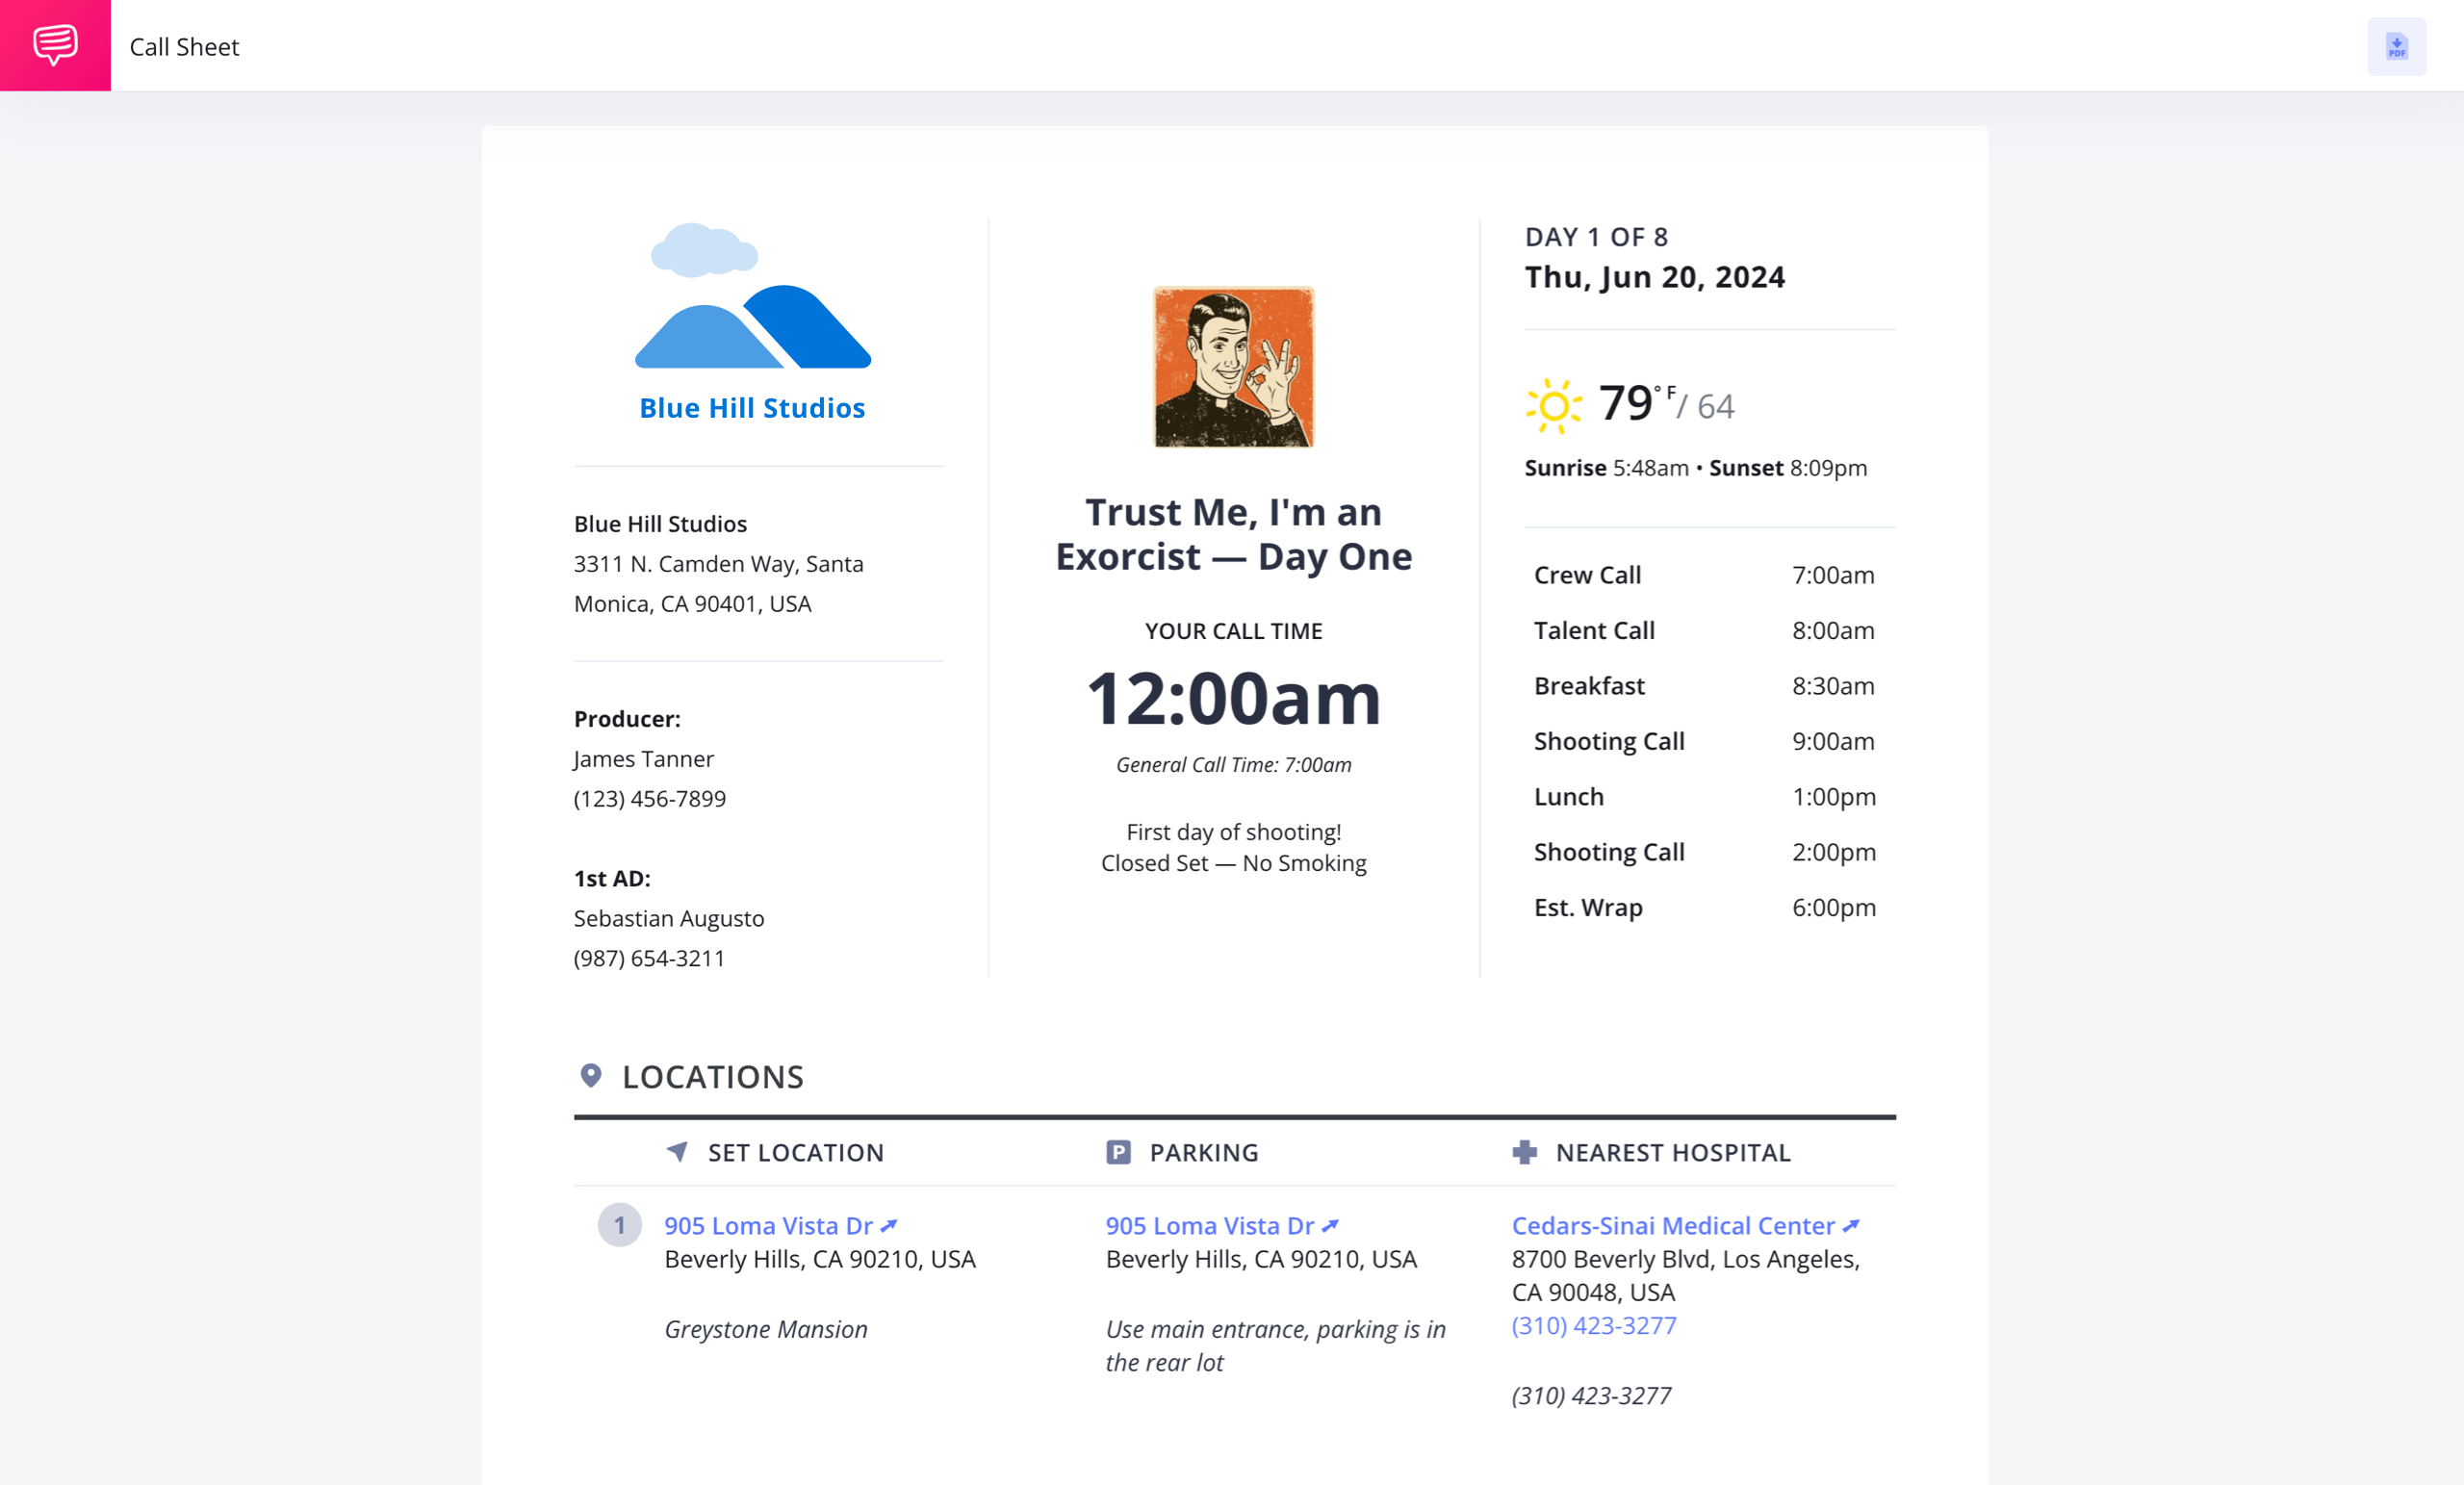
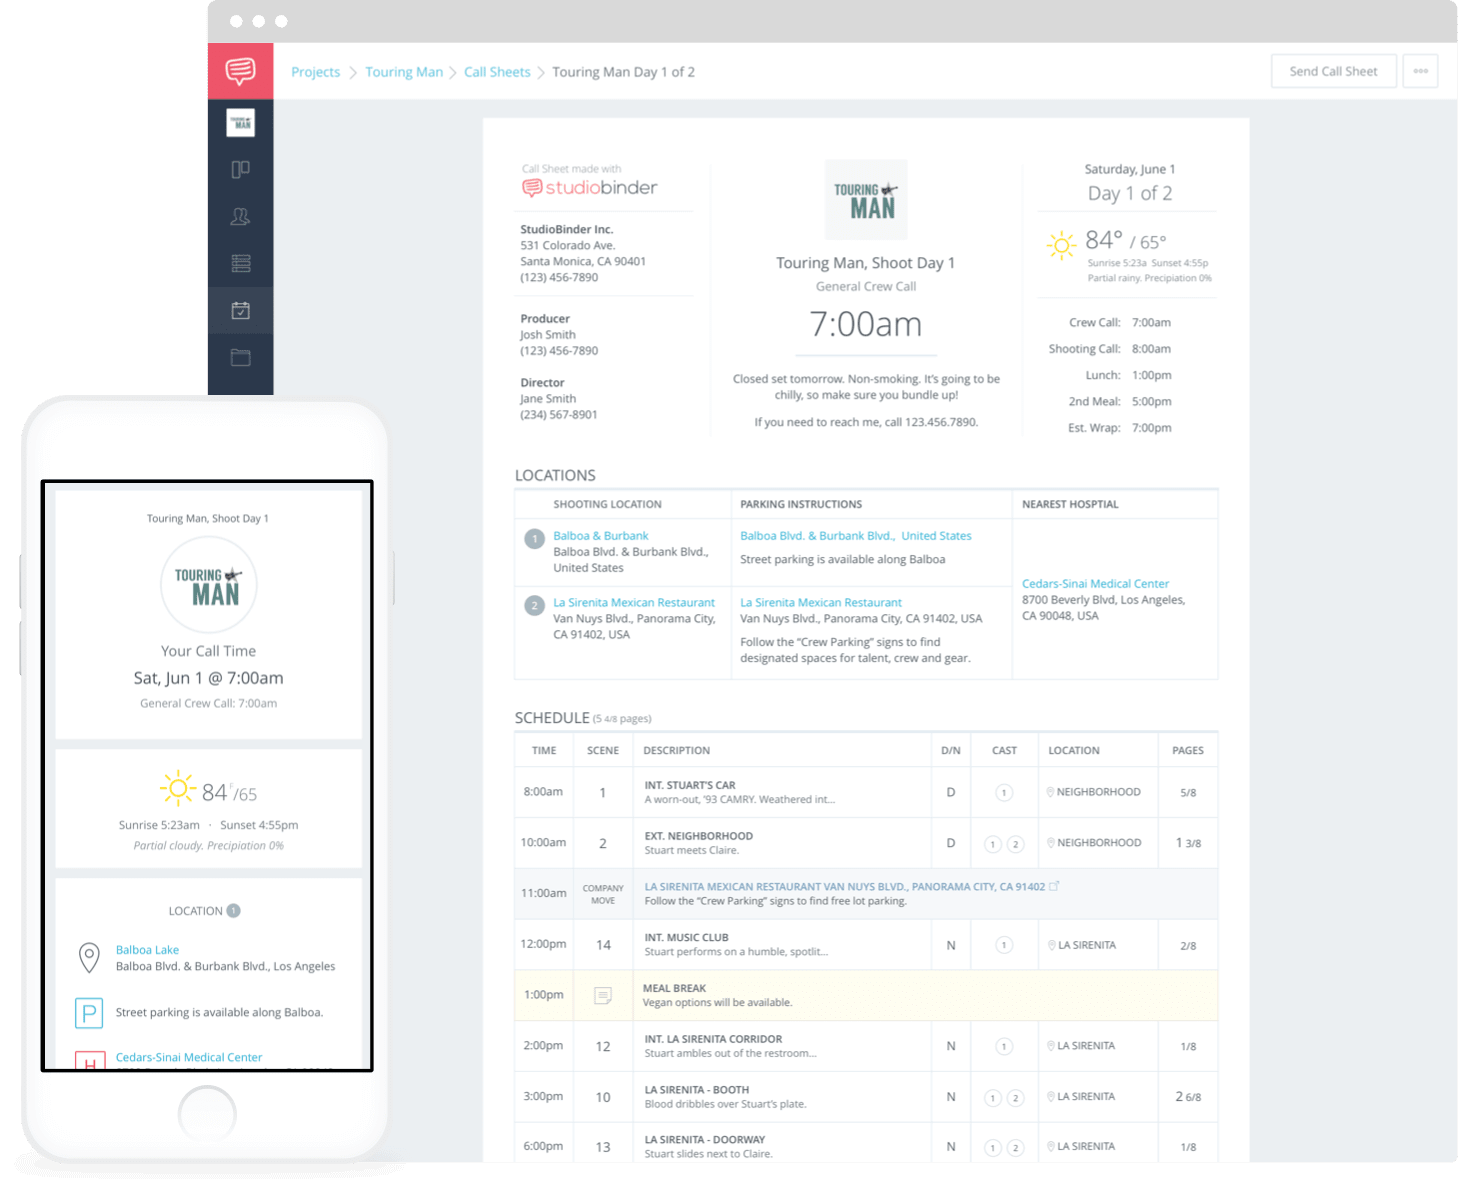
What exactly goes into a call sheet? Which producers’ names go on top? Where do you put the parking details? Is the lunch menu listed? Fret not, gentle reader. Here is everything you need to know about how to make a call sheet for film and television productions. In this article (and videos), we break down all the components that should be included and best practices to follow.
How to Make a Call Sheet in StudioBinder
Call Sheet For Film
How to make a call sheet for film
The daily call sheet is a filmmaking term for the schedule implemented by the assistant director (AD) or 2nd assistant director (2nd AD), using details from the shooting schedule and shot list associated with each scene that will be filmed that day. Properly formatted call sheets ensure that every department stays on the same page and follows the day’s schedule efficiently.
The callsheet is sent to the cast and film crew to let them know about where and when the filming is going to take place.
Planning your shoot means anticipating your needs before you get to set. The call sheet isn’t just a tool to tell your cast and crew what time to be where—it’s an essential document that ensures smooth production logistics. Using a call sheet template can help streamline communication and keep production on track.
It also prepares everyone for the unexpected. Weather conditions and nearby hospitals are a must, and parking rules and regulations are another, less dire, but appreciated practice.
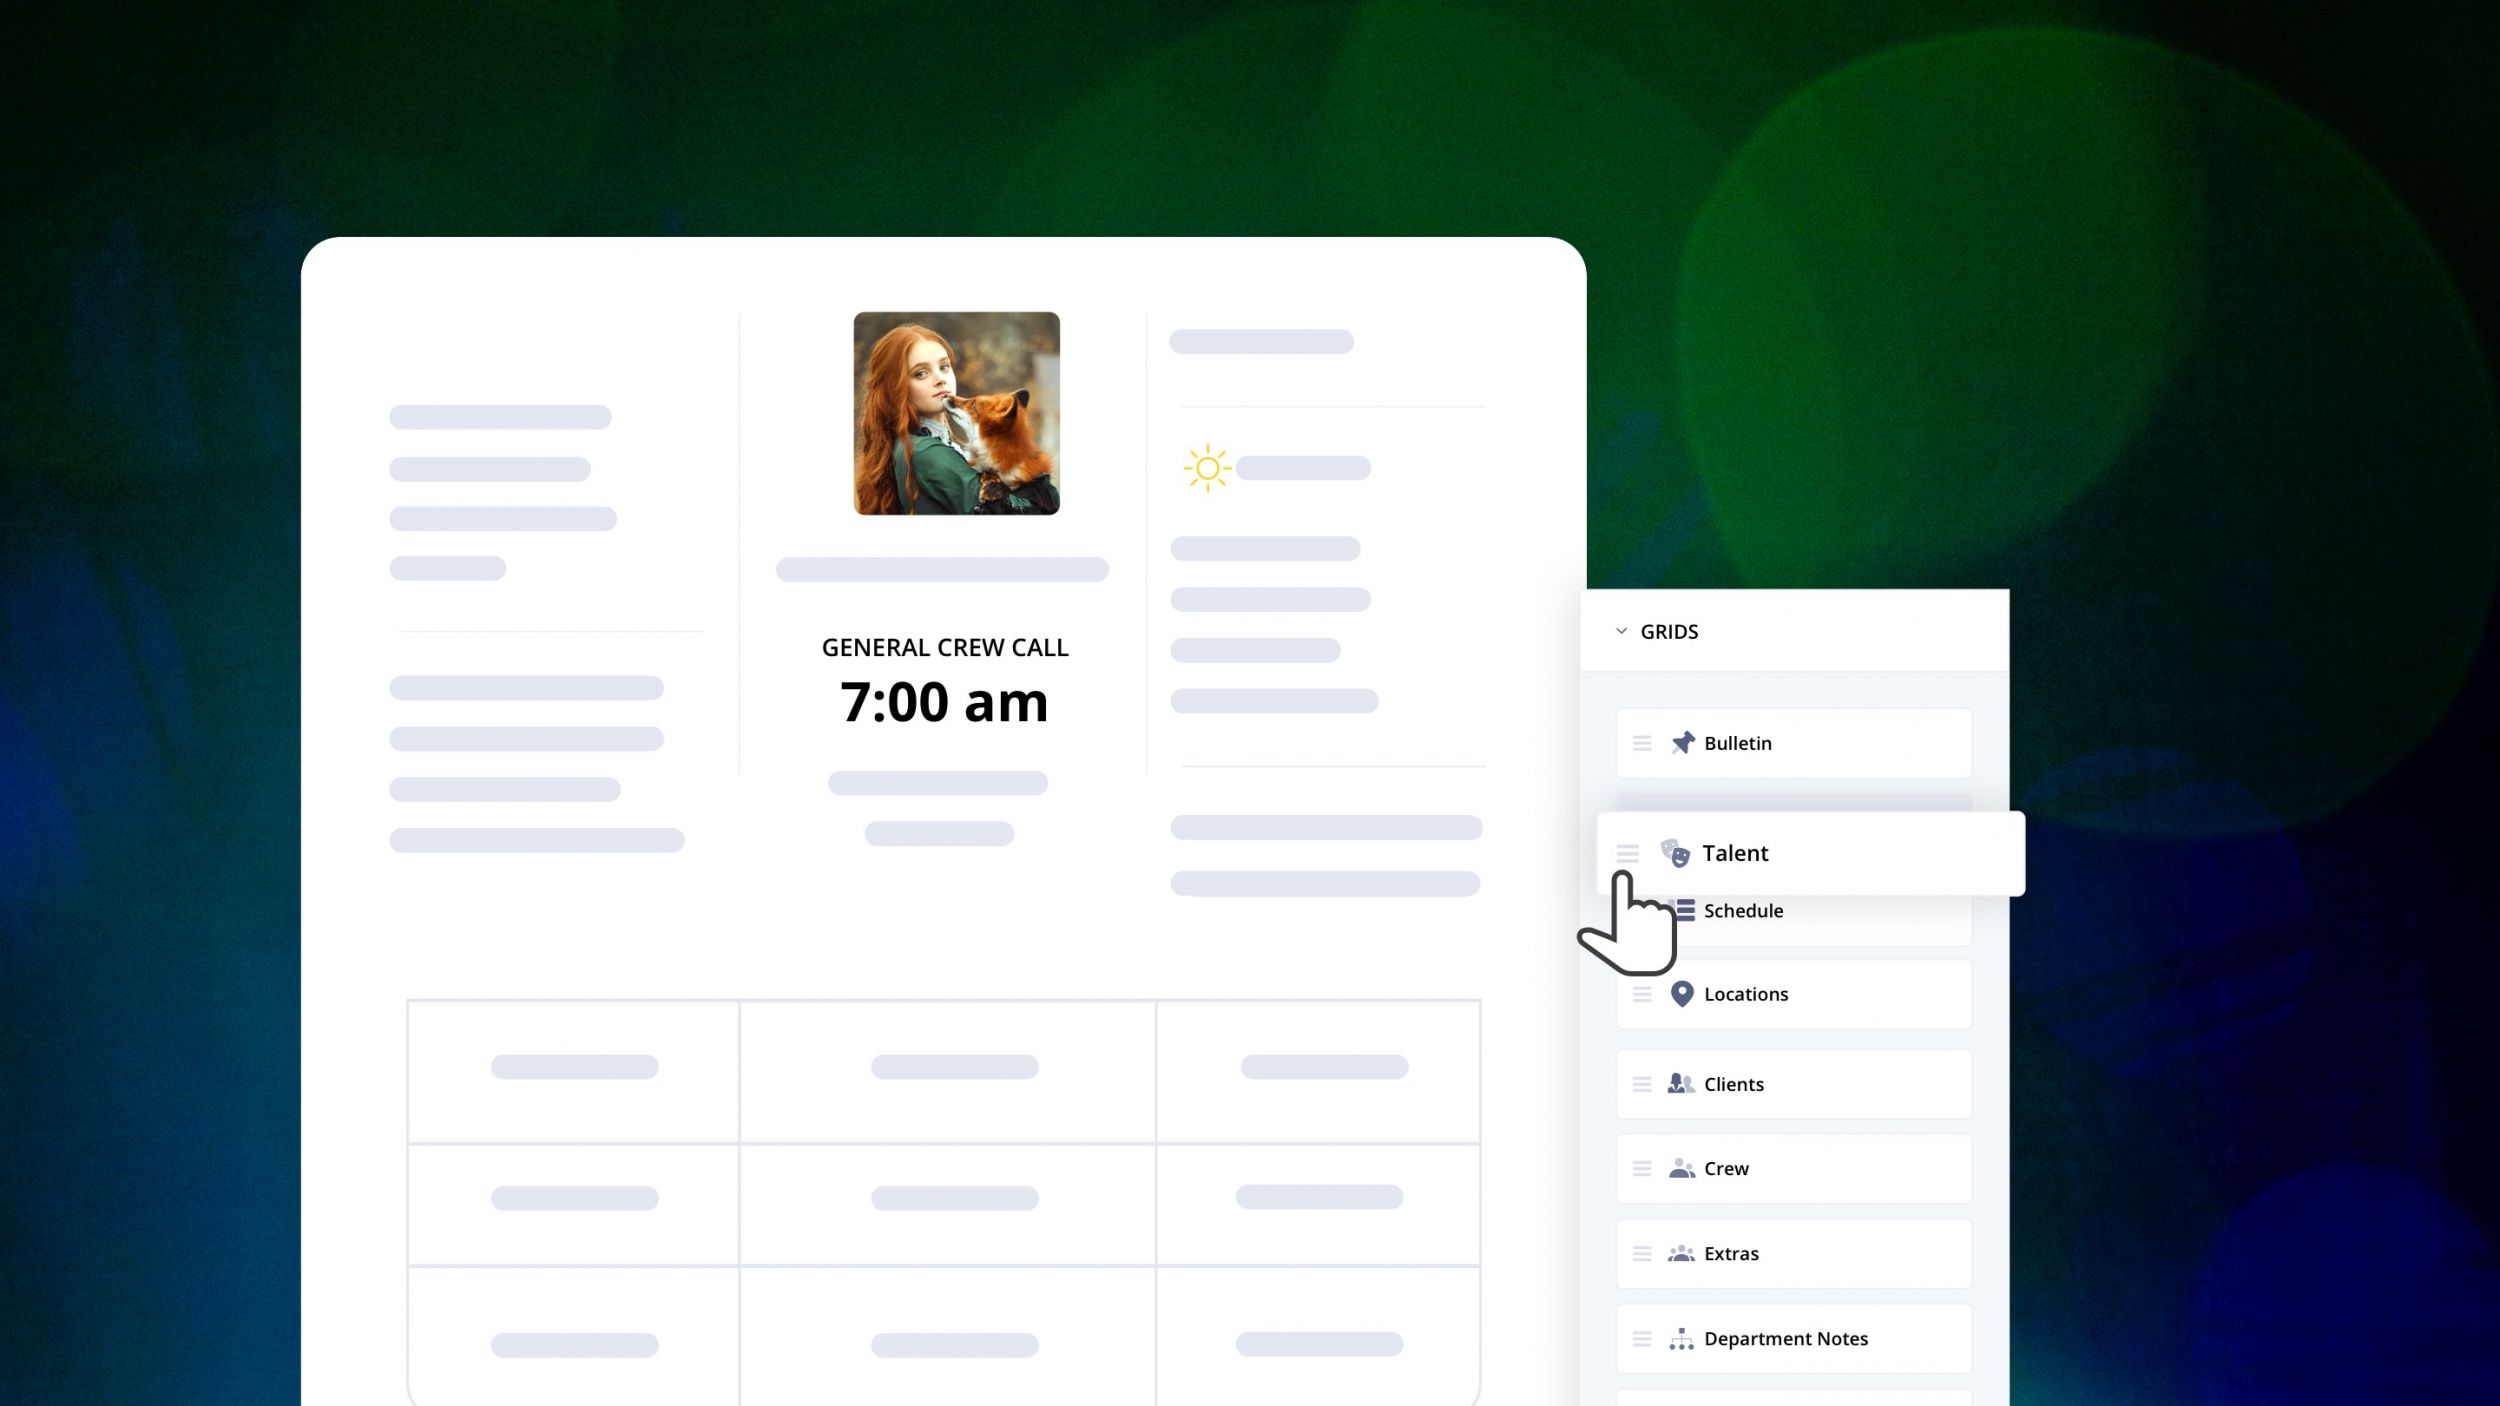
There is a lot to remember when building a call sheet, so StudioBinder has taken the liberty of making your life easier. If you forget what goes on the sheet, don't worry. Everything you need is laid out for you. Your only job is to plug in your specific information.
Take a look at StudioBinder's free call sheet builder below.
Created in StudioBinder's Call Sheet Builder
Making these documents correctly is very important. This is how your cast and crew know where they’re going, what they're doing, and when they’re doing it. Reviewing a sample call sheet can help ensure that all essential details are included and properly formatted before final distribution. Let’s walk through the steps.
1. Add production info
The top of a call sheet has the most general information about the production. These are things like the project title, the production company involved, and the contact information for high-level personnel like producers and assistant directors. A well-structured movie call sheet ensures that everyone on set is aligned with the day’s schedule and production details.
With StudioBinder, you can even add your production company’s logo and a project icon to give your call sheet template a more professional look, ensuring all necessary details are neatly organized.
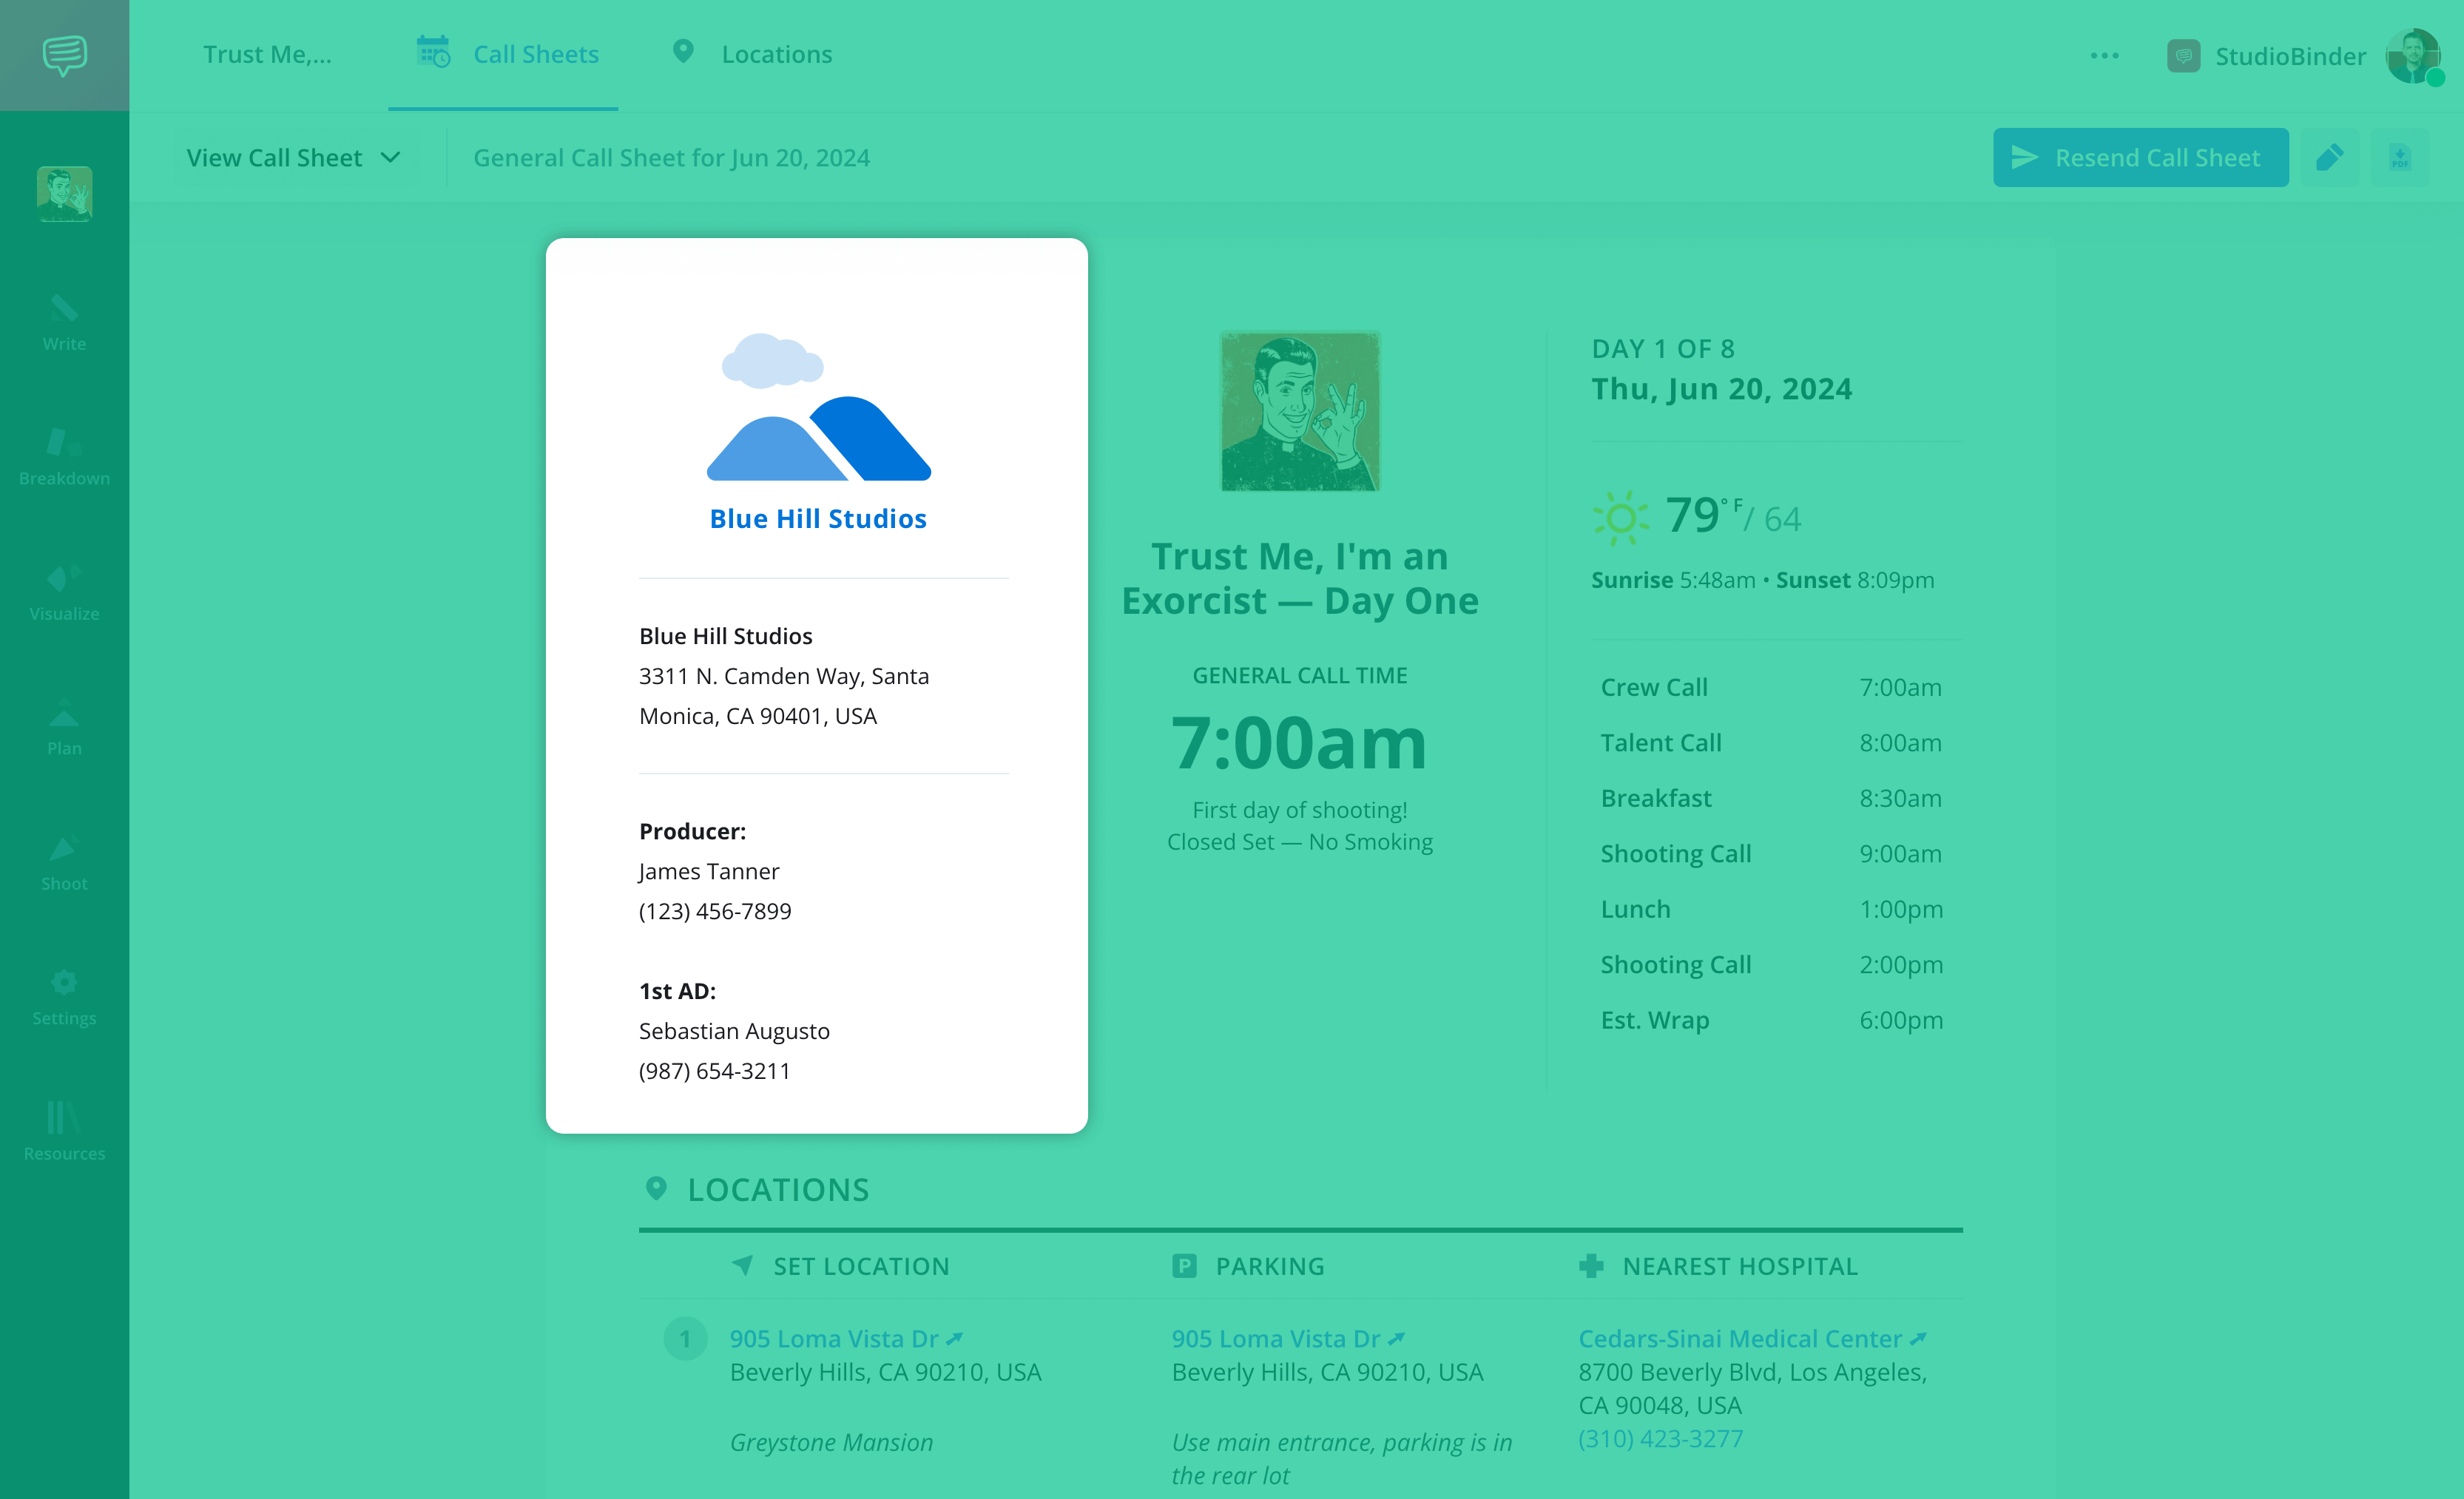
Call sheet format: Essential production details at the top
2. Include shoot day info
This top section should also include information about the specific shoot days. You’ll want to add factors like:
- Shoot Date
- DOOD (day out of days)
- Call times
- Weather forecast
- Schedule (scenes to be shot and when)
- General notes/special announcements (any considerations the cast and crew should be aware of)
StudioBinder will fill some of this in automatically based on your location and date, and the weather will update based on any forecast changes. Our sample call sheet can serve as a reference to ensure all essential details are properly included.
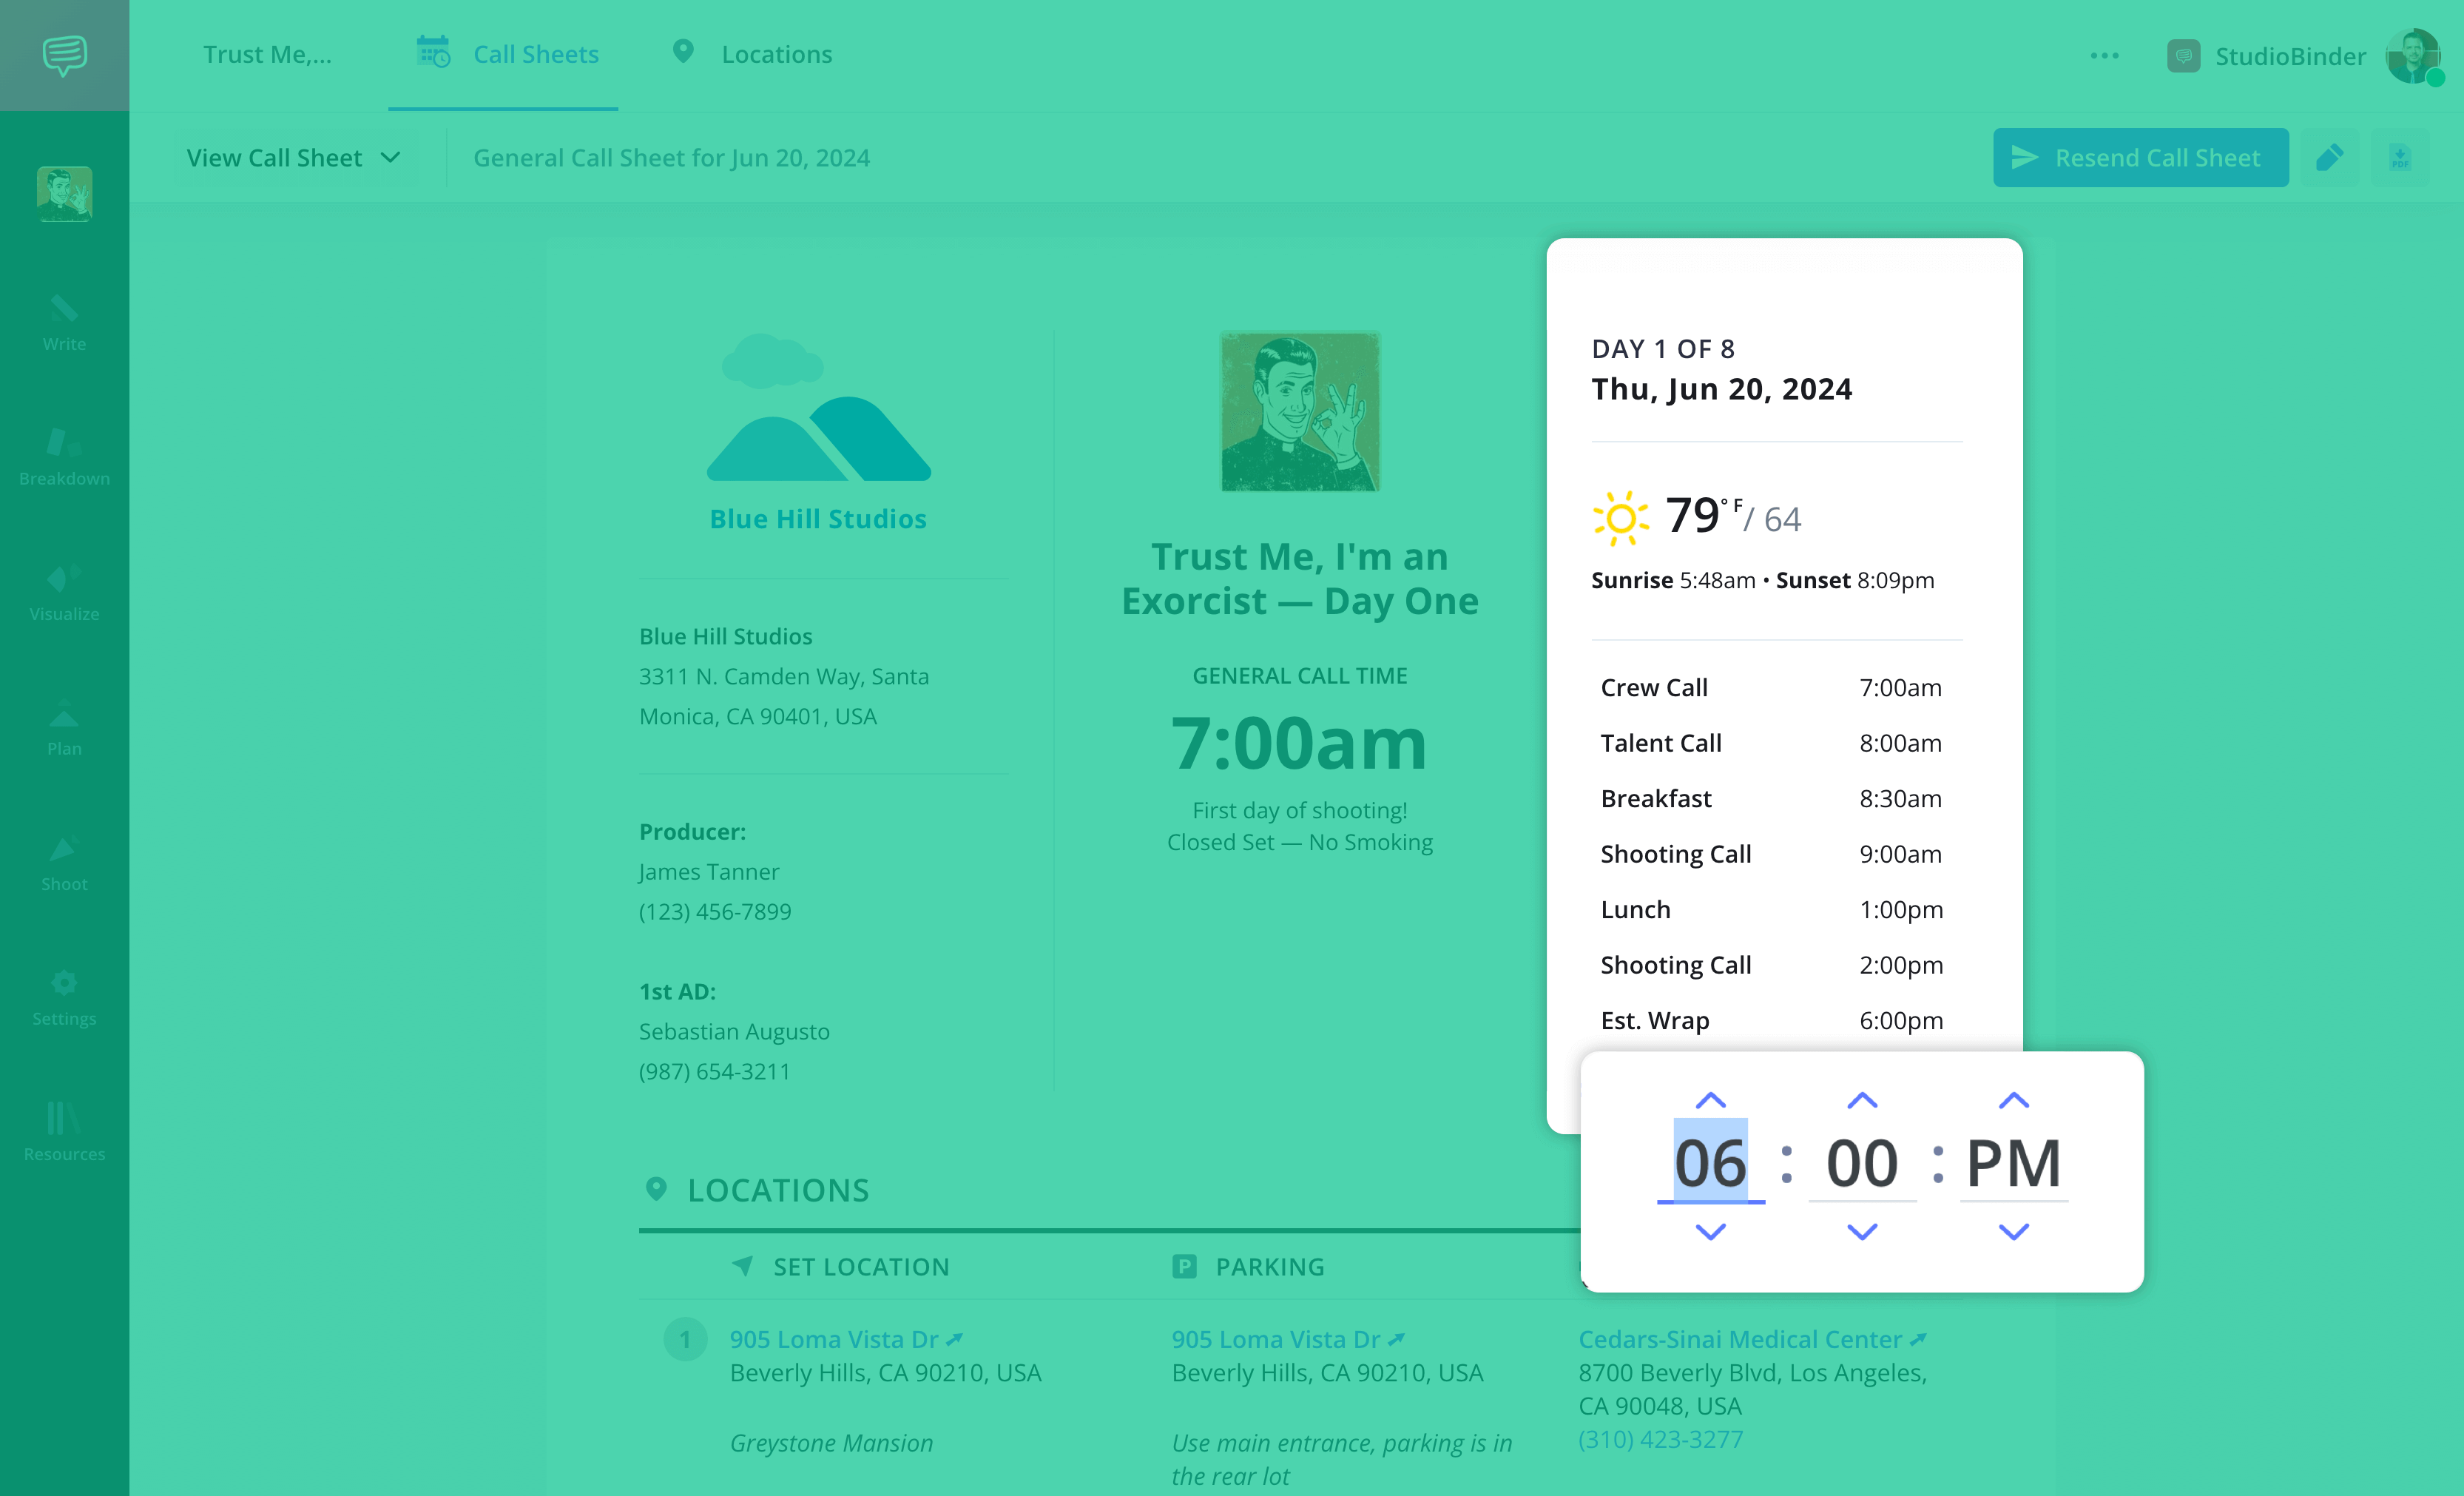
Sample call sheet: Key shoot day details & scheduling
Related Posts
3. Enter location details
You’ll want to let your team know more about what to expect from a shoot location. This means your sheet will typically include:
- Location name
- Address
- Parking details
- Additional notes (location contact, etc.)
- Nearest hospital (must have a 24-hour emergency room)
Like with the dates, StudioBinder can automatically complete a lot of this information for you. Using a movie call sheet, filmmakers can streamline communication and ensure a well-coordinated production. You can add more locations manually or select from locations you’ve entered previously.
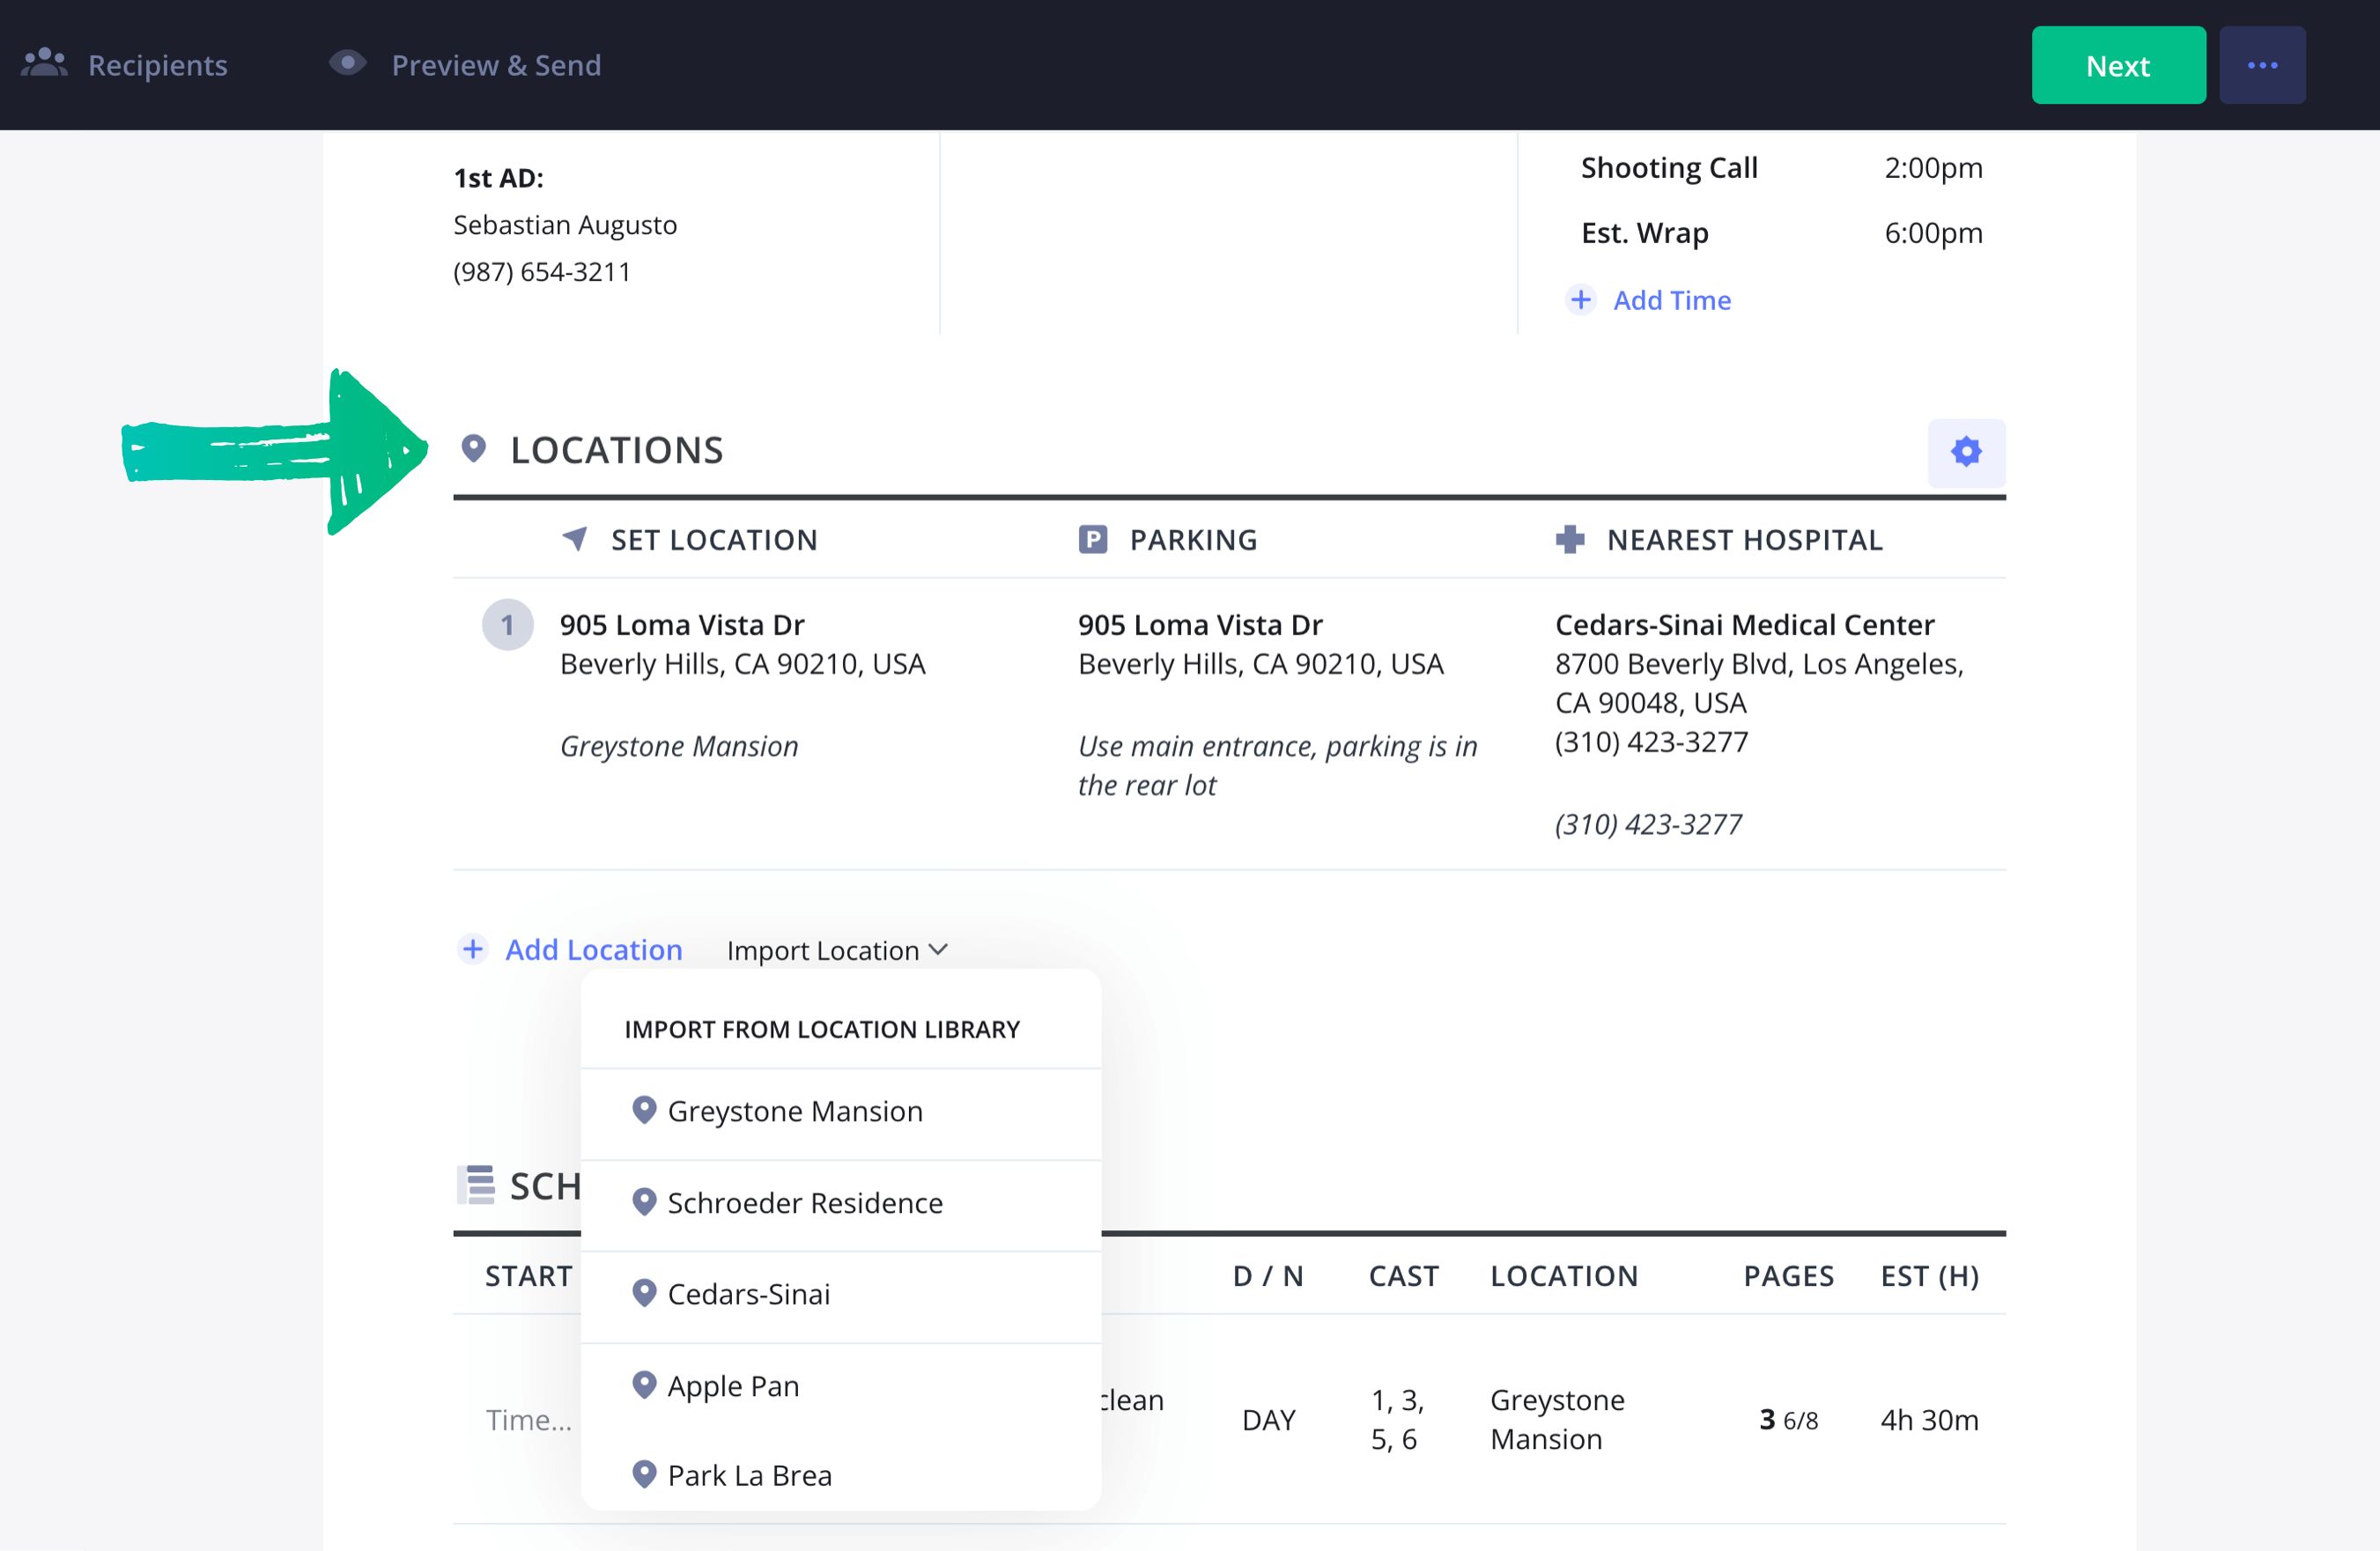
Movie call sheet location details: what to include
Related Posts
4. Set the shooting schedule
Next, you’ll want to outline the day's shooting schedule. This means addressing what is being shot when and where. Understanding the call sheet format is crucial to maintaining clarity and efficiency for the entire crew. Other information to include:
- Scene numbers
- Scene descriptions
- Cast
- Location
- Page counts
- INT. or EXT.
- Start times
- Time allotted for the scene
This can take a long time if you’re doing it manually. But with StudioBinder, you guessed it, information will be populated automatically if you've completed your shooting schedule in advance.
Of course, you can manually arrange elements if necessary by dragging and dropping, or hide/reveal columns as needed.
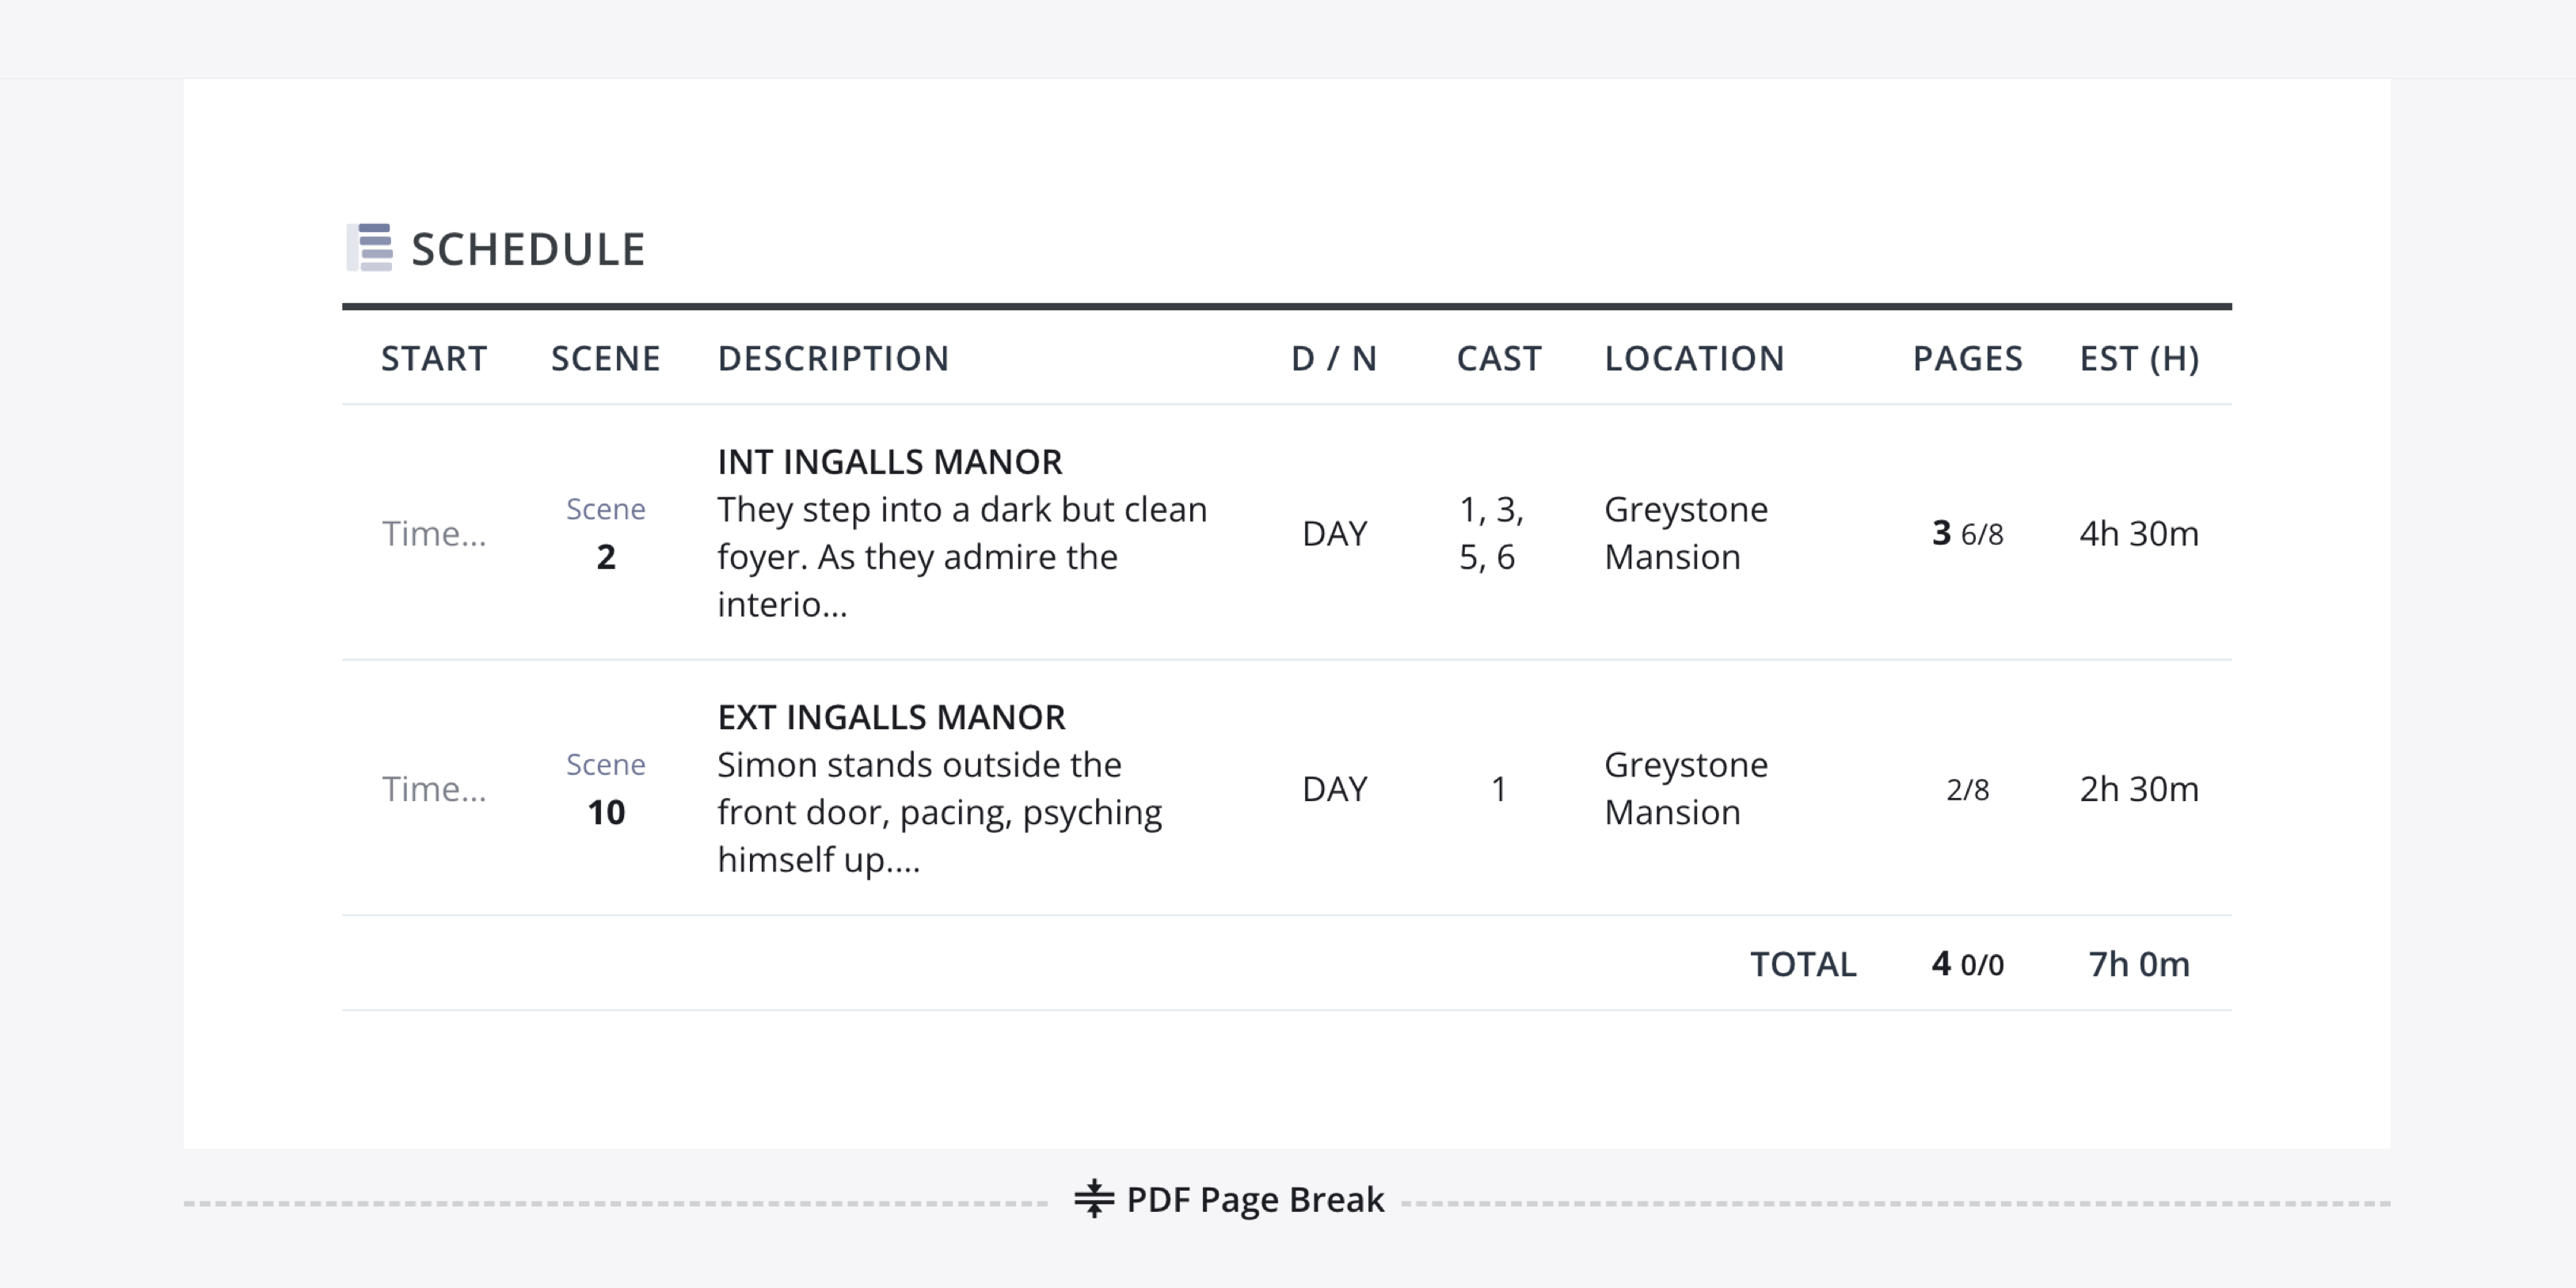
Call sheet format: How to organize your shooting schedule
PRO TIP: MEALS AND COMPANY MOVES
Don’t forget to include what time lunch will be served!
According to union rules, a full meal must be served no more than six hours from the general crew call. If you have any company moves, add them as well (include time, address, and parking notes). StudioBinder colors schedule notes and company moves yellow and blue, respectively.
5. Add an advanced schedule
If you want to go above and beyond, you can also include a schedule for the following day. This is optional, but usually appreciated by the cast and crew, who will see what to expect ahead of time.
StudioBinder will also do this automatically if you want it – no additional work required.
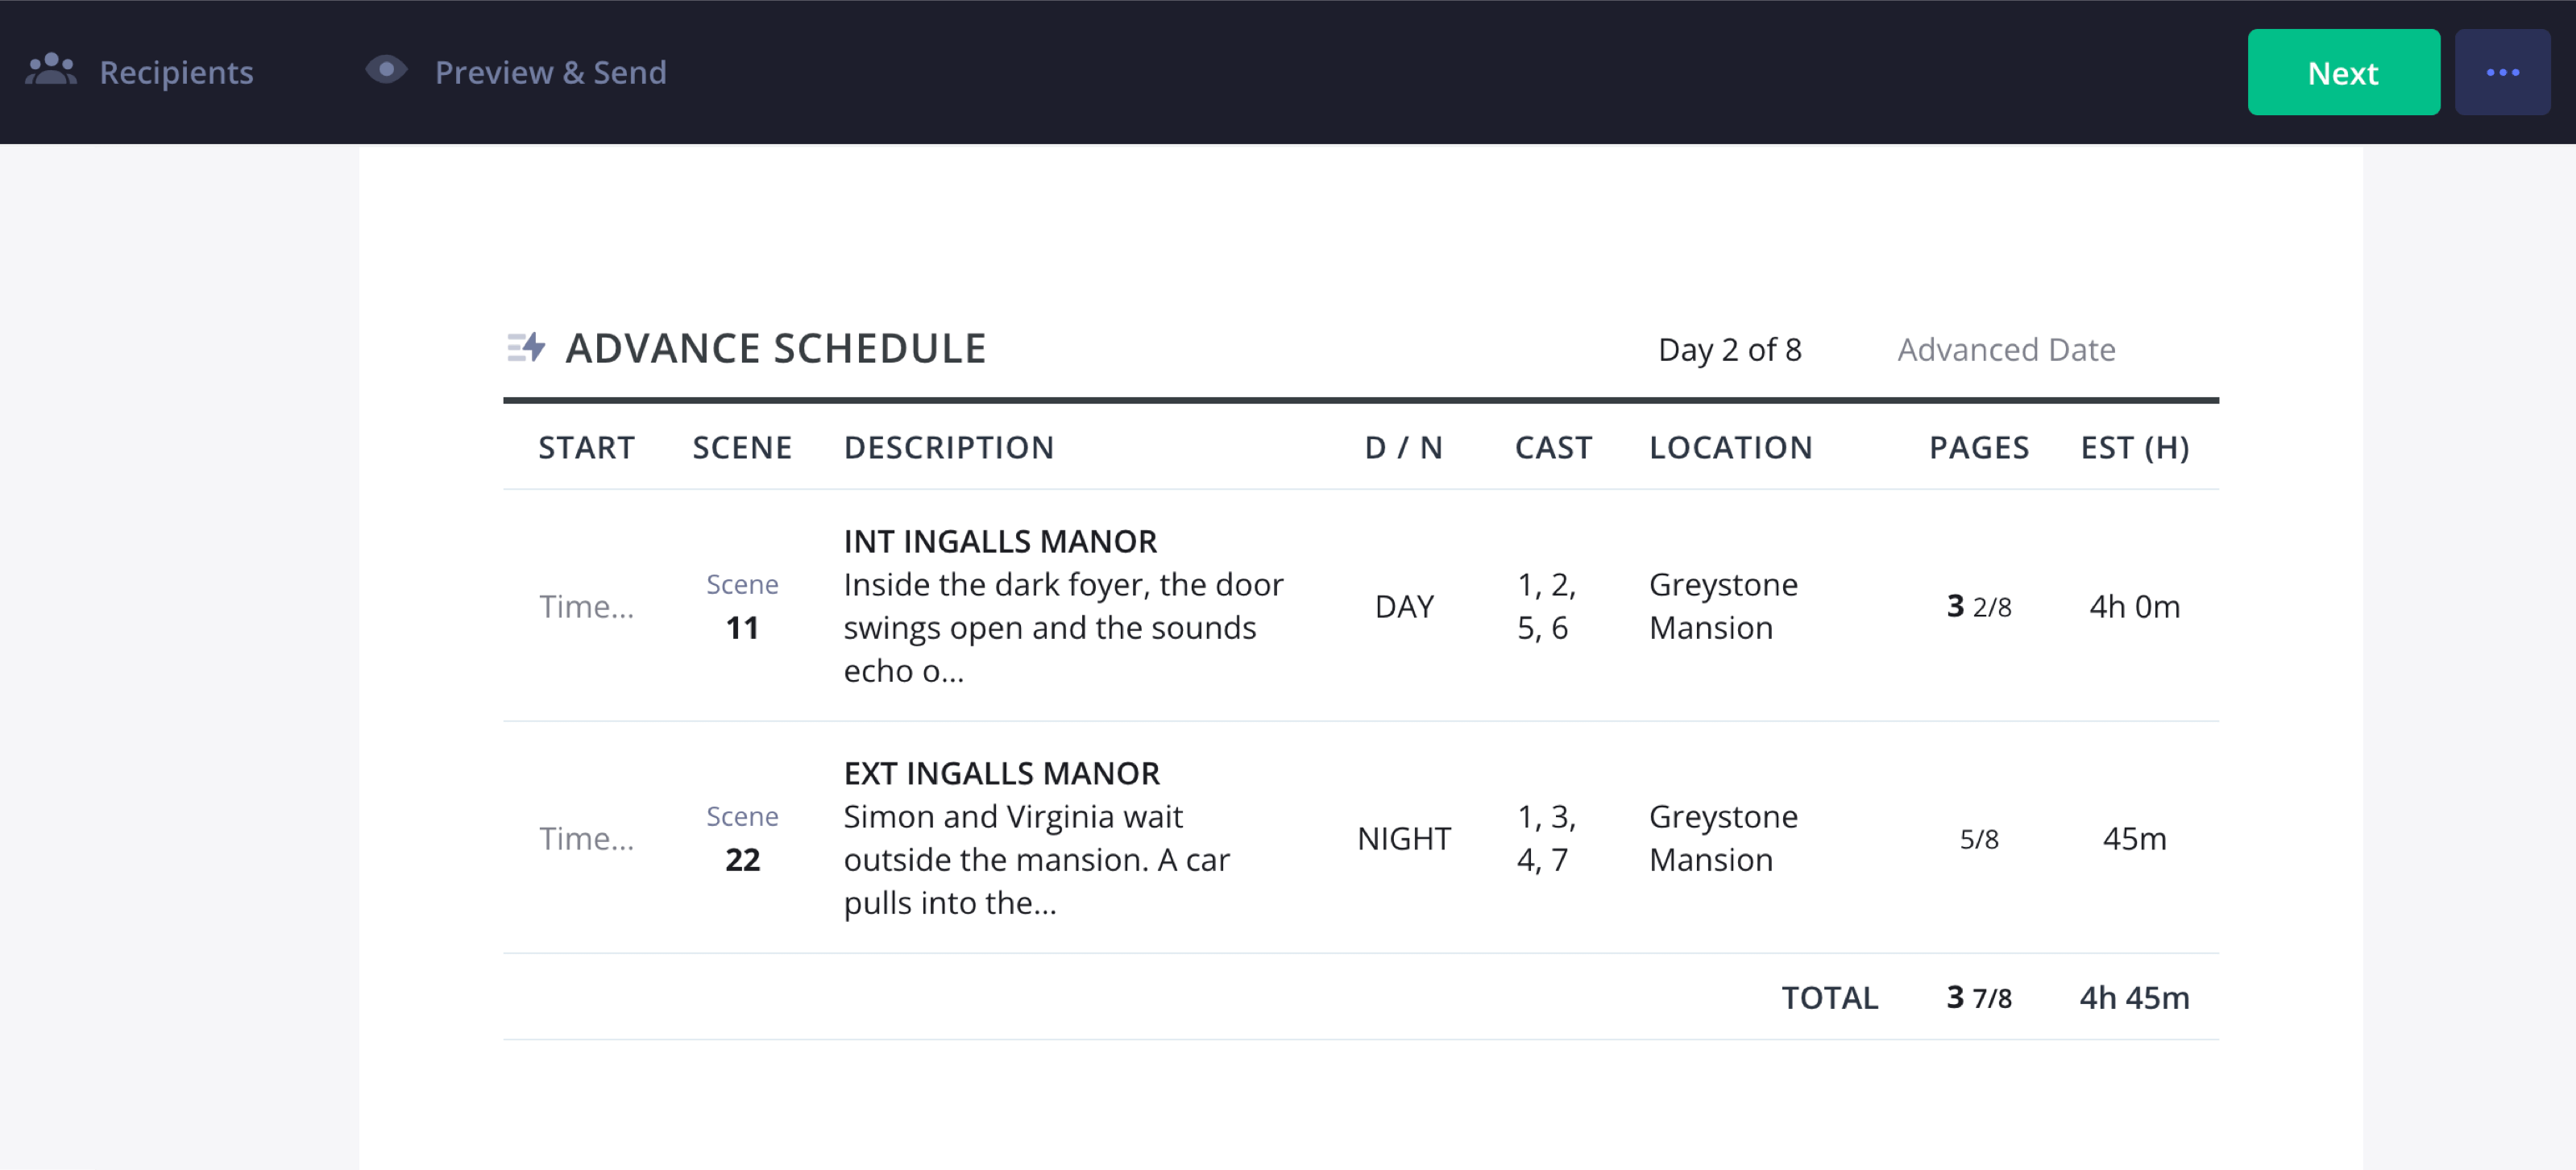
Film call sheet template: Planning ahead for shoot days
6. Add the cast
Your cast information includes their full names along with their character names, cast ID numbers, status (whether they’re starting that day, wrapping up, or in the middle of multiple days), pick-up times if they require transportation, a hair and makeup call time, and a call time to be on set.
It’s a lot of information, and luckily, StudioBinder will help you out, filling in data from the shooting schedule. It can be adjusted as needed.
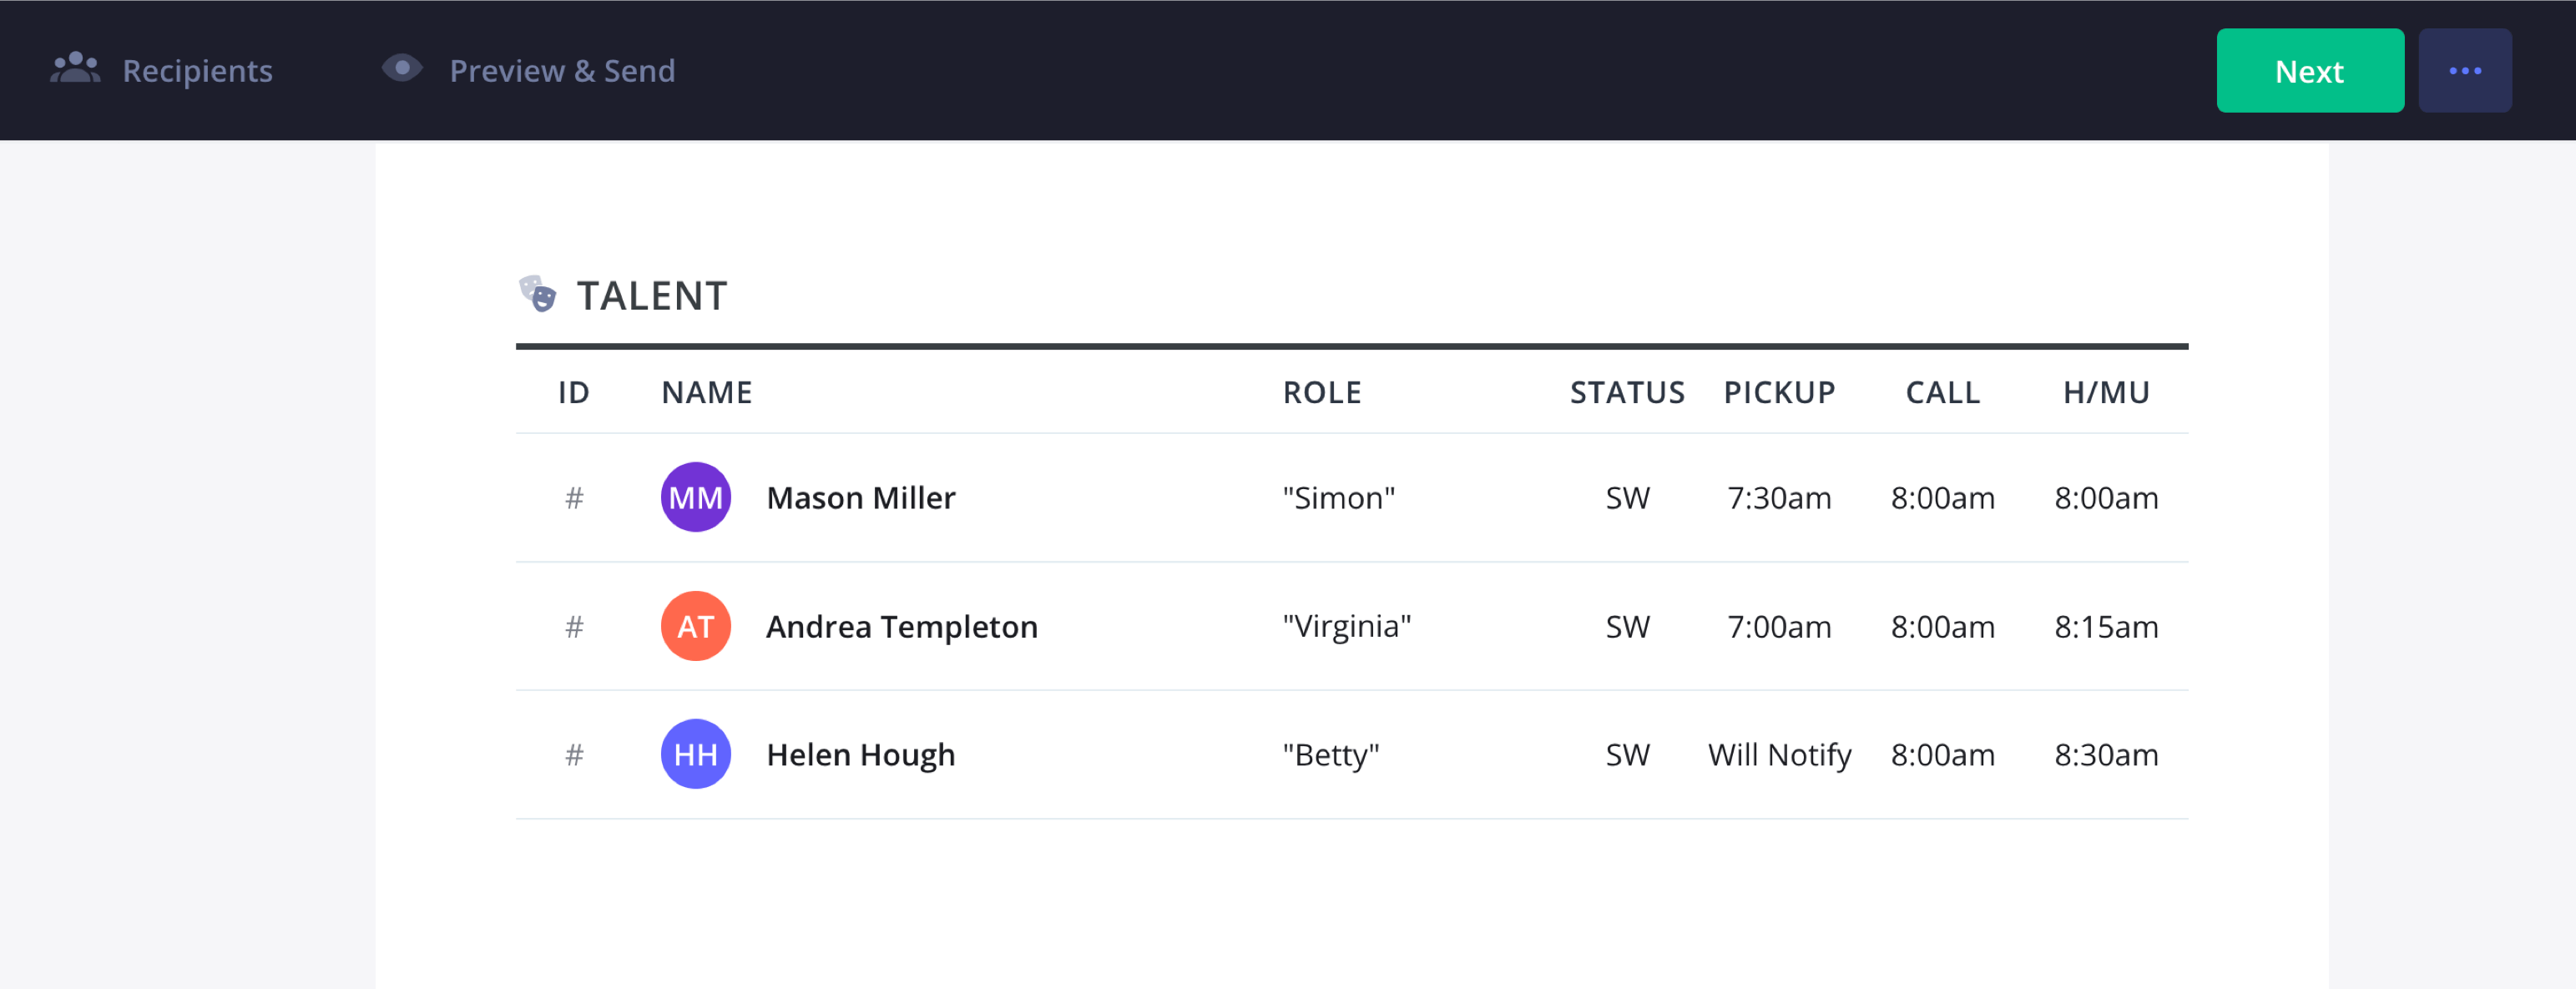
Call sheet example: Managing cast lists & call times
SWHF call sheet: Understanding actor status codes
The status column indicates the length of the talent’s job on a multi-day project. In an SWHF call sheet, these status indicators—S, W, H, F—help keep track of an actor’s working schedule. A properly formatted SWHF call sheet ensures that cast availability, scene requirements, and production logistics remain well-organized.The column is populated with a combination of the letters S, W, H, F, which stands for Start, Work, Hold, Finish.
- “SW” stands for “Starts Work,” it is the talent’s first day on the job
- “W” stands for “Works,” your talent is in the midst of their job
- “WF” stands for “Work Finish,” it is your talent’s last day on the job
- “SWF” stands for “Start-Work-Finish,” talent works for just that one day
- “H” stands for “Hold,” your talent is not being used that day
Defining pickup & on-set timing
Pickup indicates what time the talent will be picked up for transport to the set. This is most often used when talent is shooting away from home, and will be shuttled from their hotel lodging.
On local projects, talent may drive themselves to set. In this case, you can leave the pickup column blank or enter O/T, which stands for “Own Transport.”
The “On Set” call time column indicates what time the talent must be finished with makeup/wardrobe and report to set for performance.
Related Posts
7. Include background and extras
Some scenes will require background actors and extras, and that should be noted. Background actors used to populate locations are referred to as “atmosphere.” Extras are often more involved, like a waiter in a restaurant scene. Some information to include:
- Description of atmosphere/extras
- How many are needed
- Using a film call sheet template can make it easier to keep track of extras, ensuring that every role is accounted for.
- Call times for pickup, costuming, hair, makeup, and on set
Extras that have been tagged in StudioBinder’s script breakdown software can be selected and added without needing to manually enter them.
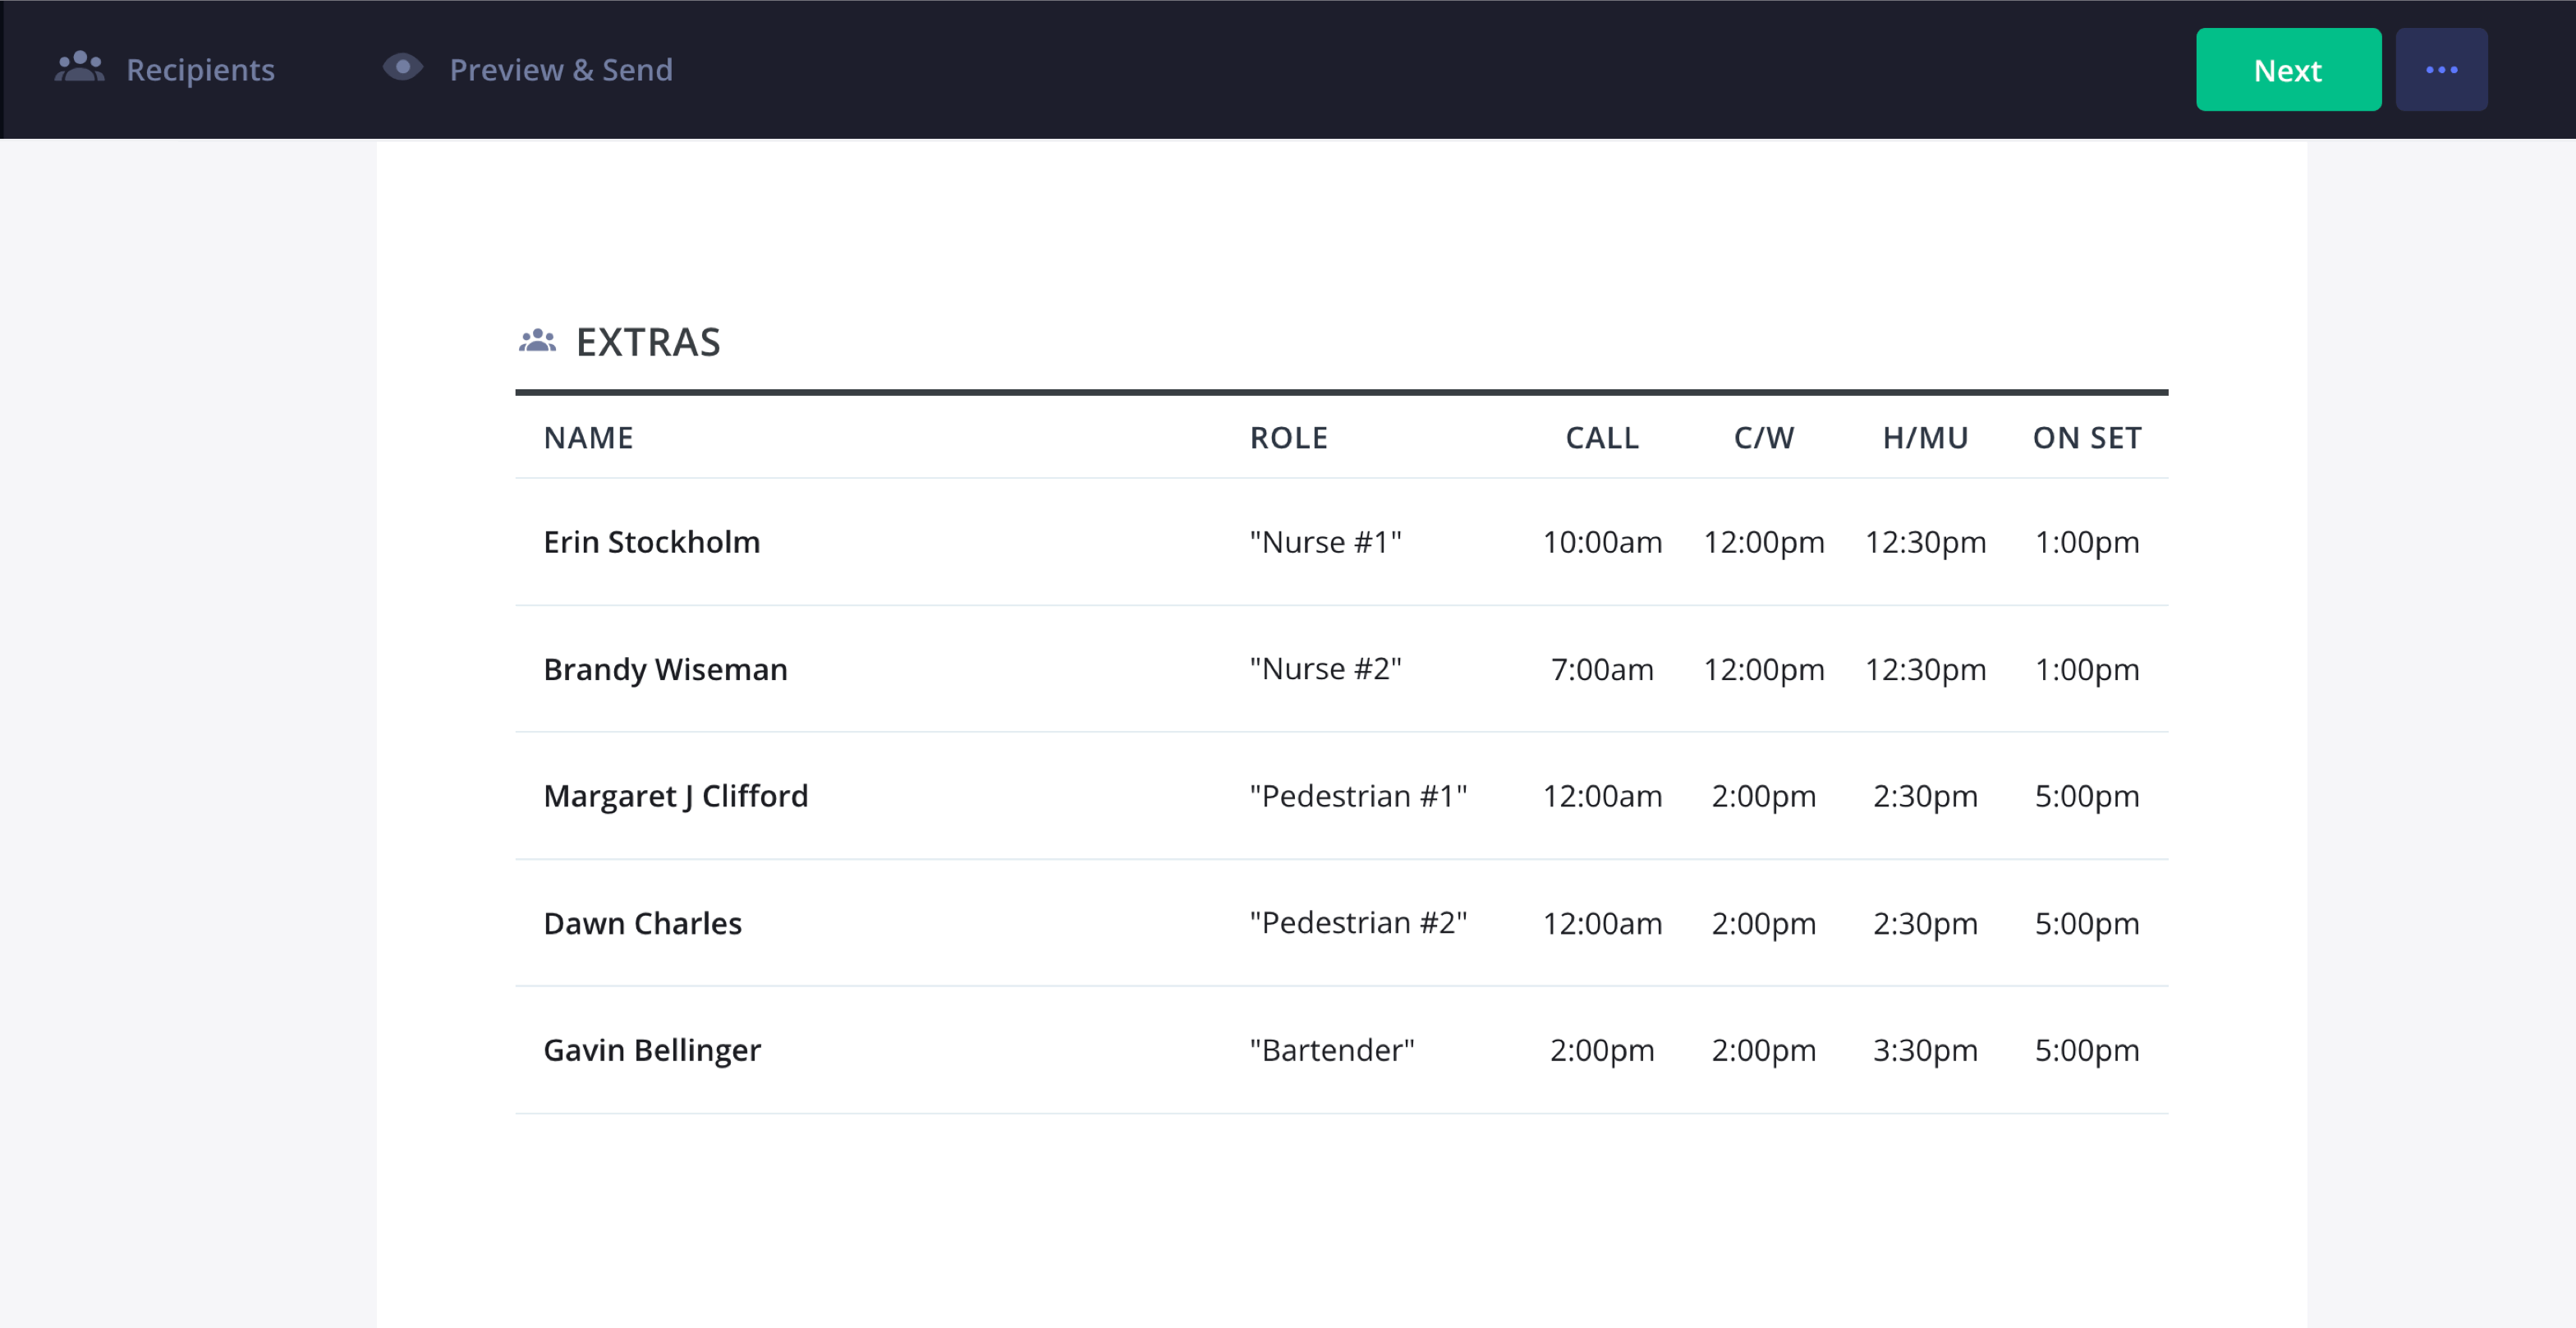
Film call sheet template: managing extras & background talent
8. Provide department notes
Every shoot day is different, so make sure you include any specific notes that certain departments should be aware of. This can be props, stunts, sound, set dressing – anything of note. A call sheet template helps departments stay organized and ensures that no crucial information is overlooked.
This information can also be transferred from your script breakdown in StudioBinder. This can save a huge amount of time and ensures nothing is forgotten when the shoot day comes.
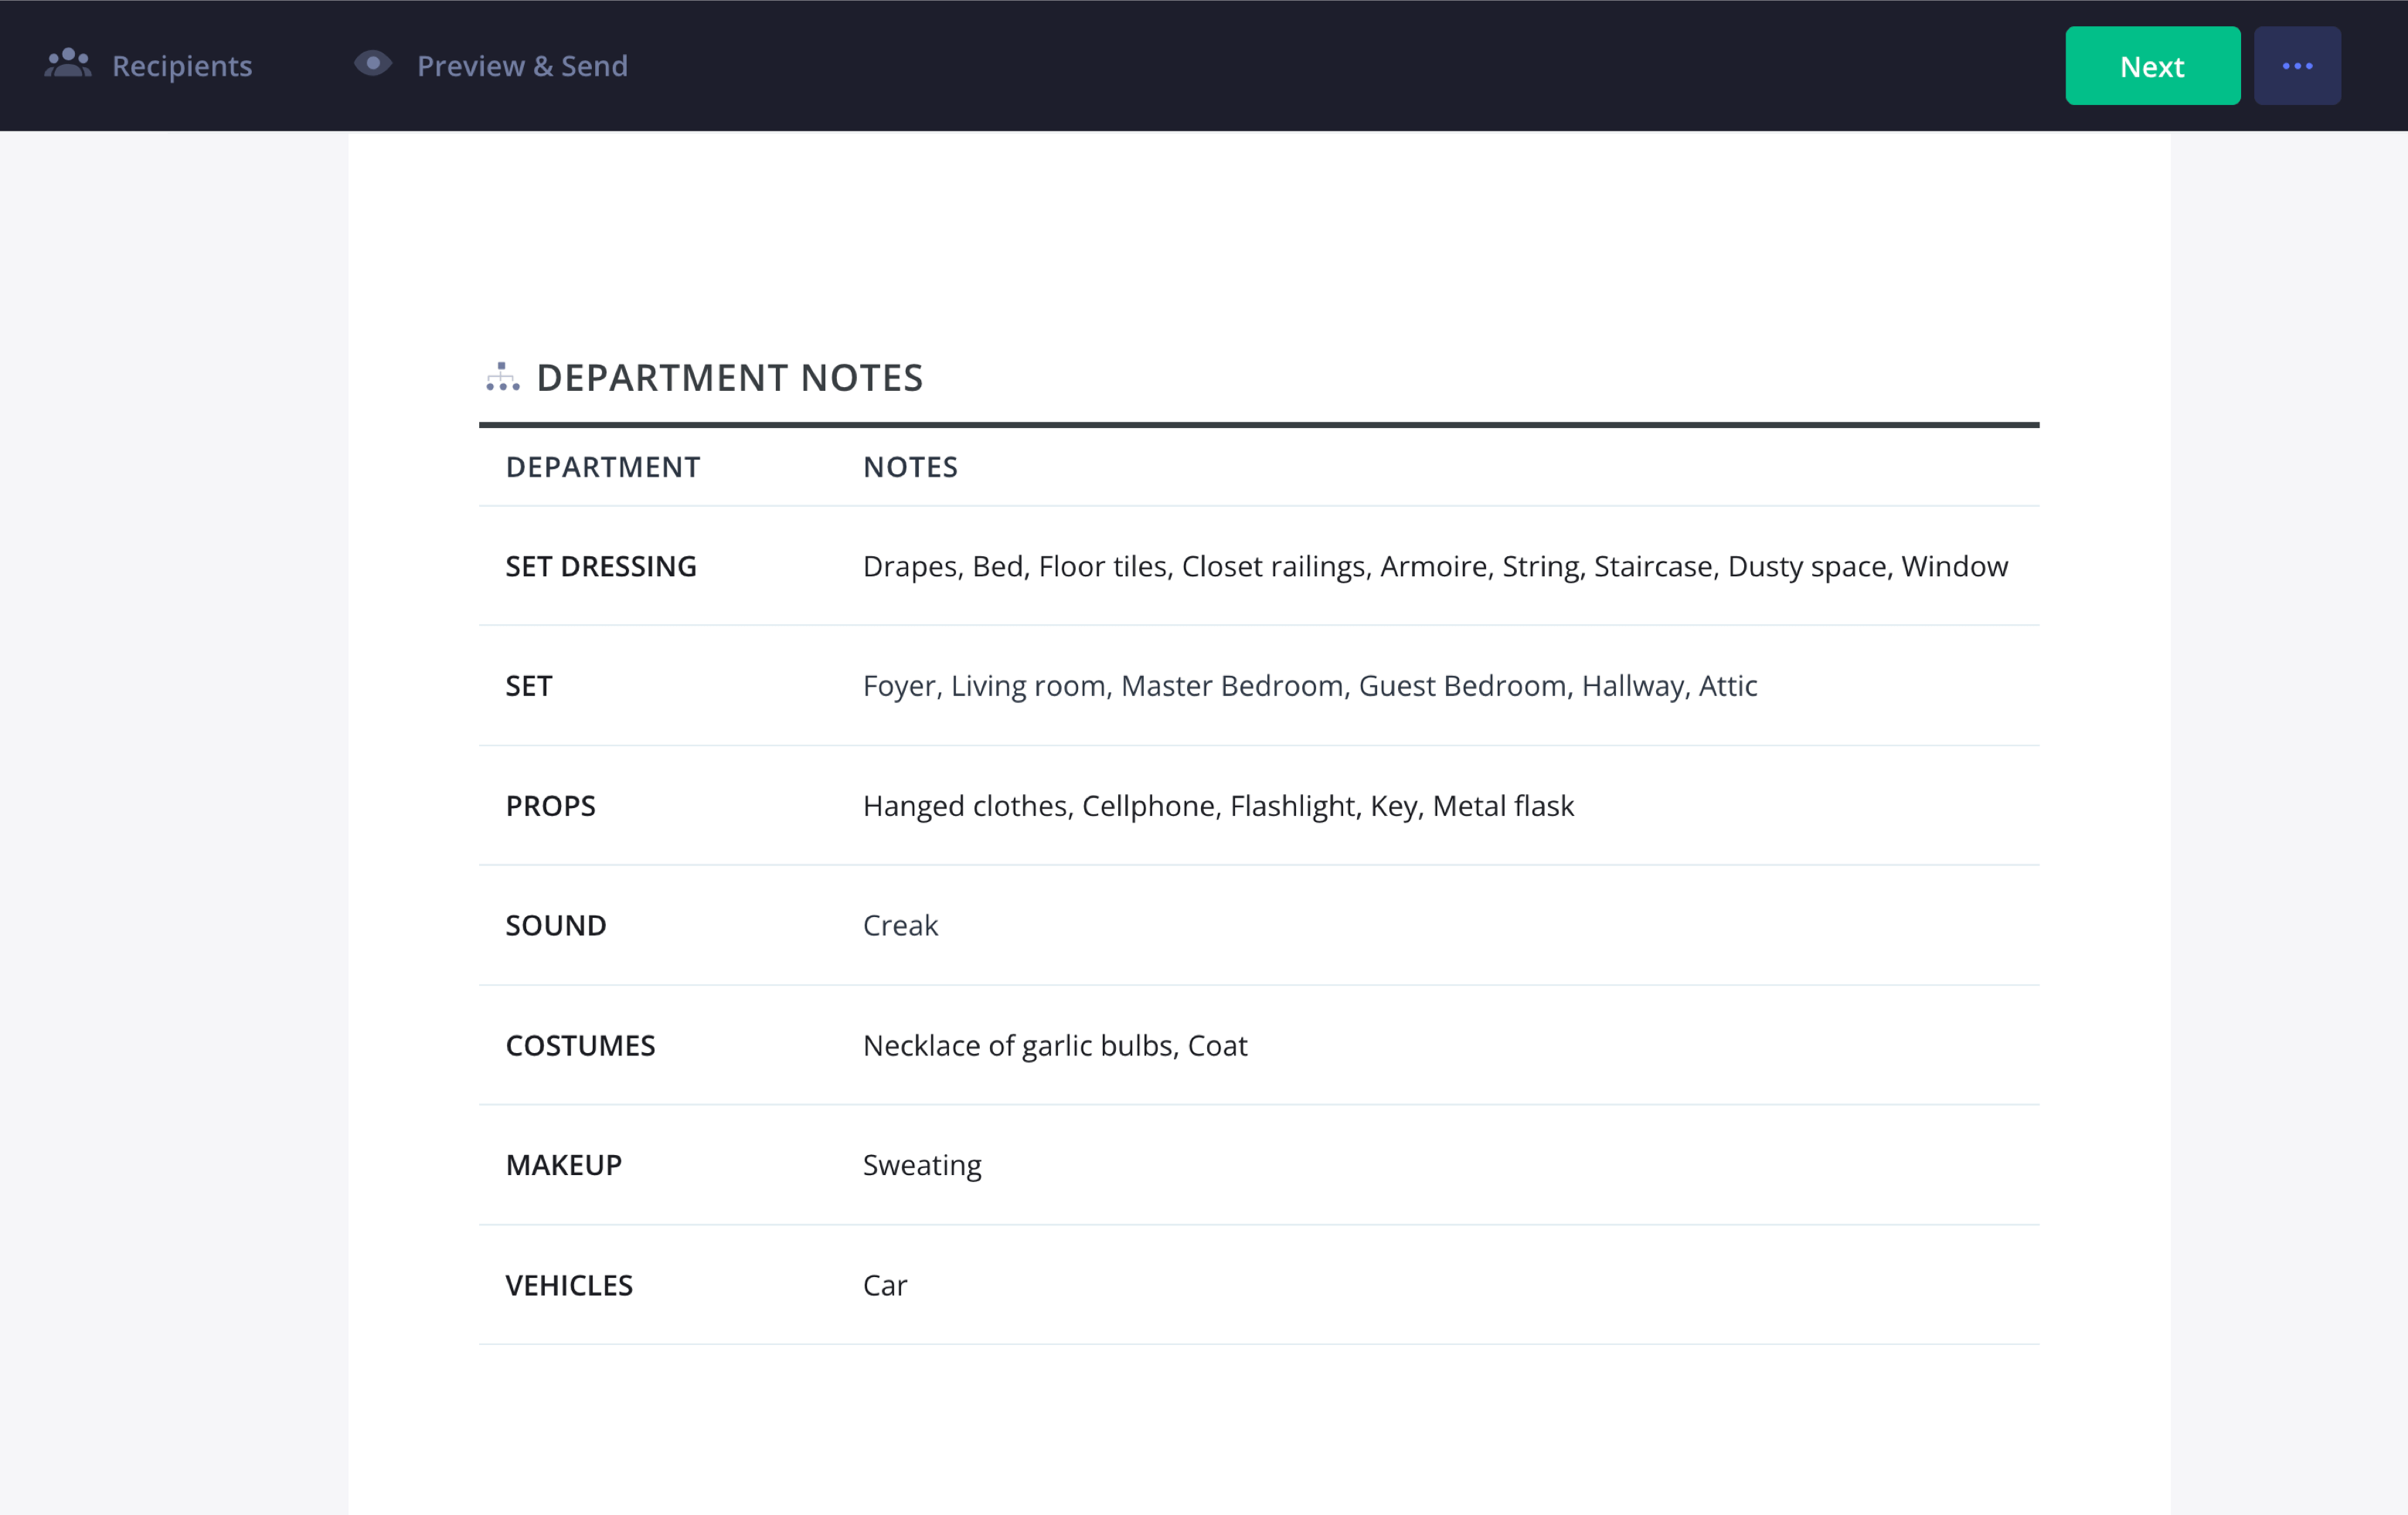
What is a call sheet? Essential notes for every department
9. Add your crew
You can’t make a movie without a film crew, and so a call sheet needs to include their information as well. A call sheet example can help ensure all necessary details are properly structured. That means names, role, or department, and specific call times. Typically, you’ll want to organize this grid by department.
If your crew has already been assigned in your StudioBinder Project Contacts, they’ll auto-populate in your sheet. You can adjust individual status and call times as needed.
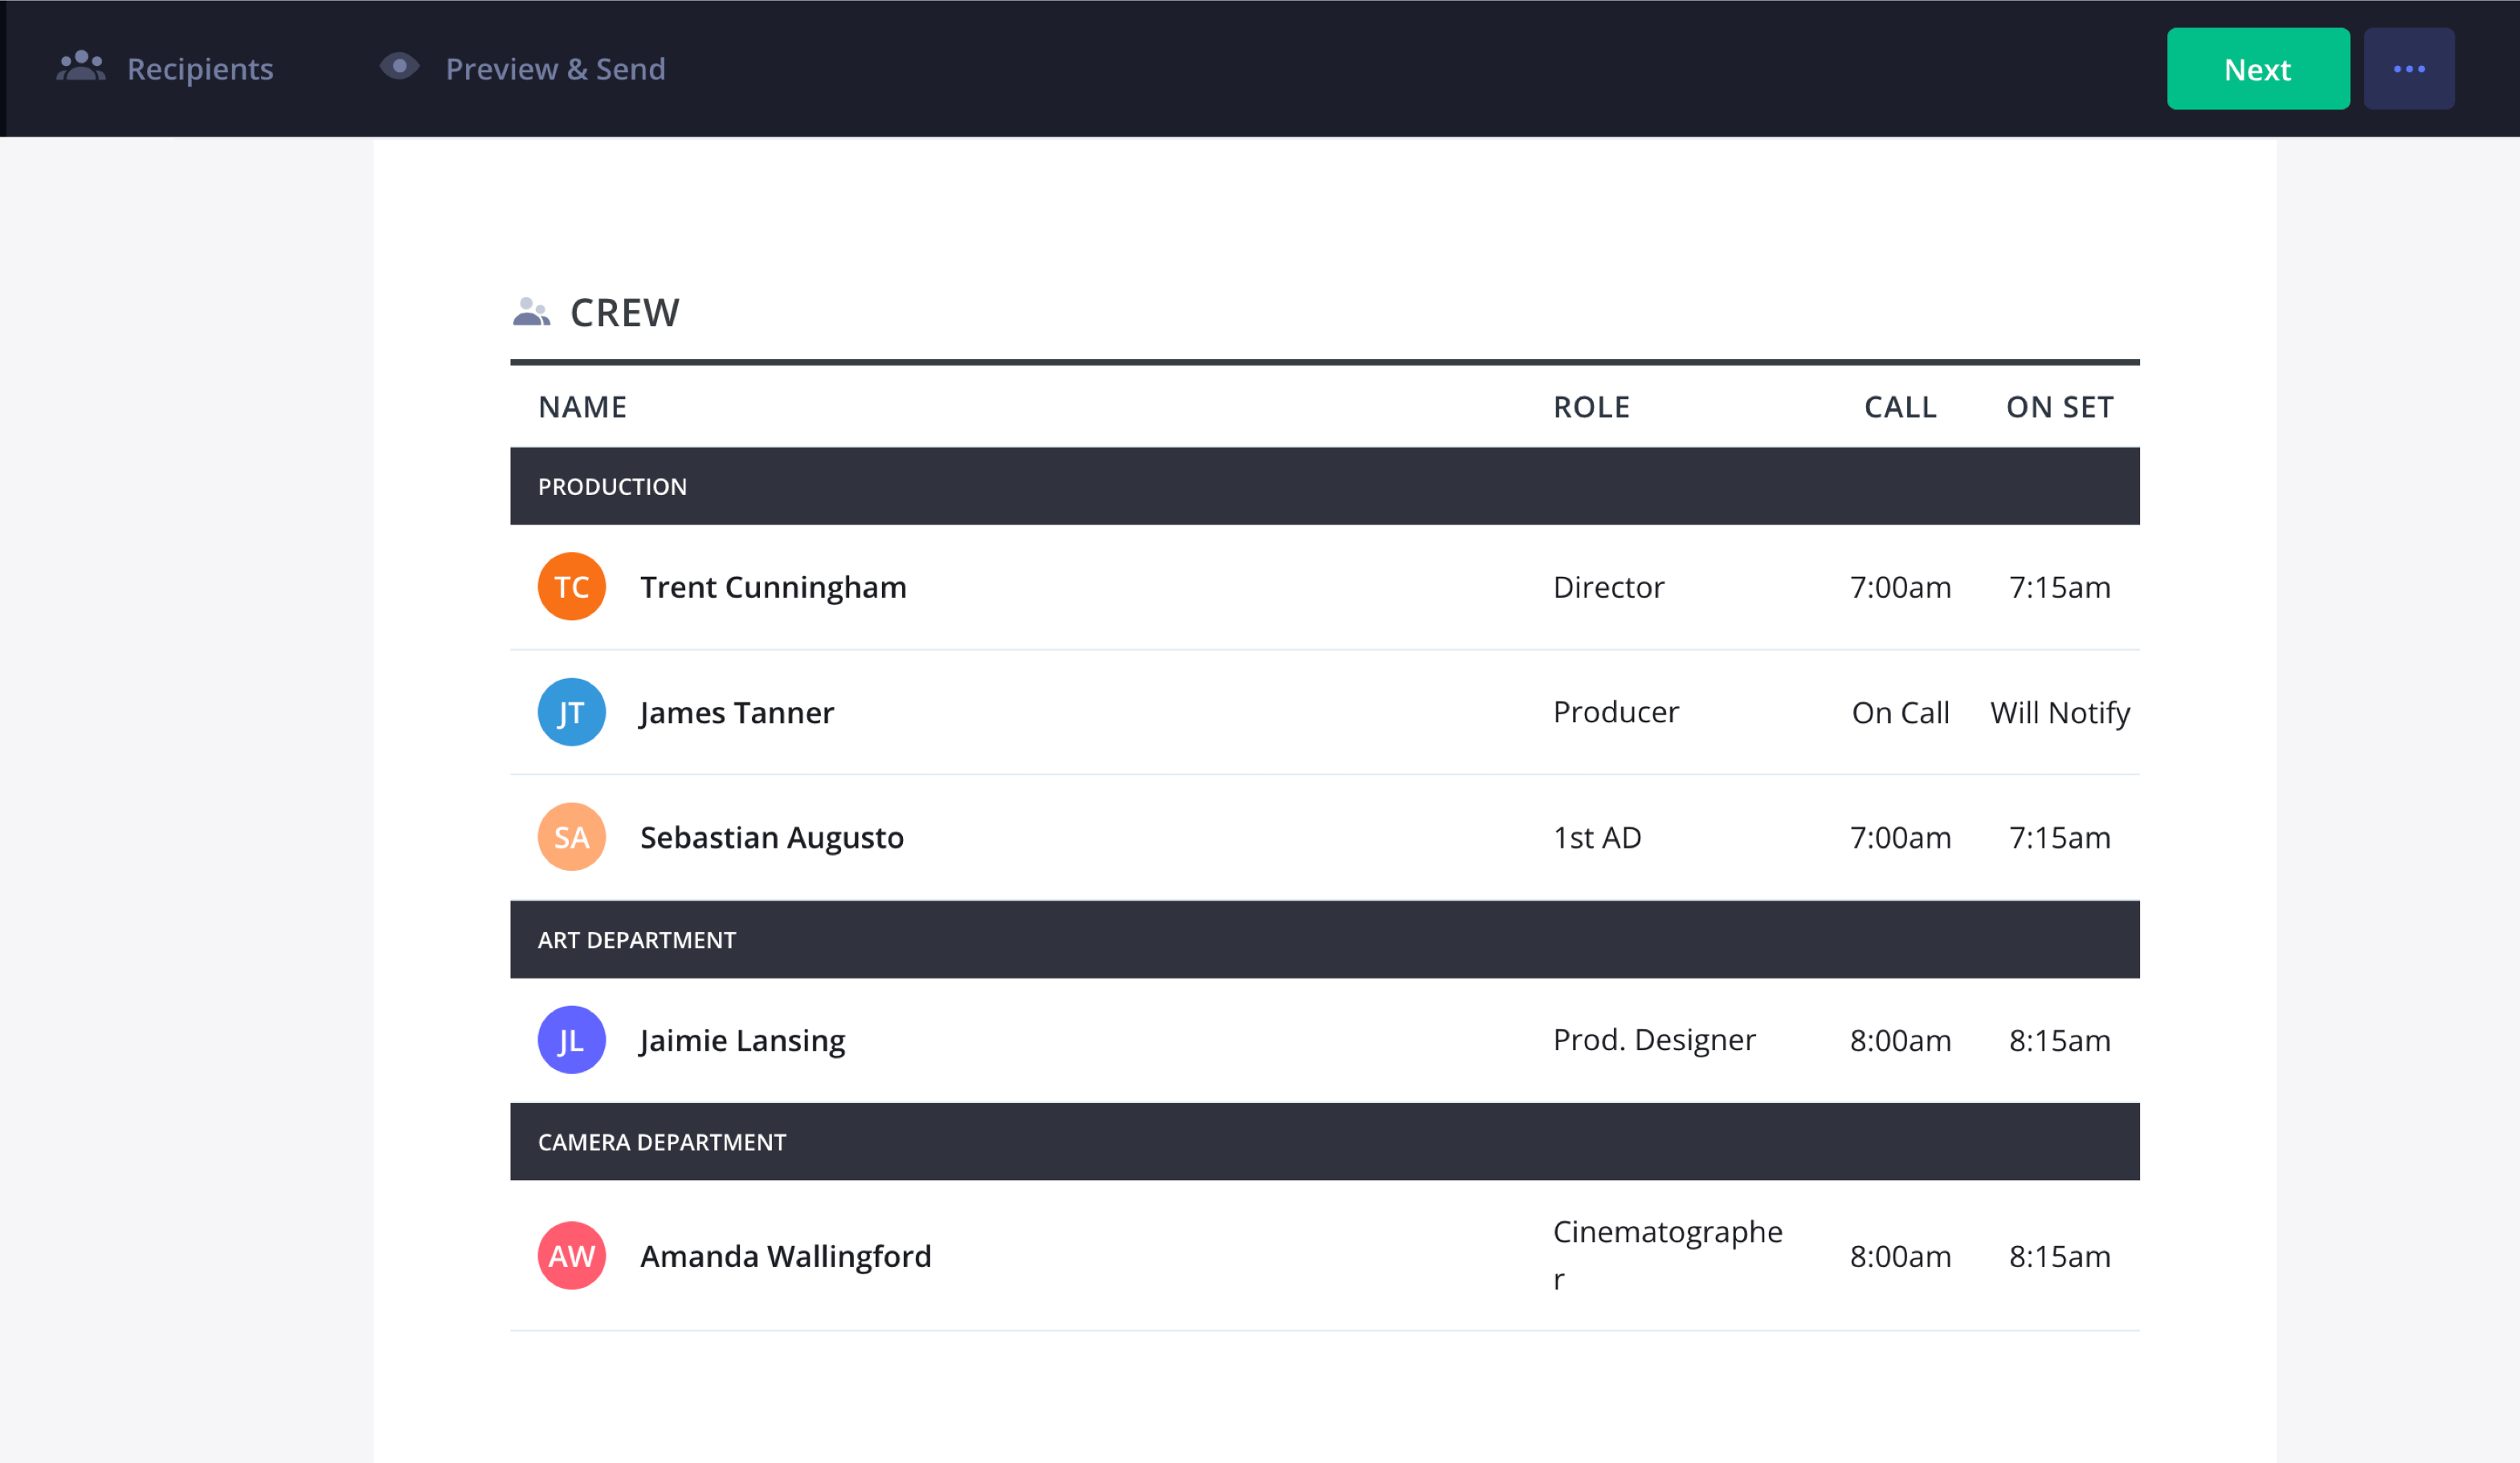
Call sheets for crew: Organizing roles, call times & responsibilities
10. Distribute the call sheet
What good is a call sheet if it isn’t sent out? No good at all. Usually, you’ll send them out as a PDF via email the night before the shoot day. You can also print them out and distribute them by hand on the set the day before.
StudioBinder makes the distribution process easy. You can email or text the call sheets, choosing recipients, adding personalized call times, and sending timely production updates. Using a call sheet template ensures that all key details are formatted consistently for every shoot.
You can also send production announcements if anything changes after you’ve sent it out.
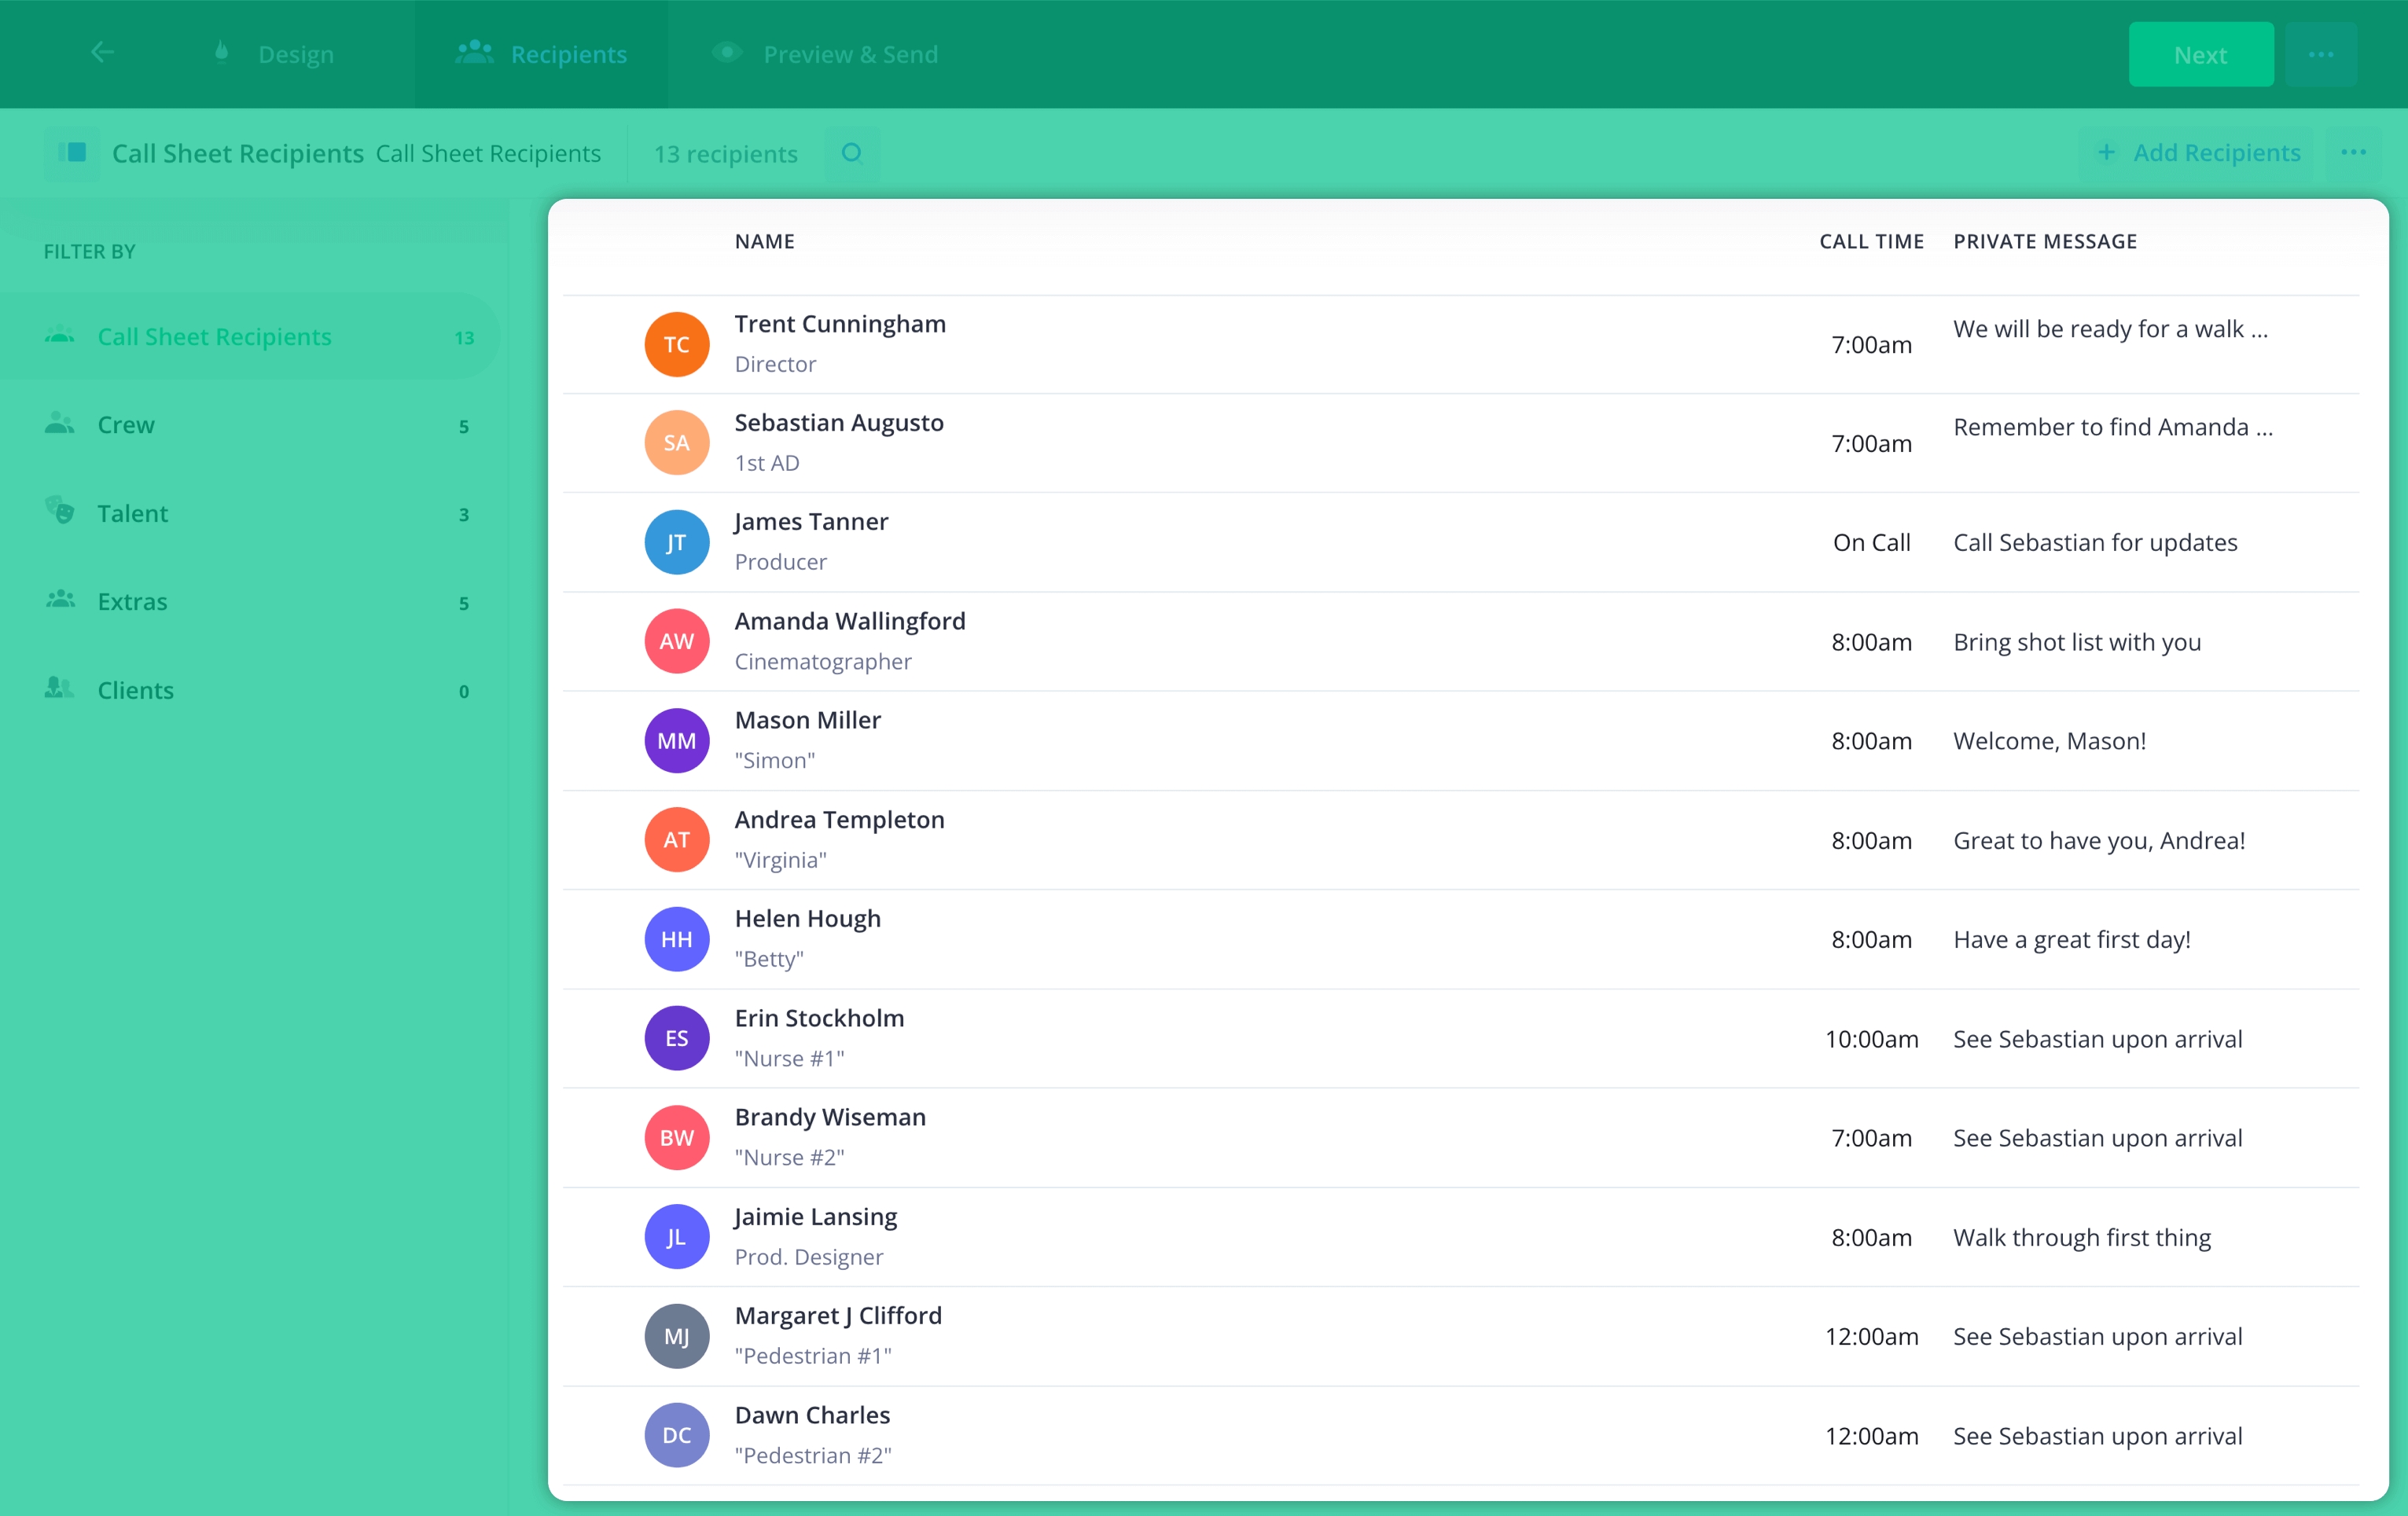
Call sheet example: How to communicate production updates
You can also preview the sheet in all its forms (desktop, mobile, email, text) to make sure it looks right.
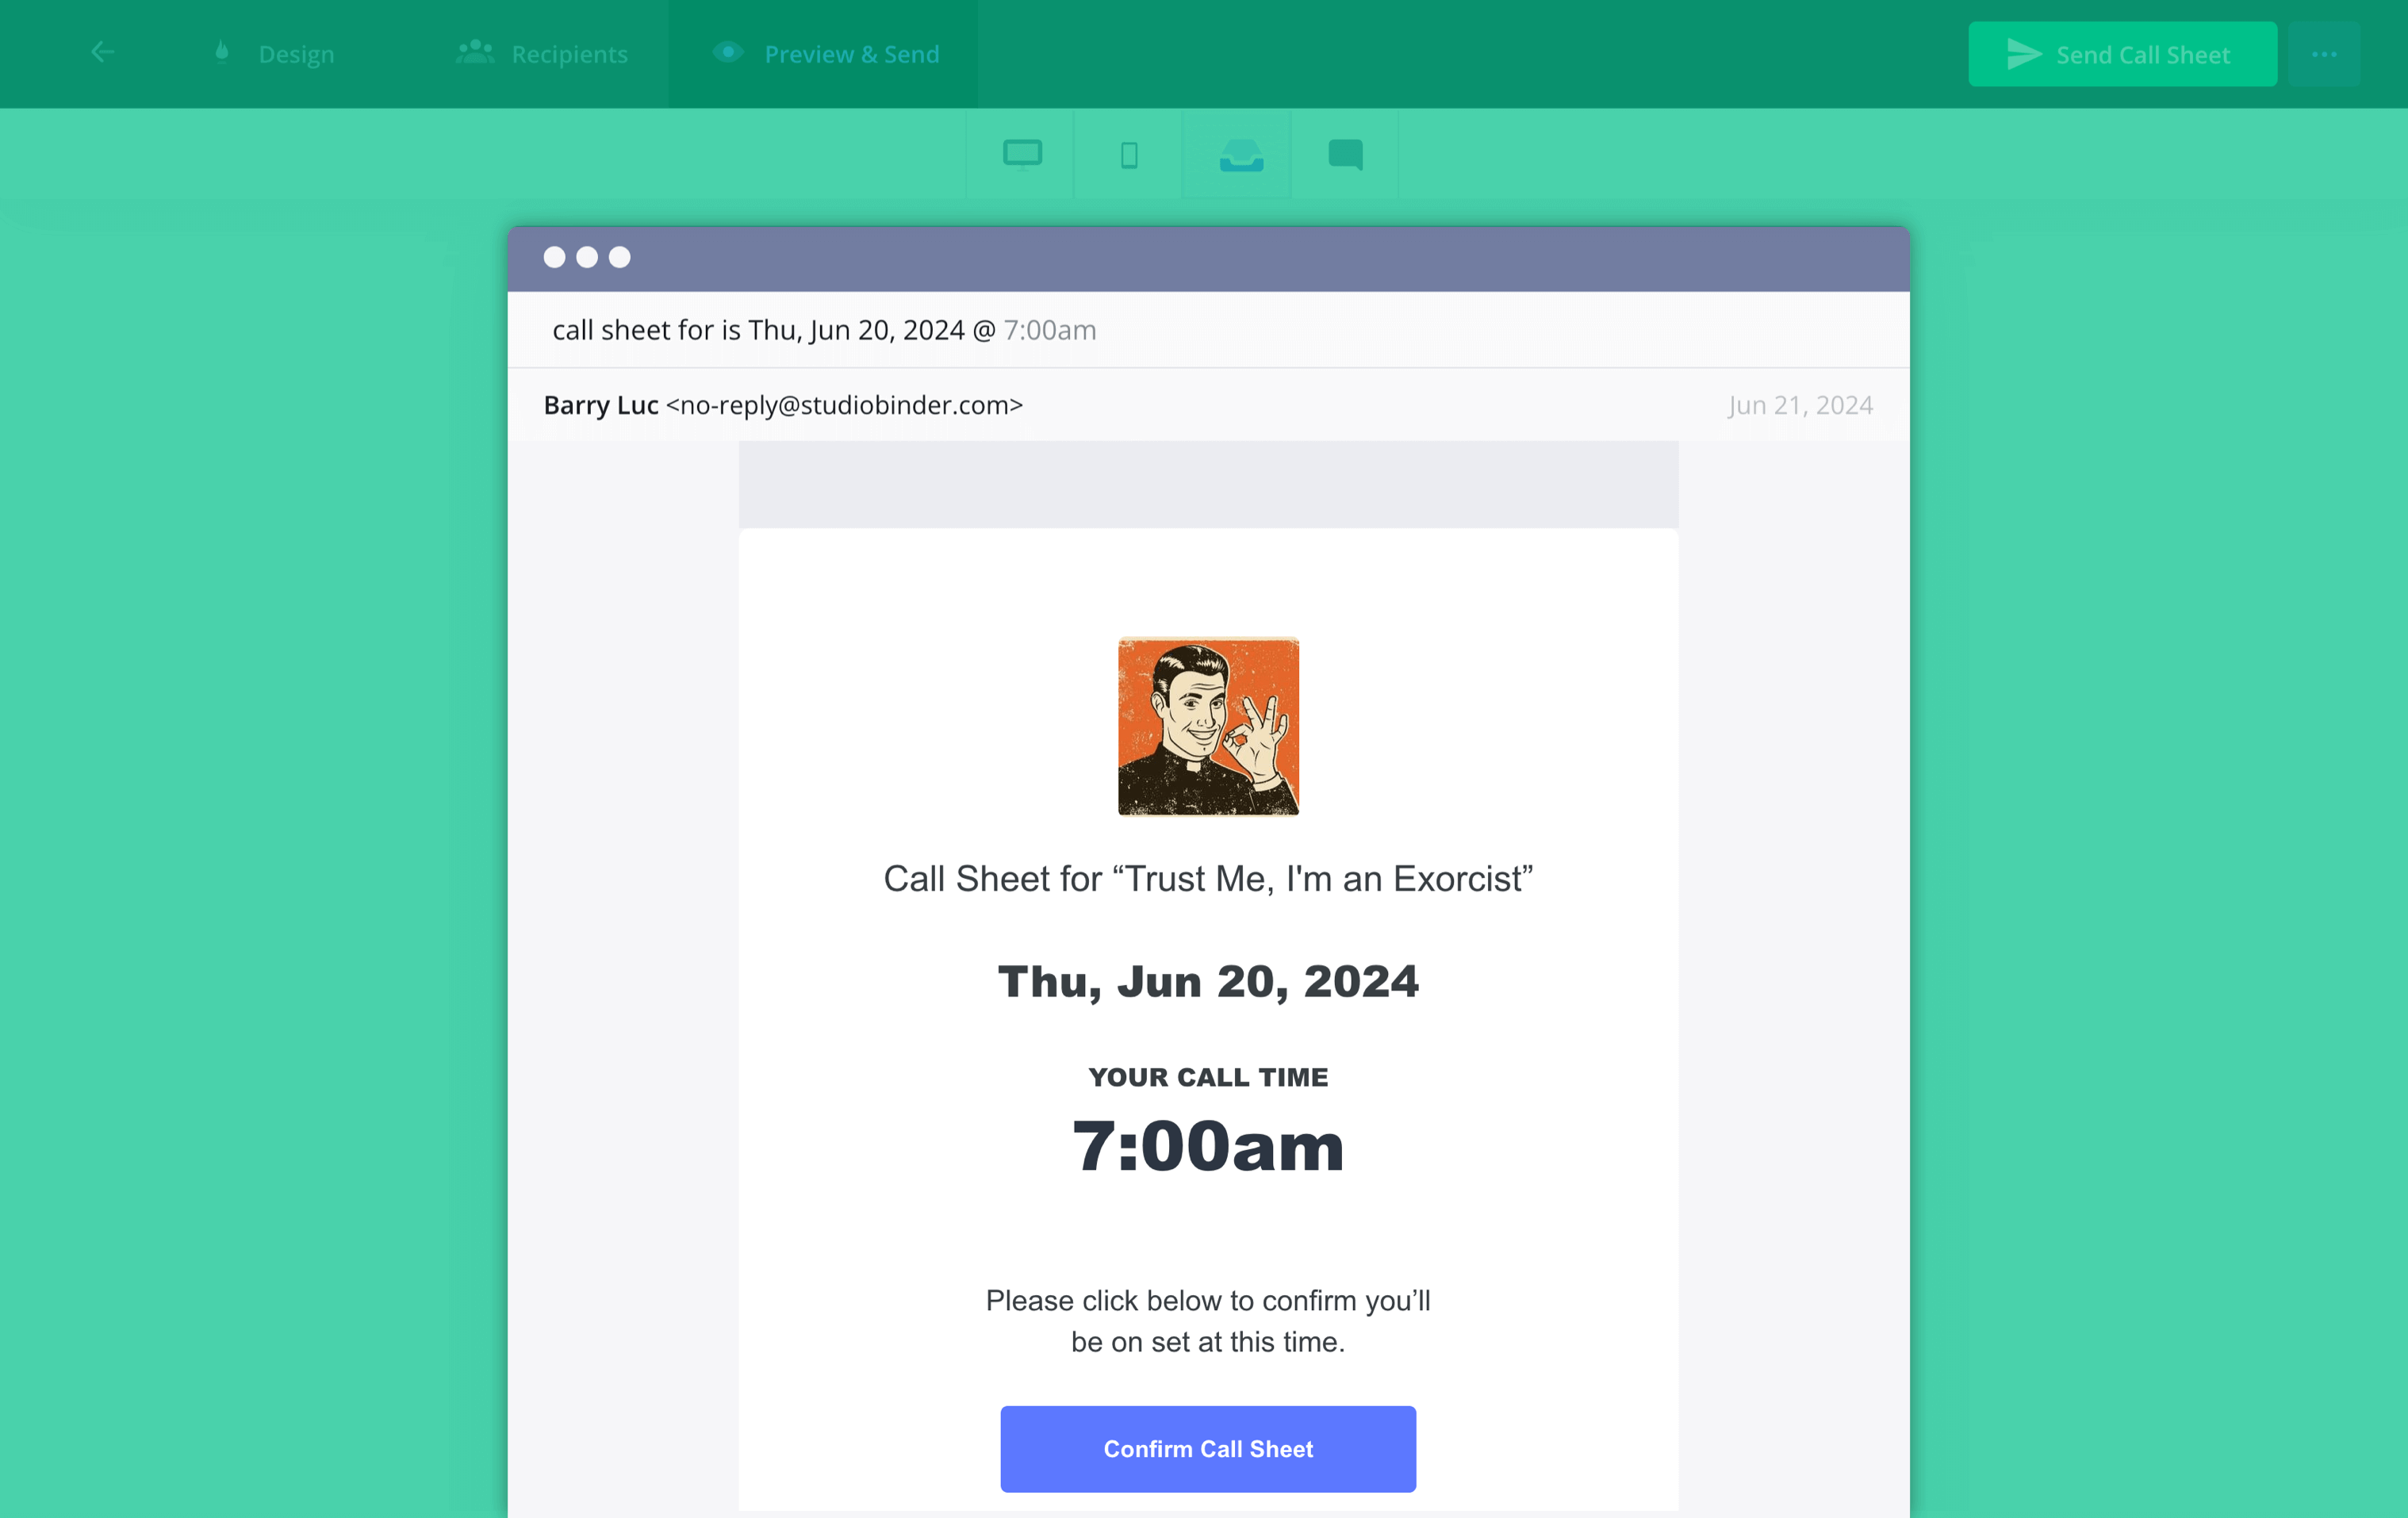
Call sheet preview
PRo Tip
Send out your sheets at least 10 hours before the general crew call time. This ensures your team can go to bed knowing when to wake up and arrive on set well-prepared for the day’s production schedule.
11. Confirm they were received
In an ideal world, your recipients would send some sort of confirmation that they have received the sheet. This could be a text, a phone call, an email, or verbal confirmation.
But this can clog an AD’s inbox and potentially create a lot of unnecessary confusion. StudioBinder allows you to track status per recipient. You’ll see view counts, and also be notified if an email bounces.
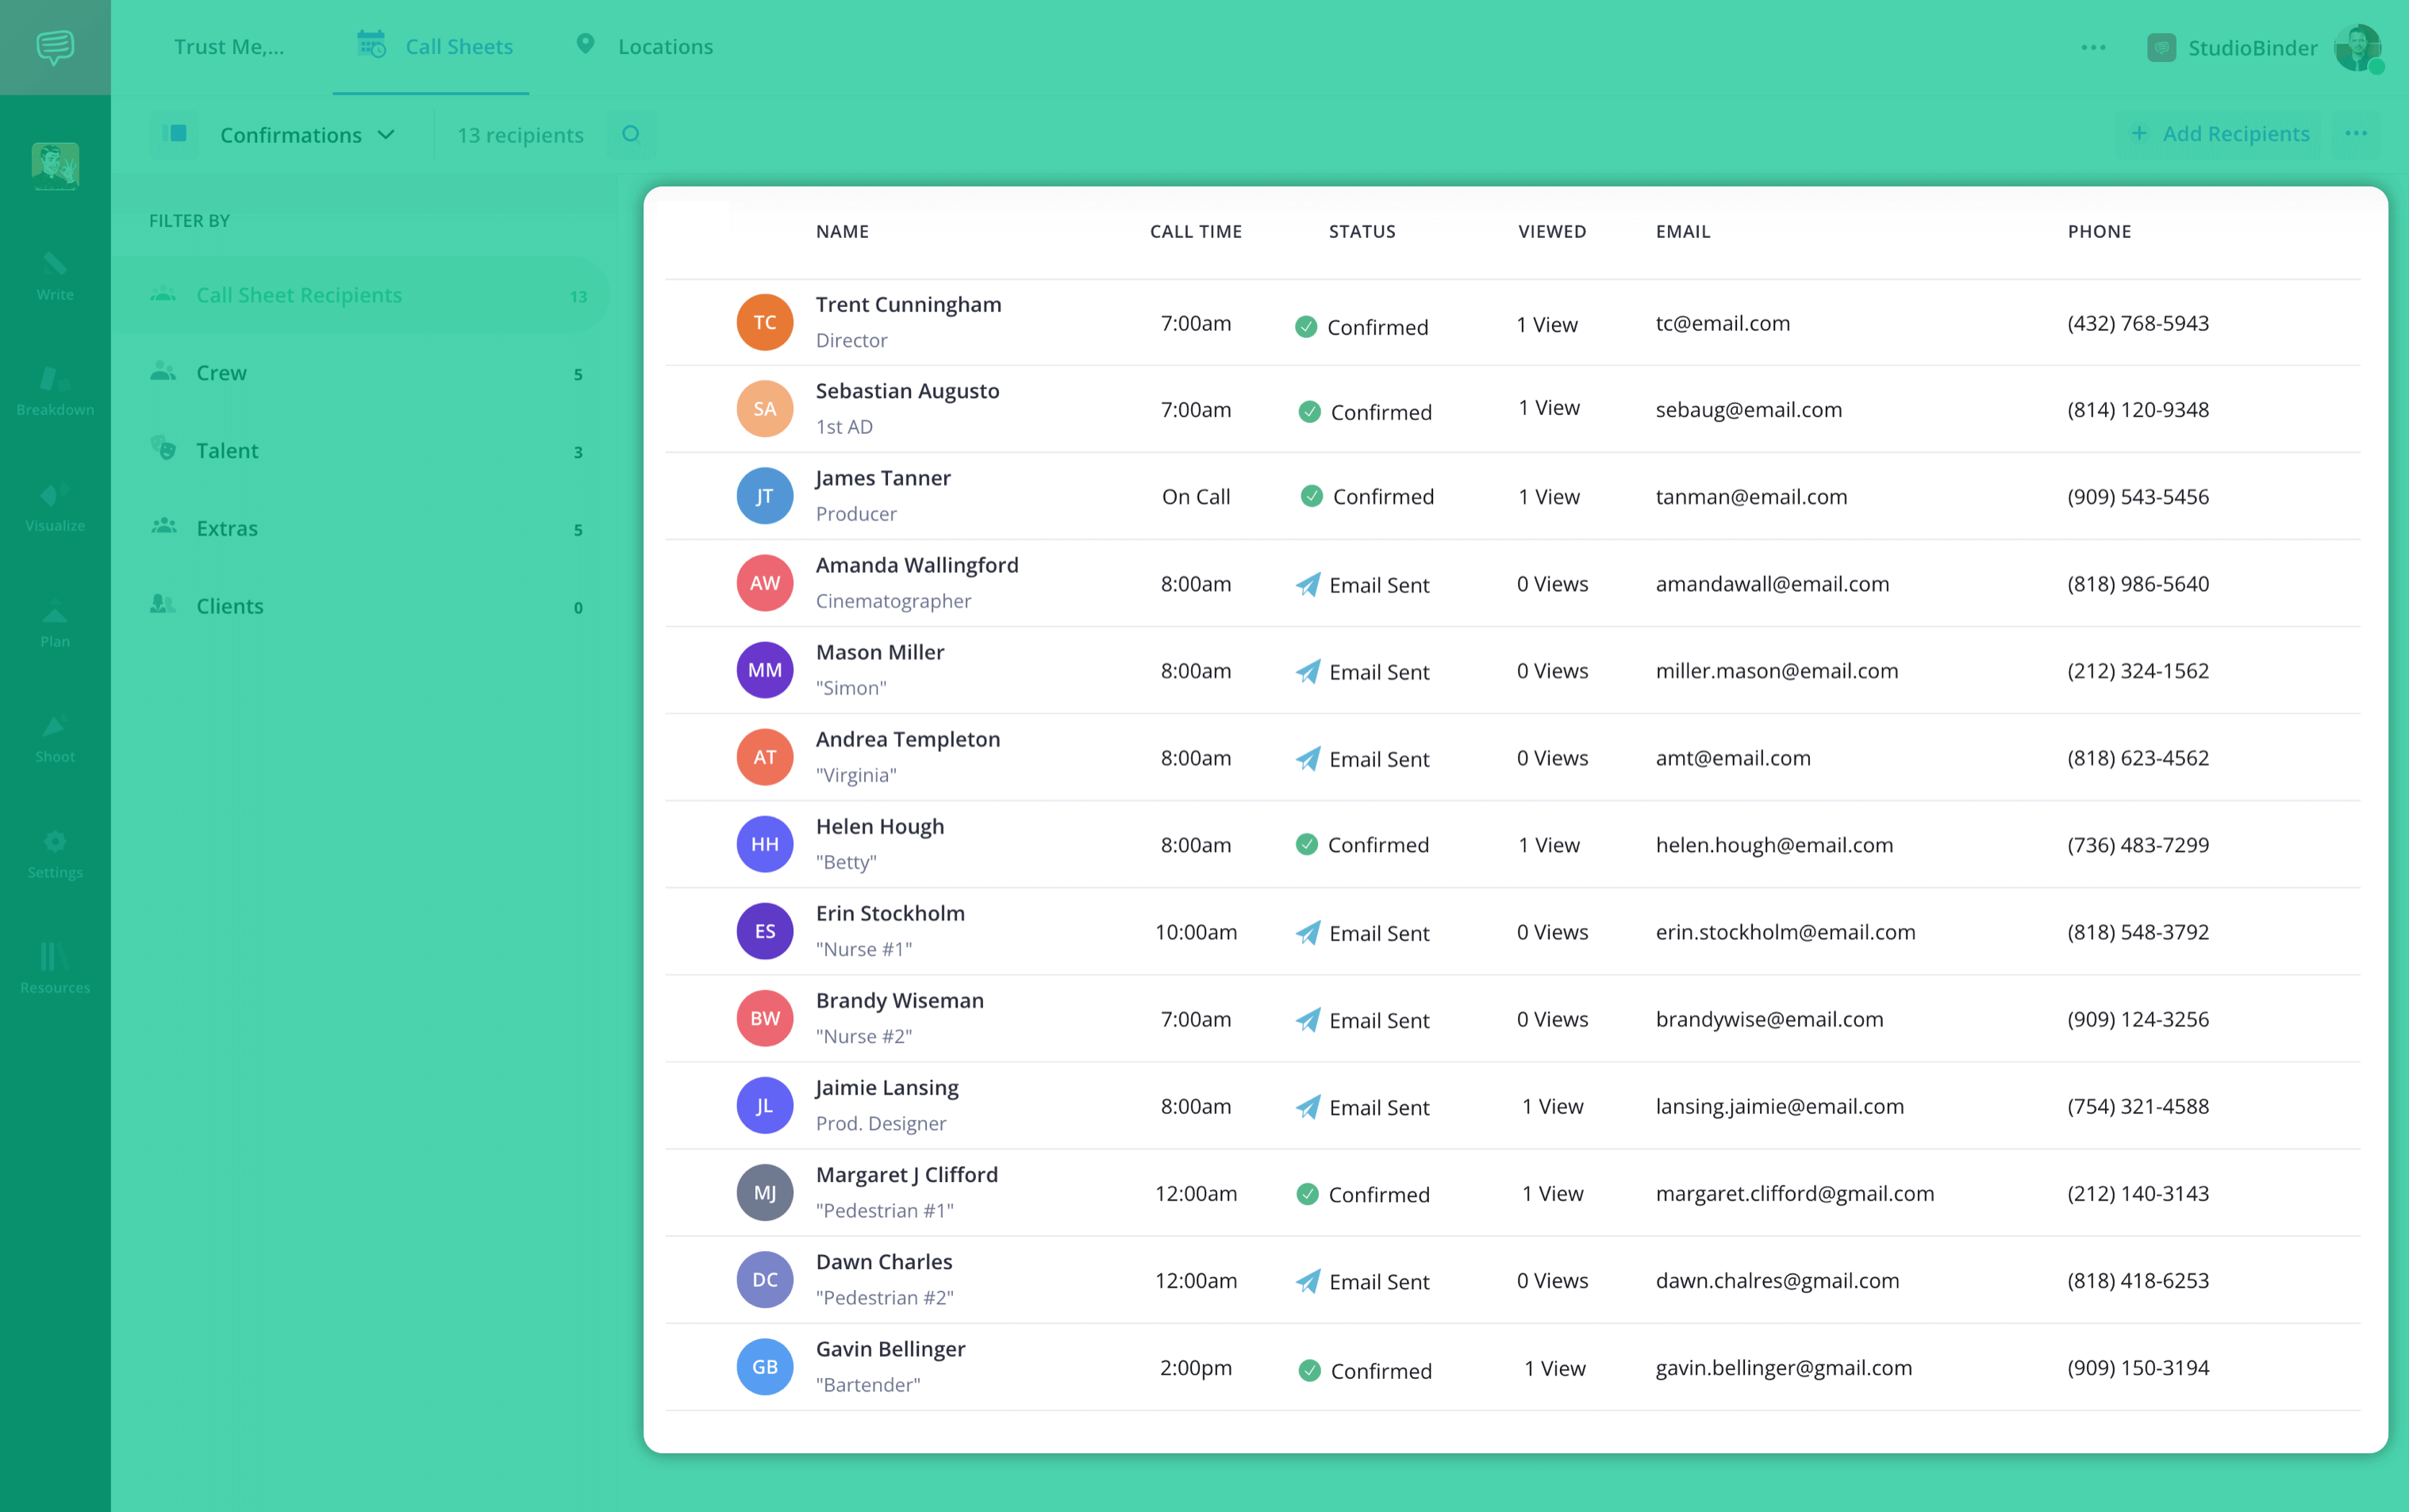
Call sheet template: How to track confirmations & responses
Related Posts
up next
Time to make your call sheet!
Now that we've covered how to make a call sheet from A-Z, it's time to do it yourself. Keeping your production efficient and professional starts with a well-made document. Just follow these steps and you'll be a hero amongst the crew.
