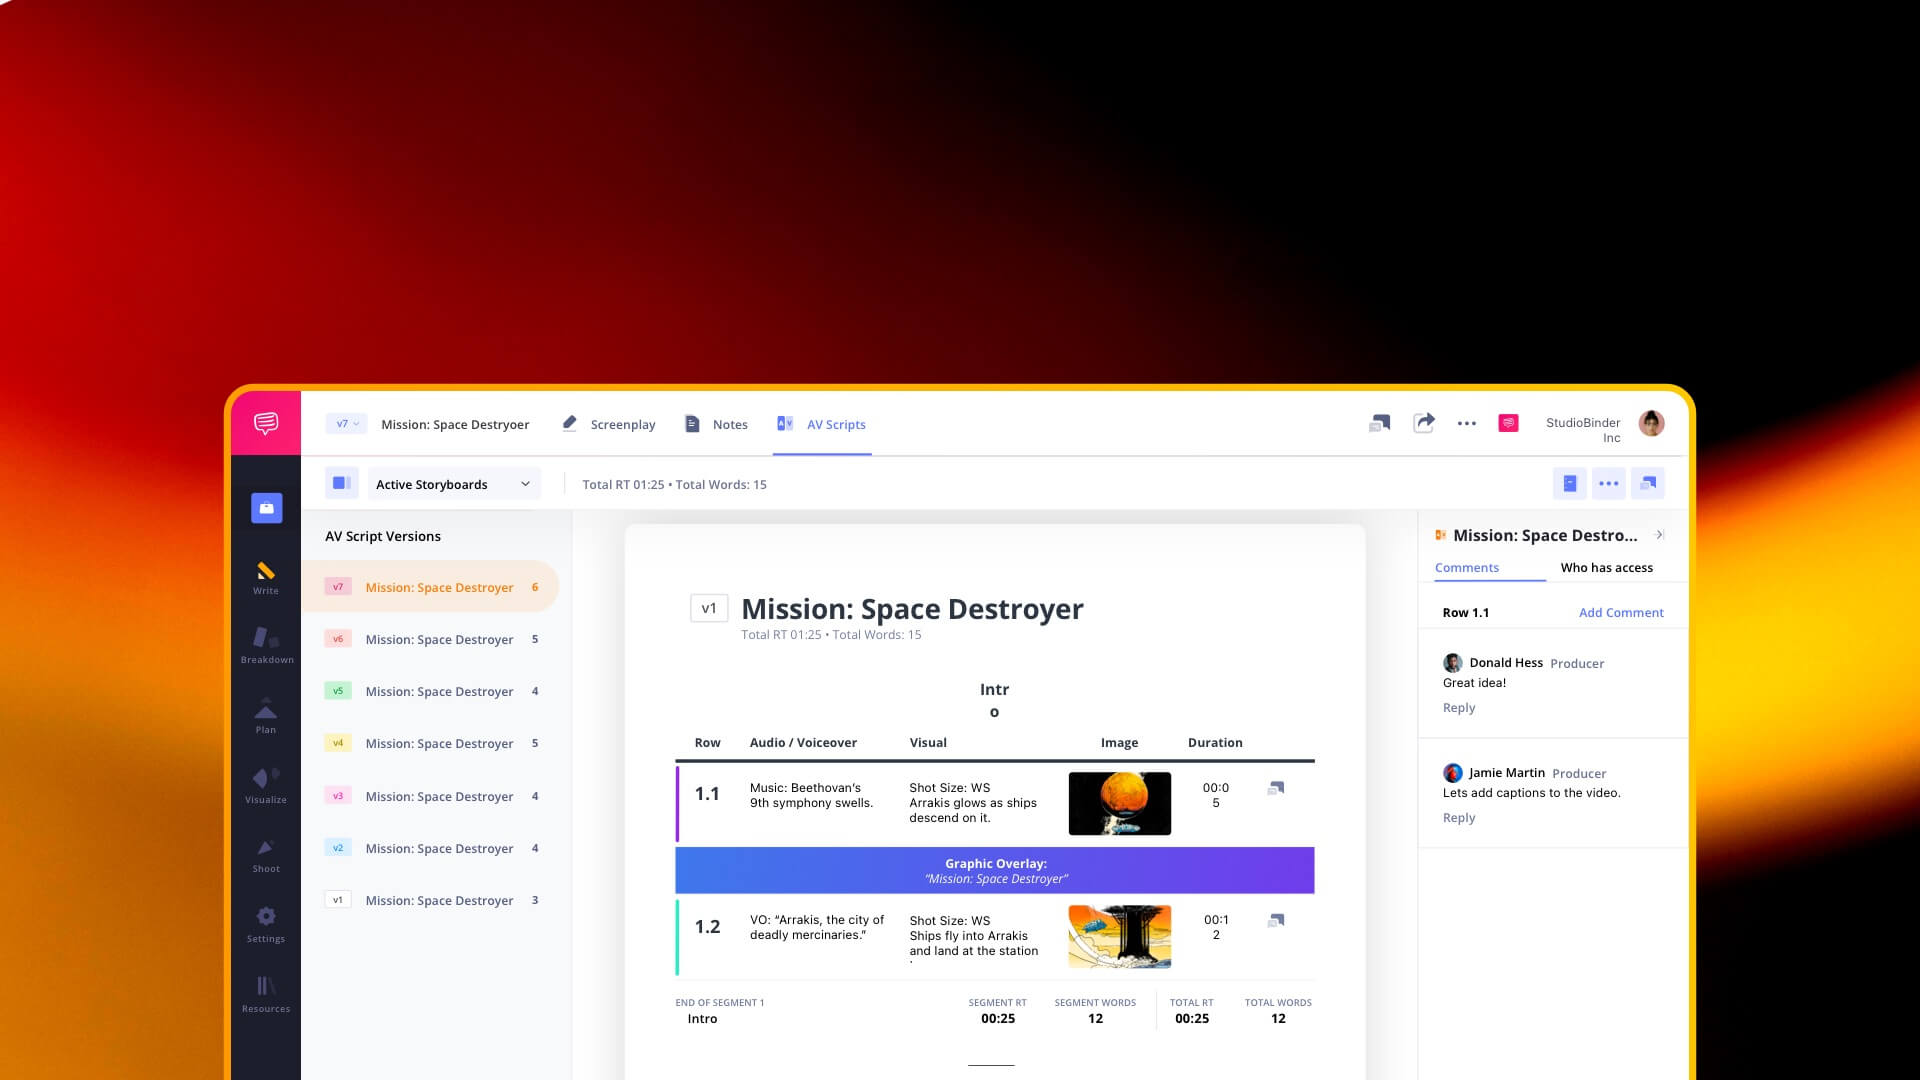
Writing a great AV script can be simple with a strong concept and the right tools. Whether you’re creating a commercial, social media ad, or explainer video, scripting for video content starts with the right audio visual script. A video script has to engage your target audience, showcase your product or service, and deliver a clear call to action, and do it with brevity.
That’s where a reliable AV script template (also known as a two column script) comes in. In this guide, we’ll walk you through the entire process of scripting for video content—and yes, there’s a free AV script template waiting for you below.
How to Write an AV Script in StudioBinder
Two Column Script Format Explained
What is an AV script?
Before we dive into writing one, let’s clarify what a finished audio visual script should look like. Think of it as a streamlined video screenplay—designed for production teams, clients, and voice actors alike. A proper AV script template lays out your voice over script and visual elements in two side-by-side columns, helping you plan, time, and produce with clarity.
Whether you’re scripting for a short film, YouTube ad, or TV commercial script, this two column approach keeps everything aligned and readable.
Have no fear!
You don’t need fancy tools to get started, but if you want a great way to format your script, StudioBinder’s AV Script Writing Software makes it easy.
Then try it for yourself.
Click the example below to explore a free commercial script example built directly in StudioBinder. This sample shows exactly how to structure a professional-grade AV script template—from the audio column to camera visuals.
Seen how it comes together? Now, let’s break down how to write an AV script step by step, so you can build your own from scratch with the same structure and clarity.
How to Start an AV Script Template
1. Establish goals and structure
First, you need to know what you’re using your AV script for. AV script templates come in a variety of forms, including television commercials, social media ad scripts, radio spots, music videos, video essays, documentaries, corporate videos, PowerPoint presentations, and much more.
Once you decide on what your medium is, you’ll have a clearer idea of how to structure your video script for maximum clarity and impact.
With the right software, you can create segments and banners to fine-tune your structure, whether you’re writing a commercial script, a corporate video, or a branded explainer.
These can organize your script with an intro, outro, or whatever sections you think you’ll need. This is just a starting point – you can add or remove these elements as you go.
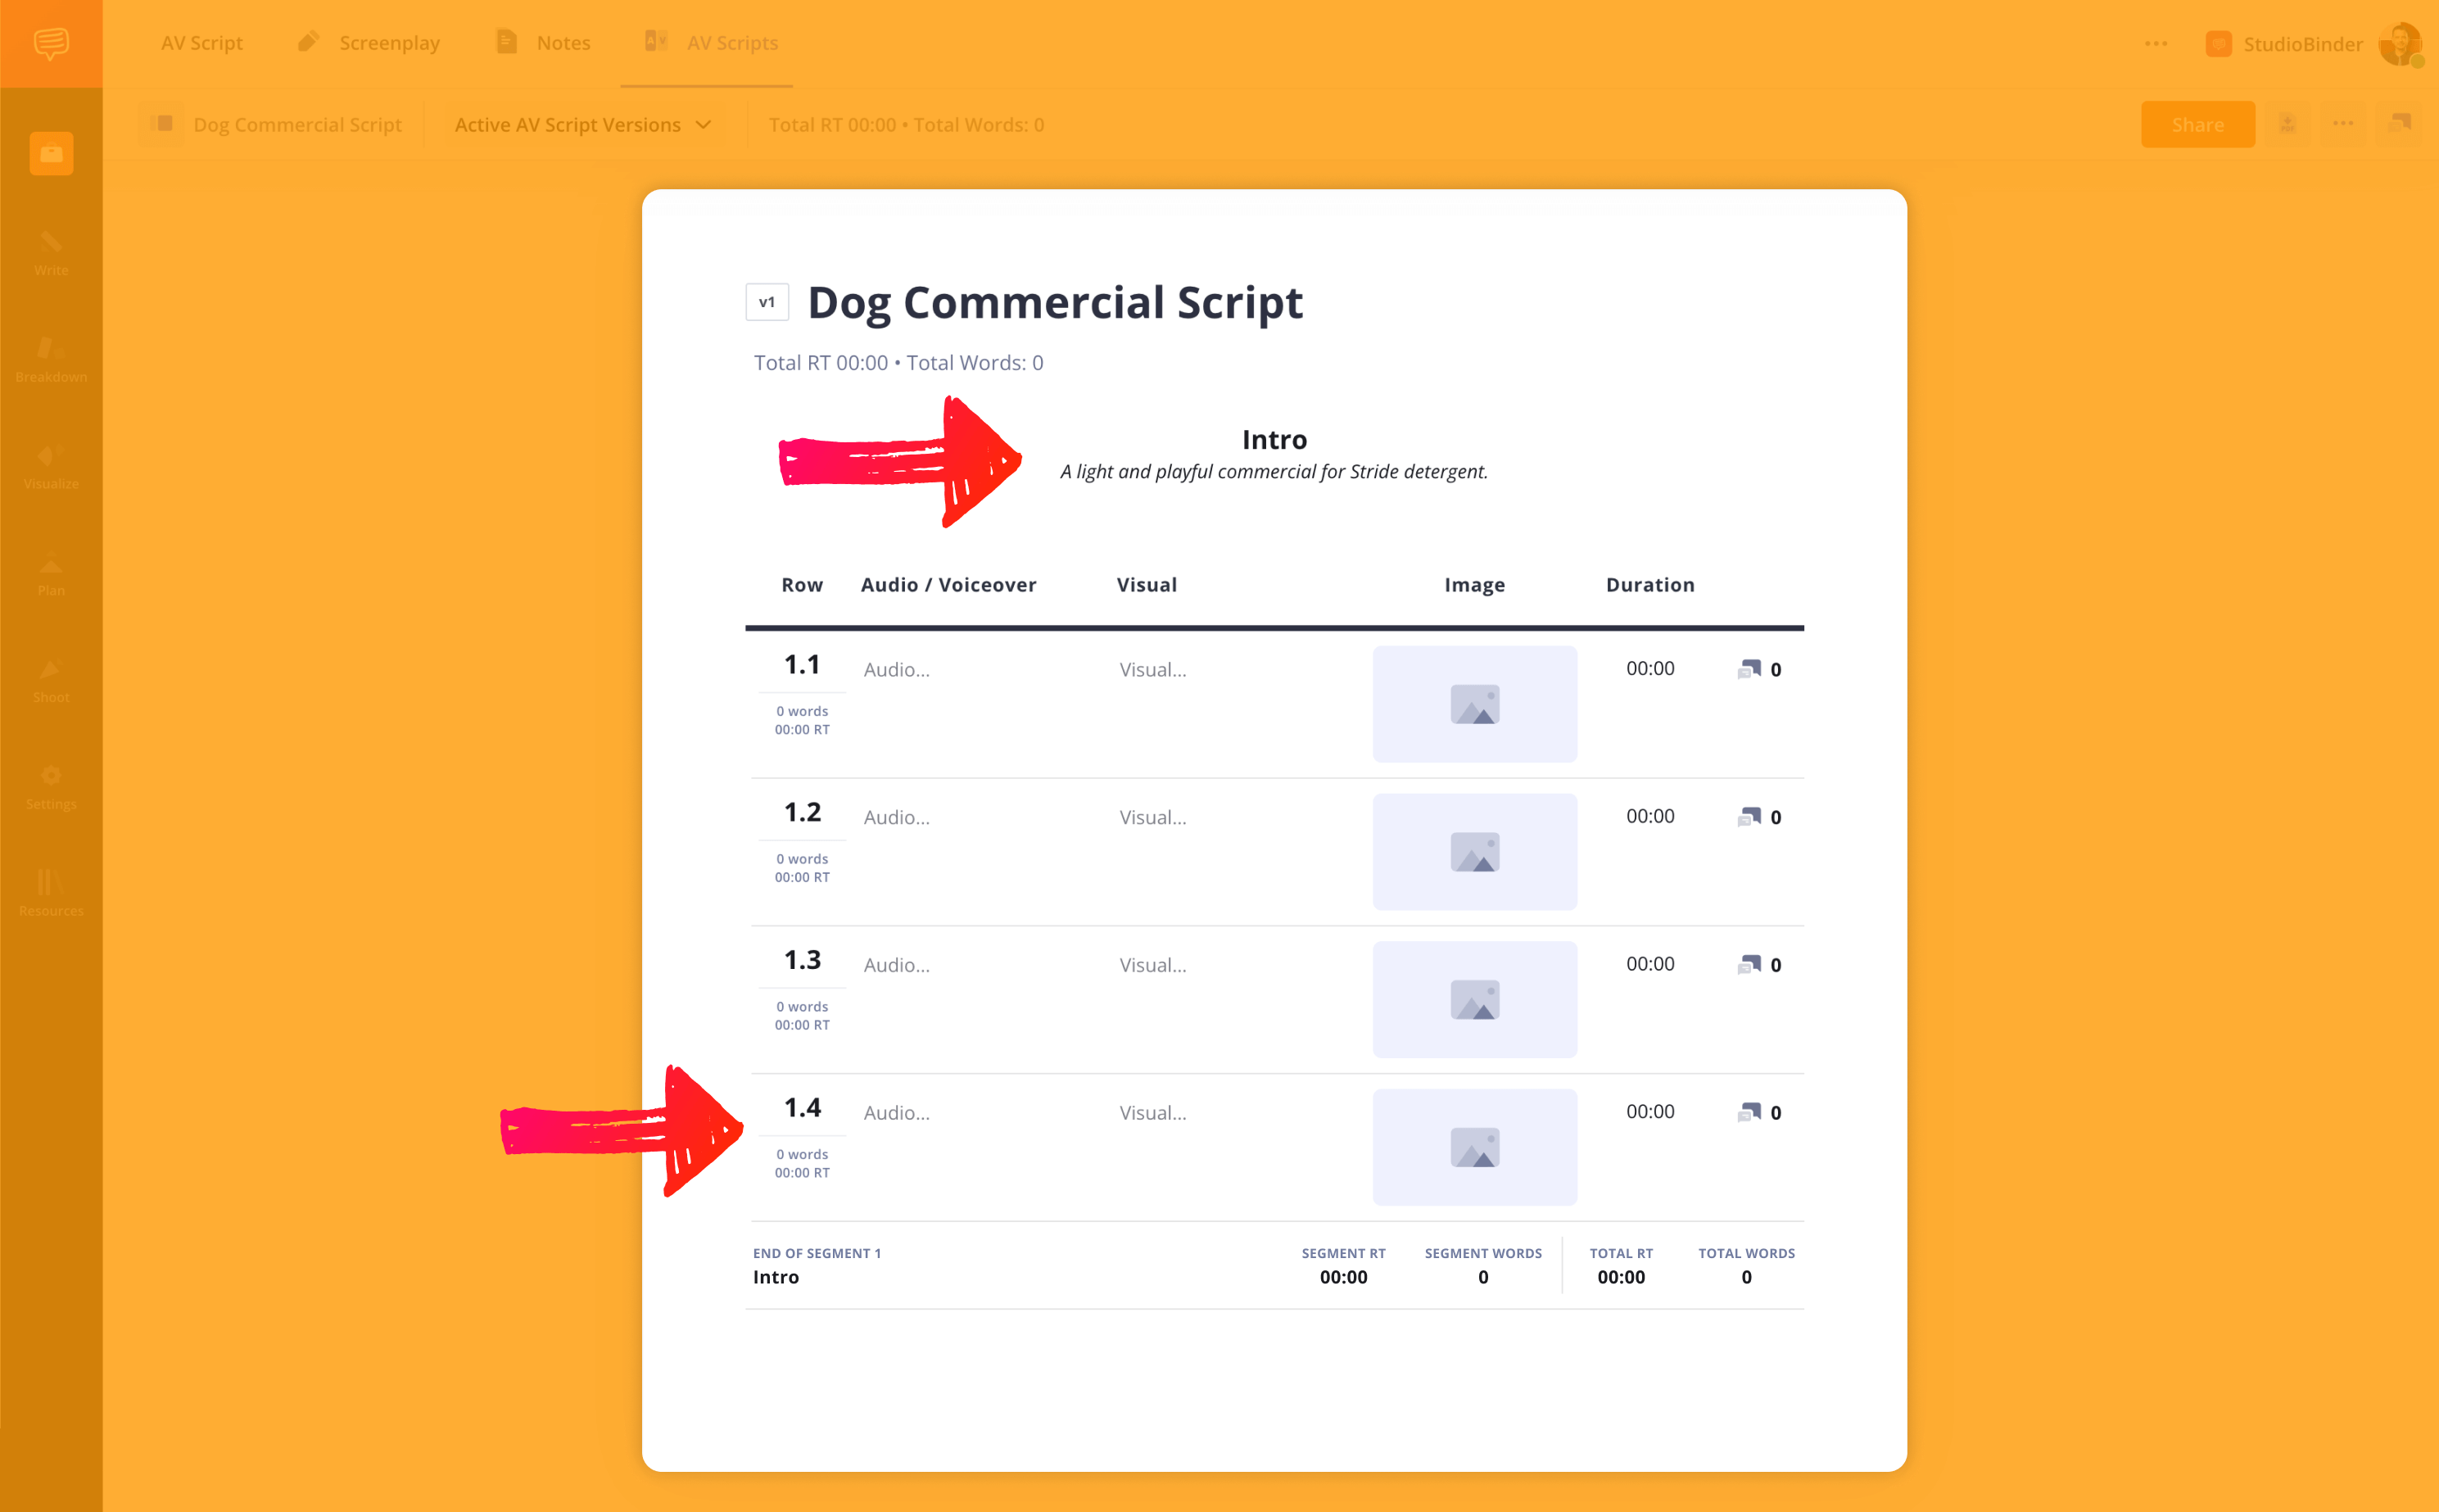
How to write an AV script • Two column layout in a standard commercial format.
Related Posts
How to Write an AV Script's VO
2. Writing a voiceover
Now it’s time to start writing your script. AV script templates use two columns, which is why they’re also referred to as "two-column scripts."
The left side contains the audio column, also known as the voice-over script, and the right side lays out the visuals.
The nature of your script will affect what you’re writing on the left side—whether it’s dialogue for an ad script, lyrics for a music video, or narration for a documentary. If it’s a music video, it may be lyrics. If it’s a radio play, it will be dialogue, often performed by voice actors to match the intended tone and pacing.
There are a few words or abbreviations you may want to include to better communicate how your visuals and audio are presented.
MONTAGE: a collection of shots or scenes that compress time
VFX: visual effects
V.O. (voice-over): narration in the video
O.C.: dialogue spoken by a character off-camera
SFX: sound effects
Be detailed, but concise. Only put what you need on your AV script. You can see we've populated our Audio/Voiceover column in this example.
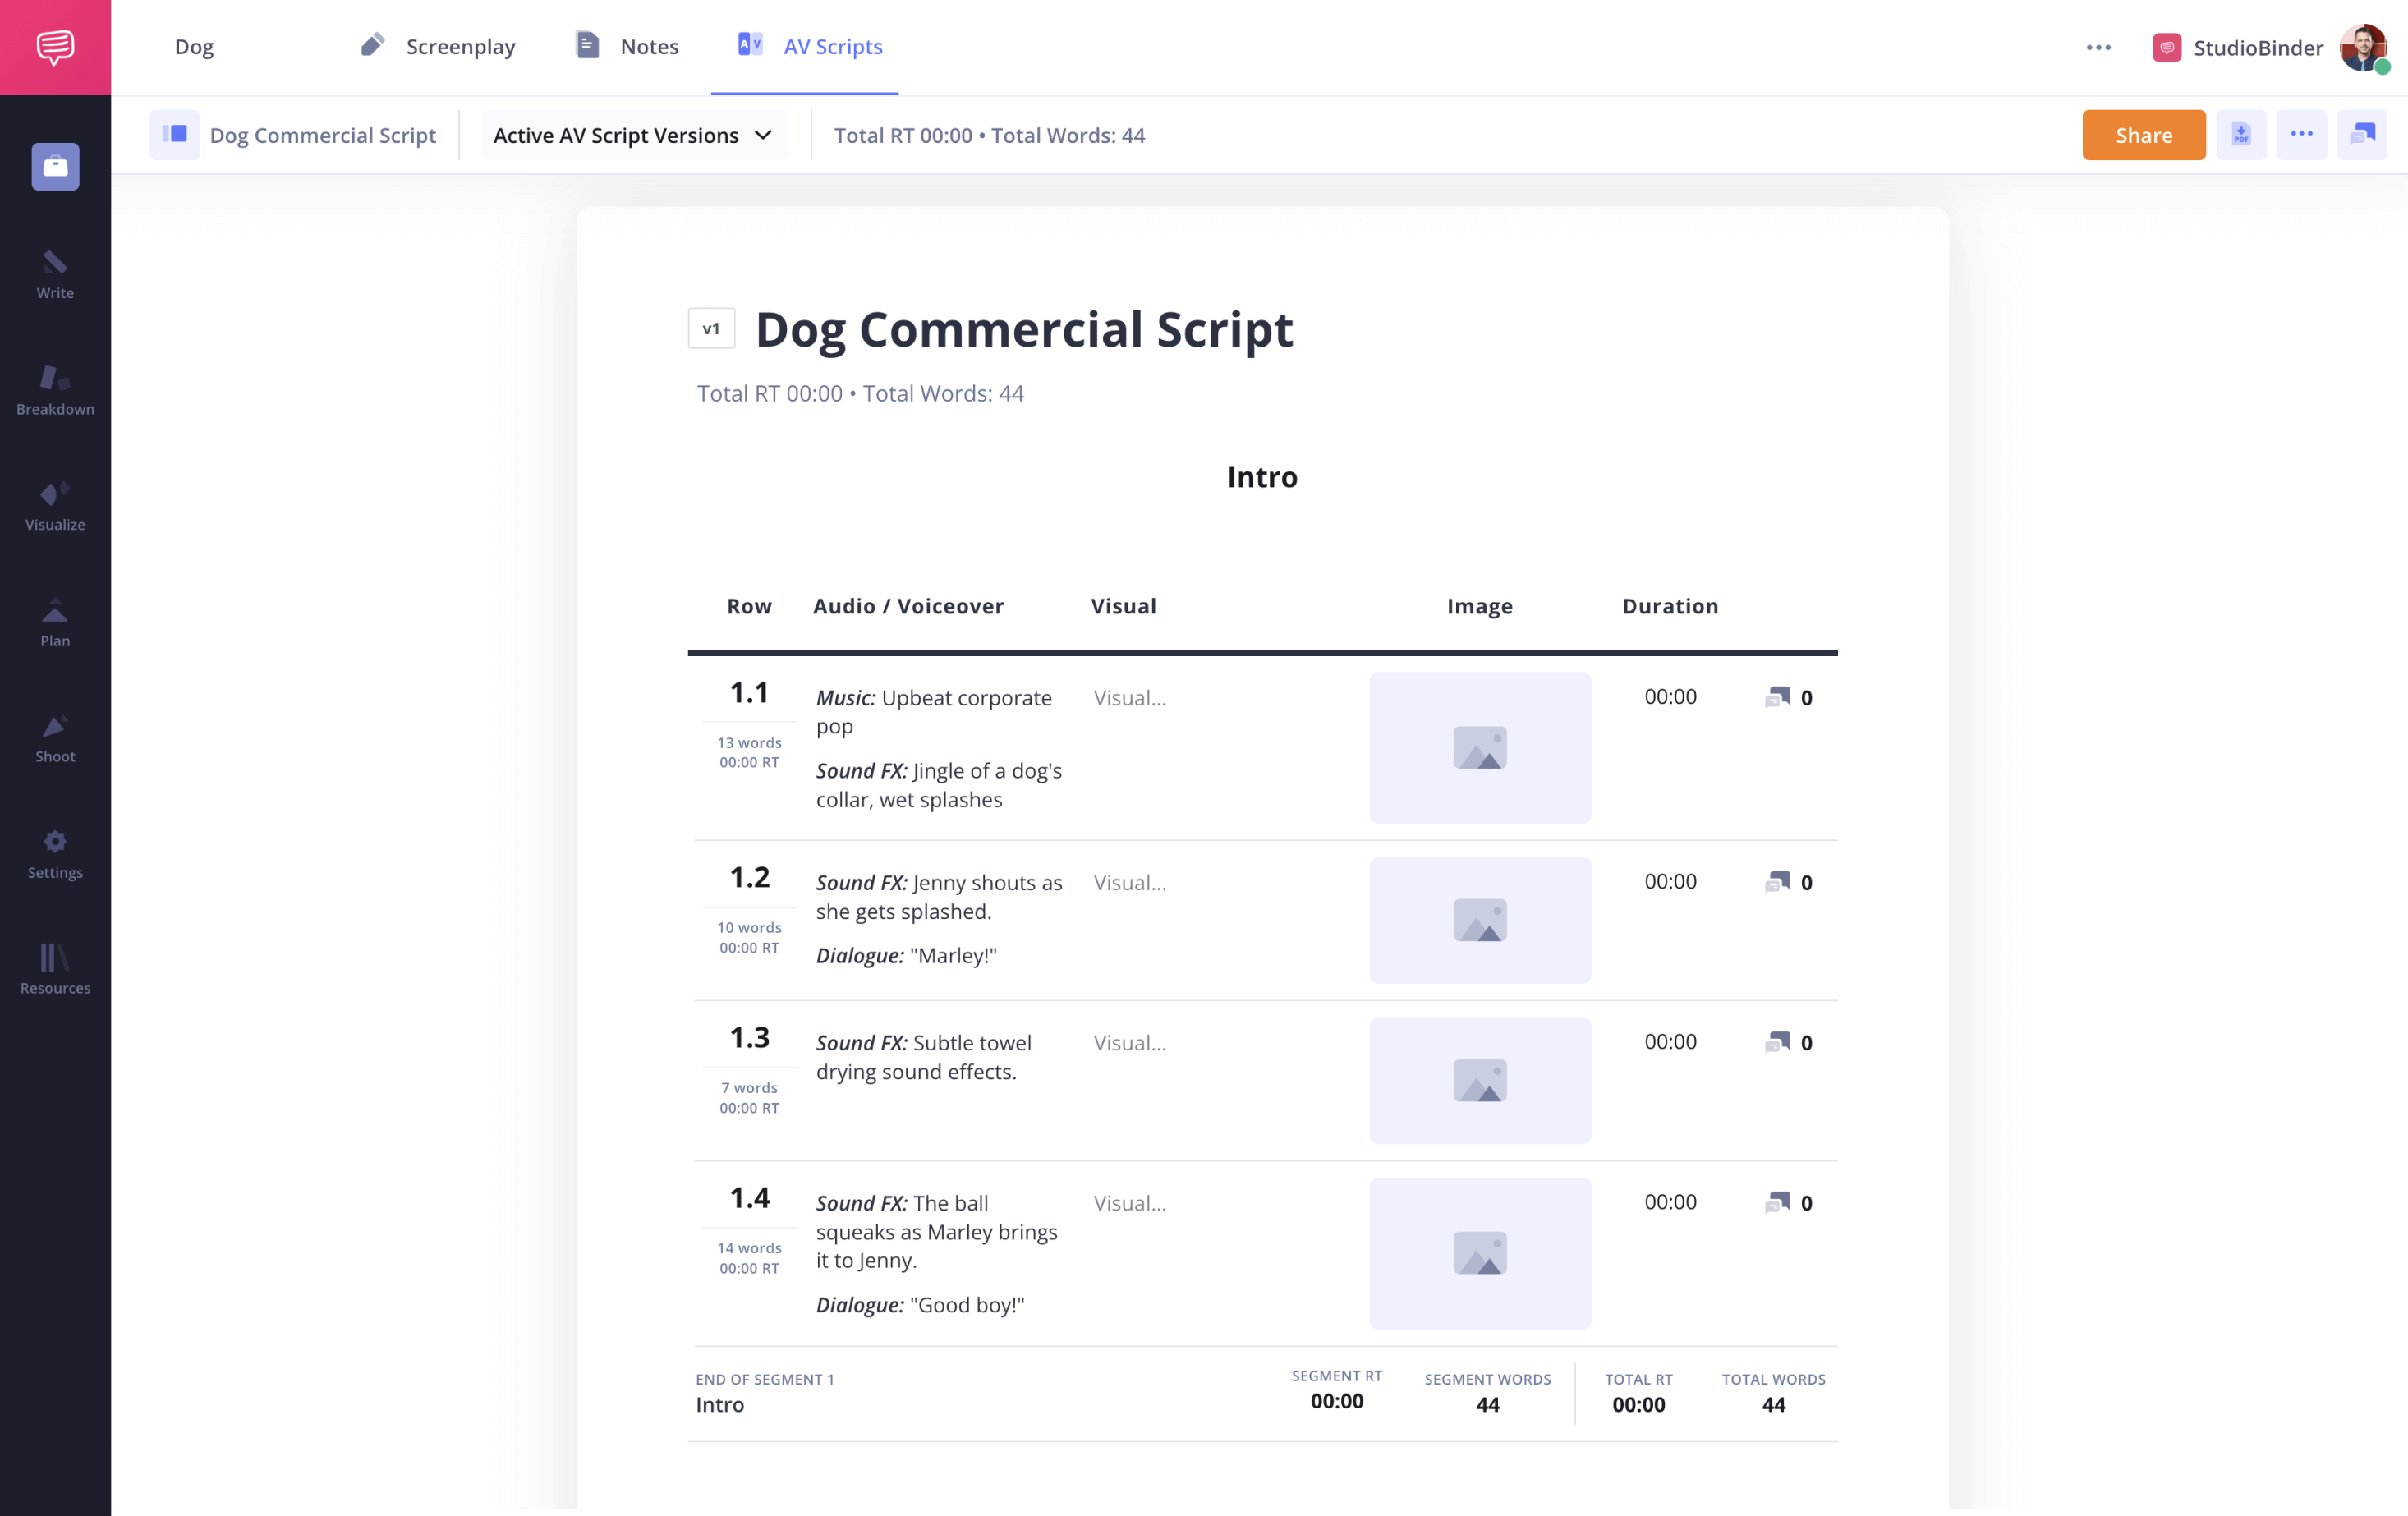
StudioBinder audio-visual script
Writing the Visuals in an AV Script Template
3. Plan your shots
After your left column is filled out, turn your attention to the right—this is where scripting for video content truly comes to life through shot composition and visual storytelling. In the video column, you’ll describe the imagery you want paired with specific lines of your video script, aligning the visuals with each voiceover or cue.
Don’t be afraid to get into the specifics, like shot size, camera angle, and even a clear scene heading to orient the viewer.
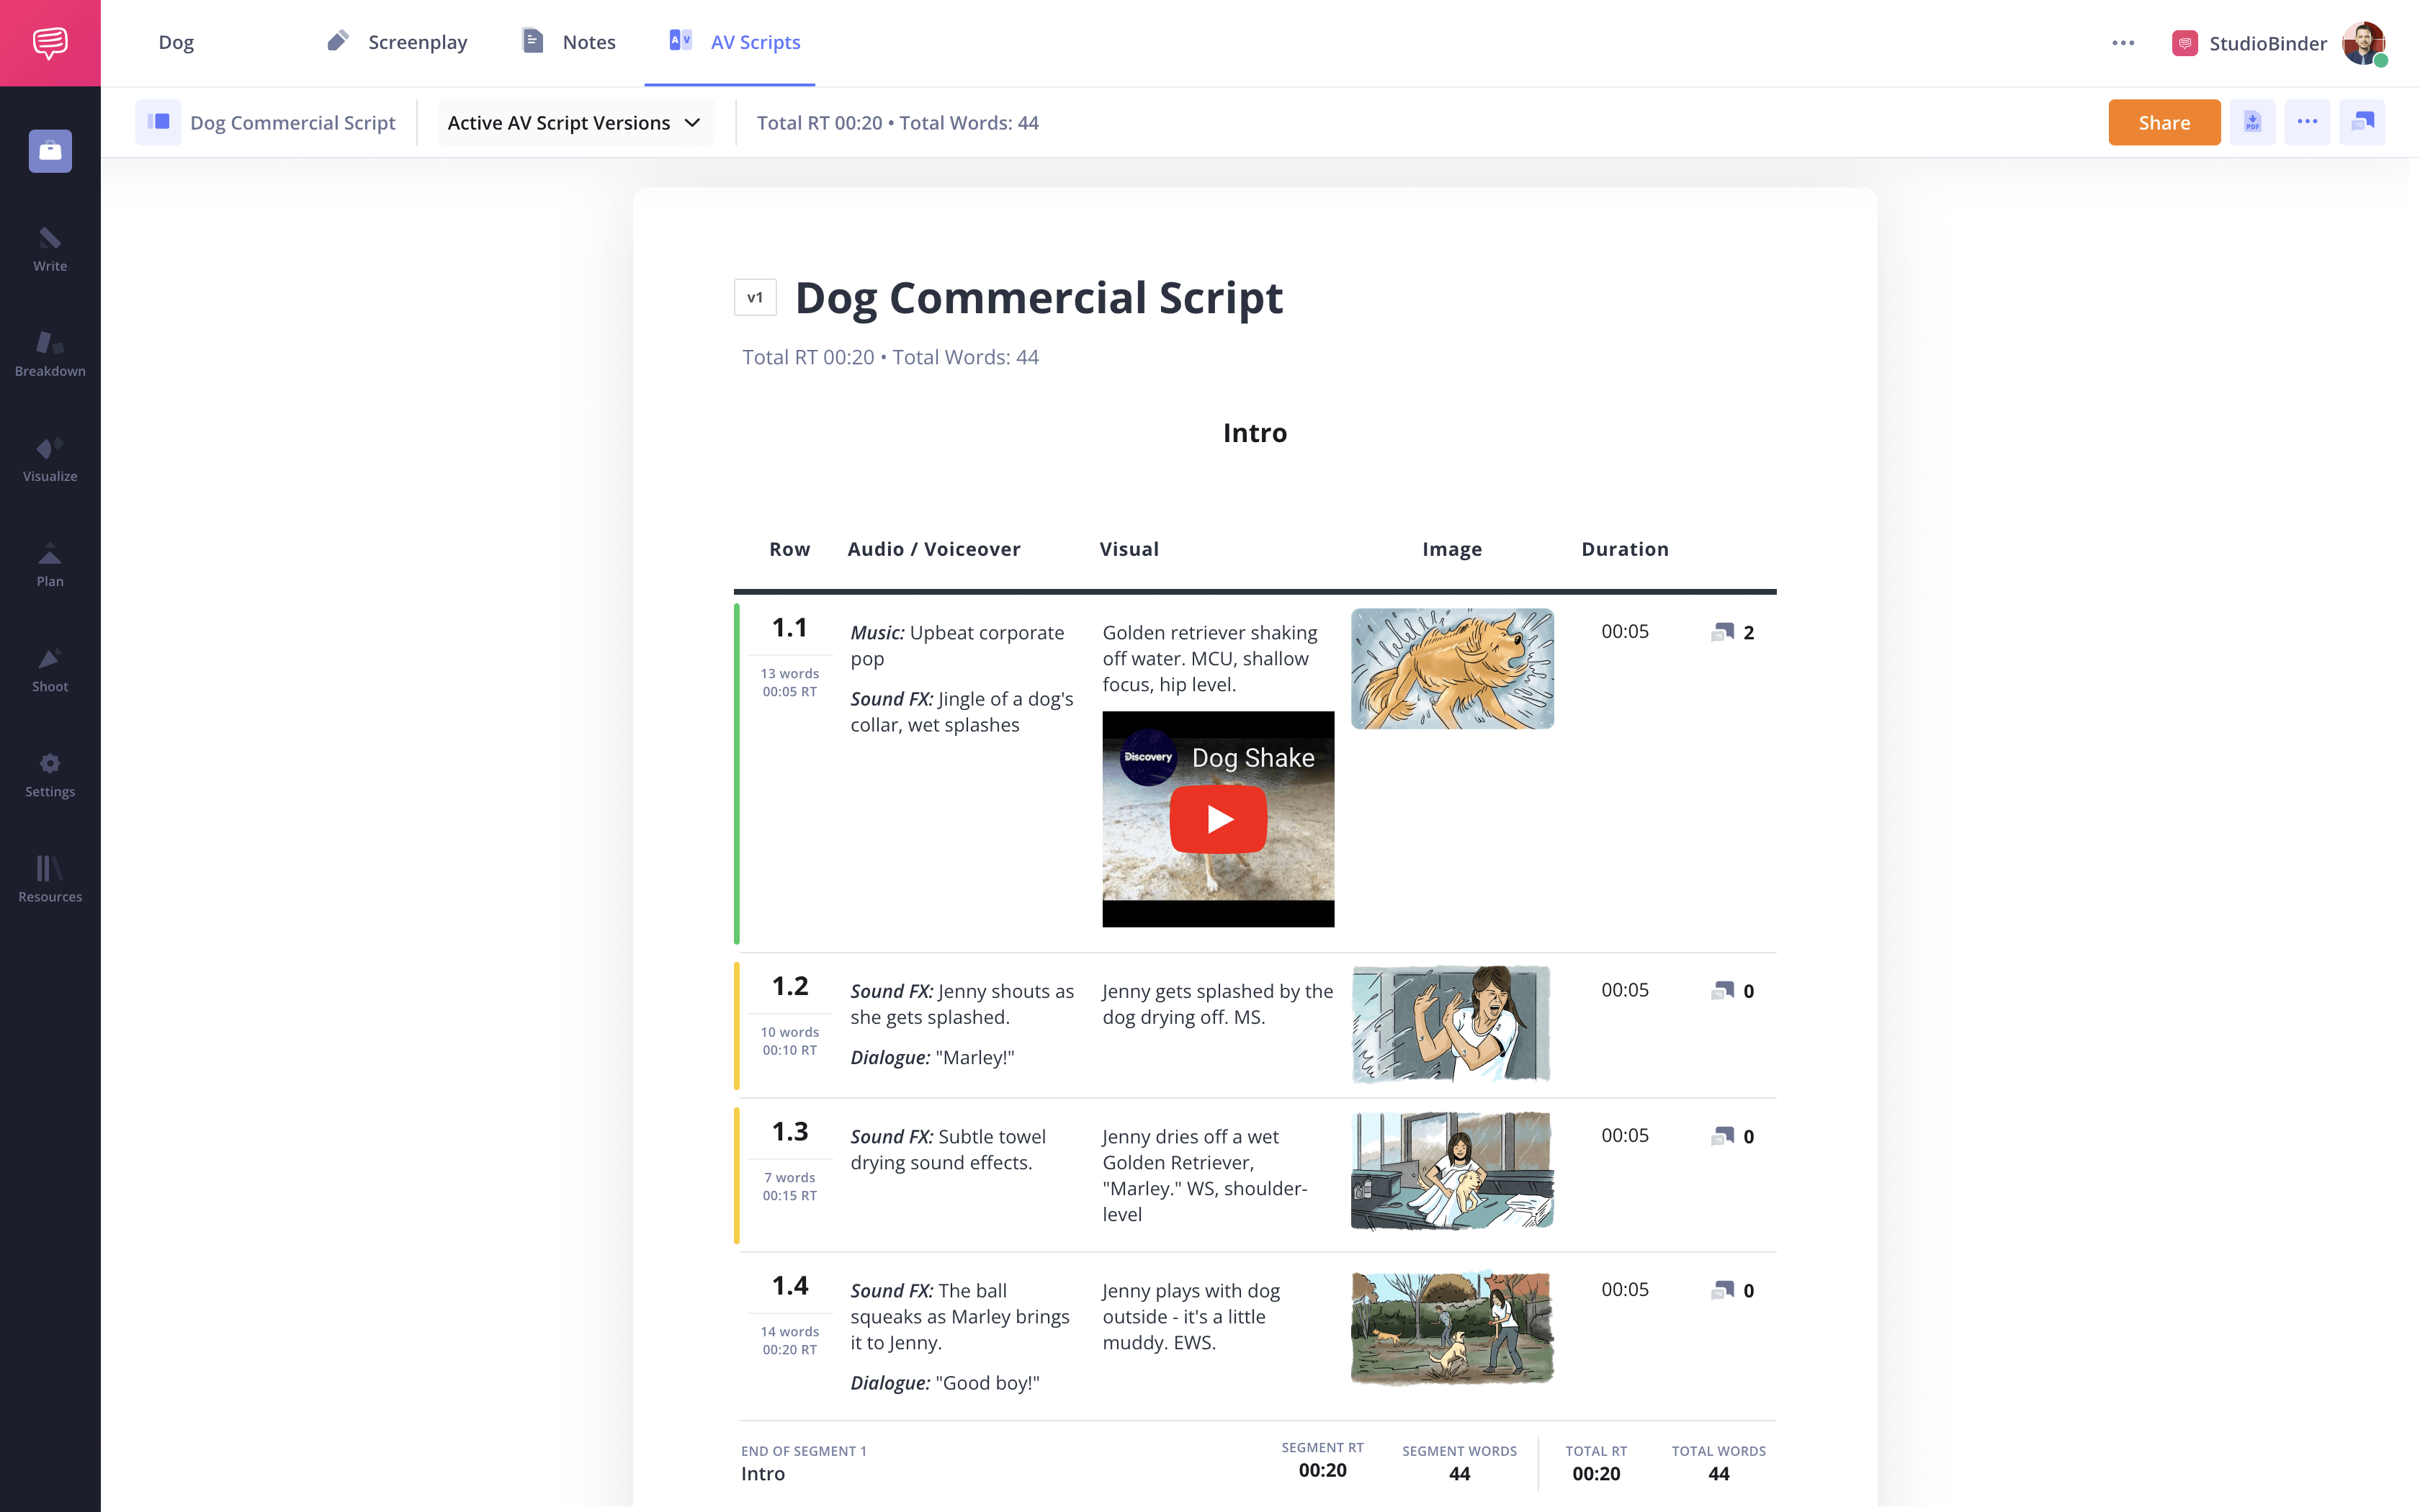
In StudioBinder, you can add links in this column if you don’t want to embed them in the audio section. You can also include actual images of storyboards, floorplans, and more.
You can even go a step further in a third image column, where you can include reference images for each line. These images can be imported, pulled from other projects, or taken via webcam.
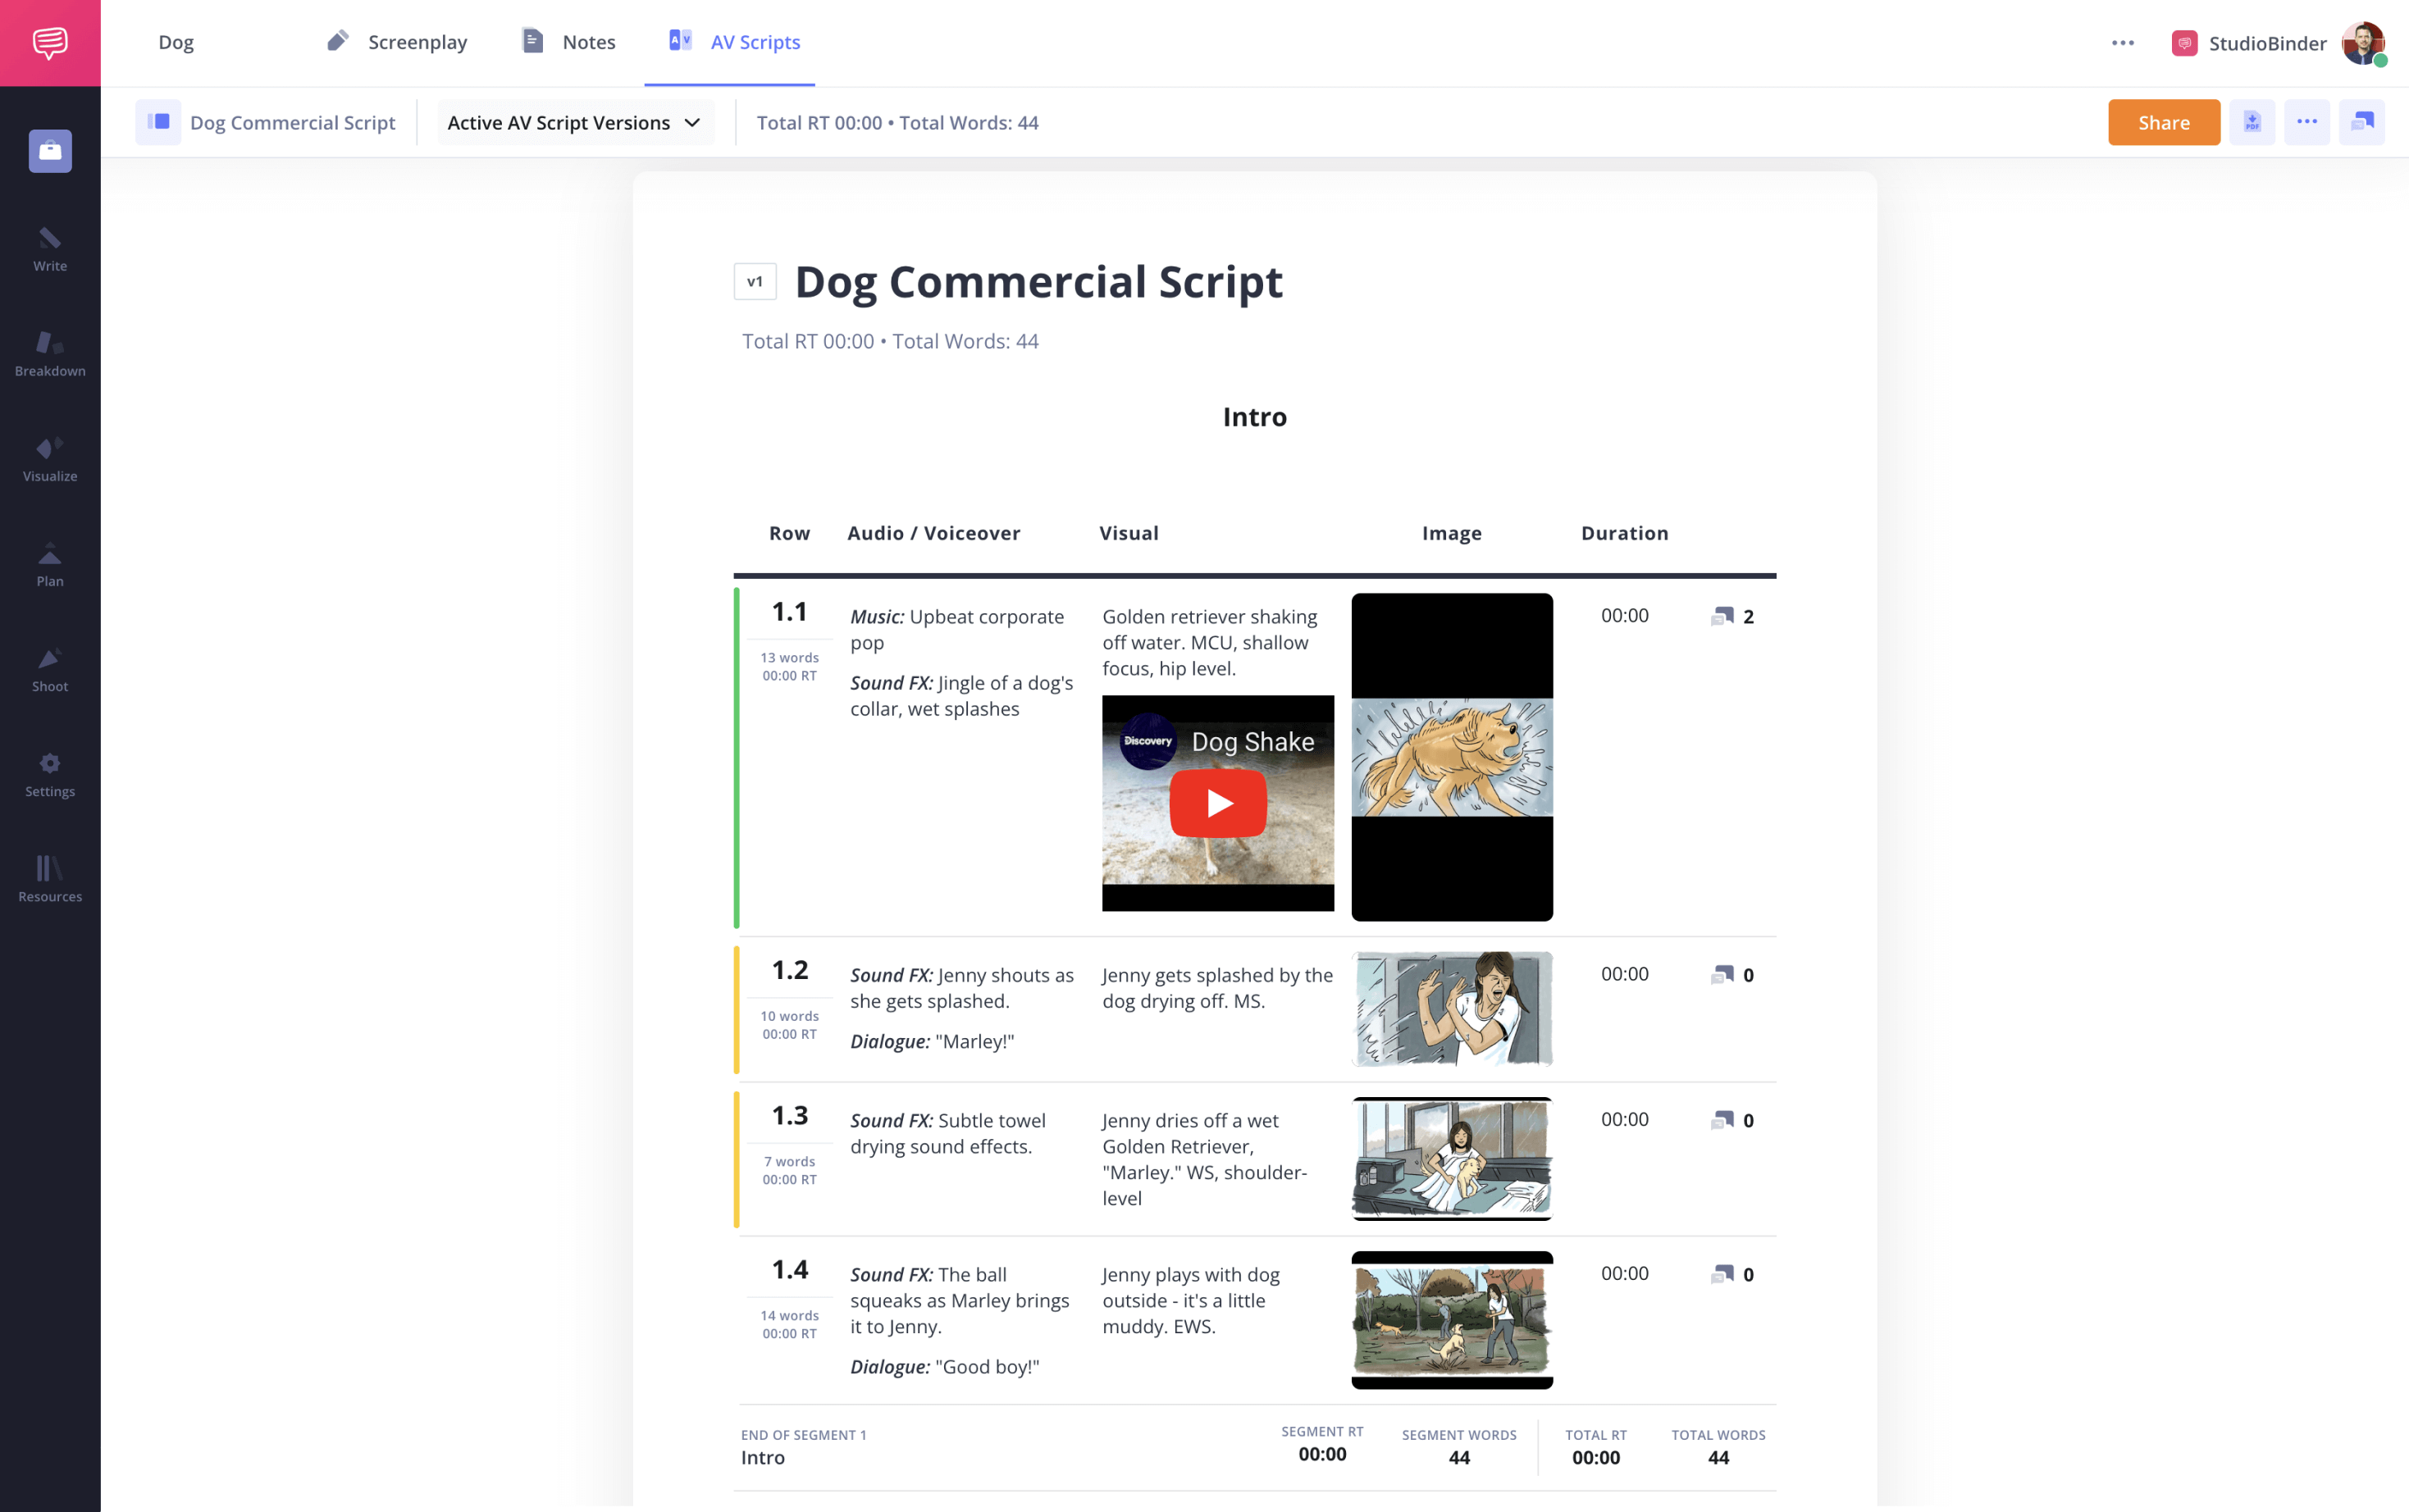
AV script template with images
Related Posts
Commercial Script Example in Two Column AV Format
4. Time your script
AV scripts are all about timing. They allow you to plan out just how long each line and section will take to get through. One way to do this is to read the script aloud and time yourself. This will give you a rough idea of how long your project will run.
StudioBinder’s AV script templates will count the words in each of your rows, segments, and entire scripts. You can also add specific durations to each line or use the built-in timer for even more exact timing.
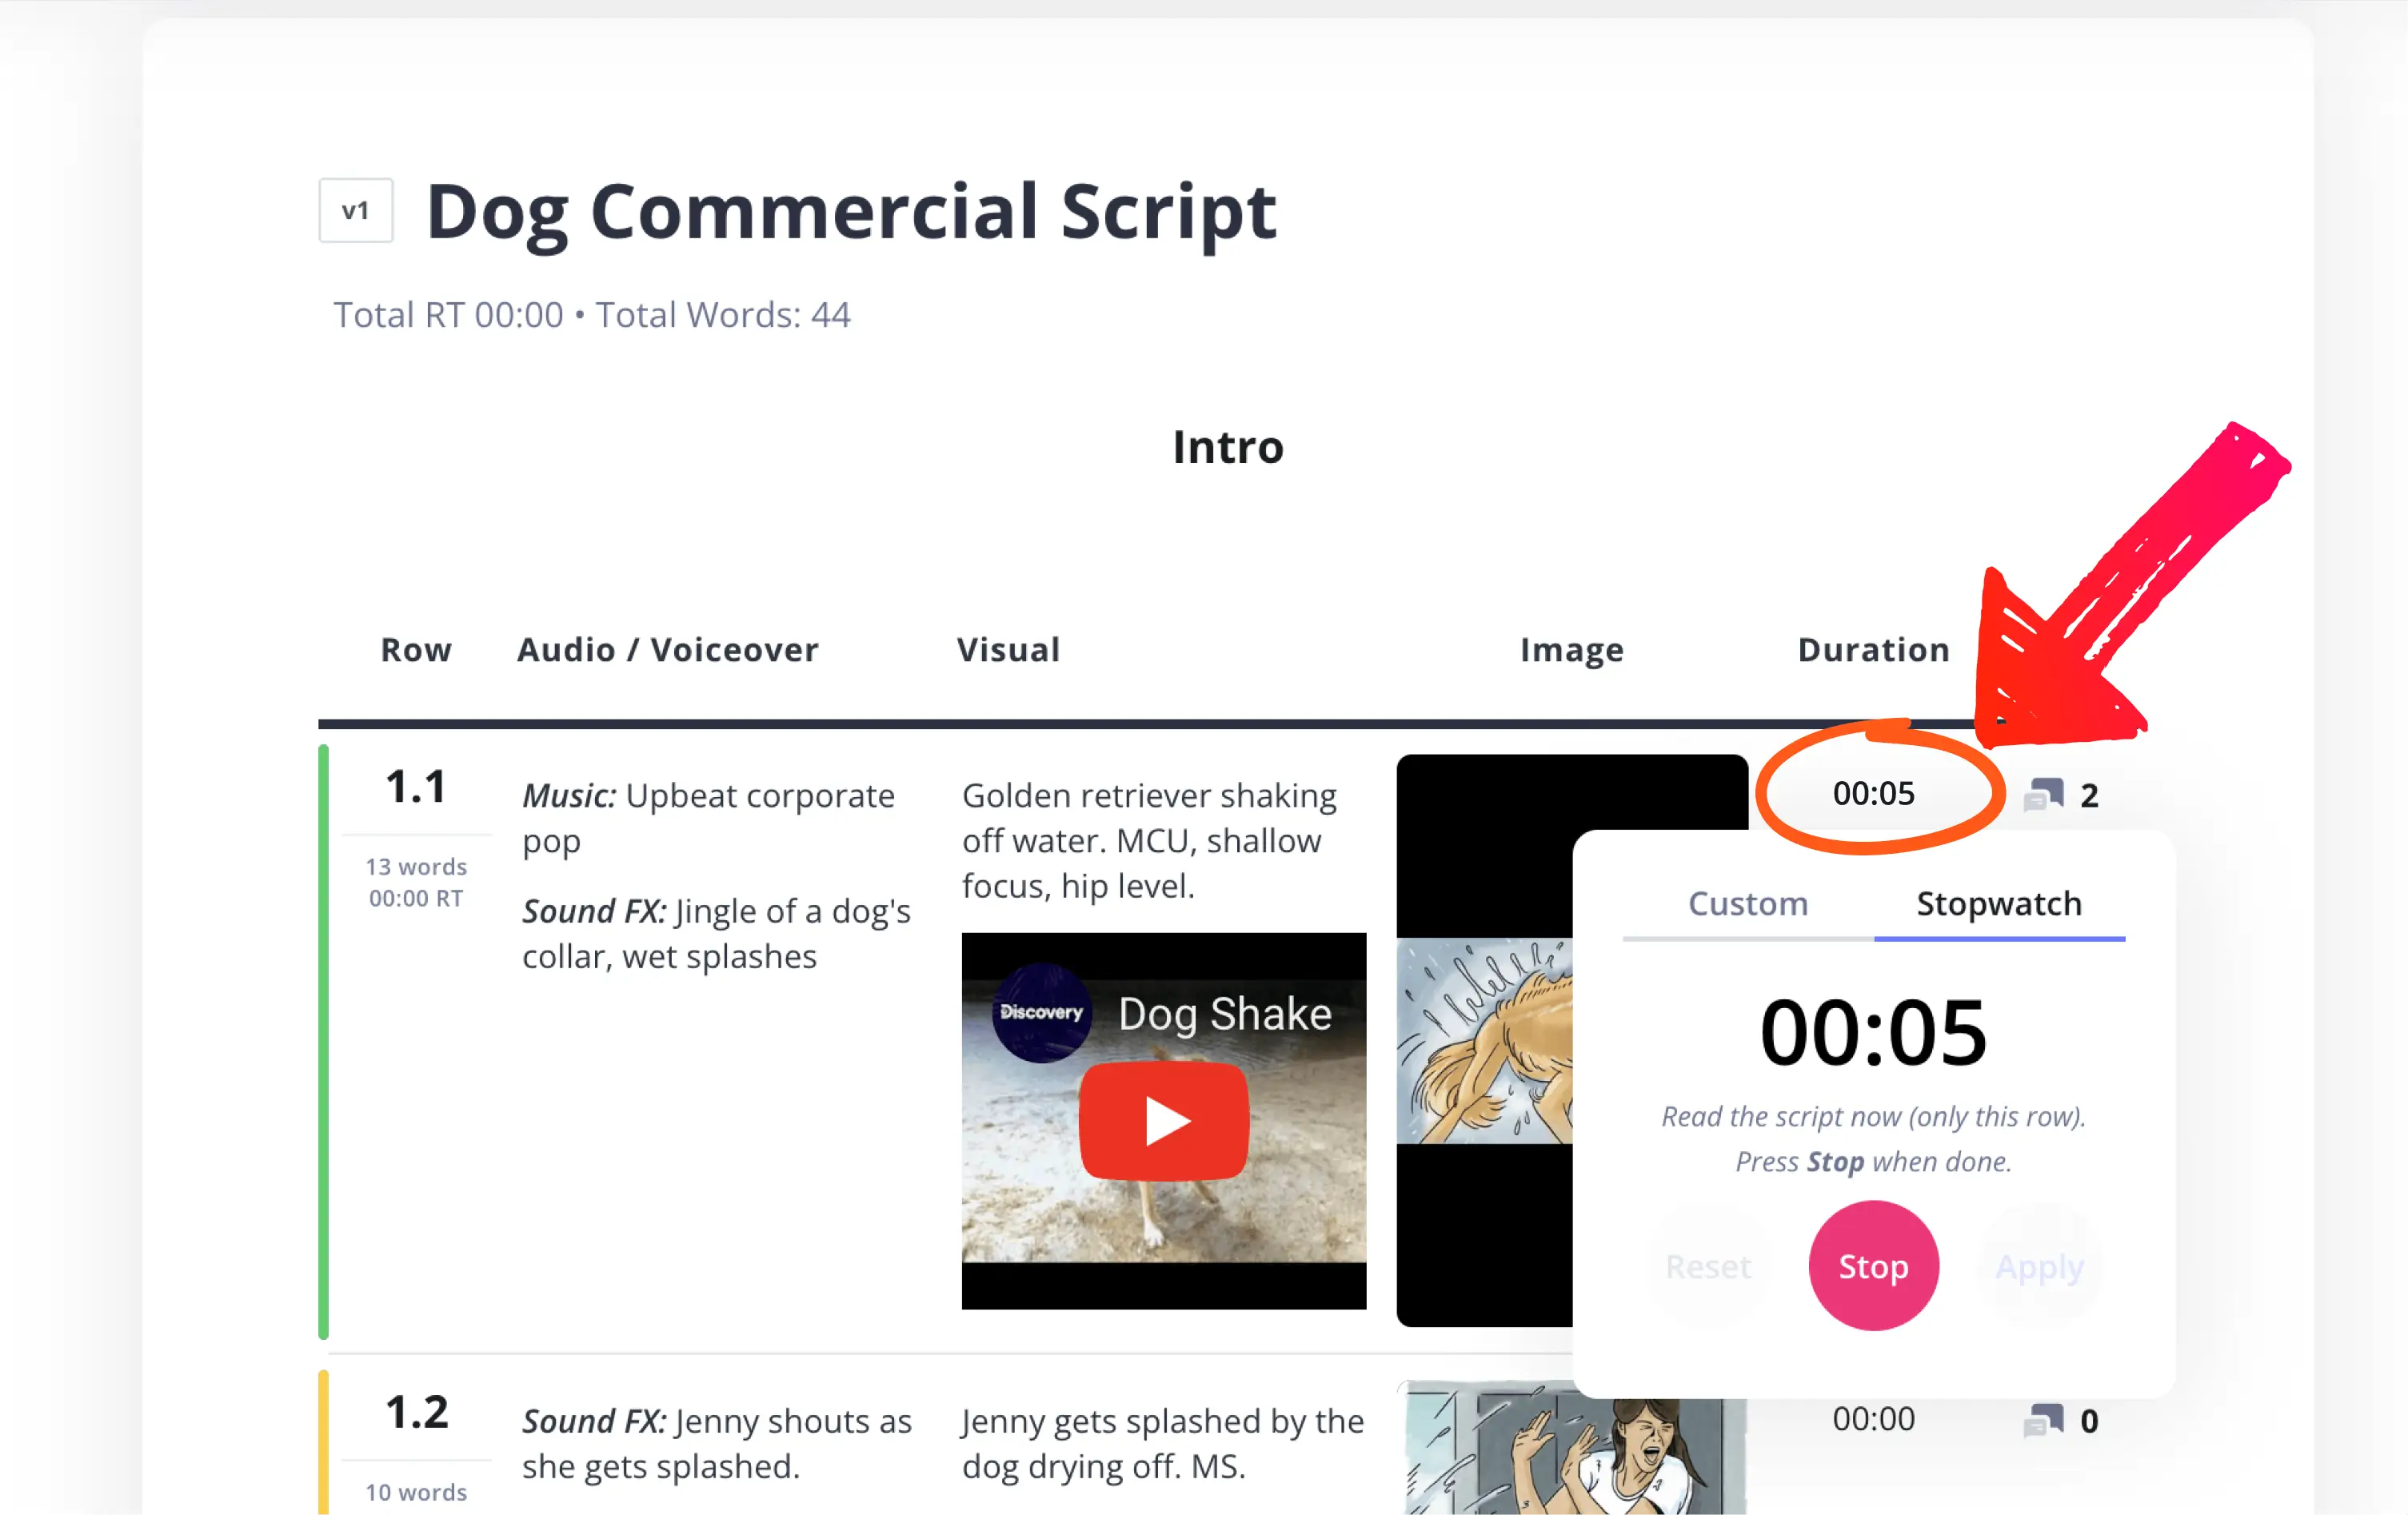
Two-column script template’s timer
These individual times will be compiled for you and totaled at the bottom of the script, so that you will know your total runtime as you go.
Now that you’ve seen a finished AV script template in action, let’s walk through how to write one yourself, from structure to voiceover to visuals.
Share Your AV Script with Clients and Collaborators
5. Get feedback
Writing an AV script is a collaborative process. When you’ve completed your draft, make sure you get feedback from the other creatives working on your project. If you’re working with a client, you’ll want their thoughts before moving forward.
StudioBinder allows you to share your script with just a couple of clicks using a “view-only” link. You can also add collaborators to the project so that they can add comments, eliminating emailing back and forth.
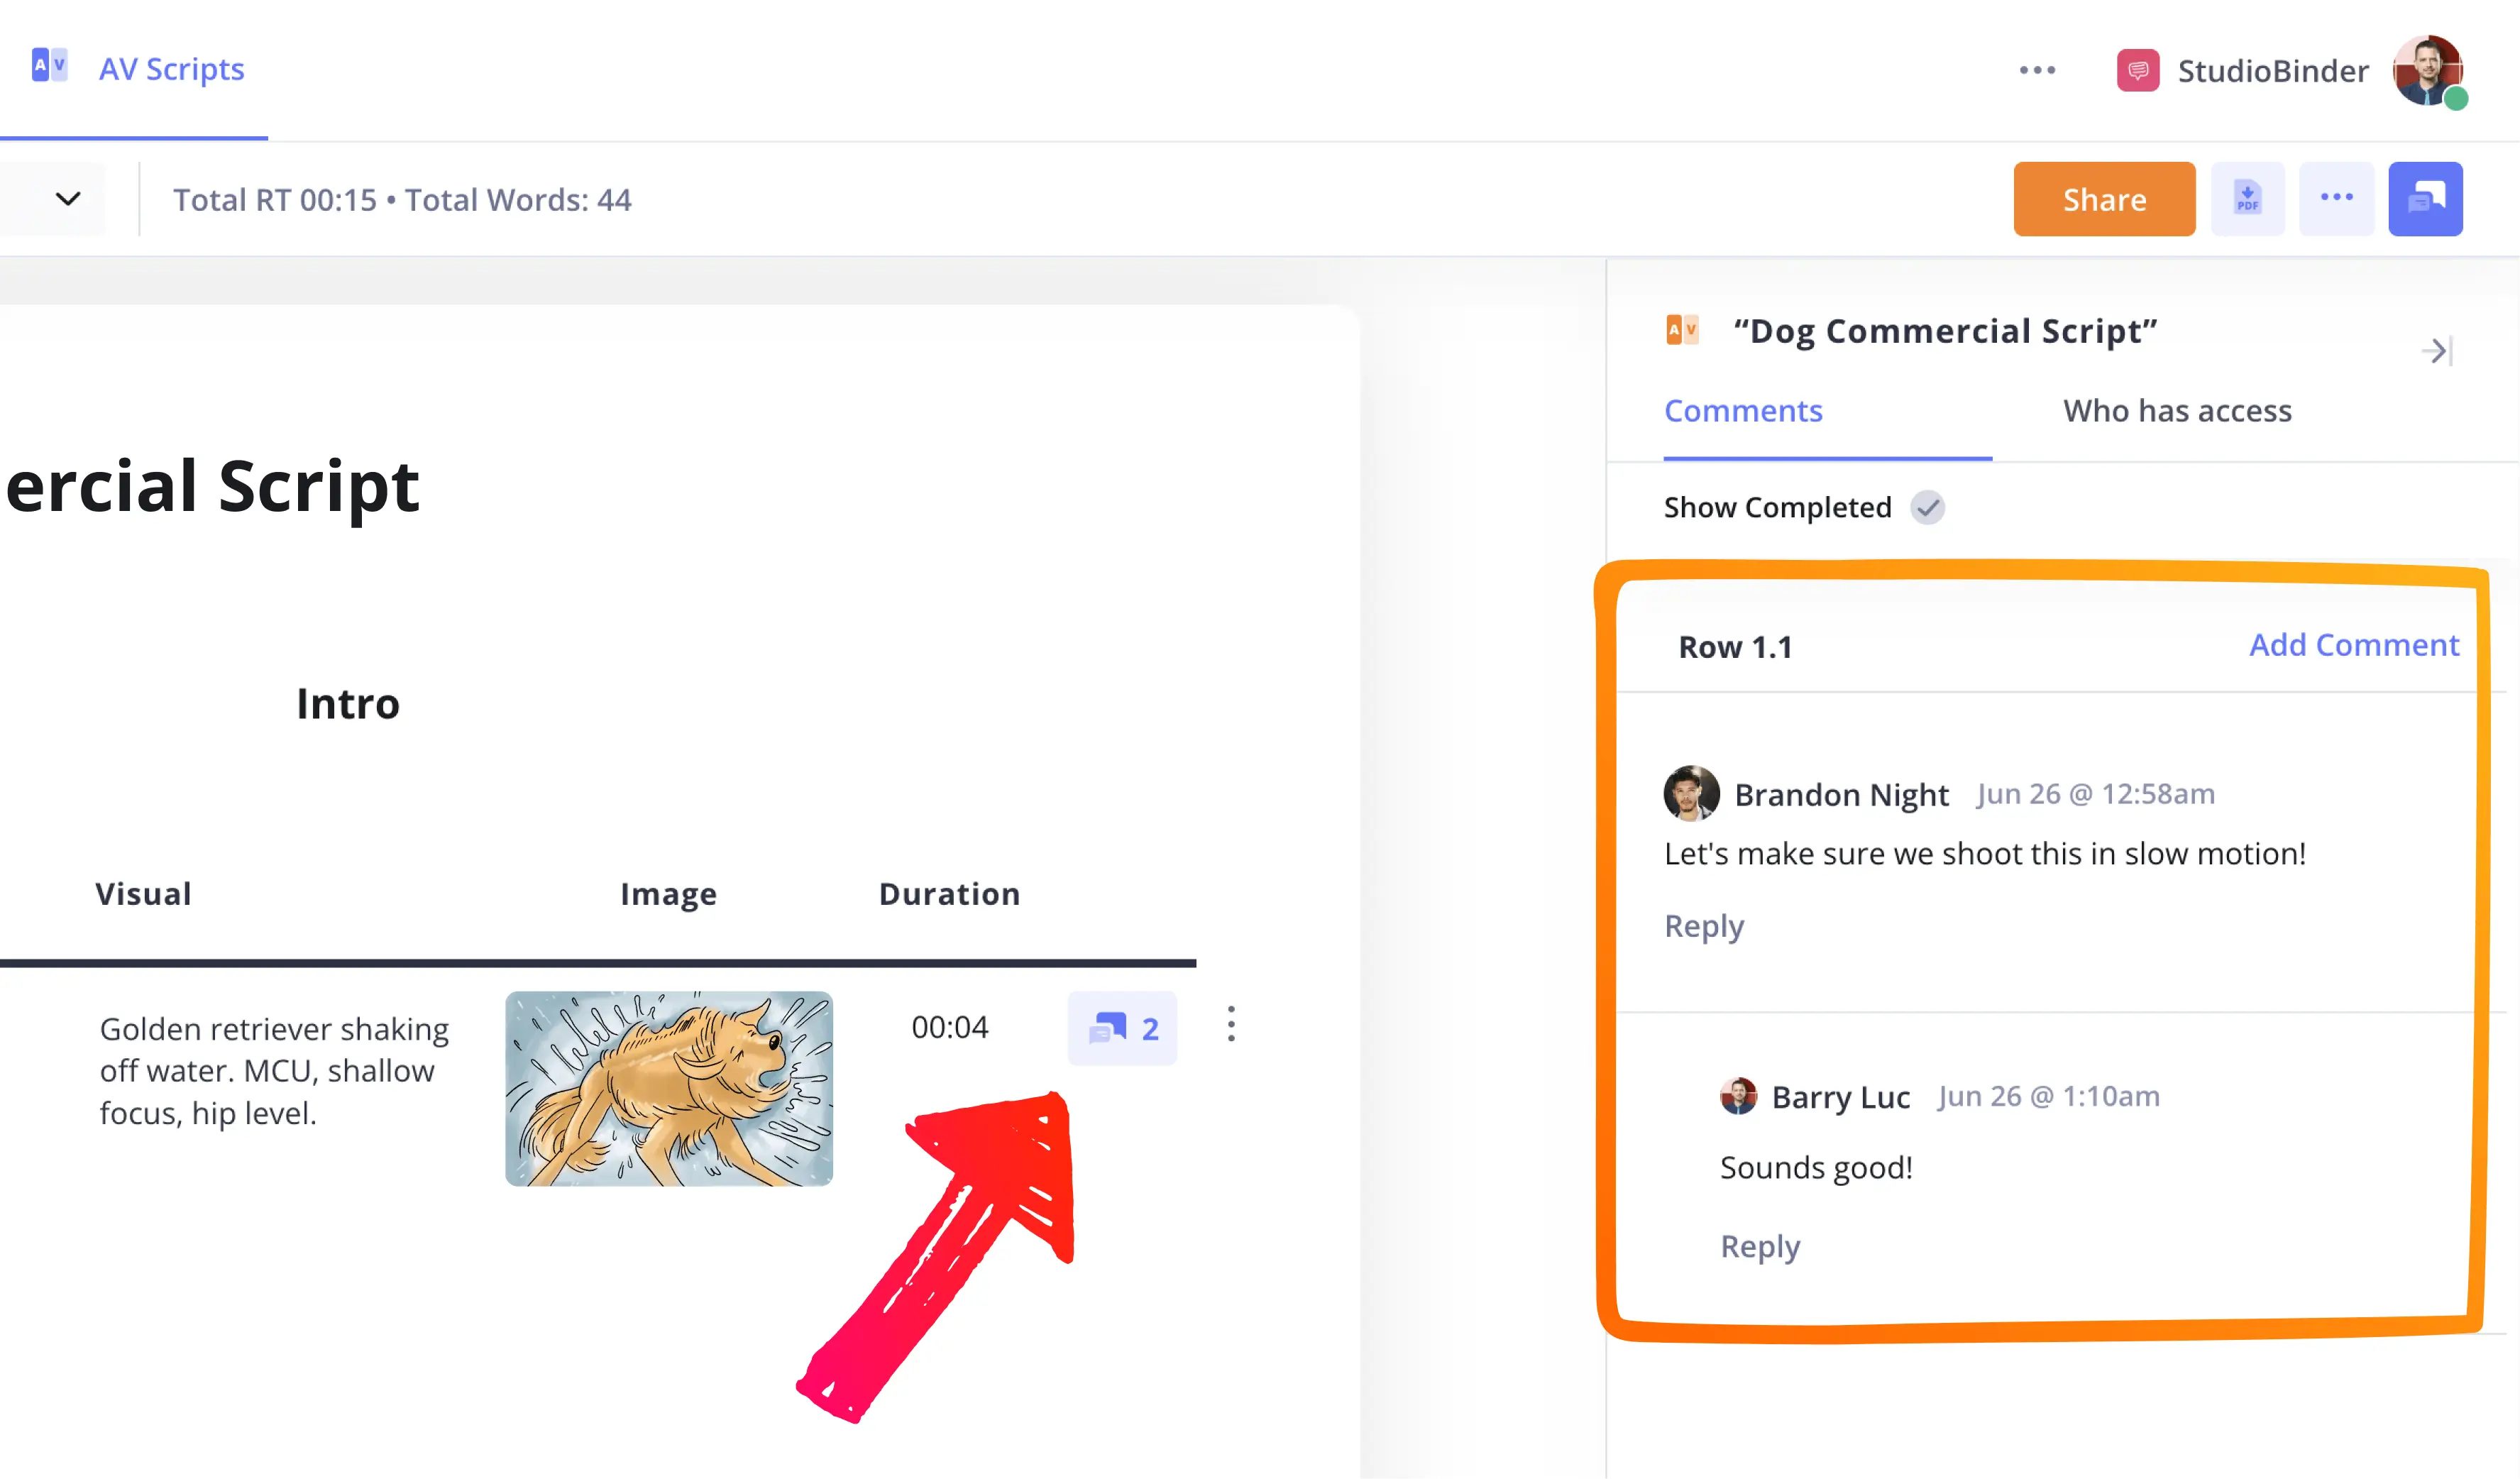
How to write an AV script with collaborators
Comments are specific to lines, so if a line is moved, the comment will come with it. Once the comment has been addressed, you can mark it as resolved.
Alternatively, you can mark each row with a status color (what these colors are and mean is up to you). For example, green can be used to mark approved lines while yellow could indicate it is under review.
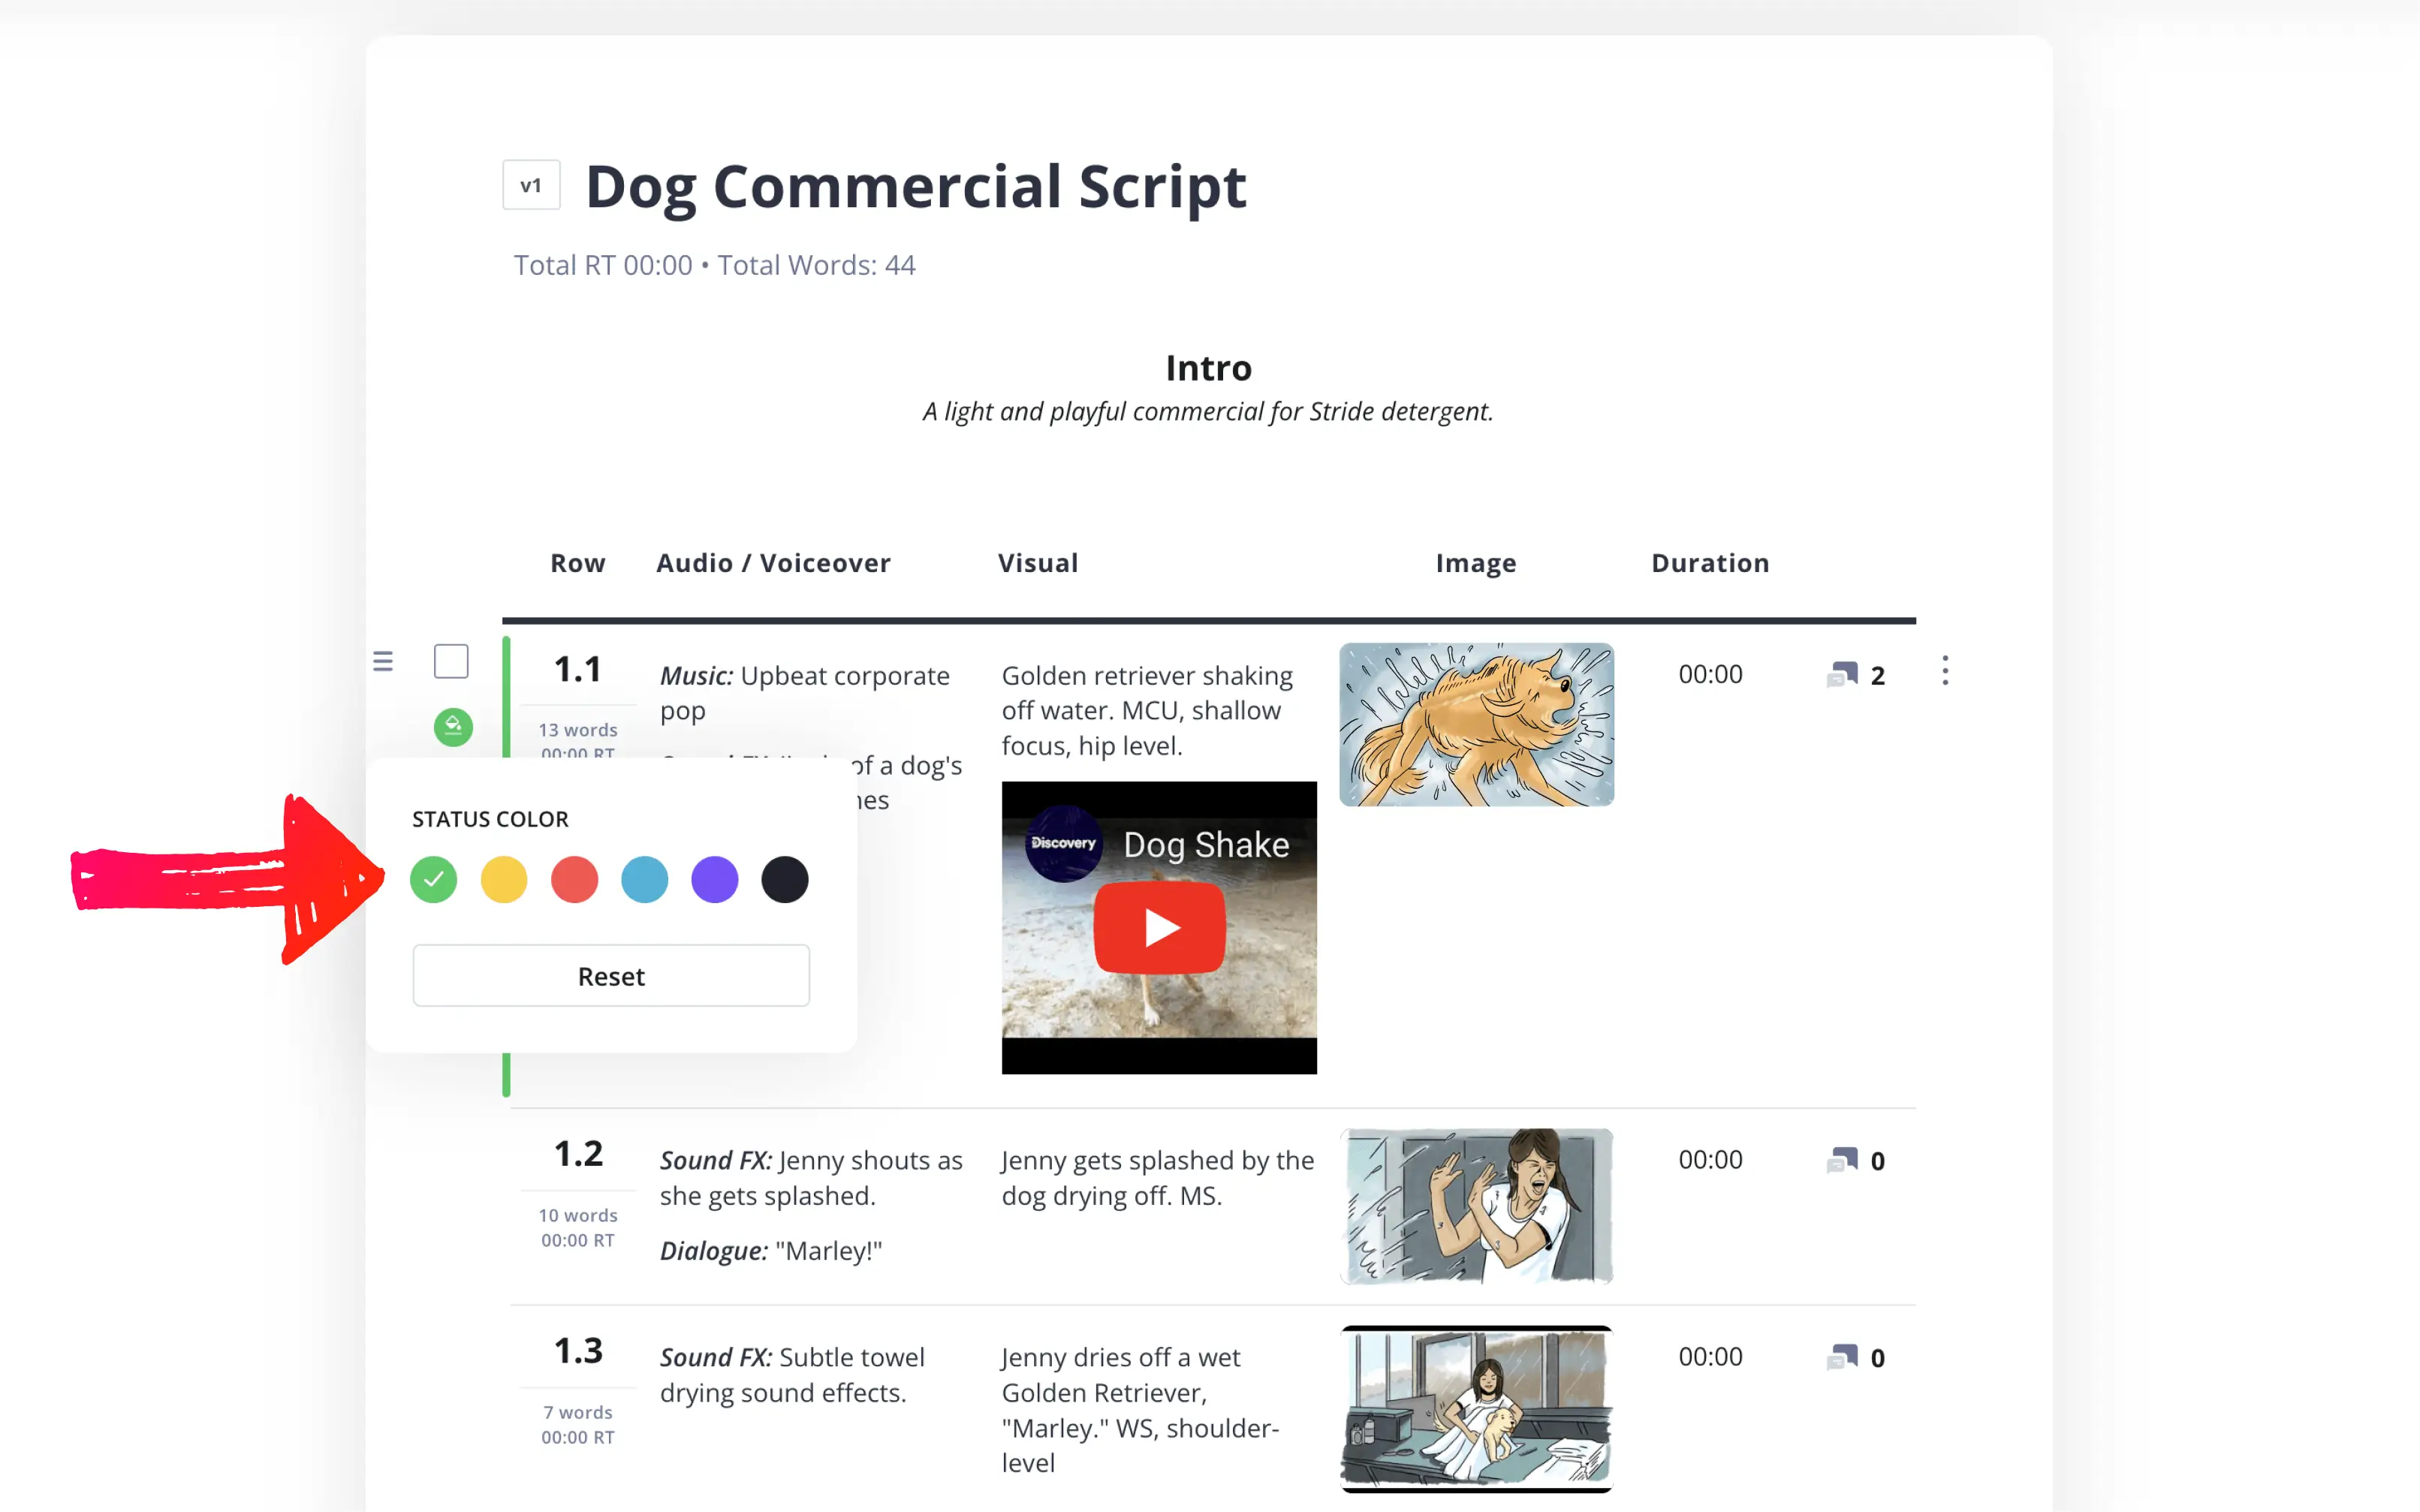
Assign a status color to each row
Along with the comments, your collaborative process will be efficient and allow you to focus on the meat of the script, not the logistics of the template.
Related Posts
Up Next
Start writing your AV script
Now you know how to write an A V script, so there aren’t any excuses to stop you from getting started. Whether you’re producing social media ads or TV commercials, StudioBinder’s AV script template helps you focus on the content, while we make it look professional.
